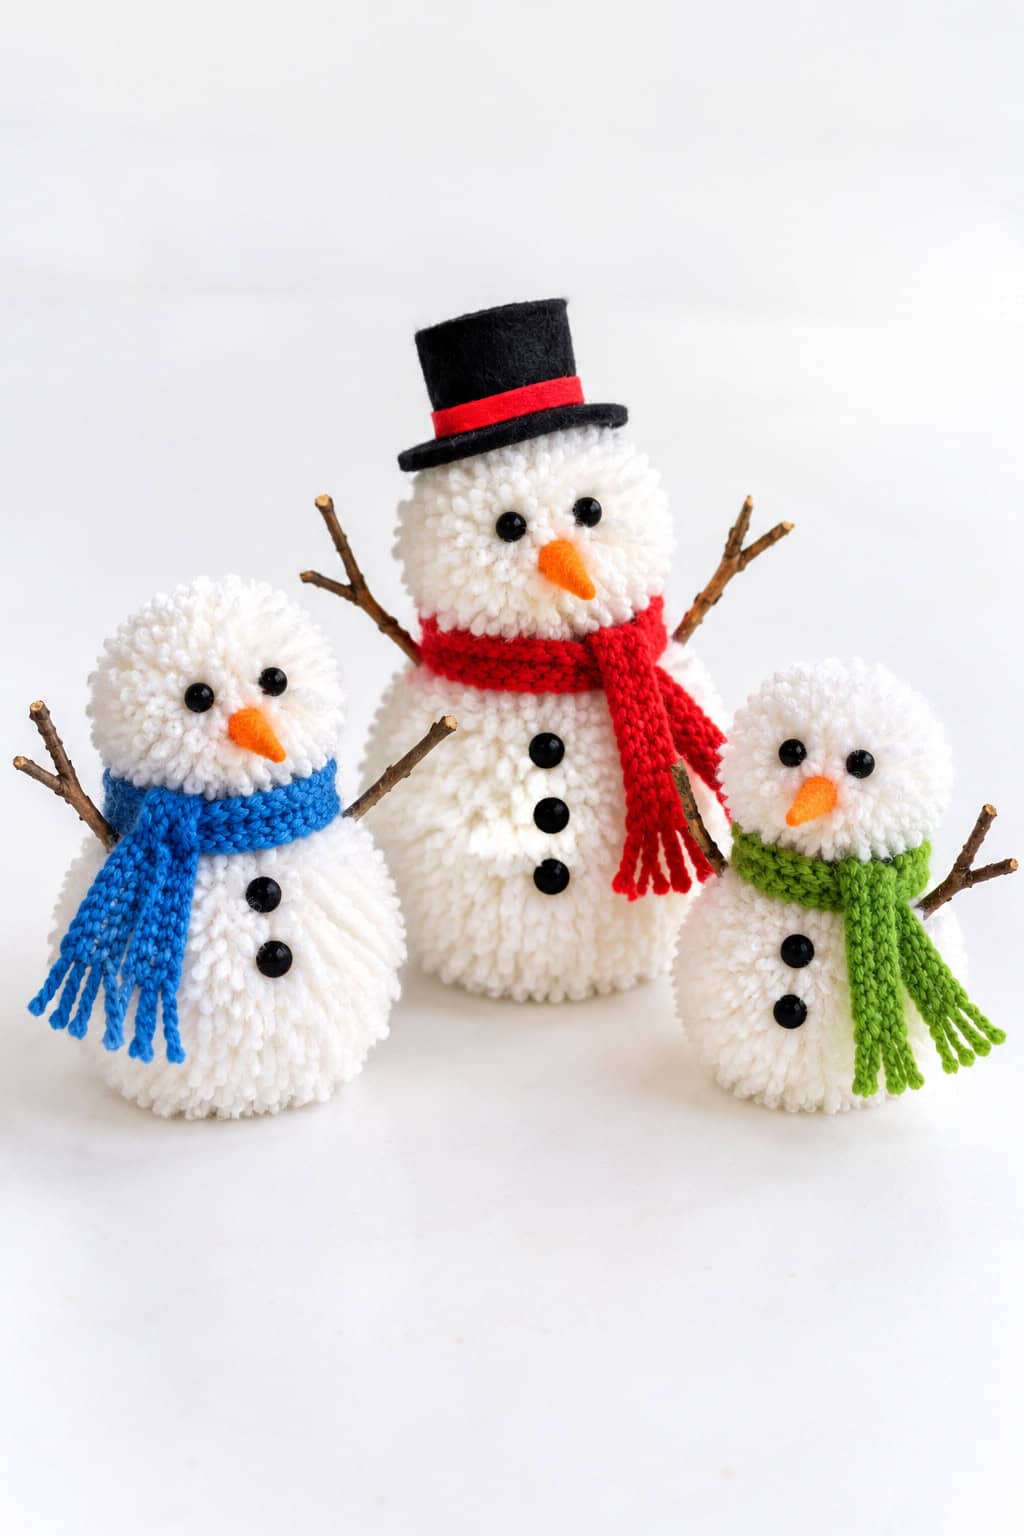
The first time snow starts drifting past the window, little ones press their noses to the glass and start asking to go build a snowman. And on the days when there’s no snow to be had, or it’s just too cold to stay out for long, a snowman craft is the very next best thing.
Better still, most of these use simple things you already have, like a paper plate, a few cotton balls, or a clean sock from the drawer.
So whether you’re a parent at your own kitchen table, a grandparent with the little ones over, a homeschool mama, or a teacher planning a winter lesson, these twenty ideas are easy to set up and easy to clean up.
20 whimsical snowman crafts for kids
Here are twenty little snowmen to make together, running loosely from the easiest ones for tiny hands to the ones older children will enjoy. So pick one for a quiet afternoon, or work your way through several as the season goes on.
1. Melted snowman craft
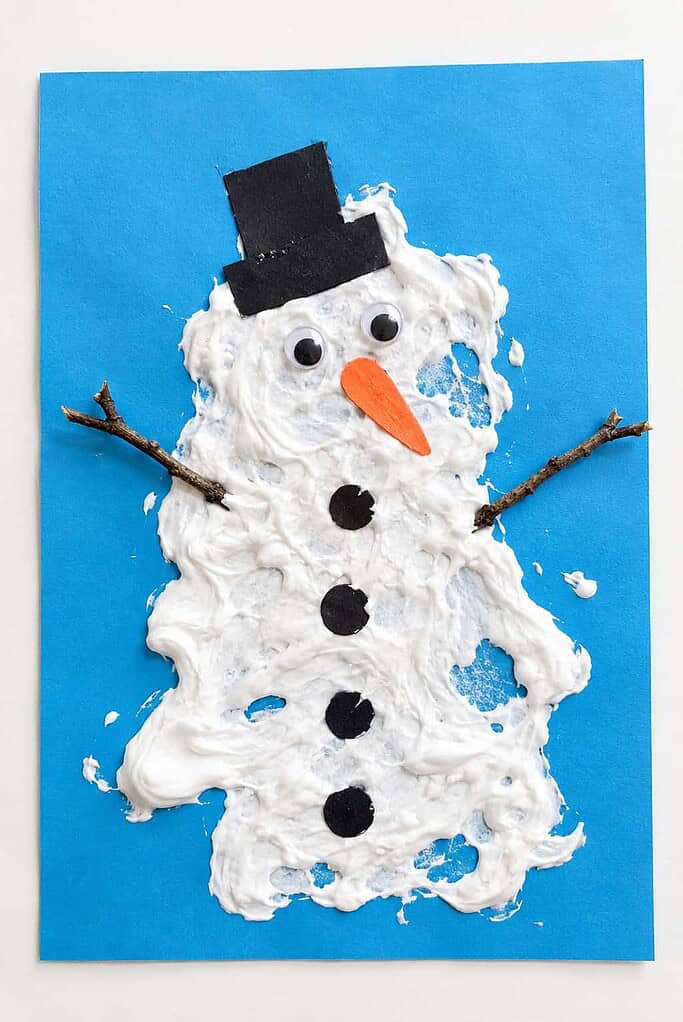
This is the snowman who had a little too much fun out in the sun, and it’s gloriously messy in the best way.
- Stir together equal parts white school glue and shaving cream to make puffy paint.
- Spread a blob of it onto blue paper in a drippy, melted puddle shape.
- Press a small black paper top hat near the top of the puddle.
- Add two googly eyes, an orange paper nose, and a few black dot buttons.
- Lay two little twigs at the sides for arms and let it dry.
The puffy paint dries raised and bumpy, so this one is worth making just to run little fingers over it later.
2. Sock snowman craft
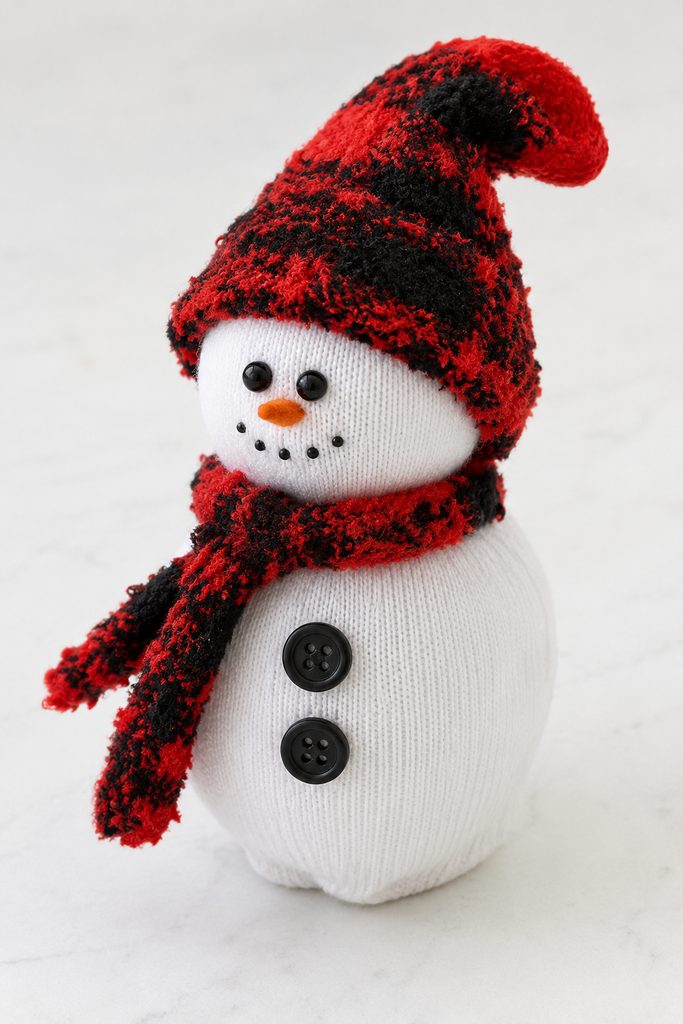
A lonely white sock becomes a chubby little snowman who will sit on the shelf all winter long.
- Pour uncooked rice into a white sock until it makes a firm ball, then wrap a rubber band tight above it.
- Add a little more rice for the head and band it off again, trimming away the extra sock.
- Pull the cuff of a colorful sock over the top for a hat.
- Tie a strip of fabric around the neck for a scarf.
- Glue on two bead eyes, a small orange nose, and a row of buttons.
The rice keeps him weighted so he sits up on his own, which makes him feel less like a craft and more like a little friend.
3. Snowman footprint craft
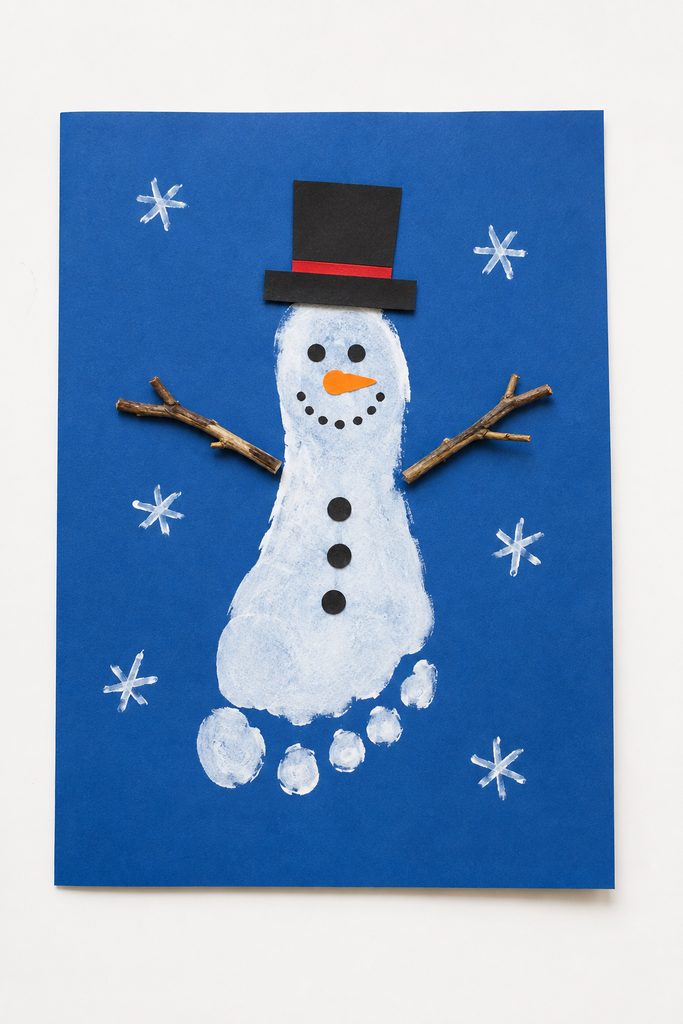
One little footprint turns into a whole snowman, and it captures how small their feet are right now.
- Paint the bottom of your child’s foot white and press it onto dark blue paper with the heel pointing up.
- Let it dry, so the heel becomes the head and the toes become the bottom.
- Glue a small black top hat above the heel.
- Add two dot eyes, an orange nose, and a row of black buttons down the middle.
- Glue a twig to each side for arms.
Date it in the corner before you tuck it away, because this is the kind of keepsake you’ll be glad you kept.
4. Snowman paper craft
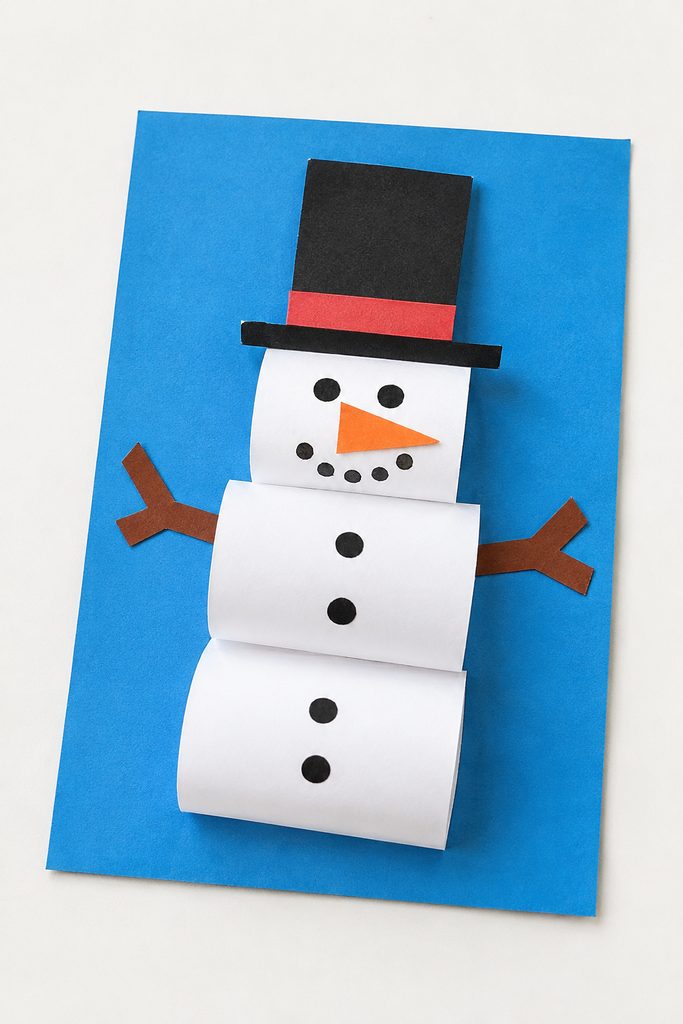
A few strips of paper curl up into a plump, rounded snowman that pops right off the page.
- Cut three strips of white paper.
- Roll each strip into a loop and glue the ends together.
- Stack the three loops and glue them onto a sheet of colored paper.
- Add a black paper hat at the top, an orange nose, and dot eyes and buttons.
- Glue a thin brown paper arm to each side.
The looped paper gives him a soft, rounded shape, and for more makes like this our fun paper crafts for kids is full of ideas.
5. Snowman popsicle stick craft
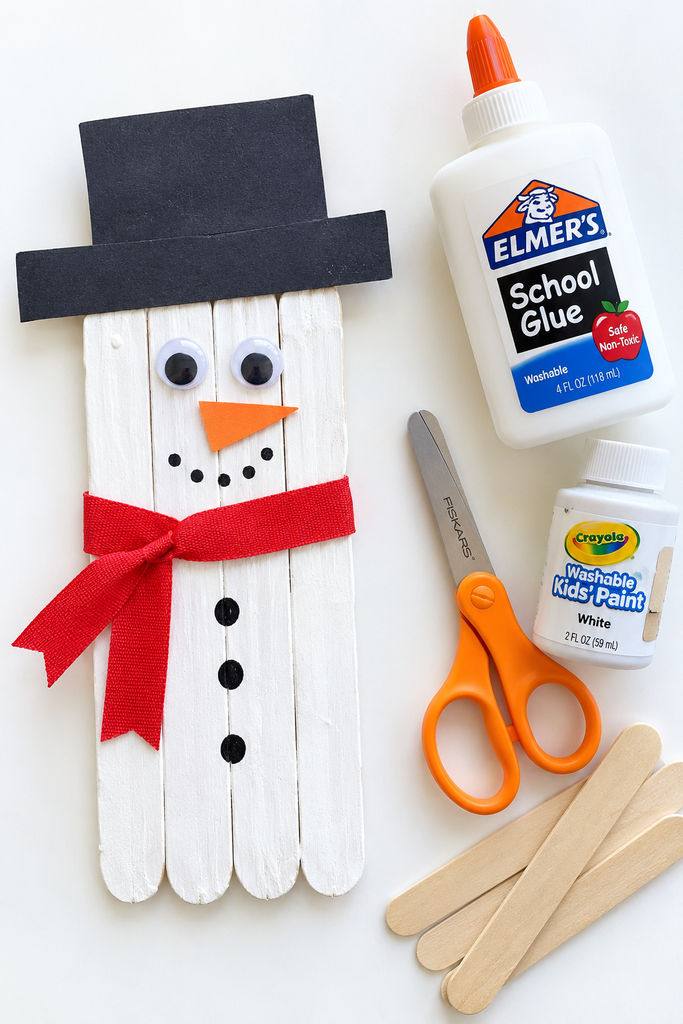
A handful of craft sticks makes a sturdy little snowman you can hang on the tree year after year.
- Line up four or five craft sticks side by side and glue two more across the back to hold them together.
- Let it dry, then paint the whole thing white.
- Glue a black paper hat across the top.
- Tie or glue a ribbon scarf near the top.
- Add two googly eyes, an orange nose, and a few dot buttons.
Because it holds up so well, this is the one that comes back out of the ornament box every winter, so it’s worth a few extra minutes.
6. Cotton ball snowman craft
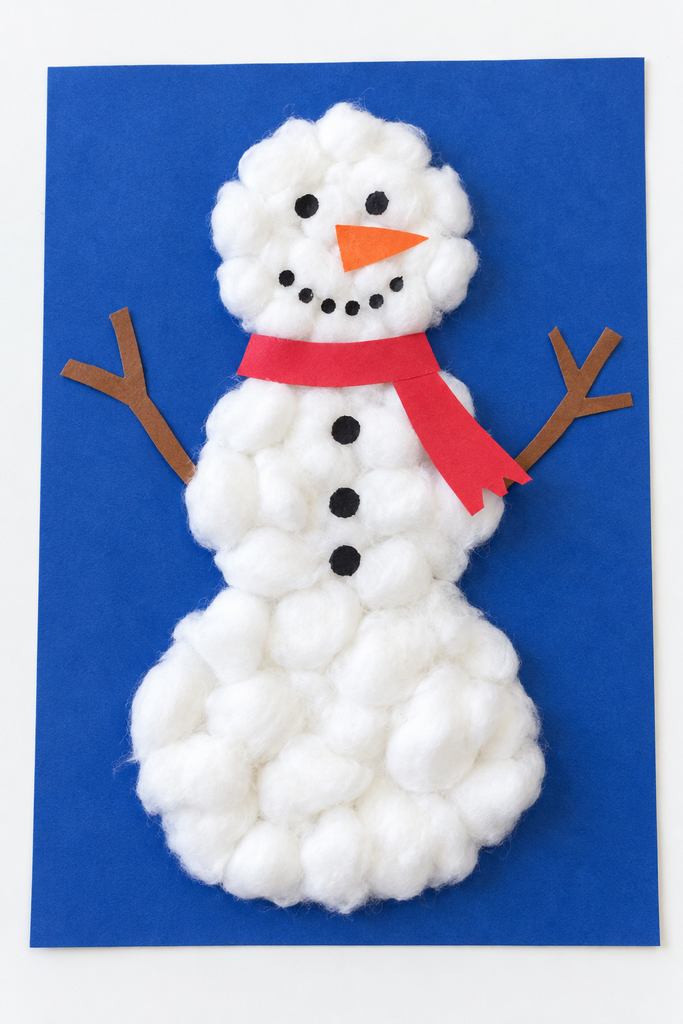
Soft, bumpy, and touchable, this is the snowman little hands love to pat.
- Draw three stacked circles on a sheet of dark paper for the snowman shape.
- Glue cotton balls all over the circles until they’re filled in.
- Add a red paper scarf between the head and the body.
- Glue on two dot eyes, an orange nose, and a few black buttons.
- Glue a brown paper arm to each side.
The dark paper behind all that fluffy white makes him really stand out, so this one always looks sweeter than the little effort it takes.
7. Snowman ornament craft
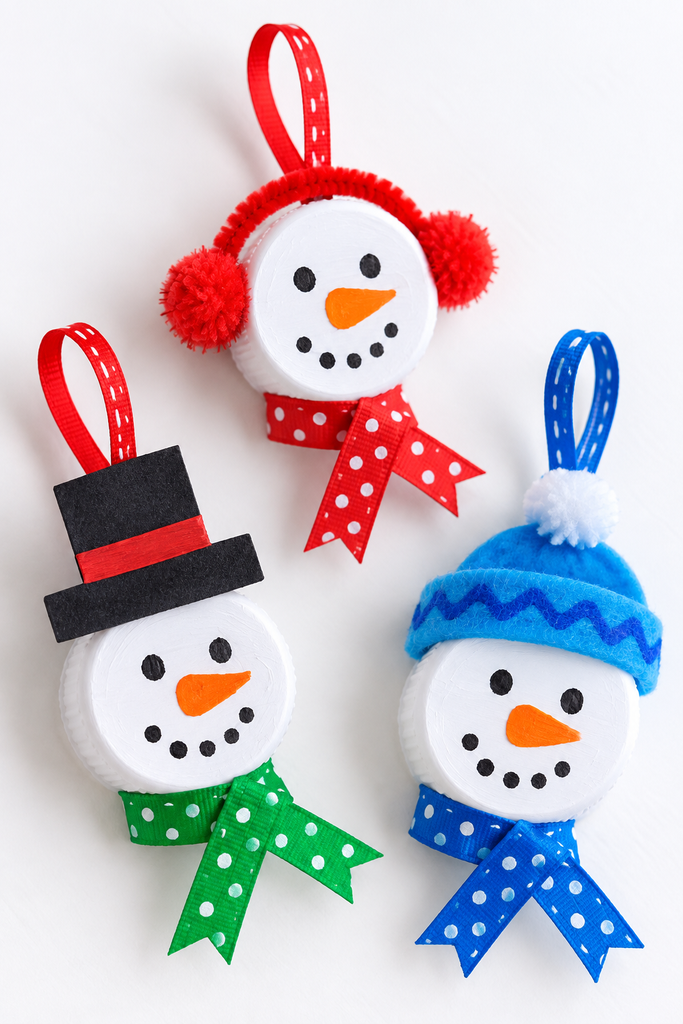
One little bottle cap becomes a smiling snowman face, and a few of them make the sweetest set for the tree.
- Start with a single plastic bottle cap for each snowman’s face, and paint it white. Let it dry.
- Glue or draw on two small dot eyes, a little orange carrot nose, and a dotted smile.
- Add a small paper hat or two pom-pom earmuffs at the top.
- Tie a little ribbon scarf across the bottom of the cap.
- Glue a loop of ribbon to the back for hanging.
Save a handful of caps through the year and you’ll have a whole flurry of little snowmen for the tree, which makes this the kind of craft that turns odds and ends into something worth keeping.
8. 3D snowman craft
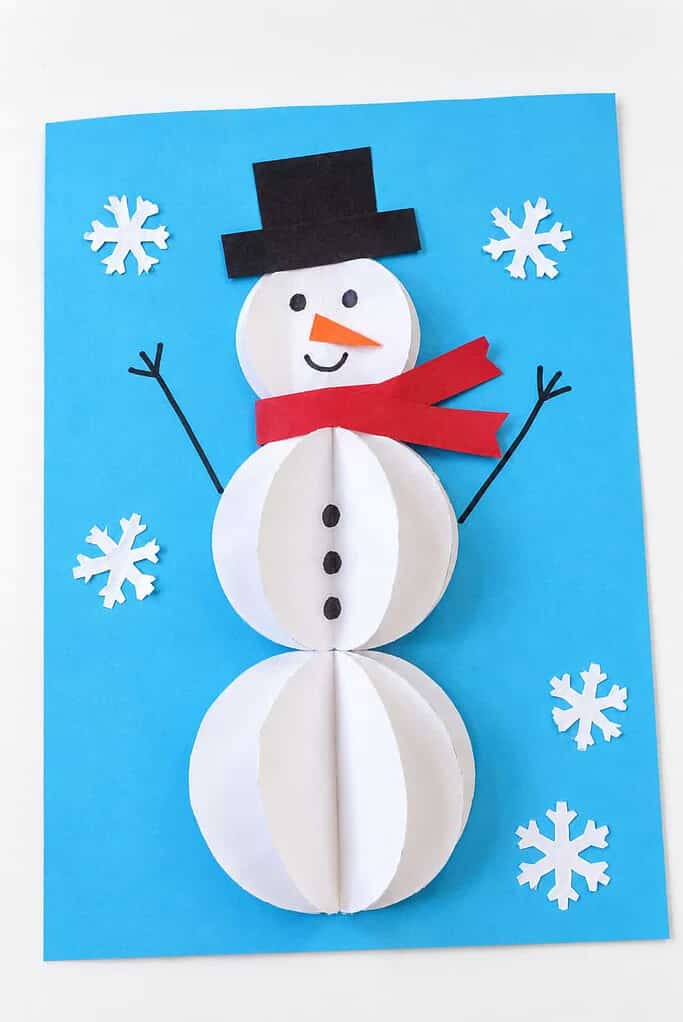
This snowman puffs right up off the paper, which little ones always find a bit like magic.
- Cut several white paper circles, a few larger ones for the body and a few smaller ones for the head.
- Fold each circle in half.
- Glue the folded halves back to back, stacking them into two puffy, rounded balls.
- Glue the balls onto blue paper, the smaller one on top for the head and the larger one below for the body.
- Add a black paper hat, a red paper scarf, dot eyes and buttons, and drawn stick arms.
The moment it stands up off the page is the moment it becomes their favorite, so don’t be surprised if they want to make three.
9. Snowman fingerprint craft
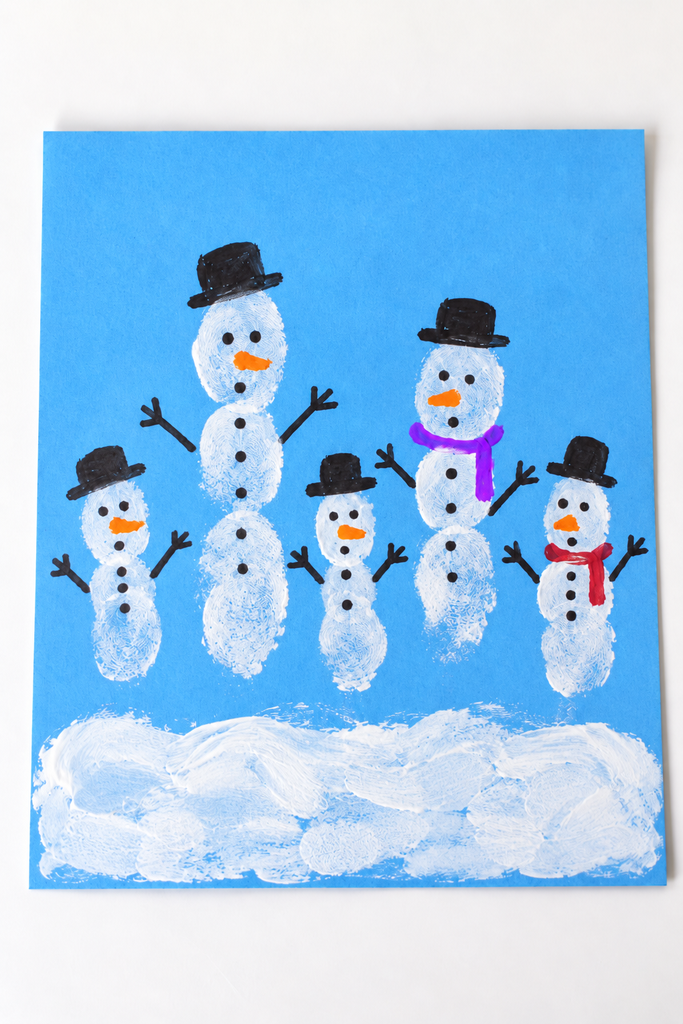
These snowmen are so small they’re made with a fingertip, which makes them just right for a homemade card.
- Dip a fingertip in white paint.
- Press two or three dots stacked on top of each other for each little snowman.
- Let them dry.
- Use a fine marker to add a tiny hat, dot eyes, an orange nose, and little stick arms.
Crowd a whole snowman family onto the front of a card, and you’ve made something the grandparents will keep on the fridge.
10. Snowman paper plate craft
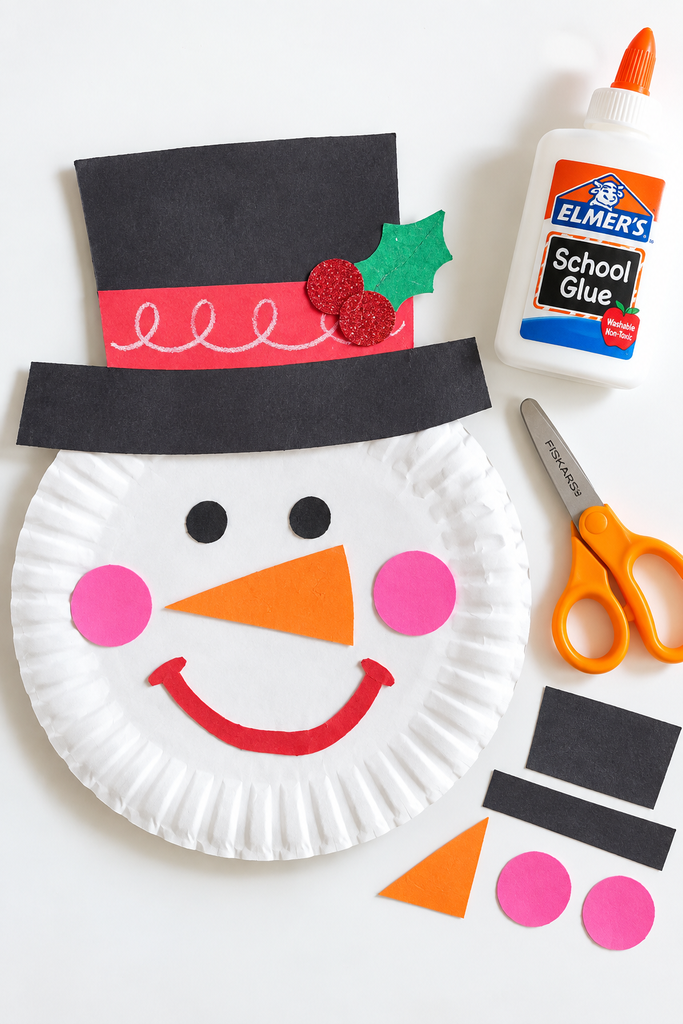
A plain paper plate is already the perfect round face, just waiting for a carrot nose.
- Use a white paper plate as the snowman’s round face.
- Glue a black paper top hat across the top.
- Add two dot eyes and an orange triangle nose.
- Glue on two round pink cheeks.
- Draw or glue a smile at the bottom.
It comes together in minutes, and for more ways to turn a plain plate into something sweet, our easy paper plate crafts for kids has plenty to reach for.
11. Snowman hat craft
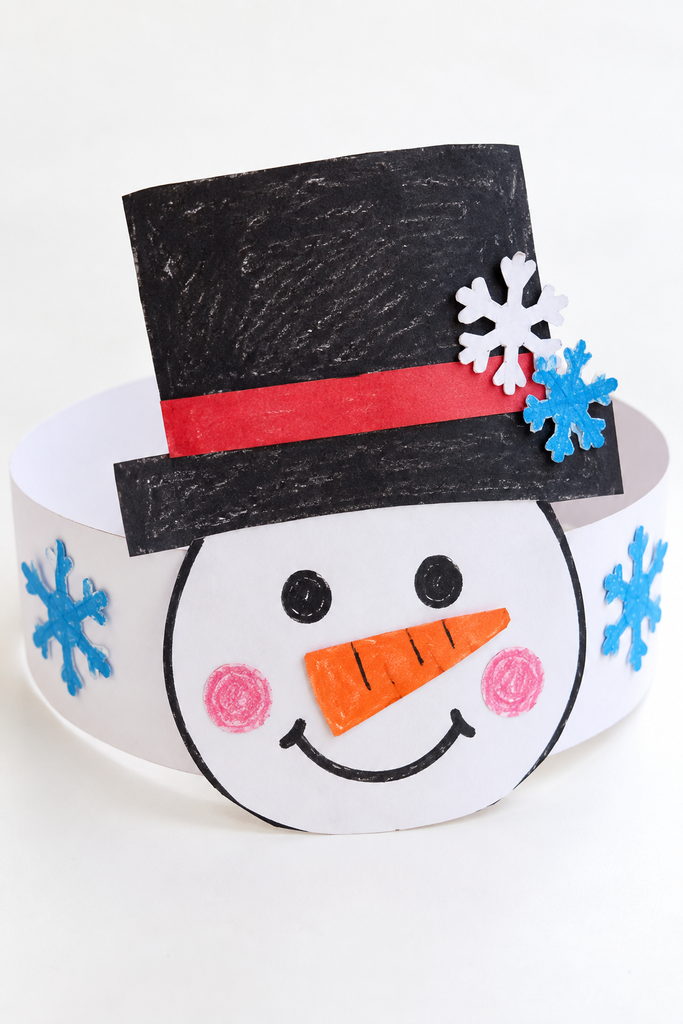
This is the snowman your little one gets to wear, and it usually leads to a bit of prancing.
- Cut a long strip of white paper for a headband.
- Draw or glue a snowman face on the front, with a black hat, dot eyes, and an orange nose.
- Add a few little paper snowflakes around it.
- Fit the band around the child’s head and staple it to size.
Set it on their head and watch what happens, because a craft you can wear is a craft that gets played with all afternoon.
12. Handprint snowman craft
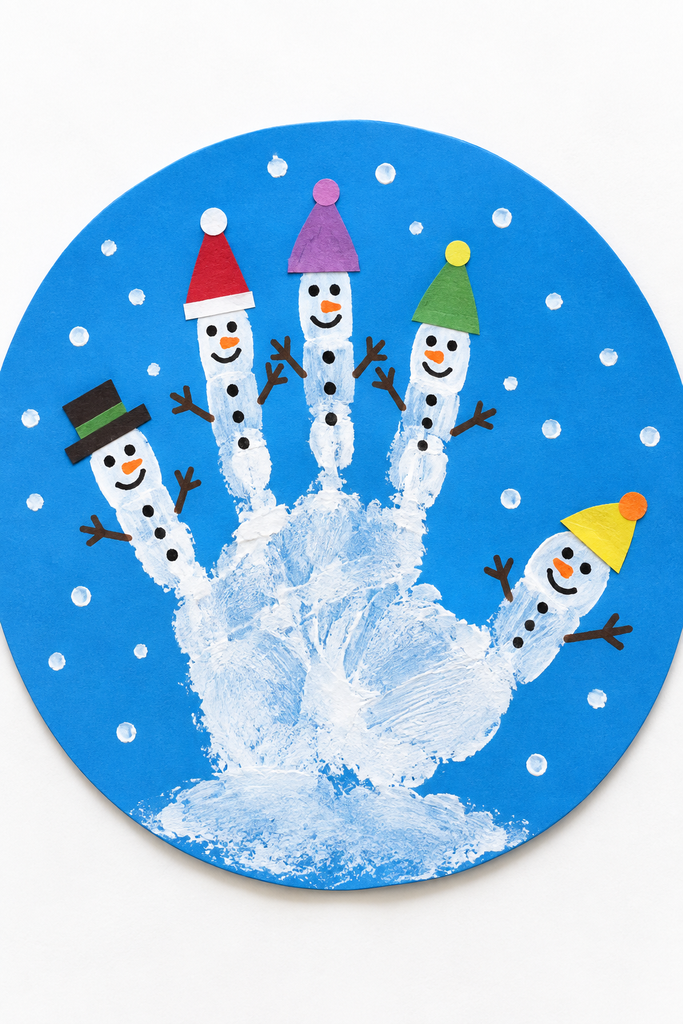
One little handprint turns into a whole row of snowmen standing on a snowy hill.
- Paint your child’s palm and fingers white and press the hand onto blue paper, fingers pointing up.
- Let it dry, so the palm becomes the snowy ground and each finger becomes a snowman.
- Give each finger a little colored paper hat.
- Add dot eyes, an orange nose, and stick arms to each one with a marker.
Handprints grow up far too fast, so this is one to date and keep, and our sweet handprint crafts for kids has more to save.
13. Snowman suncatcher craft
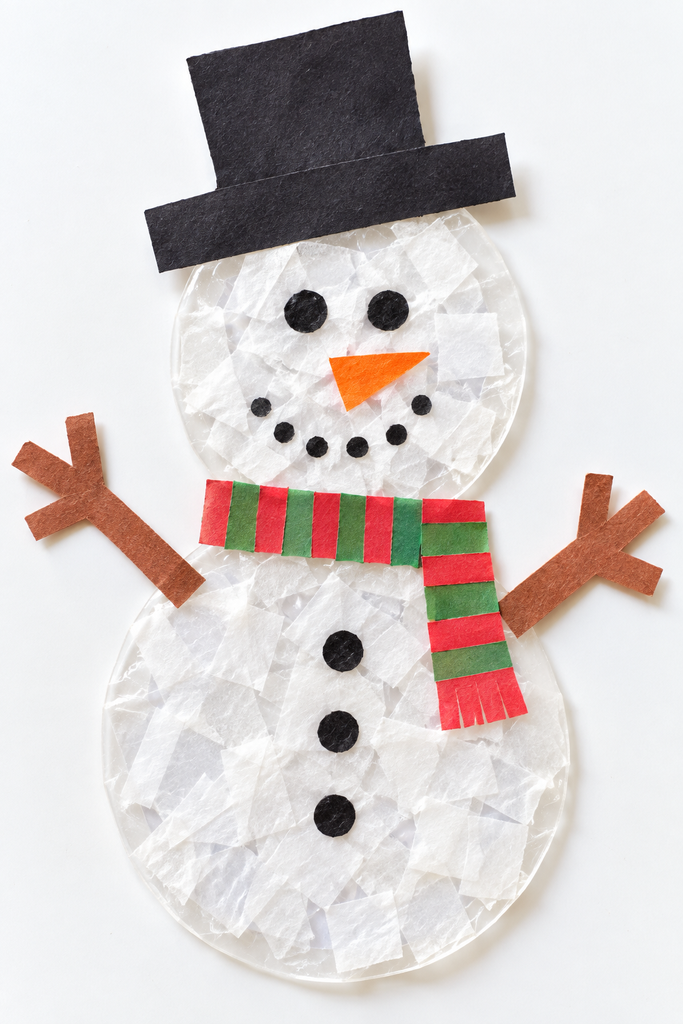
This snowman is built to glow, catching the winter light right in the window.
- Cut a snowman shape from clear contact paper and lay it sticky side up.
- Press small pieces of white tissue paper all over it.
- Seal a second sheet of contact paper on top.
- Add a black paper hat, an orange nose, a paper scarf, and two dot eyes.
- Hang it in a sunny window.
The light comes right through the tissue and lights him up, so pick a window the little ones walk past often and let him surprise them.
14. Snowman cup craft
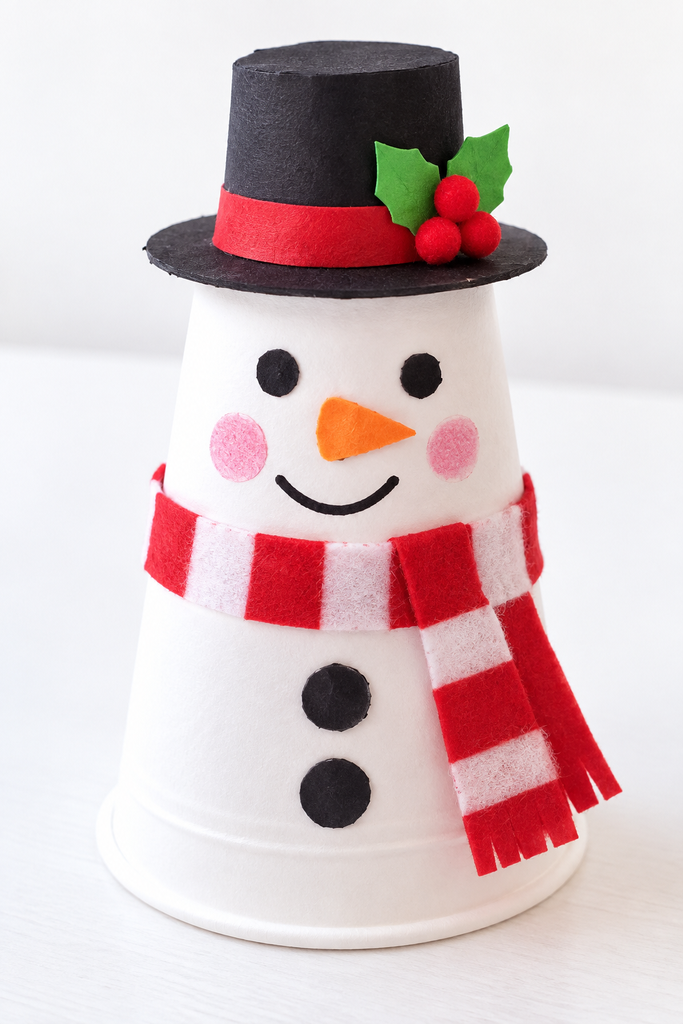
An upside-down cup makes a snowman that stands right up on the windowsill.
- Turn a white paper or foam cup upside down so the flat bottom is the top of the head.
- Glue on two dot eyes, an orange nose, pink cheeks, and a smile.
- Wrap a ribbon or paper scarf around the middle.
- Top it with a little paper hat, or add two pom-pom earmuffs.
He stands on his own with no propping up, which makes him a favorite for lining up in a row along a shelf.
15. Snowman bottle craft
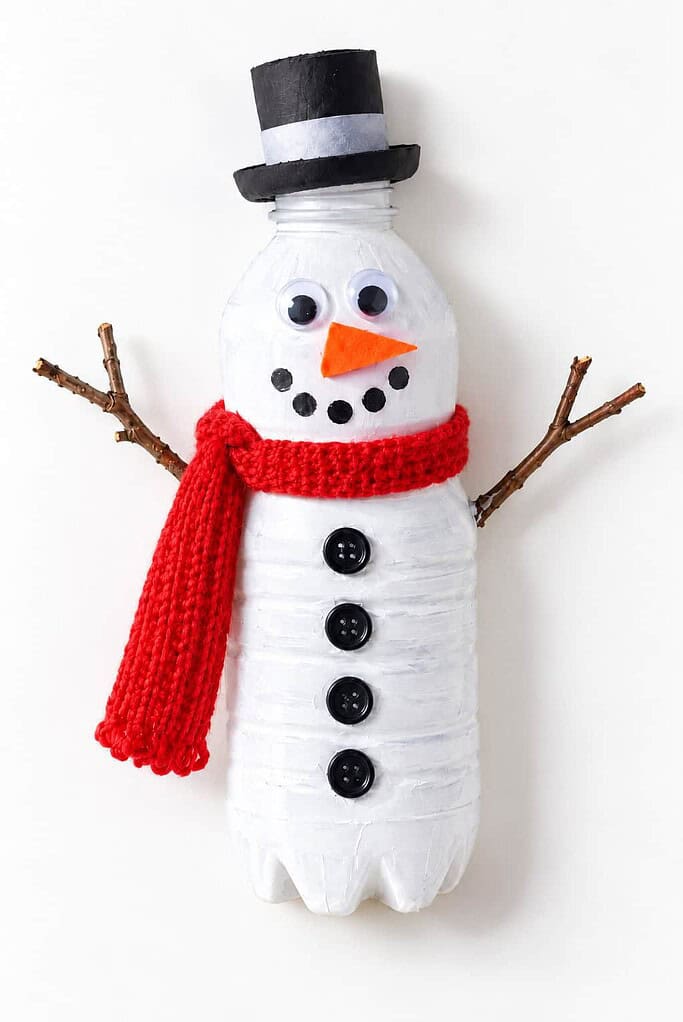
Give an empty bottle a second life as a jolly little snowman.
- Paint an empty plastic bottle white, or stuff it with cotton until it looks solid white, and let it dry.
- Glue on two googly eyes, an orange nose, and black dot buttons down the front.
- Wrap a strip of fabric or an old doll sock around the neck for a scarf.
- Poke a twig into each side for arms.
- Set a small black paper hat on the cap.
It’s a sweet way to show little ones that a bottle headed for the bin can become something worth keeping, and our clever recycled crafts for kids has more of that good, thrifty fun.
16. Snowman jar craft
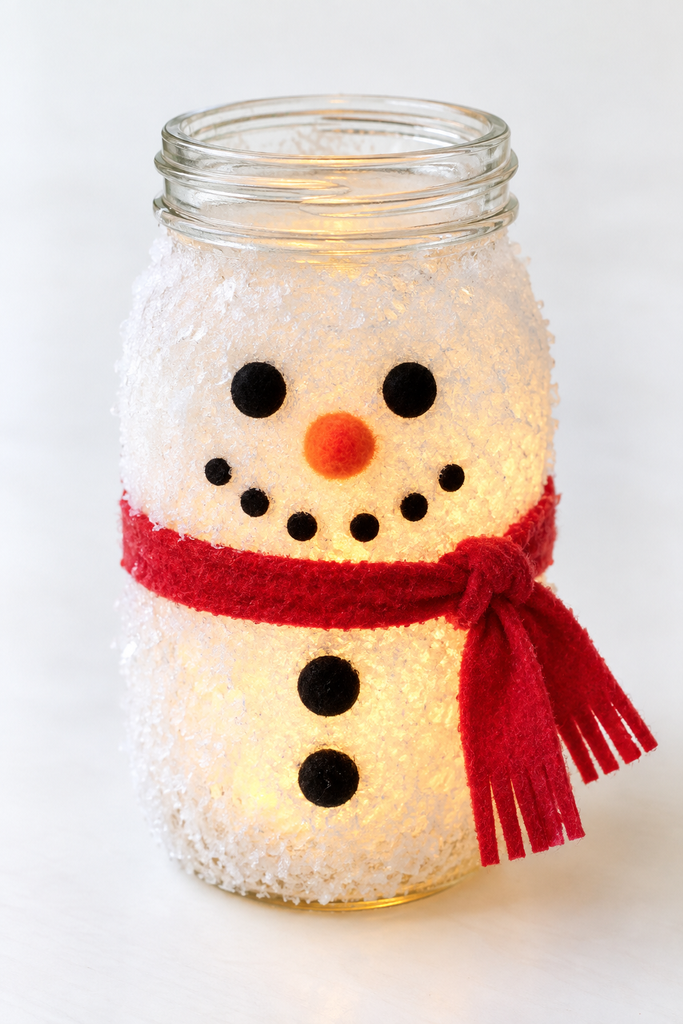
This frosty little jar turns into a glowing snowman night light.
- Brush a coat of white glue all over the outside of a clean, dry jar.
- Roll it in fake snow or Epsom salt so it turns frosty white, and let it dry.
- Add two black dot eyes, an orange nose, and a dotted smile with paint or paper.
- Tie a strip of fabric around the neck for a scarf.
- Drop a battery tea light inside so he glows.
Set him on a nightstand and switch him on at bedtime, because a soft, glowing snowman is a lovely thing to fall asleep next to.
17. Snowman globe craft
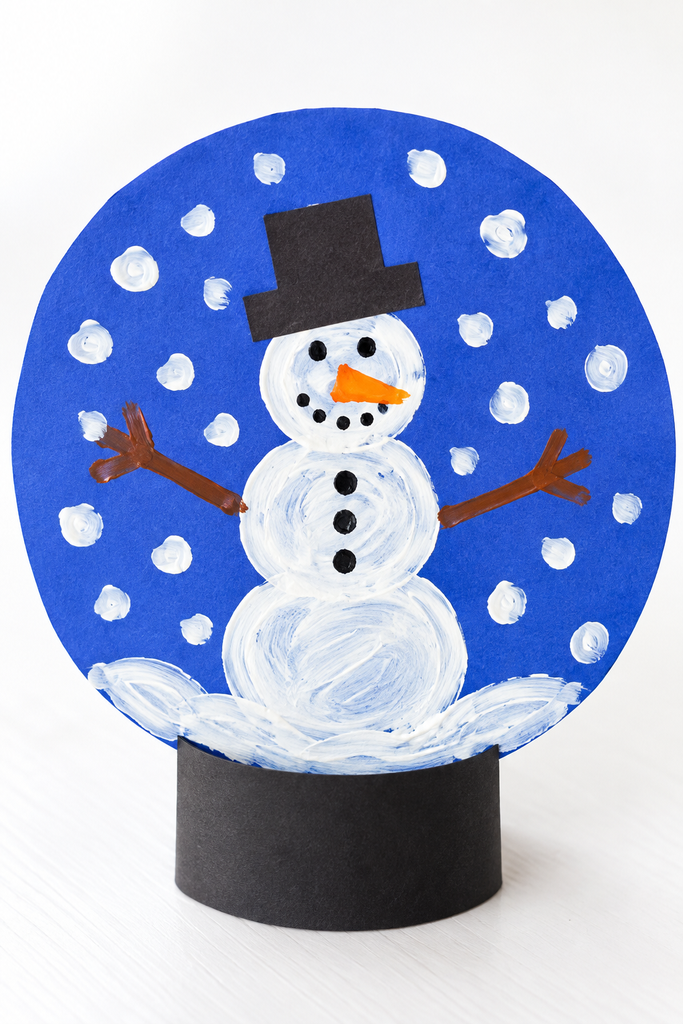
This one tucks a little snowman inside his very own snow globe.
- Cut a large circle from blue paper for the globe.
- Dab white paint inside to make a little snowman, or press on a cotton ball body.
- Add a black paper hat, a dot face, and stick arms.
- Dot white paint all around for falling snow.
- Glue the circle onto a black paper base so it stands up like a snow globe.
It’s a whole little winter scene in one craft, and children love that the snow looks like it’s forever falling around him.
18. S is for snowman craft
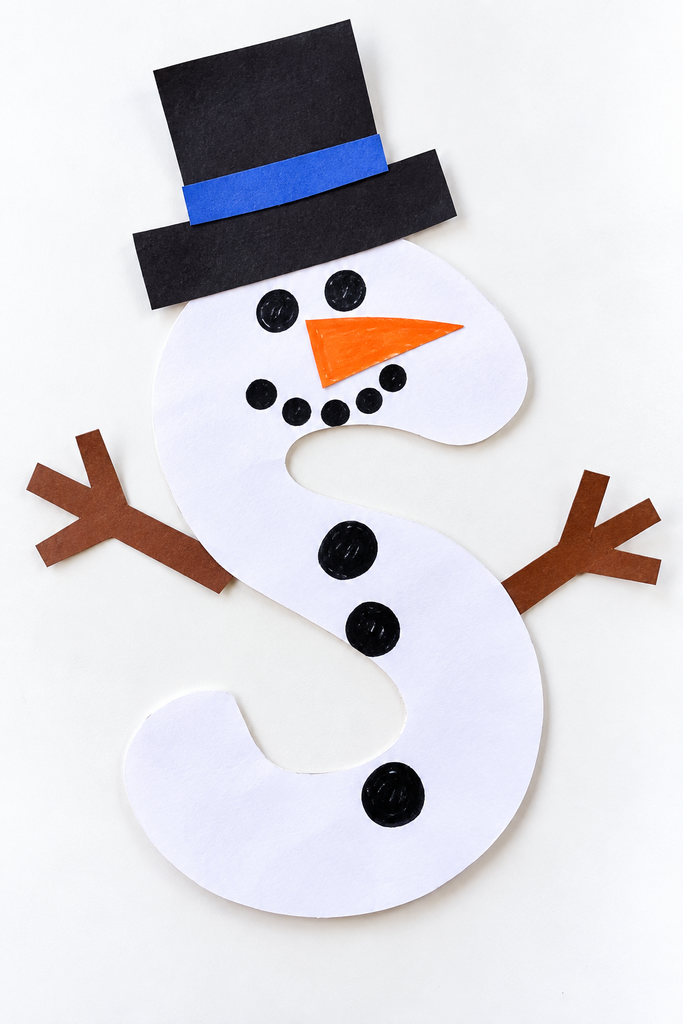
Here’s a snowman with a little letter practice hiding inside him.
- Cut a big letter S from white paper.
- Glue a black paper top hat at the top.
- Add two dot eyes and an orange triangle nose.
- Glue a row of dot buttons down the curves of the S.
- Glue a brown paper or twig arm to each side.
It’s a gentle way to sneak in some learning, and our fun alphabet crafts has a make for every other letter too.
19. Pom pom snowman craft
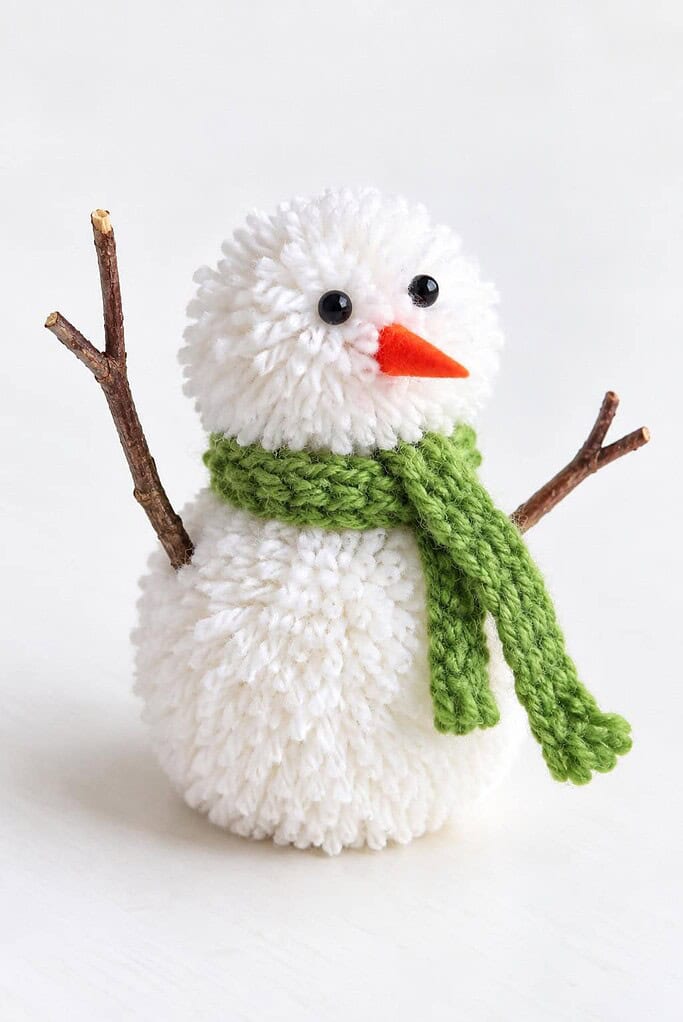
Soft and fluffy from top to bottom, this is the coziest snowman of the bunch.
- Make two white pom-poms by winding yarn around your fingers, tying the middle tight, and snipping the loops, or use two ready-made pom-poms.
- Stack the smaller pom-pom on the larger one and glue them together.
- Tie a little scarf around the neck.
- Glue on two bead eyes and a small orange nose.
- Poke a twig into each side for arms.
He’s soft enough to want to hold, so make a couple, because these have a way of becoming little pocket friends.
20. Coffee filter snowman craft
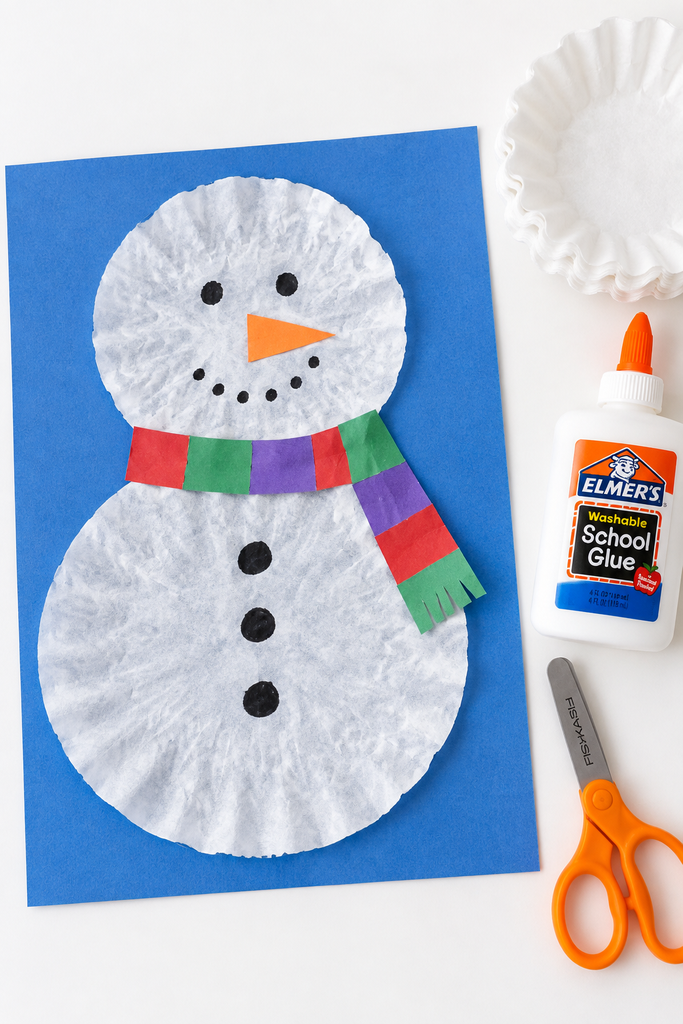
A couple of coffee filters make the softest, snowiest little snowman.
- Flatten two coffee filters, one slightly smaller for the head.
- Glue them onto blue paper so they overlap like a stacked snowman.
- Add two dot eyes, an orange nose, and a dotted smile.
- Glue a paper scarf across the neck.
- Add a few dot buttons down the front.
The filters give him a soft, papery snow texture you just can’t get from a plain circle, so this simple one always turns out prettier than you’d expect.
why kids love a good snowman craft
There’s something about a snowman that little ones warm to right away. He’s round and friendly, he shows up with the first cold day, and he’s tied to all the fun of winter, the mittens and the hot cocoa and the hope of a snow day.
A snowman craft also gives you an easy way to talk about the season while your hands are busy, about the weather turning and the quiet that comes with a snowy day. Those small conversations tend to stay with them.
And snowmen fit right in with all the other cold-weather making, so if you’re gathering ideas for the whole season, our charming winter crafts for kids has plenty more to keep little hands busy.
simple supplies to keep on hand
The nice thing about snowman crafts is how little they ask of you. A bottle of white paint, a bag of cotton balls, some white paper plates, and a stack of construction paper in white, black, orange, and blue will carry you through most of this list.
From there, a handful of extras stretch things further. Googly eyes, black paper or buttons for the eyes and buttons, and scraps of fabric or ribbon for the scarves show up again and again, so they’re worth keeping in a little bin by the table.
A few of these use one special thing, like a clean sock, a coffee filter, a jar, or an empty bottle. And a couple use bits from outside, like twigs for the arms. But most of it is probably already sitting in your craft drawer.
tips for crafting with little ones
A little prep goes a long way. Cut the hats, noses, and scarves ahead of time for the youngest ones, and set the pieces out in little piles so small hands can just glue and go.
Then let them place things where they like. A snowman with his hat tipped sideways or his buttons wandering off has a charm all his own. The point isn’t a perfect snowman.
And if you send everyone out to gather a few twigs for the arms first, you get a little fresh air and free craft supplies in one go, the way our nature crafts for kids leans on all season.
pick one snowman craft to try this week
So pick the one that fits your supplies and the ages around your table. You don’t need to make all twenty. Just one good idea and a few cotton balls is plenty.
The craft is fun on its own, but the time you spend together, buttons glued on a little crooked and all, is the part that tends to stay with them.
If you and your little ones make a few of these snowmen, I’d love to see how they turned out. Leave a photo in the comments when you get a chance, or send one our way. And if it’s alright with you, yours might be featured right here on the site to cheer on other families crafting at home. So glad you’re here.
With love,
Betty
Get the FREE 3D Turkey Craft
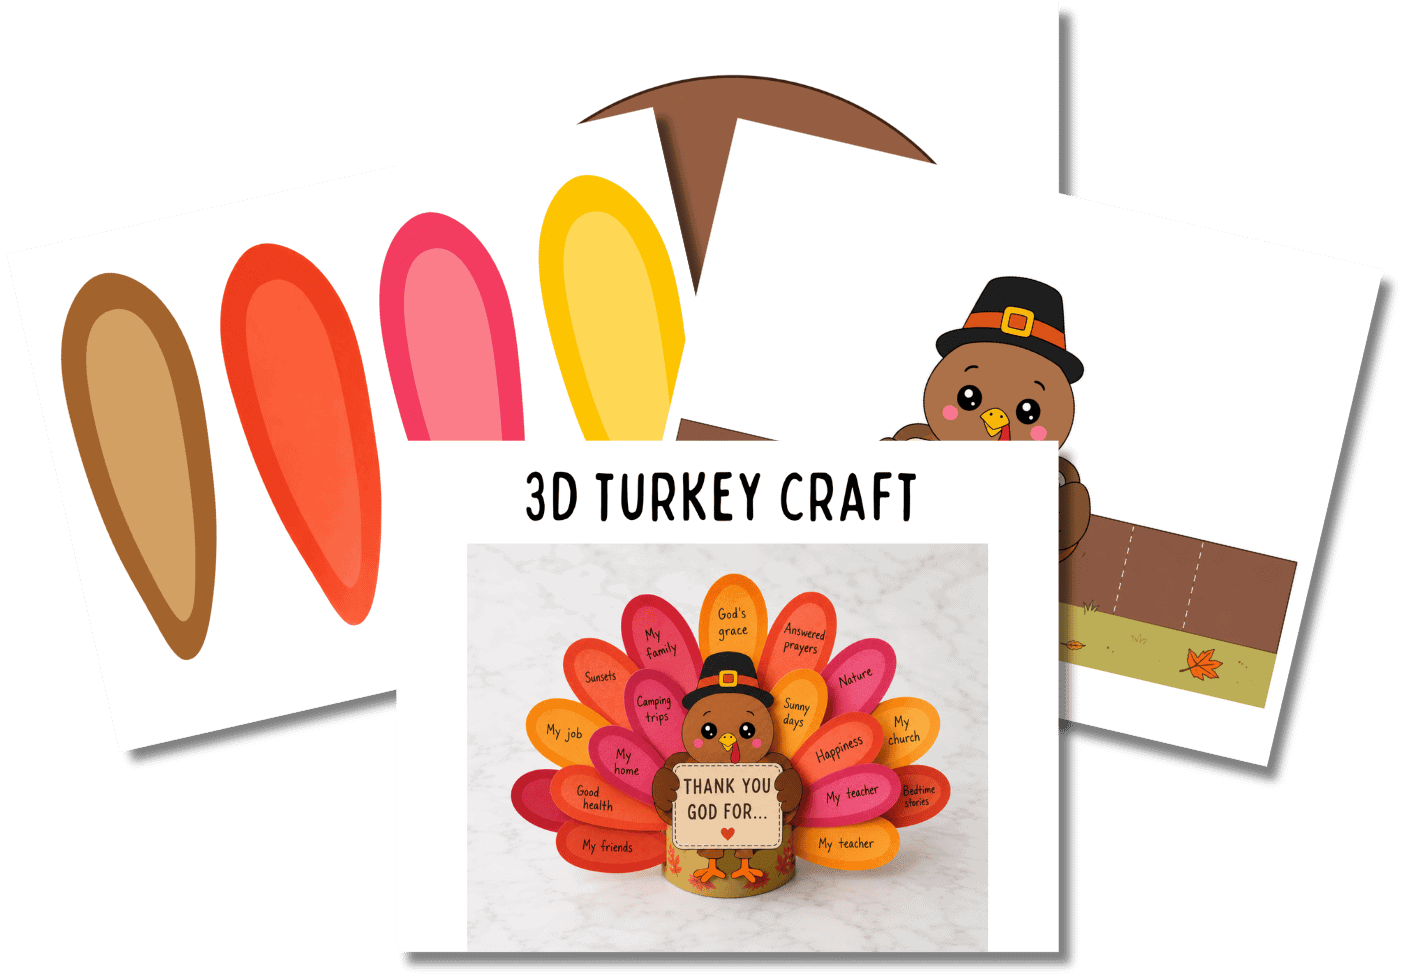
Don’t let your kids just hear that they’re blessed—help them name their blessings one by one.
With this free 3D turkey craft, kids color the turkey and his feathers, then write one thing they’re thankful to God for on each feather. The body wraps around into a base so the turkey stands up on his own, holding a sign that reads “Thank You God for…”
frequently asked questions
what age are snowman crafts best for?
Most work beautifully for ages two through ten with a little adjusting. The footprint, handprint, and fingerprint snowmen are gentle enough for the very littlest, while the jar, the suncatcher, and the 3D snowman give older children more to do.
what supplies do i really need?
Not much at all. White paint, cotton balls, paper plates, construction paper, glue, and a few googly eyes will cover most of the list. Add some scraps of fabric for scarves and a handful of twigs for arms, and you’ll be ready whenever the mood strikes.
how long do these take?
Most come together in about fifteen to twenty minutes, though the painted ones like the footprint snowman or the jar need some drying time. Save those for a day when you’re not in a hurry, or start them early and add the details later.
can we use real snow or natural bits?
The natural bits are lovely, and real twigs make the best snowman arms. Just skip real snow indoors, since cotton balls, fake snow, and coffee filters give you that snowy look without the puddle on the table.
how do i keep the finished snowmen?
The handprint and footprint keepsakes are worth dating and tucking into a memory box. The sturdier ones, like the popsicle stick, the ornament, and the sock snowman, hold up year after year, so they can come back out with the winter decorations each season.