There’s a certain kind of quiet that settles in once winter arrives. The days get short, the cold keeps everyone close to home, and the little ones start looking for something to do with their hands at the kitchen table.
That’s where a good craft comes in. These forty winter crafts are simple to set up, easy to clean up, and full of the Santas, snowmen, reindeer, penguins, and gingerbread men that little ones love this time of year.
Most of them use things you very likely already have, like paper plates, cotton balls, cardboard tubes, and a bit of white paint.
And whether you’re a parent at your own kitchen table, a grandparent with the little ones over for the afternoon, a homeschool mama, a Sunday school helper, or a teacher planning a winter lesson, there’s something here for whatever ages you’ve got.
40 easy winter crafts for kids
Here are forty simple winter crafts to make together, from Santa and his reindeer through snowmen, penguins, and gingerbread houses. So pick one for a snowy afternoon, or work through a handful as the season goes on.
1. Santa Claus paper plate craft
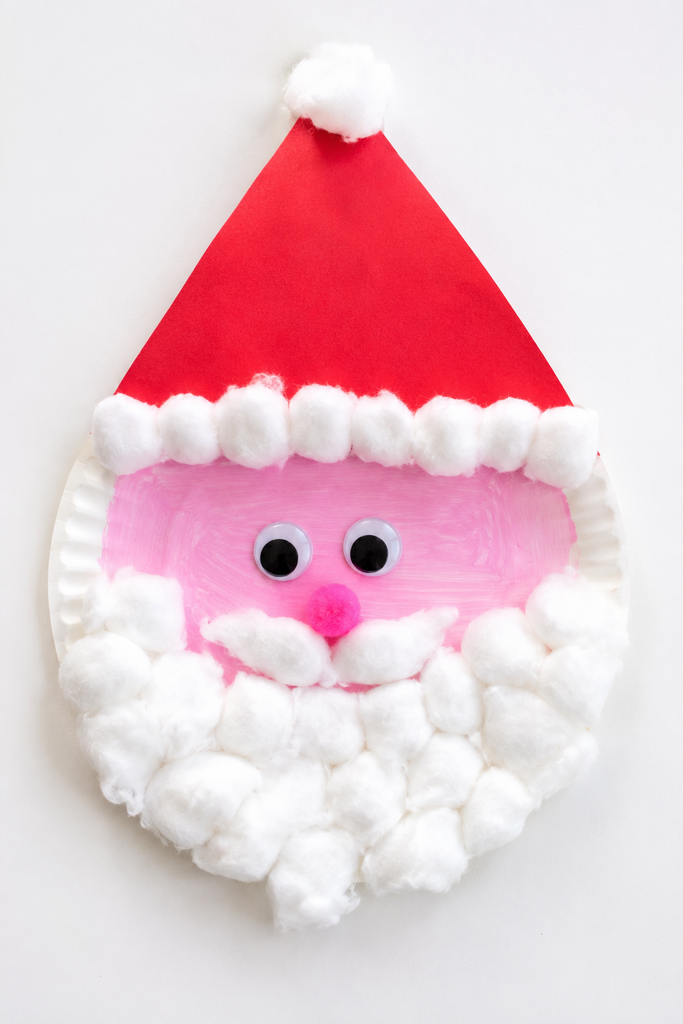
Few faces say Christmas like Santa’s, and a paper plate makes the roundest, jolliest one.
- Paint or color the bottom half of a paper plate pink for the face, and leave the rest white for the beard.
- Glue cotton balls all over the beard area and around the chin.
- Add a red paper triangle hat across the top with a cotton ball on the tip and a cotton band along the brim.
- Glue on two googly eyes, a small pink pom-pom nose, and a little cotton mustache.
He comes together fast, and the fluffy cotton beard is the part little ones love patting. For more ways to turn a plain plate into something sweet, our paper plate crafts for kids is full of ideas.
2. Reindeer footprint craft
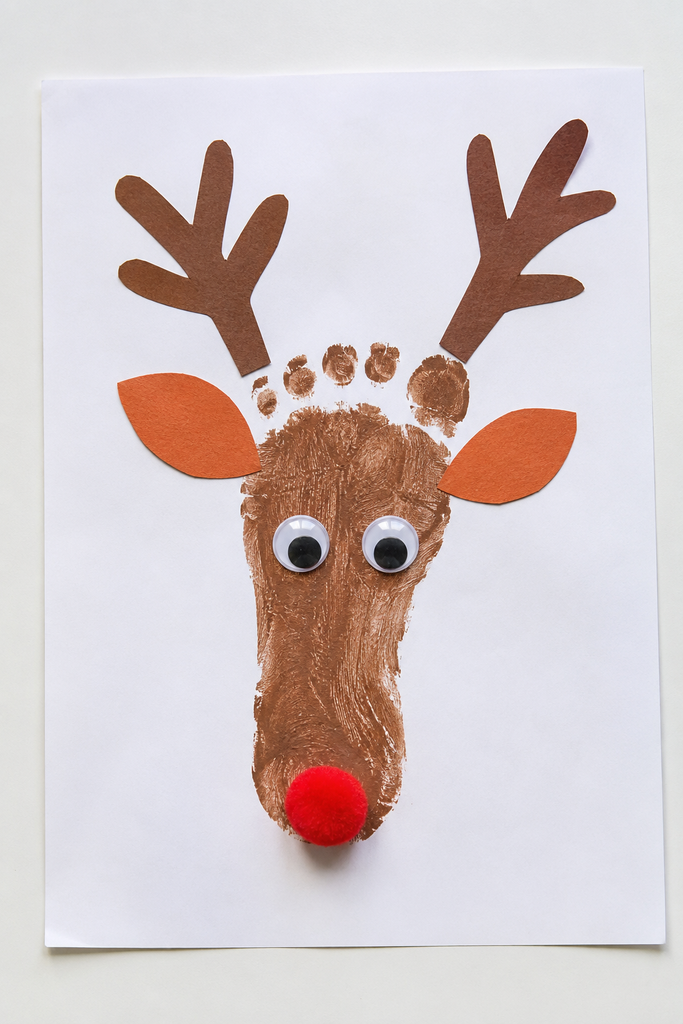
A single footprint makes the sweetest little reindeer face.
- First, paint the bottom of the child’s foot brown and press it onto paper with the toes pointing up, so the toes make the top of the head and the long heel becomes the snout below.
- Let it dry, then add two brown paper antlers spreading out from the top.
- Add two orange paper ears, one on each side just below the antlers.
- Glue on two googly eyes in the middle and a red pom-pom at the bottom of the snout for a Rudolph nose.
The chubby little footprint makes a sweet reindeer face, and a red nose turns him right into Rudolph.
3. Gingerbread man paper craft
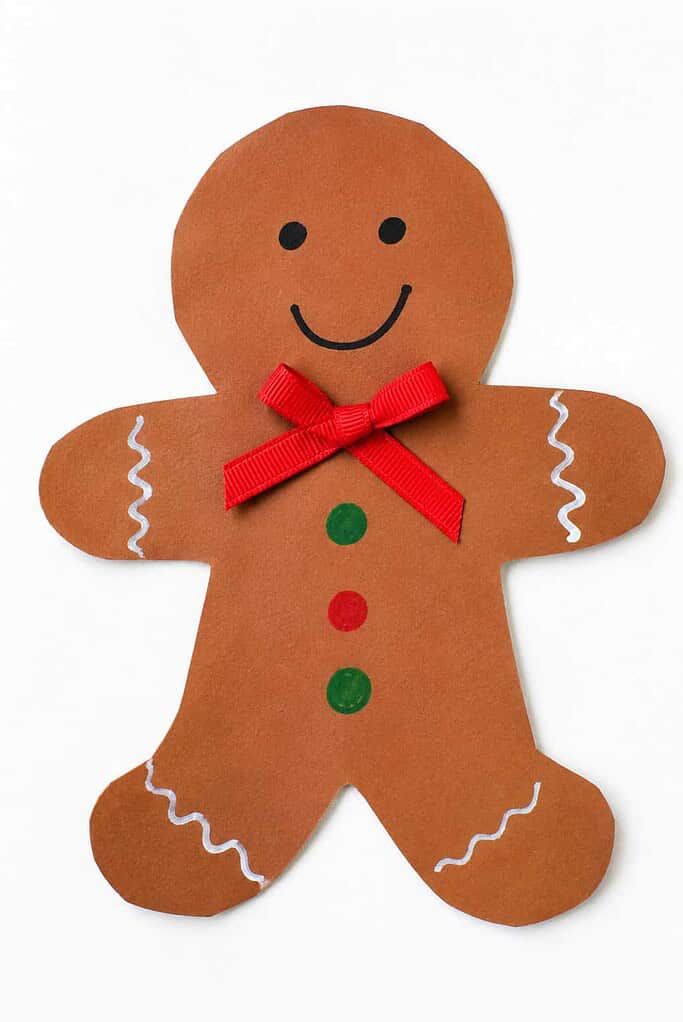
No baking needed for this gingerbread man, just brown paper and a few happy details.
- Cut a gingerbread man shape from brown paper, or trace one and let the little ones cut along the lines.
- Draw a squiggly white line of icing down the arms and legs with a white crayon or paint pen.
- Add two dot eyes, a smile, and a few button dots down the front.
- Glue on a little ribbon bow at the neck.
The wavy white icing lines are what make him look freshly decorated, crooked and all.
4. Marshmallow igloo craft
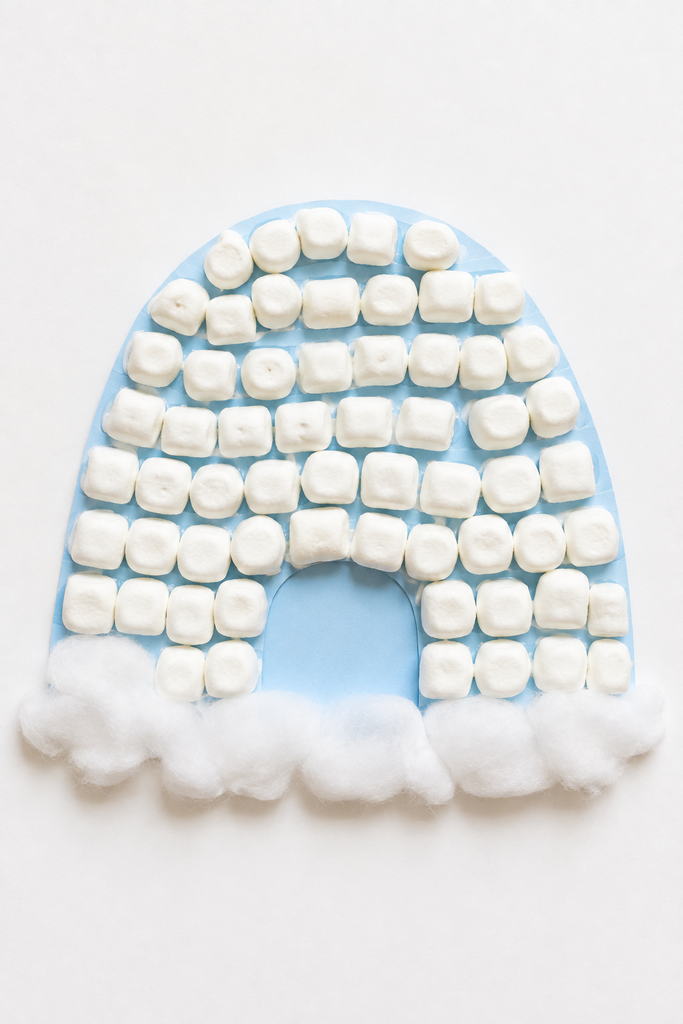
A handful of mini marshmallows stacks up into a cozy little igloo dome.
- Cut a dome shape from blue or white paper for the base of the igloo.
- Glue rows of mini marshmallows across it, starting at the bottom and curving up to the top.
- Leave a small arched doorway open near the bottom.
- Set it on a cotton snow drift if you like.
The bumpy white marshmallows look just like blocks of packed snow.
5. Mitten handprint craft
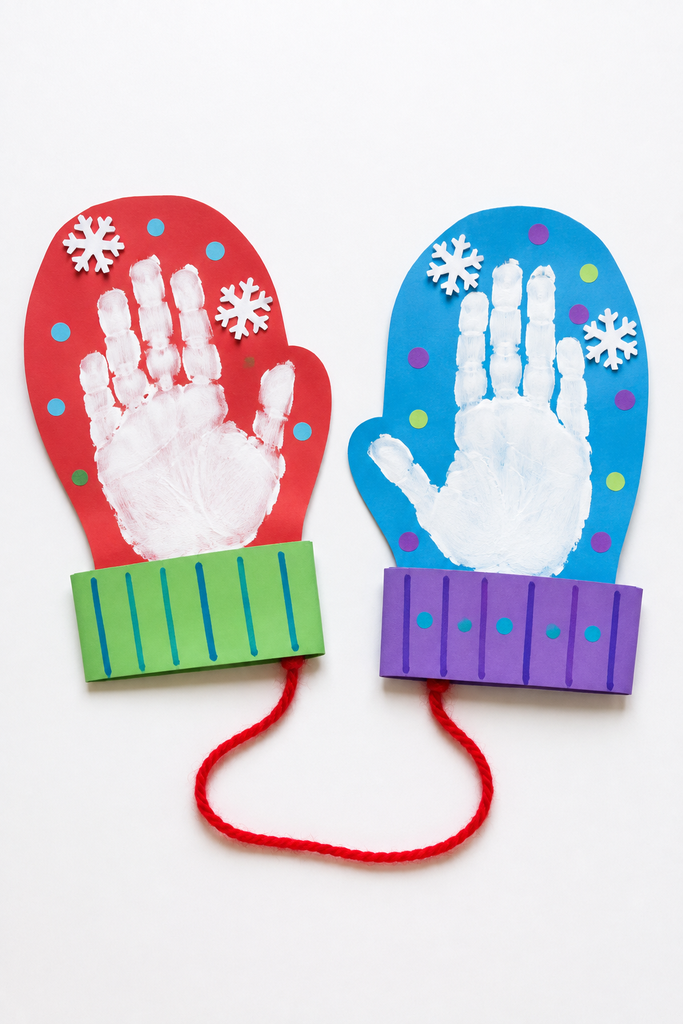
A little handprint is one of those things you hate to throw away, and a bright paper mitten gives it the perfect home.
- First, cut a mitten shape from brightly colored paper, with the thumb out to the side.
- Paint the child’s palm and fingers white and press a handprint onto the mitten, fingers together and thumb out.
- Once it dries, glue a folded paper cuff across the bottom, and decorate the mitten with dot stickers or little paper snowflakes.
- Make a second mitten the same way, then join the pair with a length of yarn between the cuffs.
Two little handprint mittens on a string are a keepsake worth hanging up each winter.
6. Snowflake suncatcher
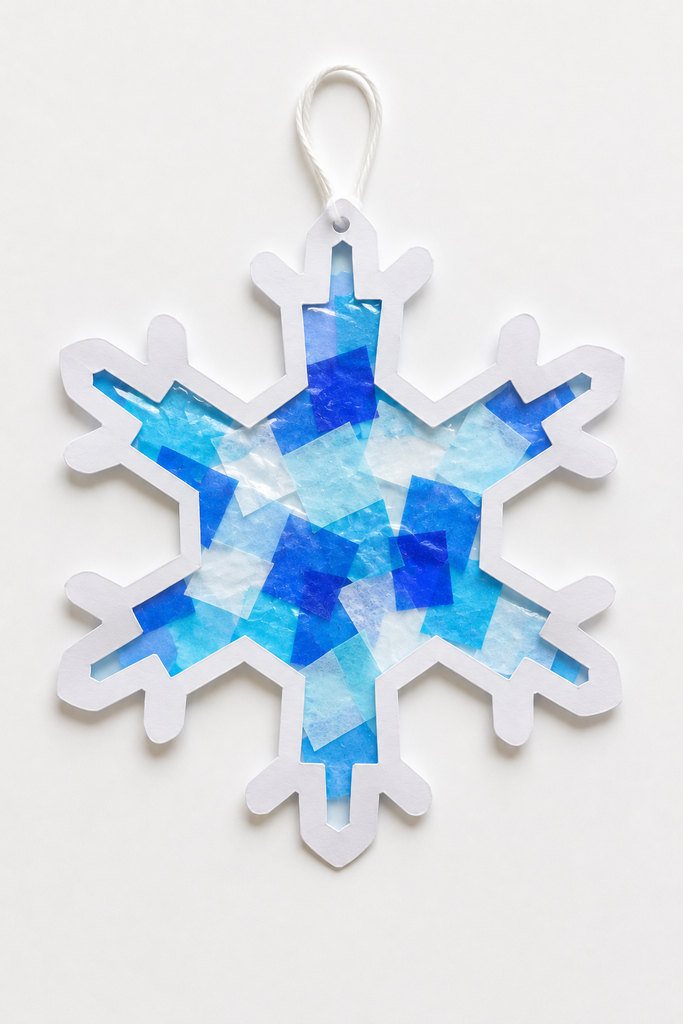
This one is made to live on a window, where the winter light can shine straight through it.
- Cut a snowflake frame from cardstock so the middle is open like a little window.
- Lay a sheet of clear contact paper sticky side up and set the frame on it.
- Press small squares of blue and white tissue paper over the opening, overlapping as you go.
- Seal a second sheet of contact paper on top and trim around the edges.
Stuck to a sunny window, the tissue glows like a little piece of stained glass.
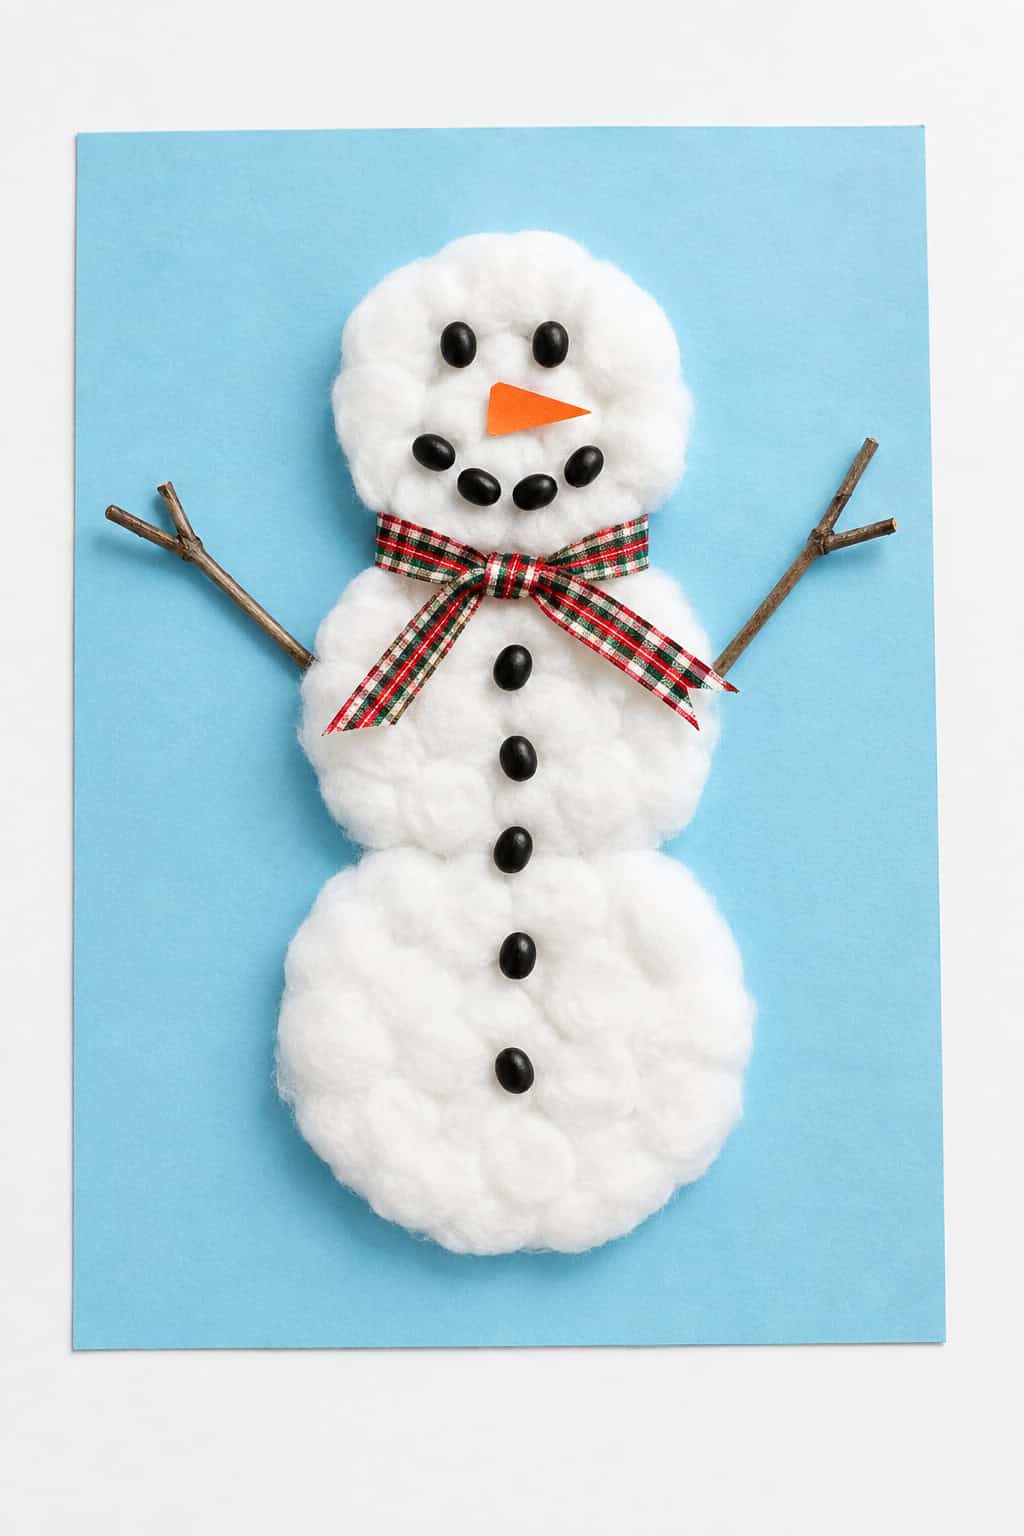
7. Cotton-ball snowman
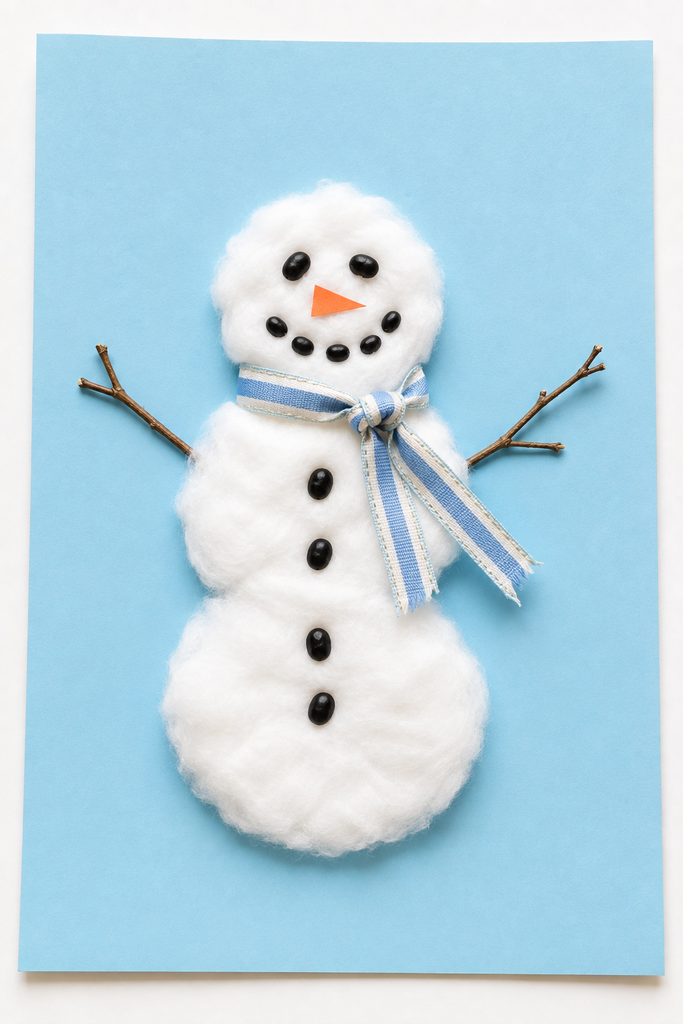
This is a snowman you can actually feel, all soft and bumpy where the cotton gets glued on.
- Sketch three stacked circles on light blue paper, small on top and largest at the bottom.
- Pull cotton balls apart and glue the fluff to fill the circles.
- Add black beans or paper dots for the eyes, mouth, and buttons.
- Glue on a small orange paper nose and two twigs for arms.
Real twigs make the best arms here, and a scrap of ribbon tied on for a scarf finishes him off.
8. Hot chocolate mug craft
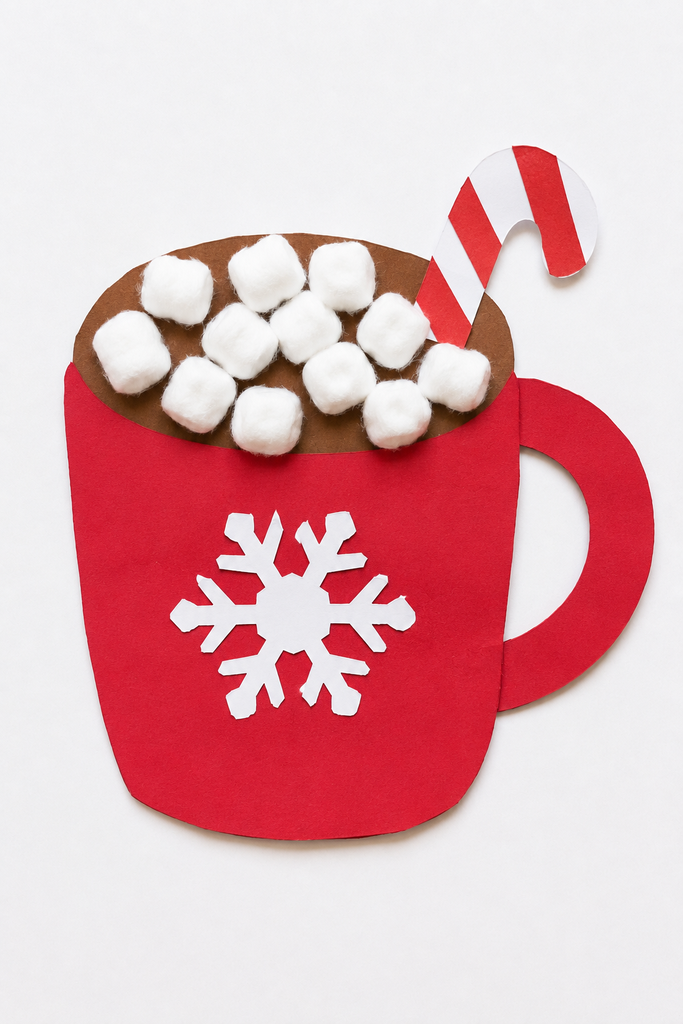
On a cold day everyone wants a warm mug, and this paper one comes piled with marshmallows.
- Cut a mug shape from colored paper and glue on a paper handle.
- Add a brown paper circle at the top for the cocoa.
- Glue small cotton balls or mini marshmallows across the top so they spill over the rim.
- Decorate the mug with stripes or a snowflake, and tuck in a paper candy cane.
The cotton marshmallows heaped on top make it look warm enough to sip.
9. Pipe cleaner icicle craft
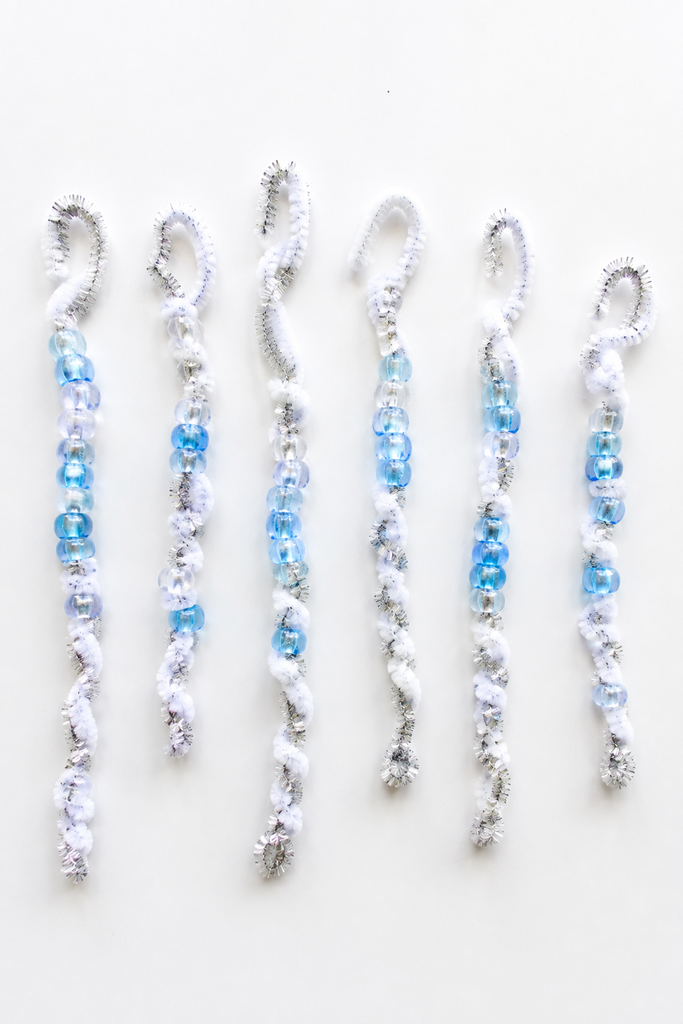
A few twists of a pipe cleaner and some clear beads make an icicle that catches the light.
- Thread clear and light blue beads onto a white or silver pipe cleaner.
- Slide the beads down and twist the bottom end so they can’t fall off.
- Bend the top into a little hook.
- Make several in different lengths and hang them in a row.
Strung along a window, they shimmer like real icicles hanging from the eaves. For more of these bendy little projects, our pipe cleaner crafts for kids has plenty to try.
10. Footprint snowman
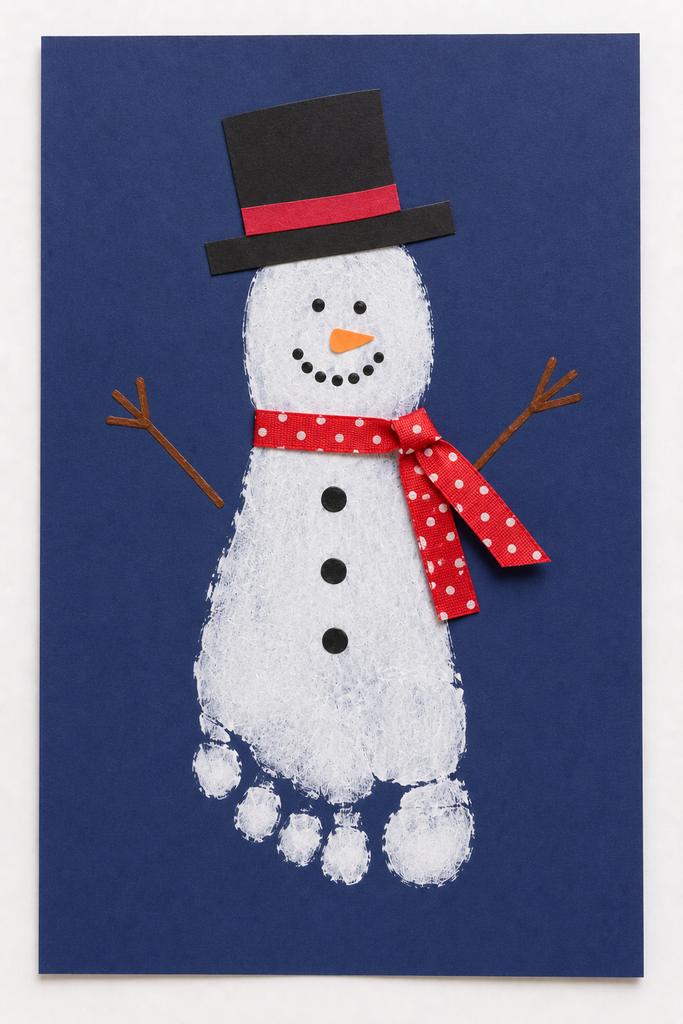
Same idea as the handprint snowman, but this time it’s a little foot that does the work, heel up for the head.
- Brush white paint over the bottom of the child’s foot.
- Press it onto dark paper with the heel up, so the heel becomes the head.
- Let it dry, then add a hat across the heel and a little face.
- Dot on coal buttons down the middle and draw two stick arms out the sides.
A caption like “I love you snow much” and the date turns it into a card grandparents will keep.
11. Paper plate walrus craft
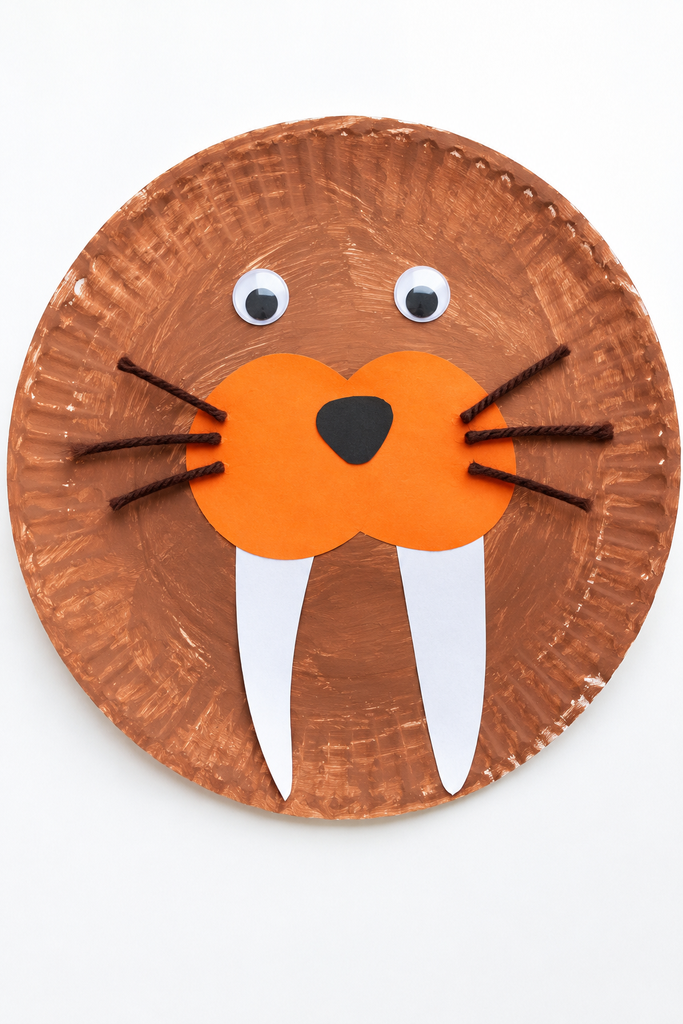
With two tusks and a bristly mustache, a paper plate makes a friendly little walrus.
- Paint or color a paper plate brown or tan for the walrus face.
- Glue on two googly eyes, then add an orange paper snout in the middle with a small black nose on it.
- Add two white paper tusks pointing down under the snout.
- Snip short pieces of yarn or paper for whiskers and glue them out from each side of the snout.
The droopy whiskers and long tusks give him a sweet, sleepy look.
12. Christmas elf craft
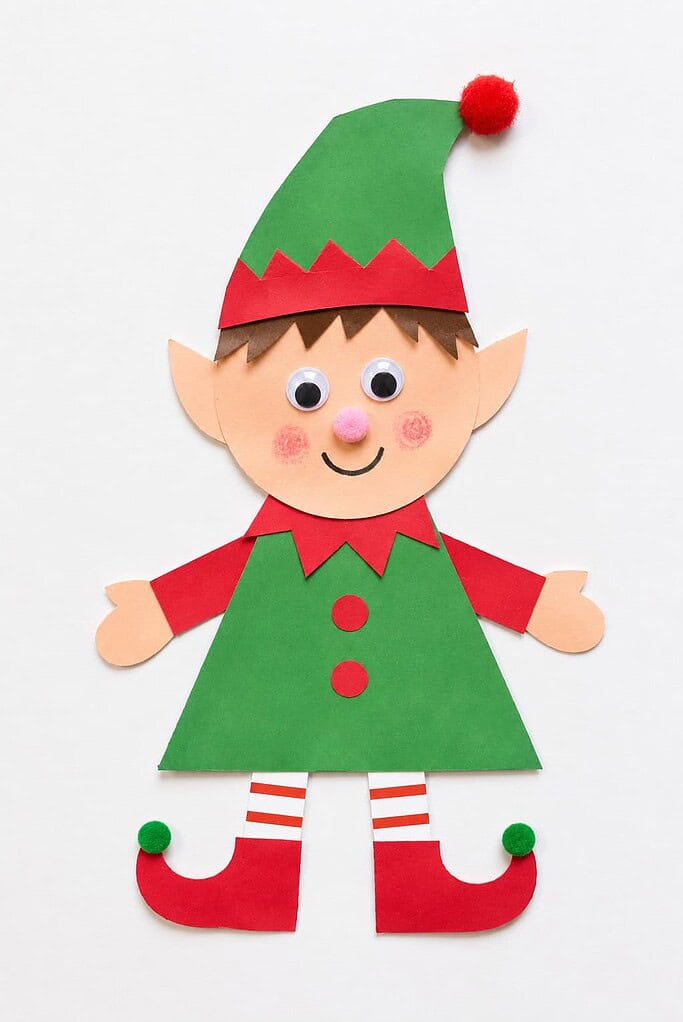
Santa’s little helper comes together from a few bright scraps of paper.
- Cut a round head from peach paper and a triangle body from green or red paper.
- Add a pointed paper hat with a pom-pom on top, tilted to one side.
- Glue on two googly eyes, a small nose, rosy cheeks, and a smile.
- Add pointy paper shoes and two little arms.
A curl of the hat and pointy shoes are all it takes to turn him into an elf.
13. Christmas tree paper craft
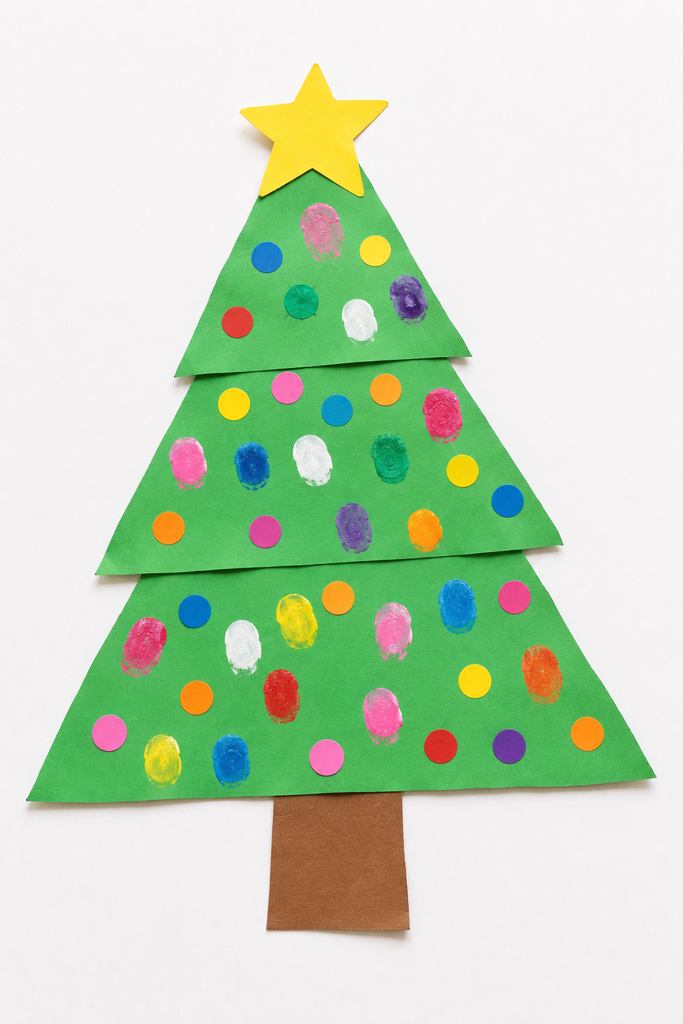
A simple paper triangle becomes a little tree the children can trim themselves.
- Cut a green triangle from paper, or stack three green triangles from small on top to large at the bottom.
- Glue it onto a page with a small brown paper trunk underneath.
- Let the little ones decorate it with dot stickers, sequins, or fingerprint ornaments.
- Add a yellow paper star at the top.
Decorating the tree is the best part, and every one turns out a little different.
14. Holly leaf craft
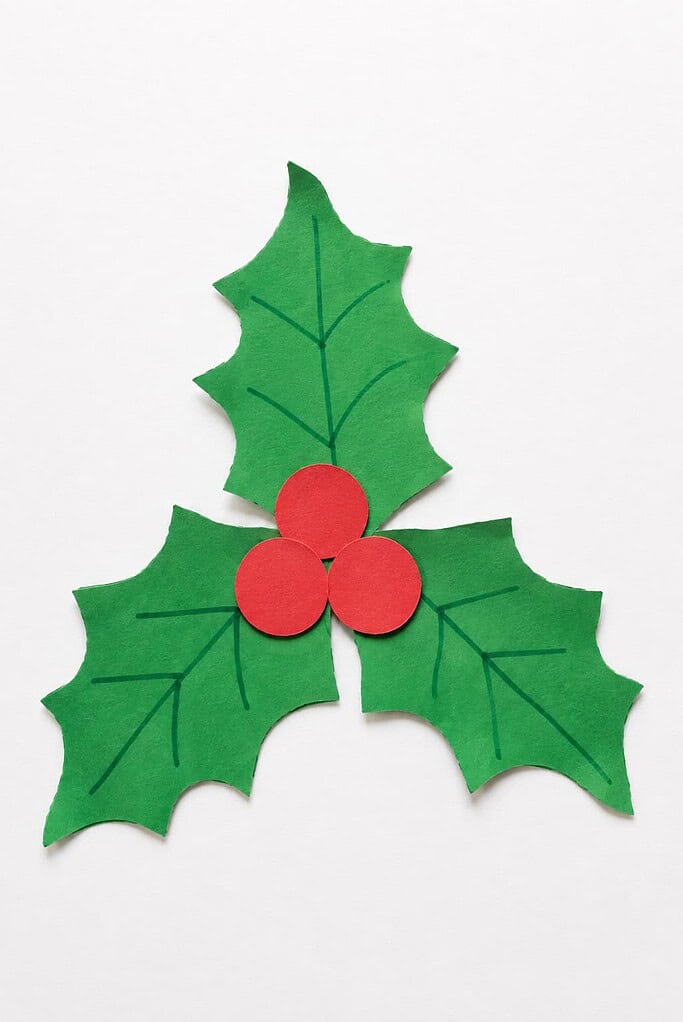
A sprig of holly is one of winter’s prettiest sights, and it’s easy to make from paper.
- Cut two or three holly leaves from green paper, with their wavy pointed edges.
- Glue them together in a little cluster on a page or a card.
- Add three red pom-poms or paper circles for the berries.
- Draw on the leaf veins with a marker if you like.
A few holly leaves and berries make a sweet card front or a bit of window decoration.
15. Mistletoe footprint craft
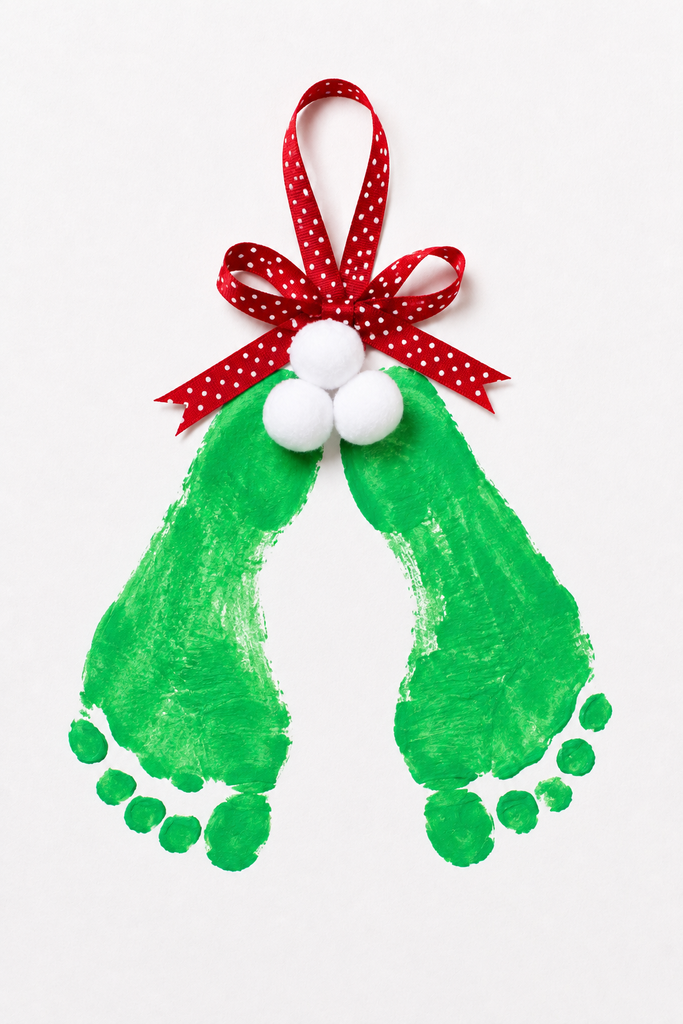
Two little footprints turn into the leaves of a hanging sprig of mistletoe.
- Paint the bottoms of the child’s feet green and press them side by side to make the leaves.
- Let them dry.
- Glue a few white pom-poms or paper circles at the top where the prints meet for the berries.
- Add a little ribbon bow and a loop for hanging.
Footprint leaves make this a keepsake worth hanging in the doorway each December.
16. Melting snowman
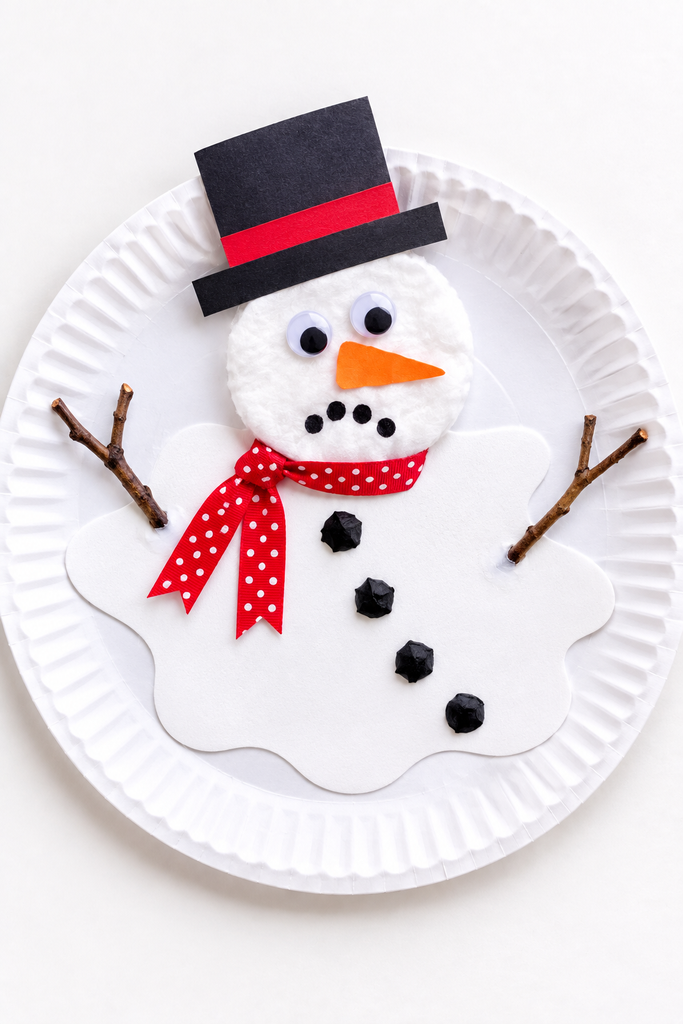
This is the snowman who’s had a little too much sun, mostly a puddle now with just his head and buttons left behind.
- Cut a wavy puddle shape from white paper or felt and glue it flat to a paper plate.
- Glue one round white circle at the top edge for the head that’s left.
- Add dot eyes, a sideways orange nose, and a small mouth.
- Lay two twig arms and a trail of coal buttons across the puddle.
Half the fun is how droopy and silly he looks, and little ones always get a giggle out of him.
17. Gingerbread house craft
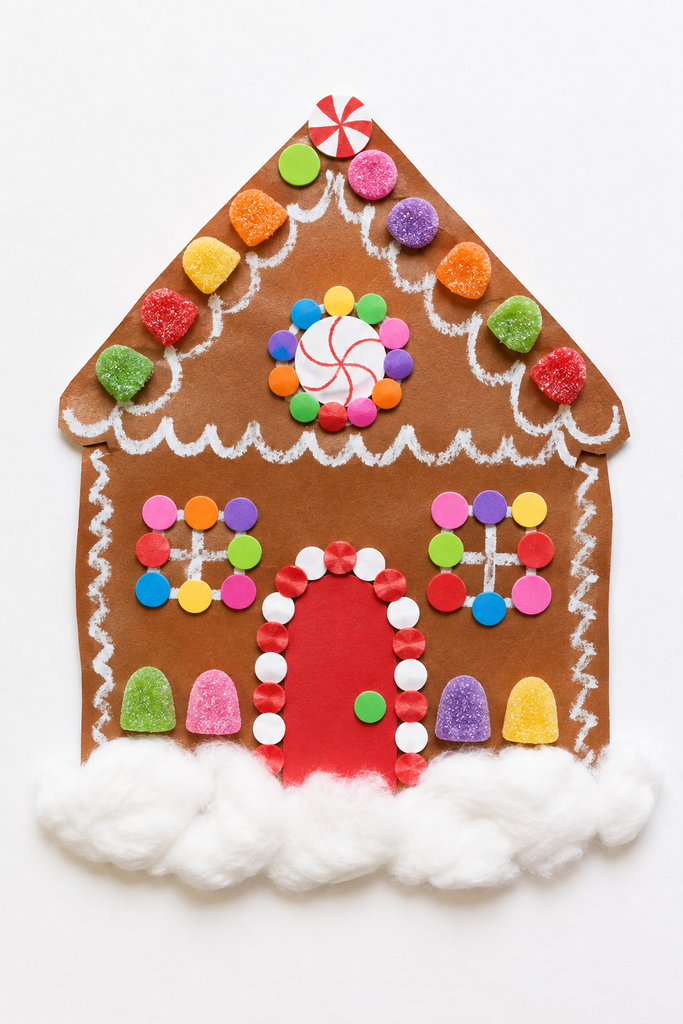
This little gingerbread house is all the fun of decorating with none of the frosting mess.
- Cut a house shape from brown paper, or glue graham crackers into a house on a page.
- Add white crayon or paint-pen icing along the roof and edges.
- Glue on paper or foam candies, gumdrops, and a little door.
- Add a snowy cotton drift at the bottom.
Piling on the candy is the best part, and there’s no wrong way to decorate it.
18. Snowman hat
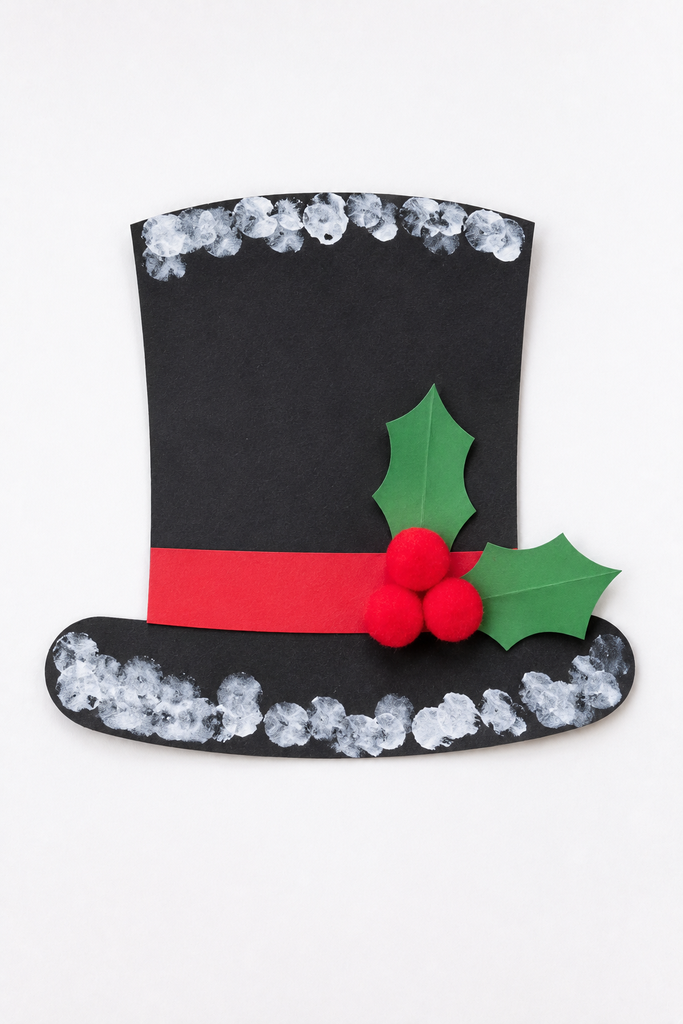
Sometimes it’s fun to make just the hat, a little black top hat with a sprig of holly that stands on its own.
- Cut a tall black top hat from paper or felt, a crown plus a wide brim.
- Glue the pieces together and add a colored band across the bottom of the crown.
- Dab a little white paint along the brim for snow.
- Glue on a sprig of holly, three red pom-poms with green paper leaves.
It’s a sweet little ornament on its own, or the finishing touch on a bigger snowman craft.
19. Winter hat
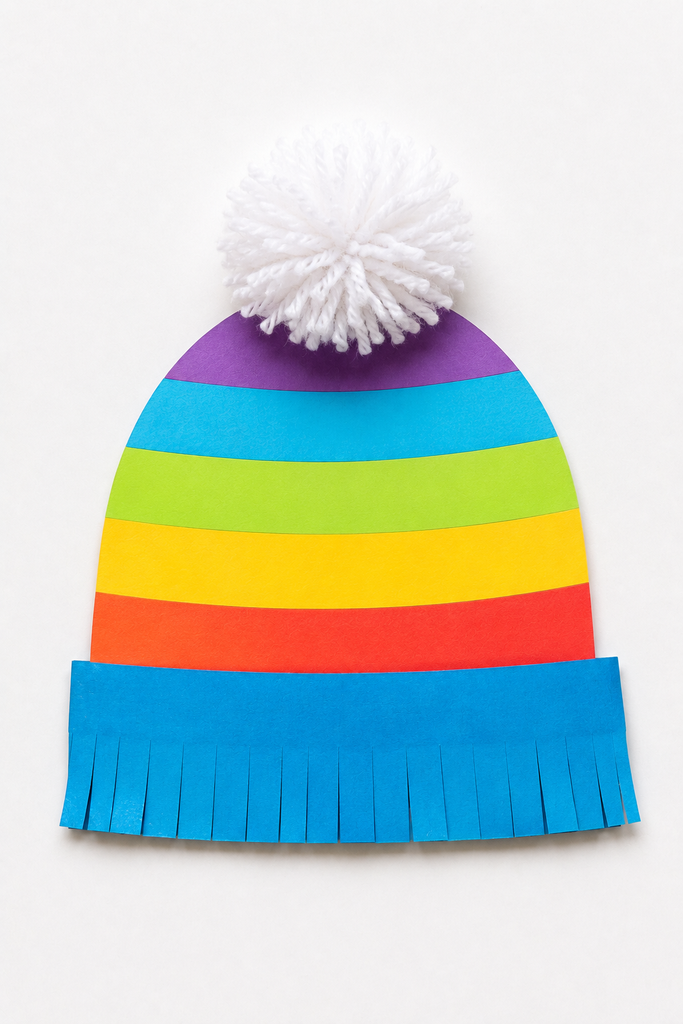
Every child knows the pull-it-on-and-go feeling of a warm winter hat, and this paper version has the same cozy cuff and pom-pom on top.
- Cut a rounded beanie shape from bright colored paper.
- Glue a wide folded cuff across the bottom edge.
- Decorate the body with painted stripes, dots, or stickers.
- Add a fluffy cotton ball or pom-pom on top.
Snip a little fringe into the cuff and it starts to look just like a knit hat.
20. Paper plate polar bear
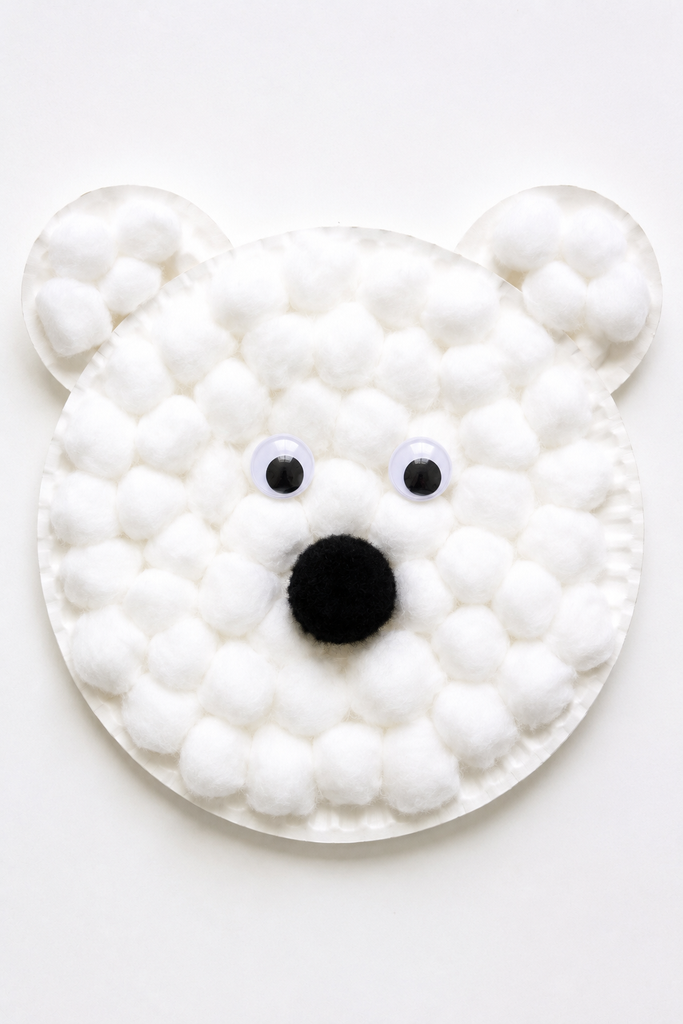
Cover a whole paper plate in cotton and it turns into the fluffiest, friendliest polar bear face.
- Roll cotton balls and glue them all around the edge of a white paper plate, then fill the center.
- Glue two big cotton balls at the top for rounded ears.
- Add two googly eyes in the middle.
- Press a black pom-pom just below the eyes for the nose.
Cover the whole plate so none of it peeks through, and he turns out soft and fluffy.
21. Candy cane reindeer craft
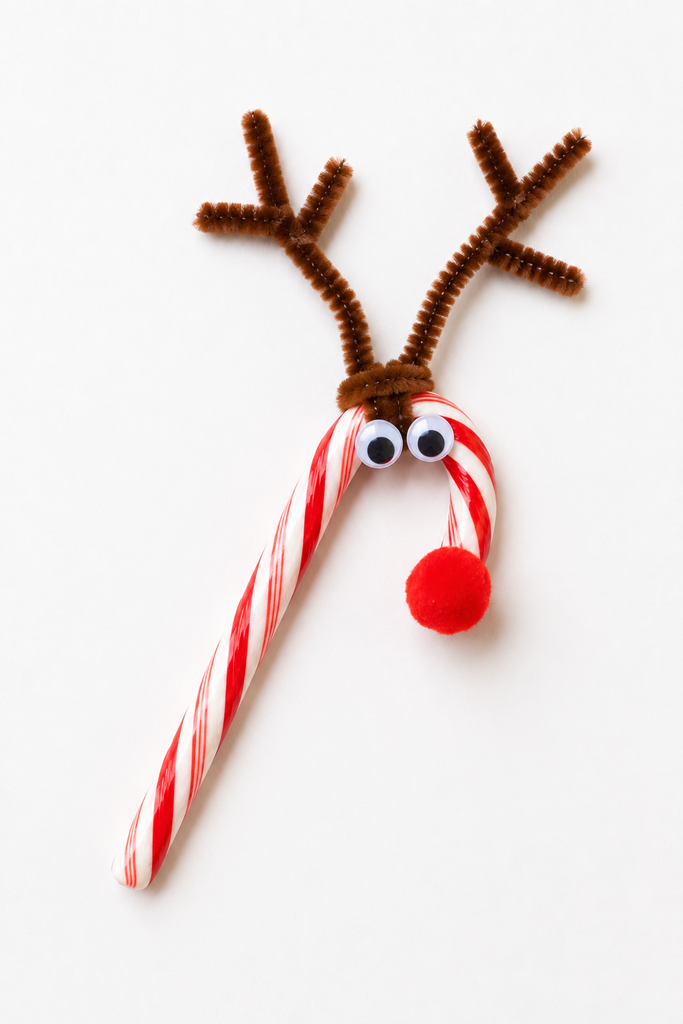
A candy cane tips on its side and becomes a little reindeer in a few quick steps.
- Lay a candy cane, or one cut from paper, with the hook facing sideways as the nose end.
- Twist a brown pipe cleaner around the top for antlers, or glue on paper ones.
- Glue two googly eyes near the curve.
- Add a small red pom-pom on the hooked tip for the nose.
The curve of the candy cane makes the perfect reindeer nose, which little ones think is awfully clever.
22. Popsicle stick Christmas present craft
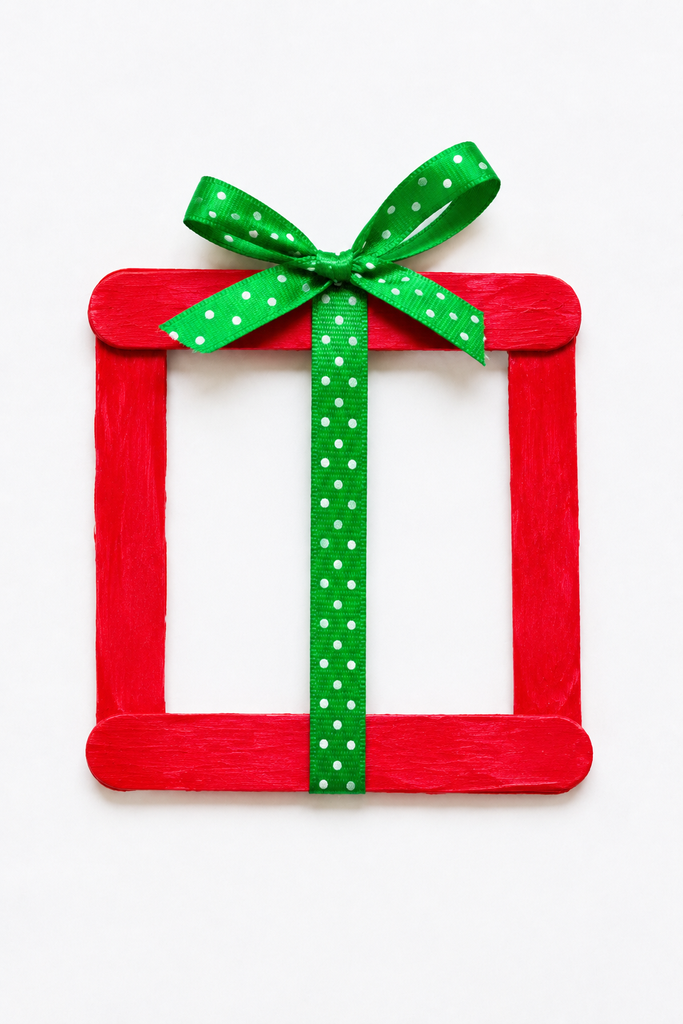
A few craft sticks and a bit of ribbon make a tidy little wrapped gift.
- First, glue four craft sticks into an open square frame, like a little picture frame, and let it dry.
- Paint the frame a bright wrapping-paper color like red, green, or blue.
- Run a length of ribbon straight up the middle of the frame, from the bottom edge to the top.
- Tie a little bow at the top center where the ribbon meets the top stick.
It looks just like a wrapped present, and it makes a sweet ornament or gift tag.
23. Christmas bell paper craft
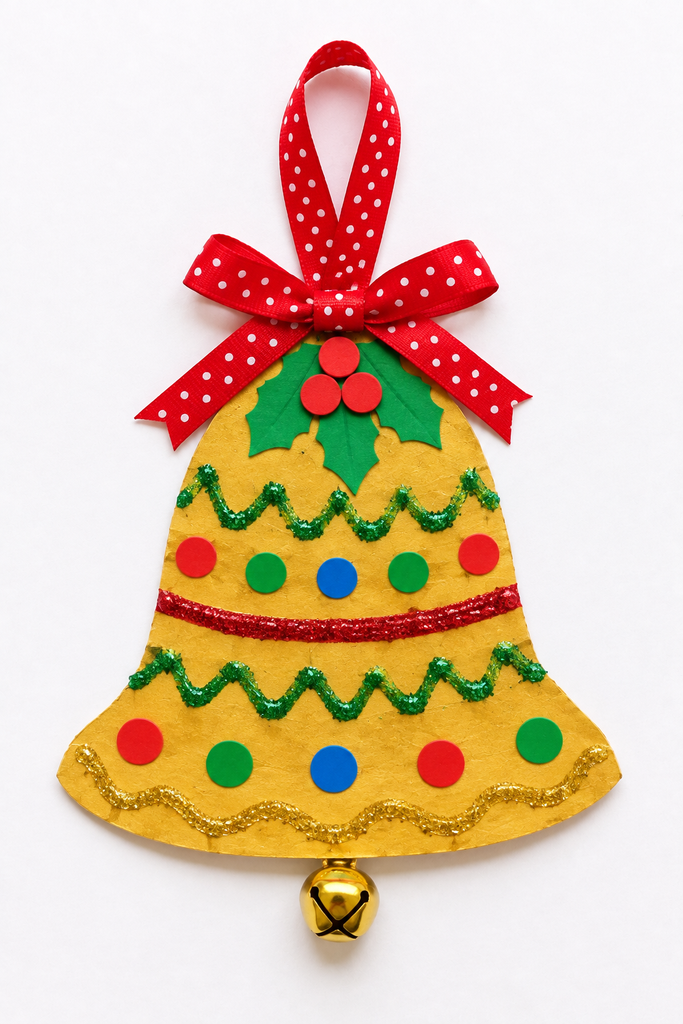
A paper bell rings in the season, especially with a little jingle bell at the bottom.
- Cut a bell shape from gold or silver paper, or two to layer.
- Decorate it with glitter glue, dot stickers, or a paper bow at the top.
- Glue a small jingle bell or a round bead at the bottom for the clapper.
- Add a loop of ribbon at the top for hanging.
Hang two together and they really do give a soft little jingle.
24. Handprint polar bear
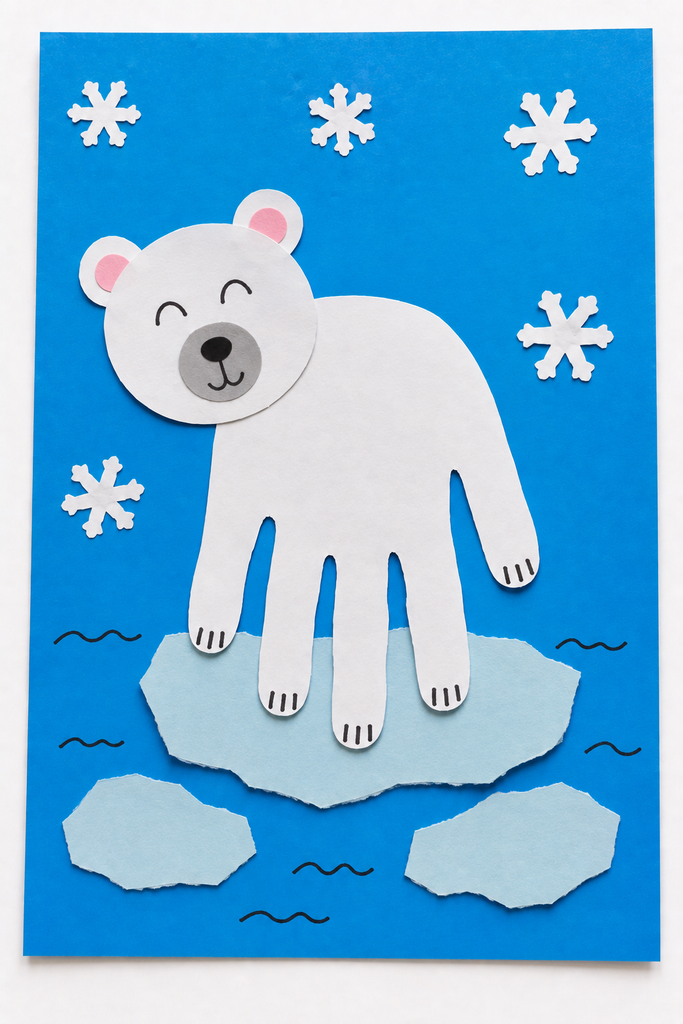
Here the child’s own hand becomes a polar bear on all fours, with the fingers spread out as four stumpy legs.
- Trace the child’s open hand on white paper and cut it out, then turn it upside down so the fingers become the bear’s legs.
- Glue a round white paper head at one end of the body and add ears, a little face, and a gray snout.
- Draw tiny black claws on each fingertip.
- Glue the bear onto blue paper with pale blue paper shapes underneath for ice, then add paper snowflakes and wavy water lines around him.
Spread the fingers a bit as you trace, so his four legs come out nice and chunky.
25. Coffee filter angel craft
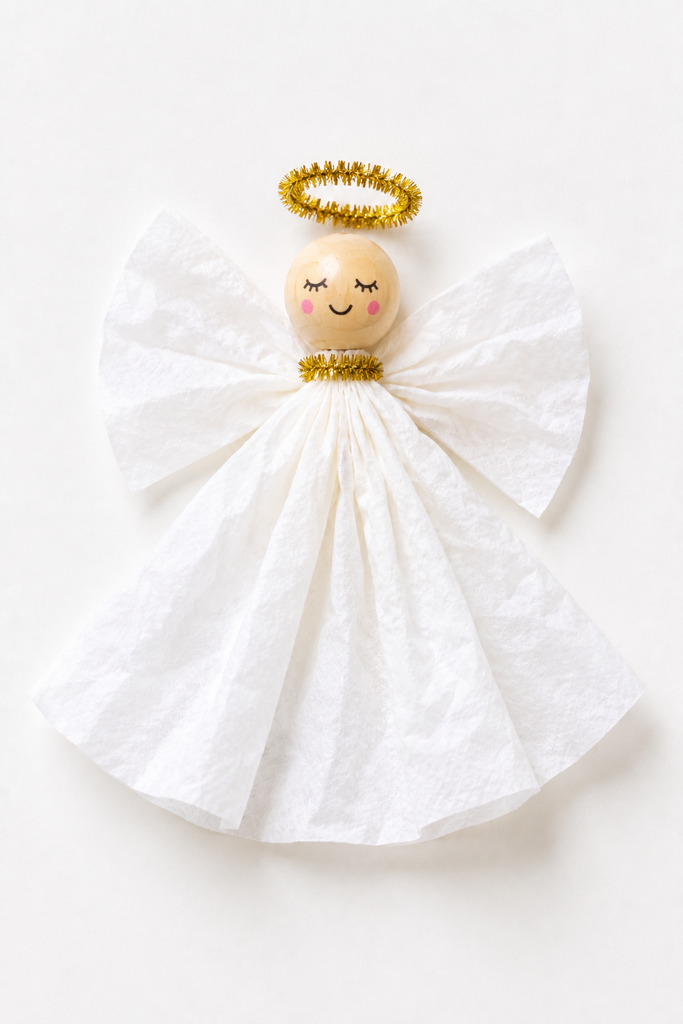
A humble coffee filter makes the flowiest, prettiest angel gown.
- Pinch a coffee filter in the middle and gather it into a gown shape.
- Glue a wooden bead or paper circle on top for the head.
- Fold a second coffee filter into wings and glue them to the back.
- Bend a gold pipe cleaner into a halo and rest it above the head.
The soft folds of the filter make the gown look like it’s floating.
26. Santa beard craft
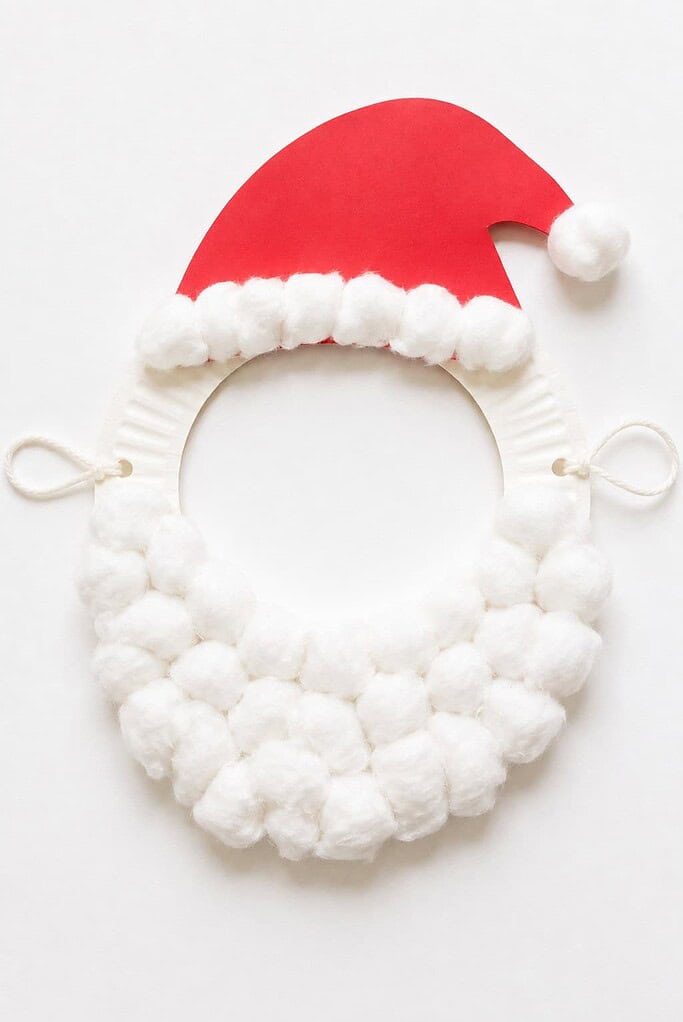
This wearable Santa face lets little ones try on the jolliest beard in the world.
- Cut the middle out of a paper plate so a face fits through, leaving a wide bottom rim for the beard.
- Glue cotton balls all over the bottom rim for a fluffy white beard.
- Add a red paper hat across the top with a cotton band and a pom-pom.
- Punch a hole on each side and tie string so it fits around the head.
Once it’s on, every child becomes Santa, and the giggles come right along with it.
27. P is for penguin
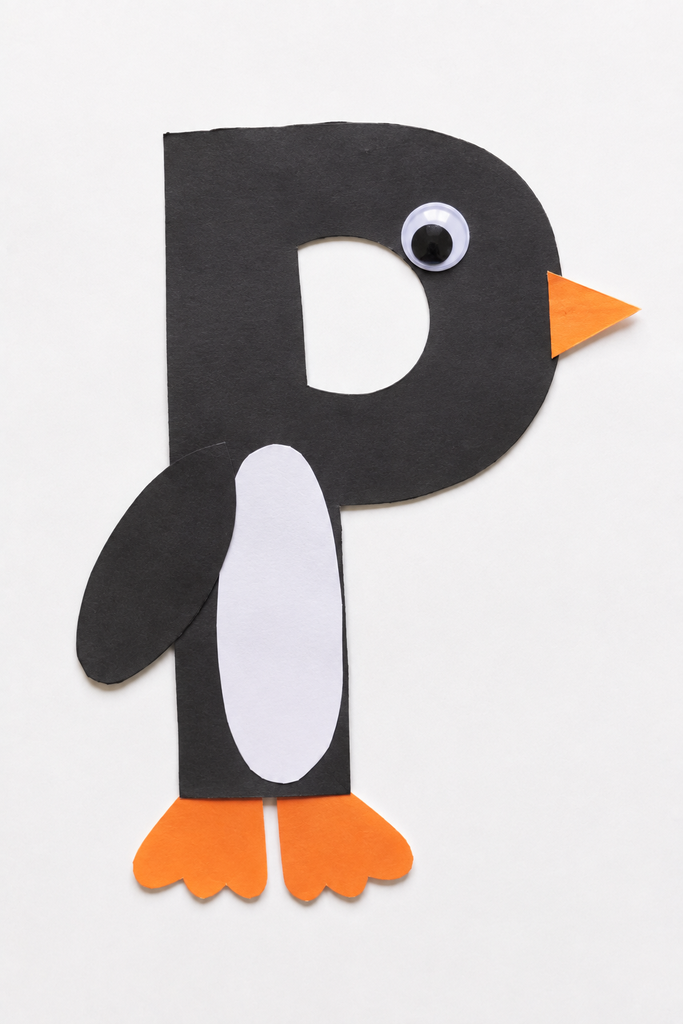
This one does double duty, teaching the letter P while a penguin appears right out of its shape.
- Cut or color a big uppercase letter P in black, using the loop as the head and the stem as the body.
- Glue a white oval on the stem for the belly.
- Add an orange triangle beak and a googly eye up on the loop.
- Glue orange feet at the bottom and a little wing on the side.
The P’s own shape becomes the penguin, which little ones find delightful.
28. Cardinal handprint craft
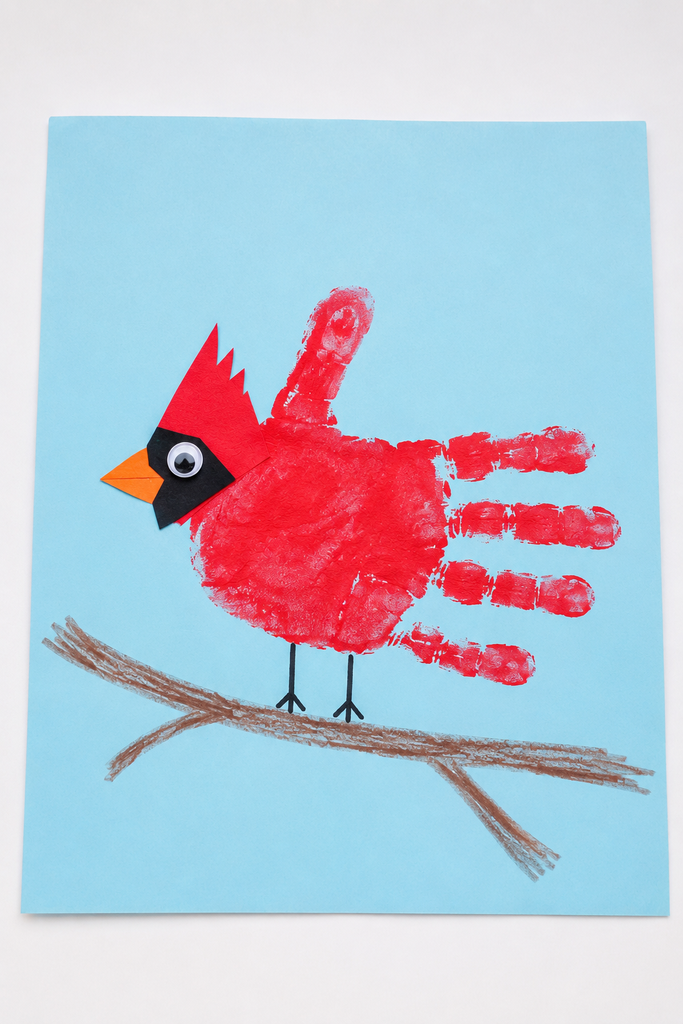
A bright red handprint makes the cheeriest winter bird on a snowy branch.
- Paint the child’s hand red and press it onto paper with the fingers together, pointing to one side for the tail.
- Let it dry.
- Add a small red paper head at the thumb end with a little pointed crest.
- Glue on a googly eye, a small orange beak, and a black paper patch around the face, then draw a brown branch underneath.
A red cardinal against the snow is a sight that always feels like winter.
29. Cotton ball penguin
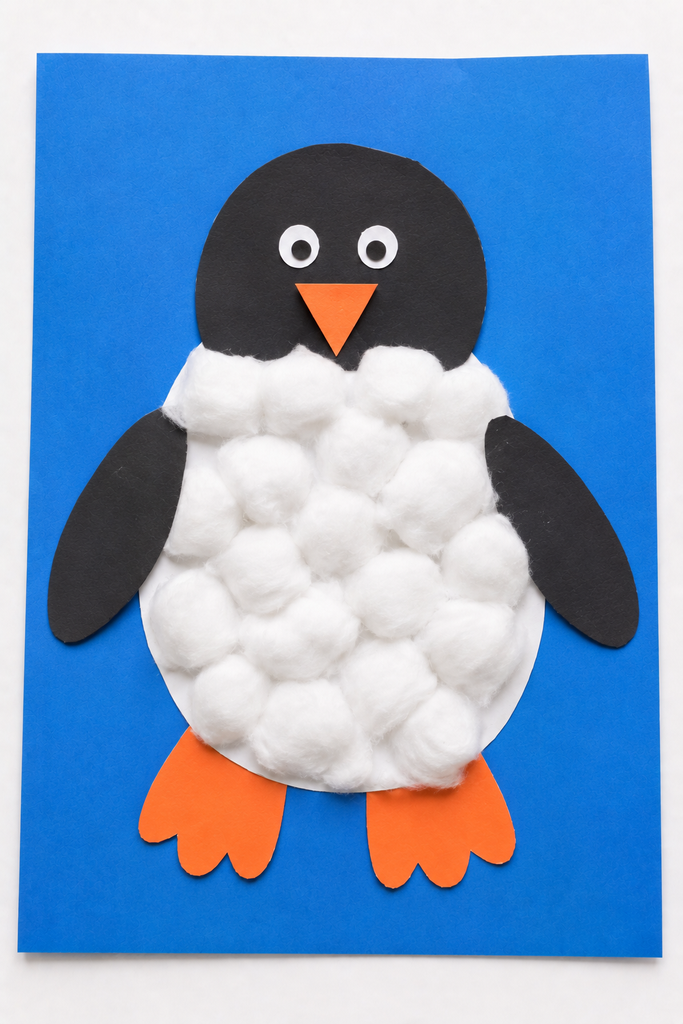
Penguins have those round white bellies, and a few cotton balls give this one a belly you’ll want to pat.
- Cut a white penguin body, a black head and wings, and an orange beak and feet.
- Spread glue over the belly and press on cotton balls to cover it.
- Let it dry, then add the black head and wings.
- Glue on the beak, feet, and two little eyes.
The puffy cotton makes him look round and well fed.
30. Egg carton penguins
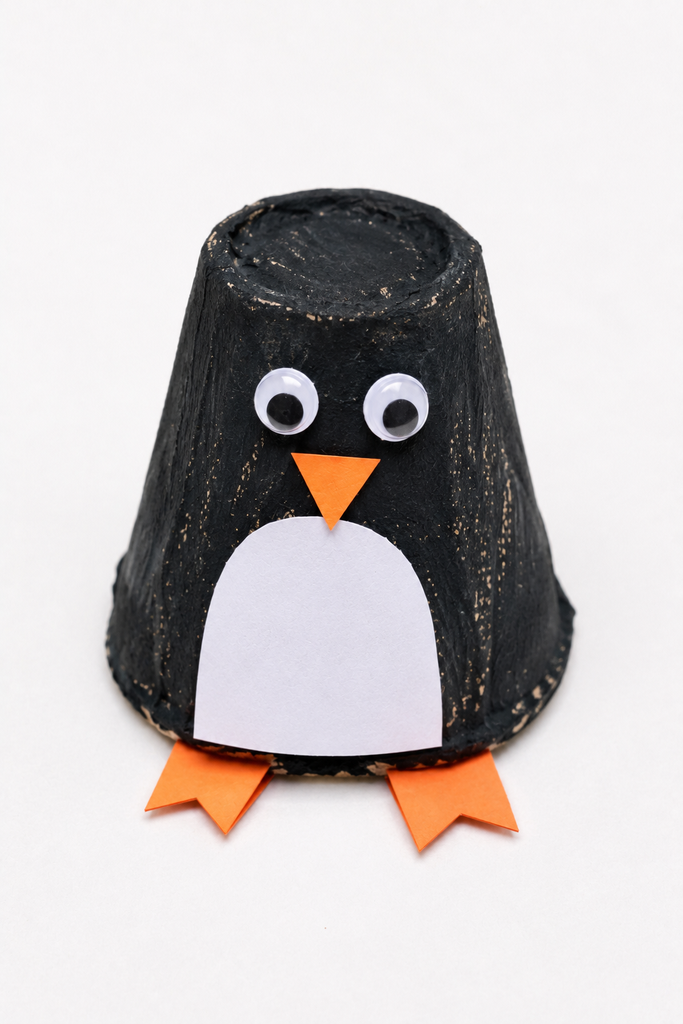
The little cups in an egg carton are already the perfect round shape for a penguin’s body, so they’re worth rescuing before they get tossed.
- Cut a single cup from a cardboard egg carton and trim the edges.
- Paint it black and let it dry all the way.
- Glue a small white belly on the front and add googly eyes and an orange beak.
- Fold two orange paper feet and glue them at the bottom so he stands.
Those cartons are worth saving, and our egg carton crafts for kids turns them into all sorts of little creatures.
31. Penguin toilet paper roll
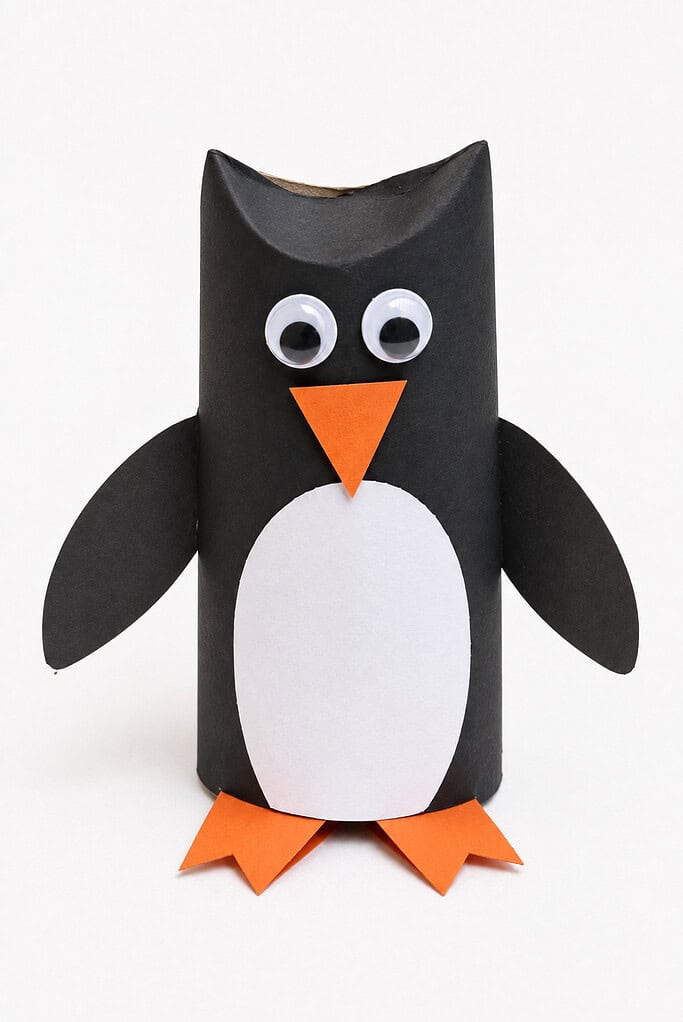
Another cardboard tube saved from the bin, this time standing tall as a little penguin.
- Wrap a cardboard tube in black paper, or paint it black, and let it dry.
- Glue a white belly on the front and add two googly eyes.
- Add an orange beak and fold orange feet at the bottom front.
- Glue a wing on each side and curl the edges around a pencil.
Pinch the top corners in a little and he gets a proper rounded head.
32. Pom-pom pinecone ornament
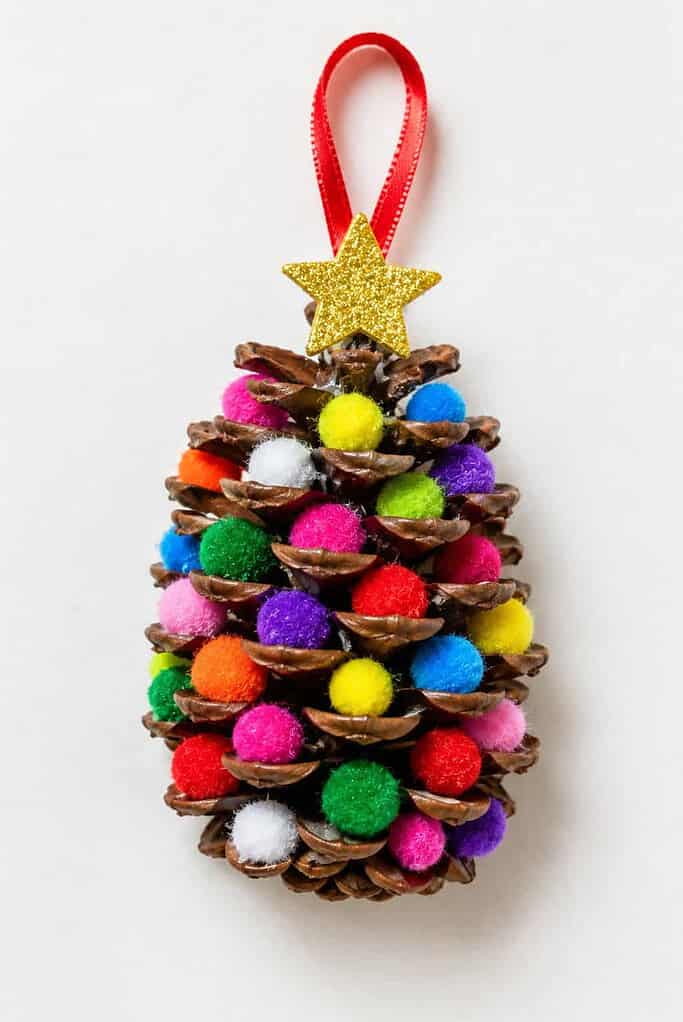
A real pinecone dressed up with tiny pom-poms looks just like a decorated little tree.
- Start with a dry pinecone, standing it upright on its base.
- Dab small dots of glue between the scales.
- Press a colorful mini pom-pom onto each dab for the ornaments.
- Glue a small star or bow on top and add a ribbon loop for hanging.
The little pom-poms tucked among the scales make it look trimmed for Christmas. For more makes from things you gather outside, our nature crafts for kids is a lovely place to look.
33. Penguin handprint
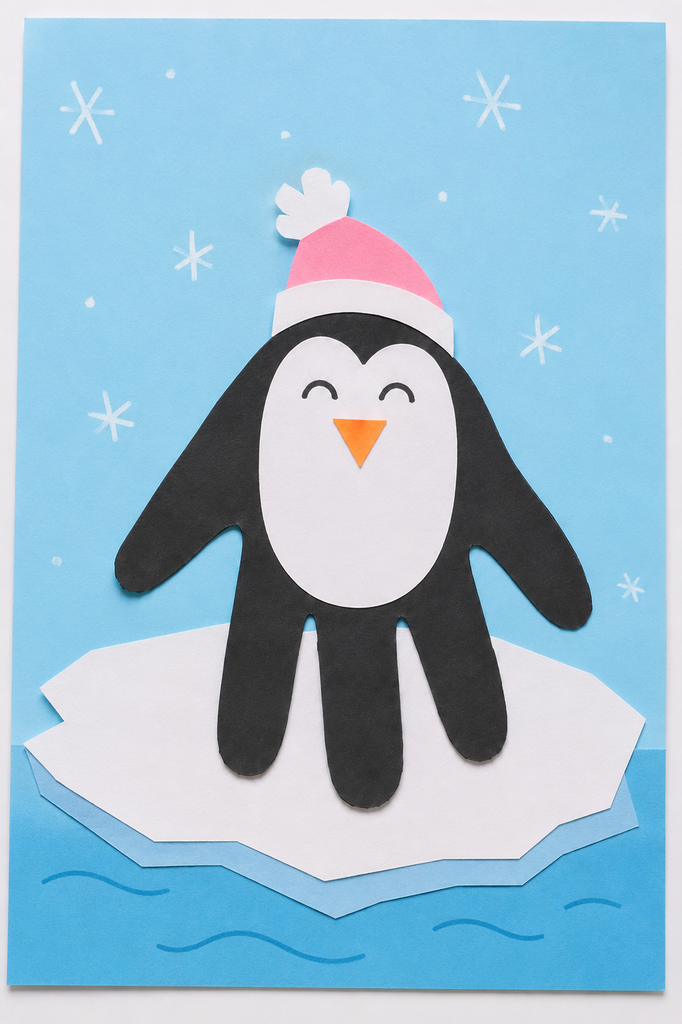
Turn a handprint upside down and the fingers become a penguin’s feet and flippers, ready to waddle.
- Paint the child’s hand black and press it down, or trace it on black paper and cut it out, then turn it so the three middle fingers point down as the feet and the thumb and pinky spread out to the sides as flippers.
- Glue a white paper oval on the palm for the belly, then add a white face at the top with two closed happy eyes drawn on and a small orange triangle beak.
- Give it a little pink paper hat with a white folded brim and a white pom-pom on top.
- Glue the penguin onto blue paper sitting on a white paper ice floe, then add wavy blue lines for water along the bottom and a few white painted snowflakes in the sky.
A tiny paper hat and scarf get him ready for the cold.
34. Arctic fox handprint craft
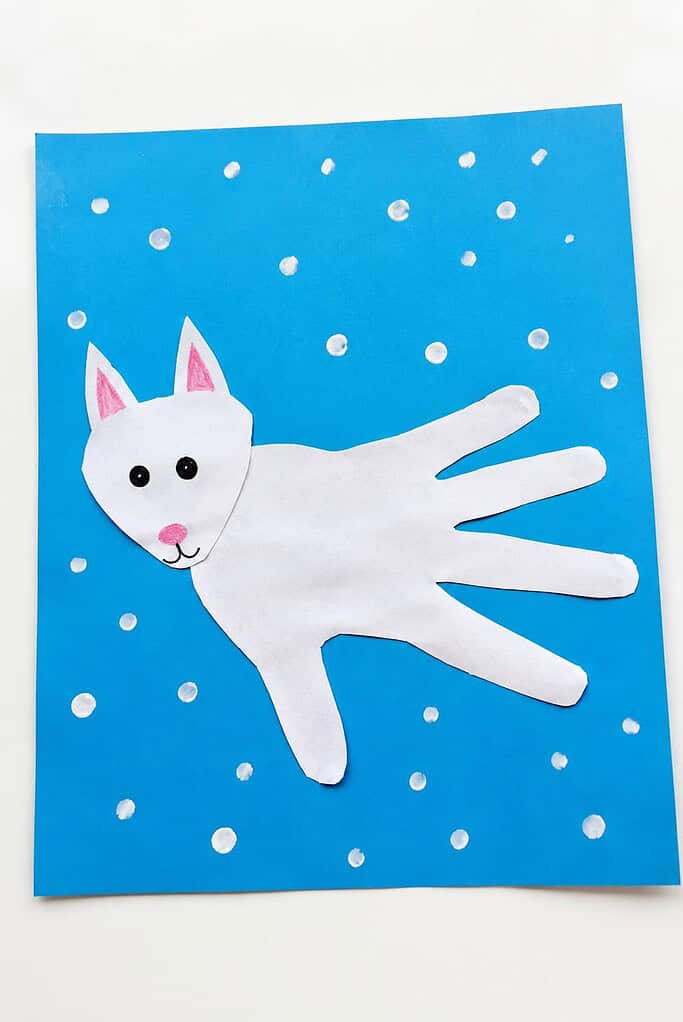
A white handprint curls into a little arctic fox with a bushy tail.
- Trace and cut the child’s hand from white paper, or paint a white handprint and let it dry.
- Turn it so the palm is the fox’s body and the fingers form the bushy tail and legs.
- Add a white paper head with two pointed ears and a little pink nose.
- Glue on two eyes and set the fox on a blue snowy background.
The spread fingers make a wonderfully fluffy tail, just right for a fox in the snow.
35. Popsicle sled craft
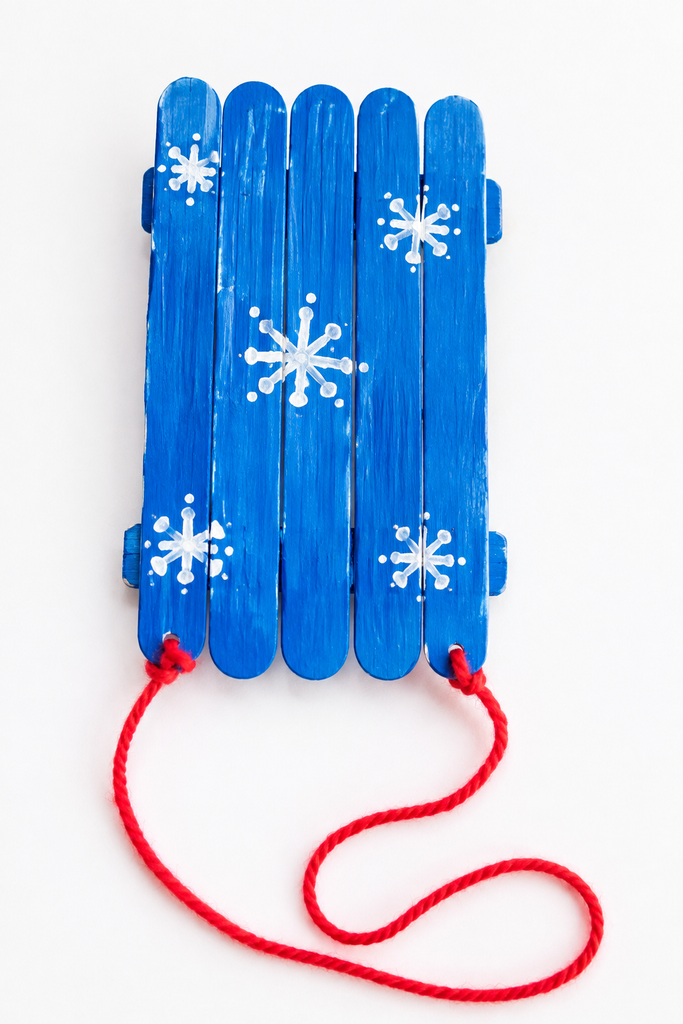
A handful of craft sticks builds a little sled ready to race down a paper hill.
- Lay four or five craft sticks side by side and glue two more across the back to hold them together.
- Glue one more stick along each side, curling up at the front, for the runners.
- Paint or color the sled a bright red or blue.
- Add a length of yarn at the front for the pull rope.
It looks just like the sled you’d haul to the top of a snowy hill.
36. Moose headband craft
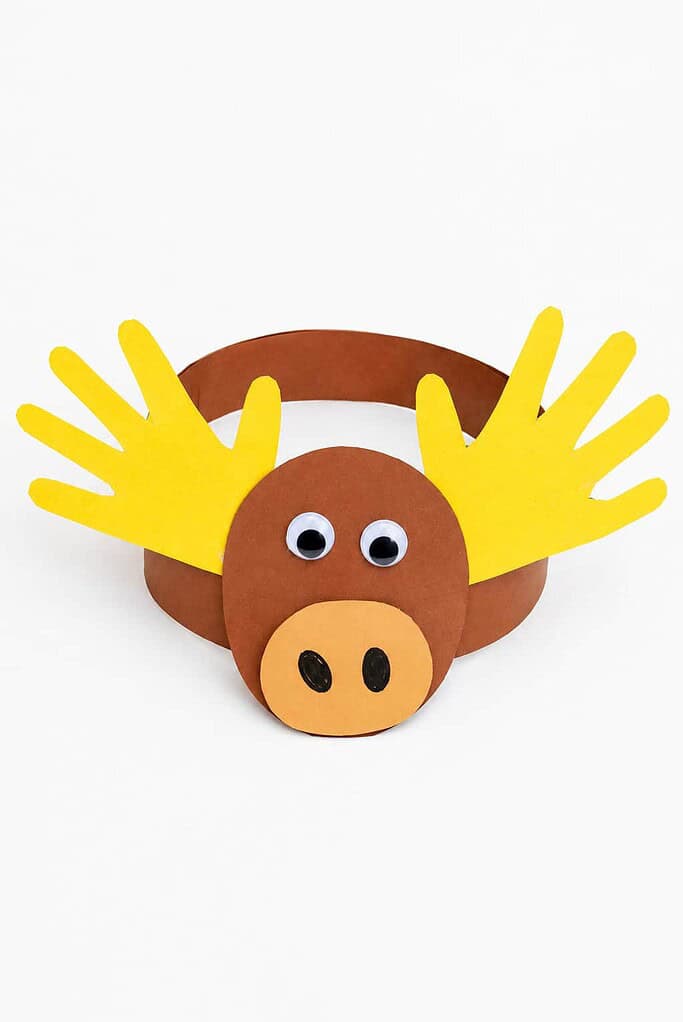
A paper headband and two big antlers turn any little one into a friendly moose.
- Cut a long strip of brown paper for the headband and fit it around the child’s head.
- Trace both of the child’s hands on yellow paper and cut them out for the antlers.
- Glue a handprint antler to each side of the band.
- Add a brown paper moose face at the front with two googly eyes and an oval tan snout, then staple the band to size.
The handprint antlers make each moose one of a kind, and they’re fun to wear all afternoon.
37. Snowy owl
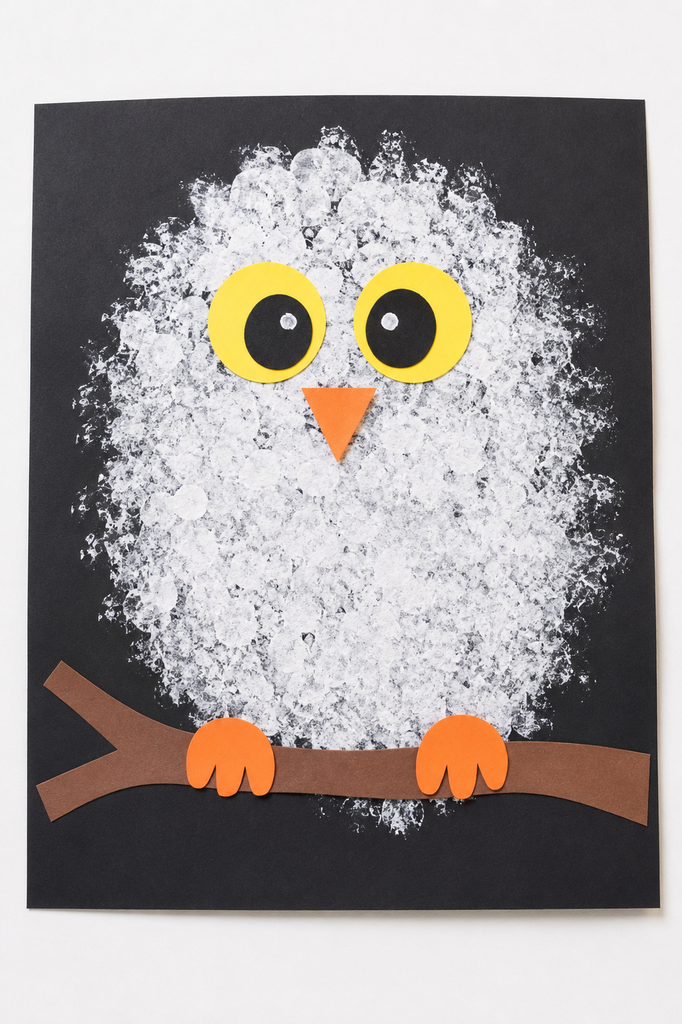
The snowy owl is one of winter’s quietest visitors, all white feathers and wide yellow eyes, and a bit of dabbed paint brings that fluffy look to life.
- Dip a sponge or a scrunched paper towel in white paint and dab a big fluffy owl shape onto black paper, keeping the paint thicker in the middle and lighter and wispier around the edges.
- Let the paint dry all the way.
- Cut two yellow paper circles and glue a smaller black circle inside each for the eyes, then glue them side by side near the top and add a small orange triangle beak between them.
- Cut a branch from brown paper and glue it across the bottom of the owl, then add two little orange paper feet so the owl grips its perch.
The black paper behind all that dabbed white is what makes him glow, and those big round eyes do the rest.
38. Handprint winter tree
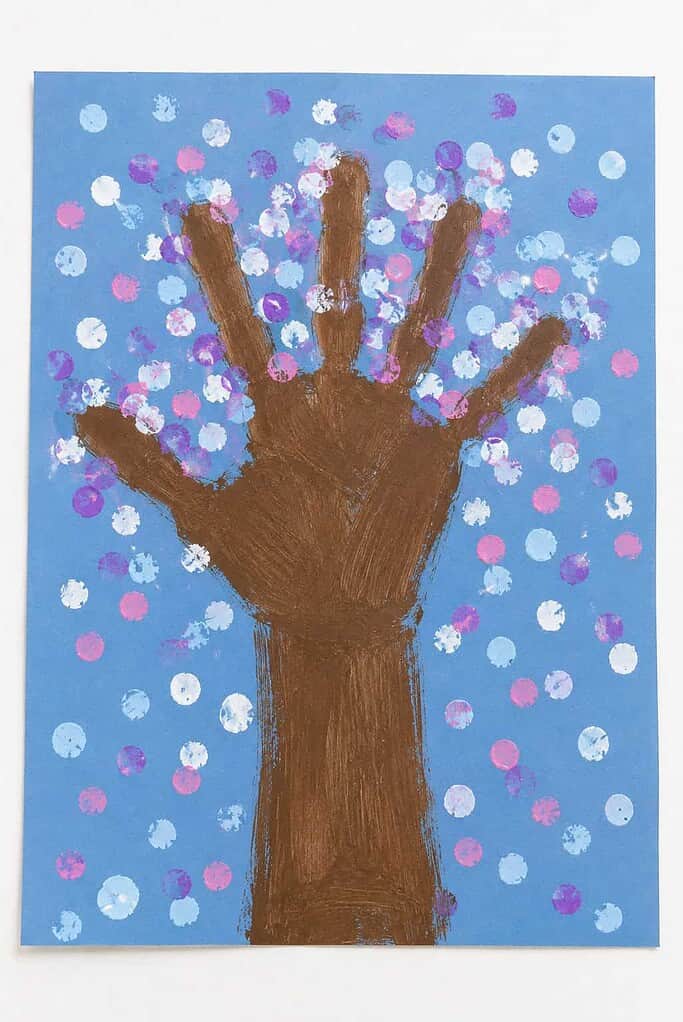
In winter the trees go bare, and a child’s open hand makes the perfect set of empty branches waiting for snow.
- Paint the child’s hand and forearm brown and press it onto blue paper, or trace and fill it in.
- Let the trunk and branches dry.
- Dip a cotton swab in white, blue, and purple paint.
- Dab clusters of dots around the bare branches for snow.
The spread fingers make the branches, and the dots are the snow settling on them.
39. Snowy pinecone
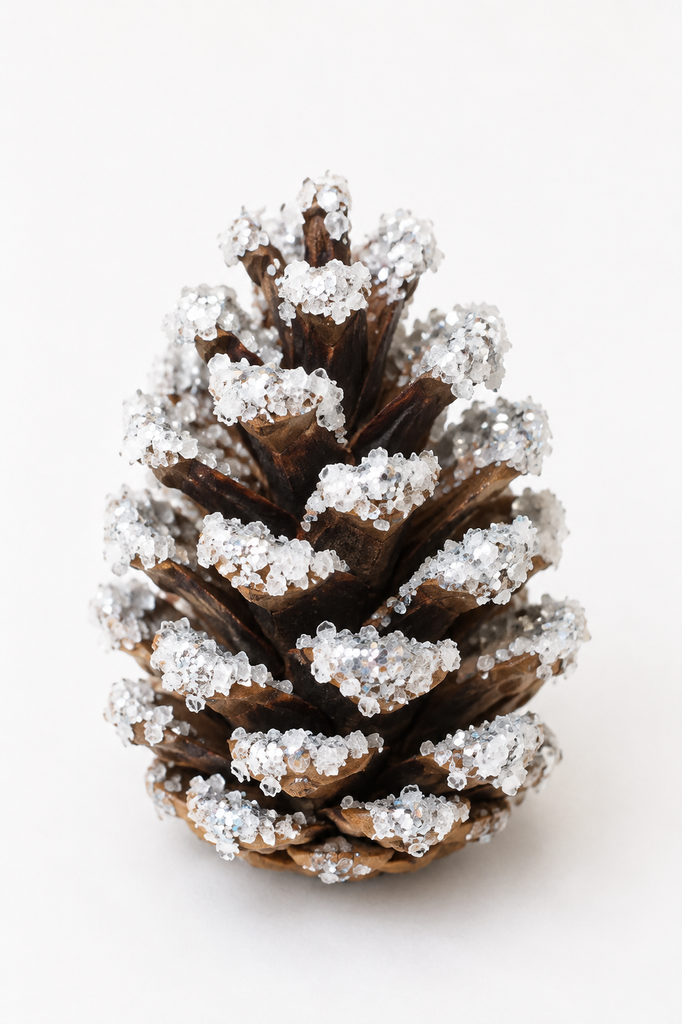
Gather a pinecone or two on your next cold-weather walk, and a little glue and salt will dust them with snow.
- Brush white glue over the tips of a dry pinecone.
- Sprinkle or roll it in Epsom salt for a crusty, snowy look.
- Add a little white or silver glitter while the glue is still wet.
- Set it upright to dry for a couple of hours.
Leaving the brown showing through with just the tips frosted makes it look freshly snowed on.
40. Paper plate snow globe
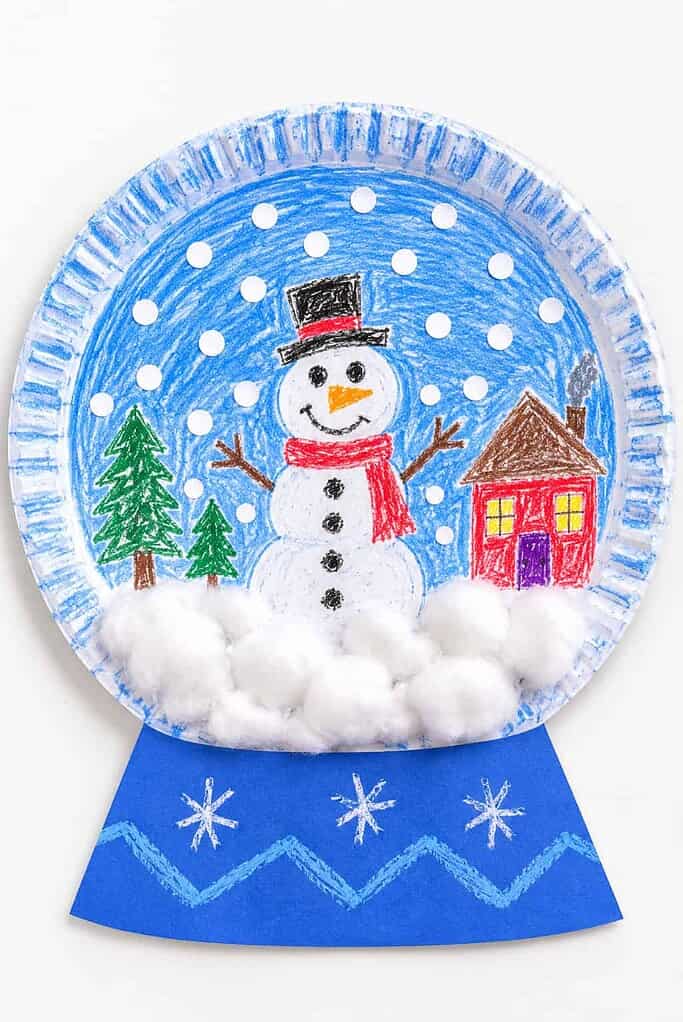
Every child loves to shake a snow globe and watch the snow swirl, and this flat paper one lets them make their own little scene to keep.
- Turn a paper plate over and draw a winter scene on the back, a snowman, some trees, a little house.
- Cut a base or stand from construction paper and glue it to the bottom.
- Glue cotton along the bottom for snow drifts.
- Punch white paper dots and scatter them on for falling snow.
The round plate becomes the glass of the globe, and the base is what makes it read as one.
why kids love a good winter craft
Winter has a way of keeping everyone indoors, and the afternoons can start to feel long. A craft gives little hands something to do and gives the whole day a gentle little anchor.
So many of these are the animals children already adore, the waddling penguins, the fluffy polar bears, the wide-eyed snowy owl. If your little ones can’t get enough of them, our animal crafts for kids has plenty more to make together.
And nearly all of them use what’s already around the house, so there’s no special trip to the store before the fun can start.
simple supplies to keep on hand
The nice thing about winter crafts is how little they ask of you. A stack of white paper plates, a bag of cotton balls, a bottle of white paint, and a good pile of construction paper will carry you through most of this list. Keep plenty of brown paper on hand too, since the gingerbread men, reindeer, and moose antlers all lean on it.
From there, a handful of extras stretch things further. Googly eyes, pom-poms, pipe cleaners, craft sticks, and a bit of ribbon or yarn show up again and again, so they’re worth keeping in a little bin by the table.
A few crafts ask for one special thing, like mini marshmallows for the igloo and the hot chocolate, a coffee filter for the angel, or a small jingle bell for the paper bell. And a couple use bits from outside, like twigs for the snowman’s arms and a pinecone or two. But most of it is probably already sitting in your craft drawer.
tips for crafting with little ones
A little prep goes a long way. Cut the shapes ahead of time, lay an old towel or some newspaper over the table, and set the supplies out in bins so small hands can reach them.
And try not to fuss over how it turns out. The point isn’t a perfect snowman. It’s the cotton glued on a little lumpy, the googly eyes stuck on crooked, and the proud face when they hold it up to show you.
A few of these, like the handprint and footprint ones, are keepsakes you’ll be glad you kept. For more of those little hand-and-foot treasures, our handprint crafts for kids is a sweet place to look.
pick one winter craft to try this week
So pick the one that fits your supplies and the ages around your table. You don’t need to do all forty. Just one good idea and a little glue is plenty.
The craft is fun on its own, but the time you spend together at the table is the part that tends to stay with them.
And if you do make a few, I’d love to hear which ones your little ones reached for first. Leave me a note in the comments below and tell me how they turned out.
With love,
Betty
Get the FREE 3D Turkey Craft
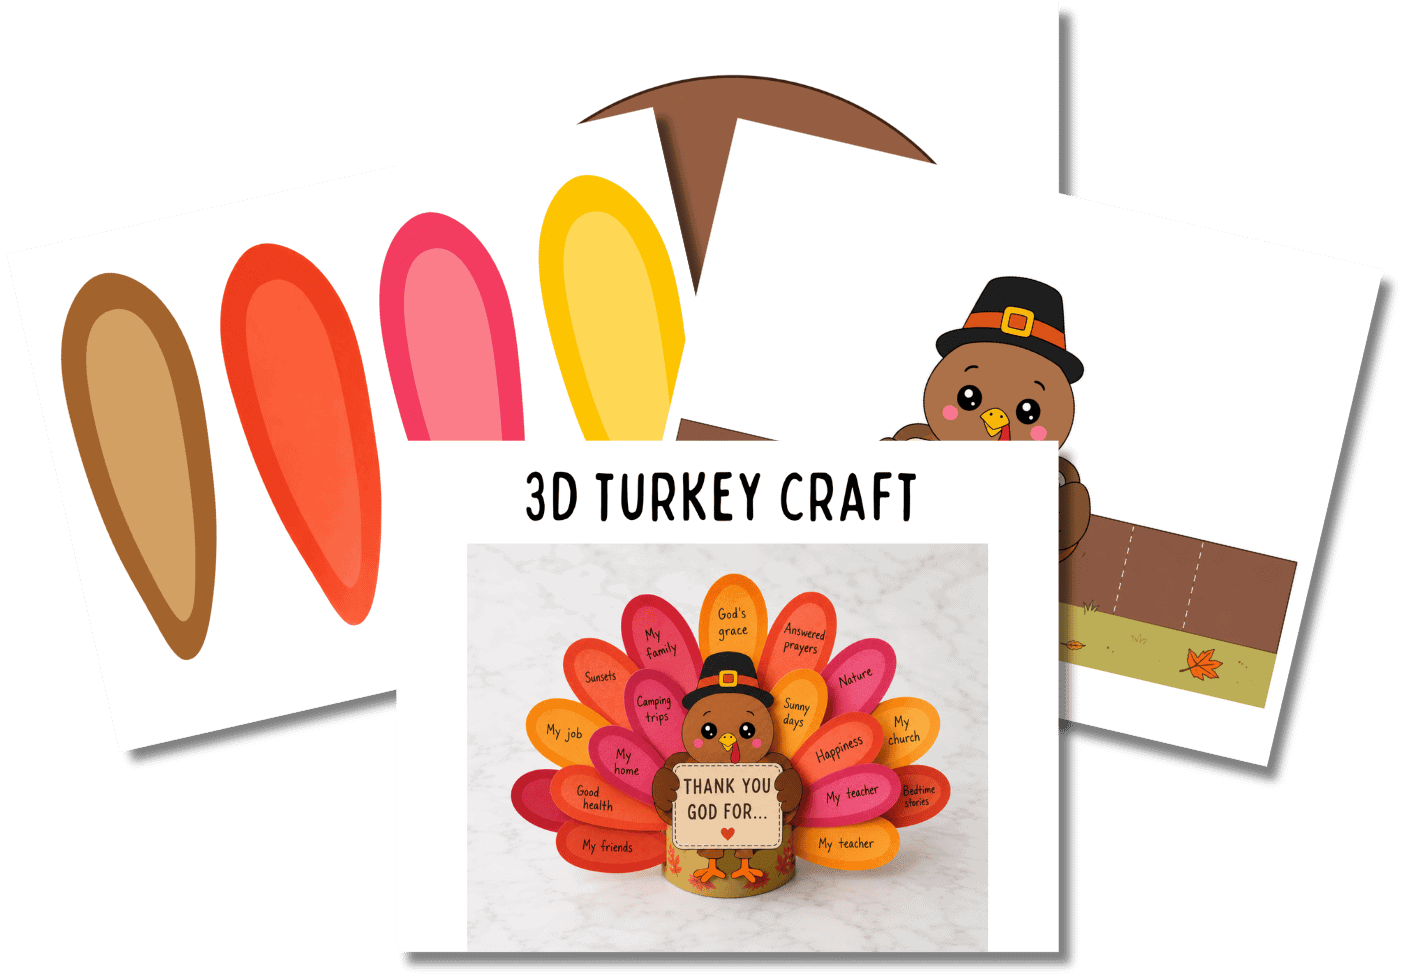
Don’t let your kids just hear that they’re blessed—help them name their blessings one by one.
With this free 3D turkey craft, kids color the turkey and his feathers, then write one thing they’re thankful to God for on each feather. The body wraps around into a base so the turkey stands up on his own, holding a sign that reads “Thank You God for…”
frequently asked questions
what age are these winter crafts best for?
Most work beautifully for ages two through ten with a little adjusting. The reindeer footprint, mitten handprint, and cotton-ball snowman are gentle enough for the very littlest, while the snowflake suncatcher, gingerbread house, and coffee filter angel give older children more to do.
what supplies do i really need?
Not much at all. Paper plates, cotton balls, white paint, construction paper, glue, and a few googly eyes and pom-poms will cover most of the list. Add a handful of craft sticks and pipe cleaners for the sled, the present, and the icicles, and you’ll be ready whenever the mood strikes.
how long do these take?
Most come together in about fifteen to twenty minutes, though the ones with paint, like the footprint and handprint crafts or the snowy pinecone, need some drying time. Save those for a day when you’re not in a hurry, or start them early and add the details later.
can i use real snow or natural materials?
Yes, and the natural bits are lovely. Real twigs make wonderful snowman arms, and a gathered pinecone is perfect for the snowy pinecone or the pom-pom ornament. Just skip real snow indoors, since fake snow, cotton, and marshmallows give you the wintry look without the puddle.
how do i keep the finished crafts?
The handprint and footprint keepsakes, like the mitten pair, the cardinal, and the little arctic fox, are worth dating and tucking into a memory box. The snowflake suncatcher hangs nicely in a window, and the sturdier ones like the popsicle present, the paper bell, and the pom-pom pinecone make cheerful little ornaments year after year.