
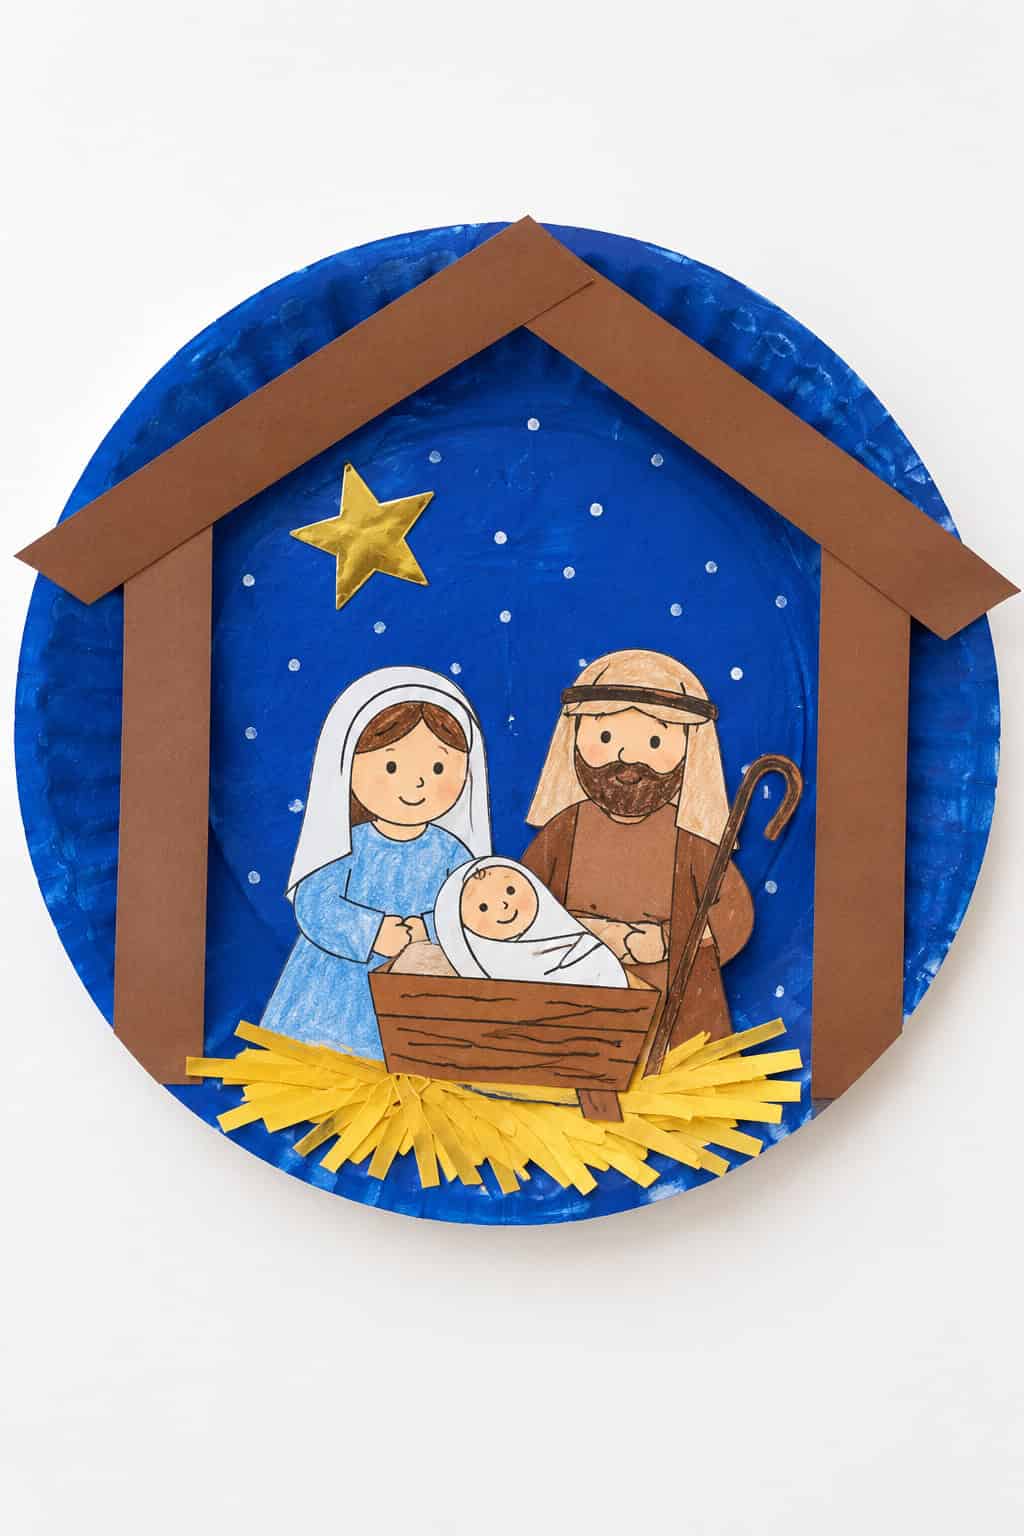
There’s a certain hush that comes over little ones at Christmas, especially around the manger scene. They want to hold the tiny figures and set baby Jesus in his little bed, and they always seem to have questions about the star and the animals and the angels.
That wonder is the perfect doorway into the story of the very first Christmas. It’s the tenderest story we have, about the night God came near as a baby, born in a stable and laid in a manger because there was no room anywhere else.
So when you’re telling that story, a craft gives little hands something to do while the truth settles in. Whether you’re a Sunday school teacher, a homeschool mama, a grandparent, or a parent at the kitchen table, these sixteen ideas are simple to set up and gentle enough for the youngest crafters.
And every one of them comes back to the same good news. Unto us a Savior is born.
“For unto you is born this day in the city of David a Saviour, which is Christ the Lord.” — Luke 2:11
16 joyful nativity crafts for kids
Here are sixteen simple crafts to make together, from the manger and the shepherds to the angels and the wise men. So pick one for a single lesson, or work through several as you count down the days to Christmas.
1. Paper plate nativity scene
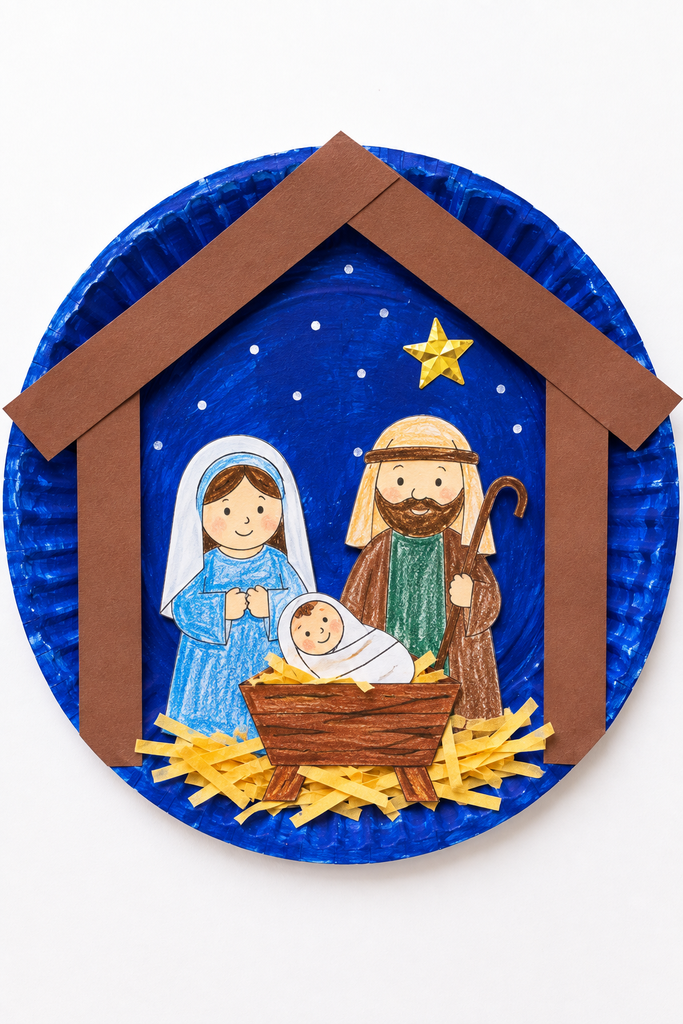
A paper plate makes a ready-made little stable, holding the whole scene in one place. It’s a lovely first craft to set the story in front of the children.
- Start with a paper plate and paint the center a deep blue or black for the night sky, then let it dry.
- Cut a simple brown stable roof from paper and glue it around the top edge.
- Color and cut out little figures of Mary, Joseph, and baby Jesus in the manger, then glue them in the middle.
- Add a bit of yellow paper or raffia for the straw.
- Press a gold star sticker up in the corner of the sky.
This one gives the little ones the whole picture at a glance, all the important pieces gathered under one roof. It makes a sweet keepsake to prop up on a shelf through the season.
2. Popsicle stick manger
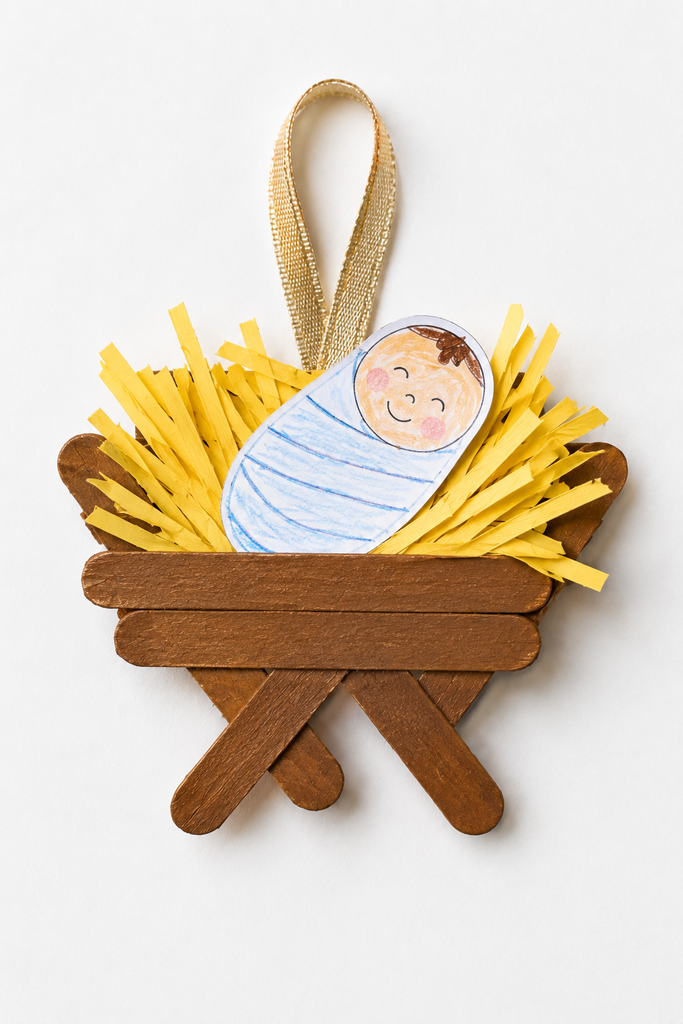
This craft zooms right in on the manger itself, the humble bed where baby Jesus was laid. A few craft sticks make a little trough you can hang on the tree.
- Glue two craft sticks into an X shape for the legs, then lay a third across the top for the crib.
- Add two or three more sticks across to build up the little trough.
- Tuck a bit of yellow paper or raffia into the trough for the hay.
- Color and cut a small swaddled baby Jesus and glue him onto the hay.
- Add a loop of ribbon on the back so it can hang.
Little ones love how quickly this one comes together. It gives you a gentle moment to talk about how the King of the world had only a feeding trough for a bed.
3. Handprint nativity
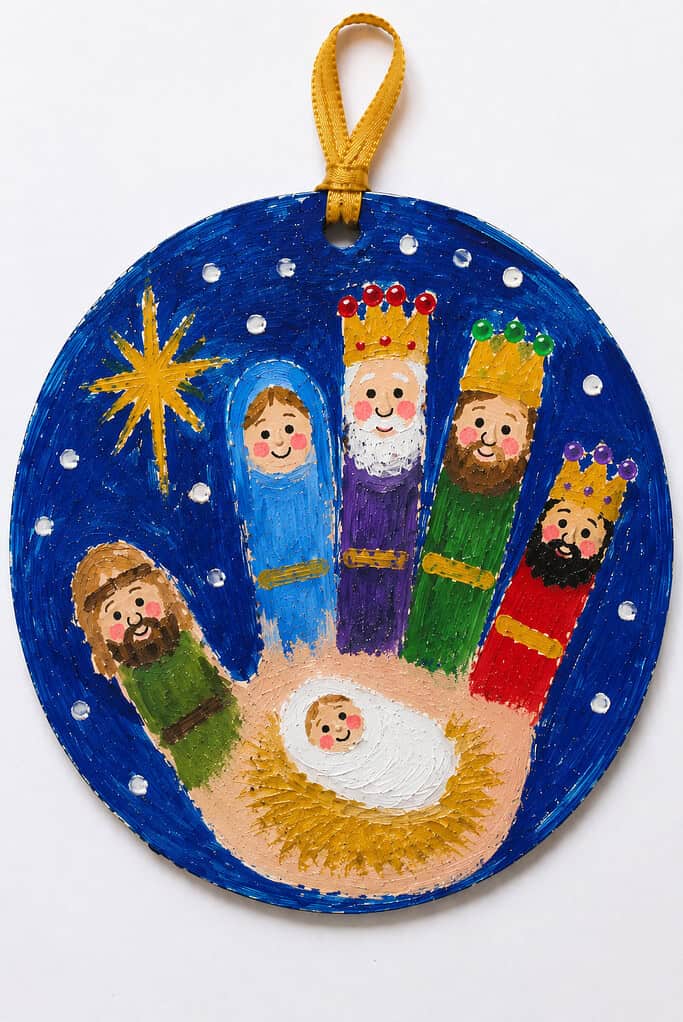
Here the whole scene is painted from a single handprint on a round ornament, with baby Jesus down in the palm and the figures rising up along the fingers. It makes a keepsake you’ll want to hold onto for years.
- Start with a round ornament or a paper circle and paint it deep blue for a starry night sky.
- Paint the child’s hand and press it in the middle, fingers spread and pointing up.
- Turn the palm into a manger of golden straw with baby Jesus resting in it.
- Paint each finger into a figure standing behind him, like Mary, Joseph, and the three kings.
- Add a bright gold star to one side and dot little white stars around, then punch a small hole at the top and tie on a ribbon loop for hanging.
There’s something tender about a whole nativity painted from a child’s own hand. If you’d like the little ones to keep the words of the story close too, our simple bible verse crafts are a lovely next stop.
4. Toilet roll nativity figures
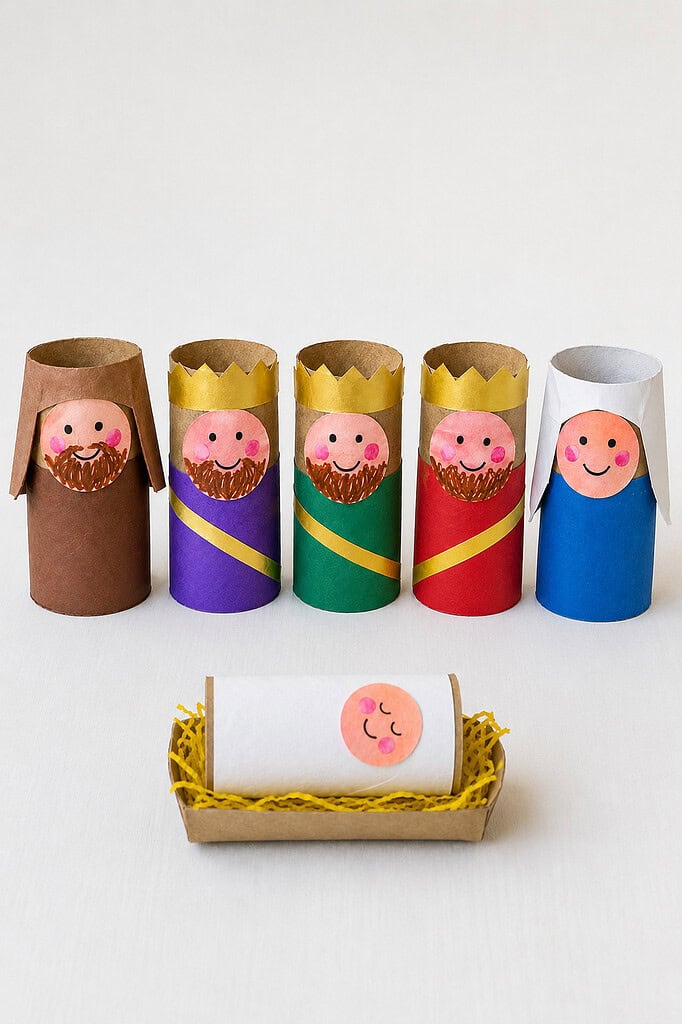
These little standing characters turn a few saved cardboard tubes into the whole cast of the story. Children can line them up and play out the scene again and again.
- Stand a plain cardboard tube upright for each figure, one for Mary, one for Joseph, and three for the kings.
- Cut a small circle of peach paper for each face, draw on a happy face with marker, adding a brown beard for the men, and glue it near the top of the tube.
- Wrap a band of colored paper or cloth around the lower part of the tube for the robe, leaving the face showing above.
- For the three kings, cut a zigzag strip of gold paper and wrap it around the open top for a crown, then add a gold sash across the robe.
- For Mary and Joseph, drape paper or cloth over the open top and down the sides for a veil and a headdress.
- For baby Jesus, wrap a short tube in white paper, add a little round sleeping face, and lay him in a small cardboard tray filled with shredded yellow paper straw.
This is a wonderful way to use up the tubes you’ve been saving. For more ways to make something lovely from what would have been tossed out, our clever recycled crafts for kids have plenty to reach for.
5. Baby Jesus in a manger
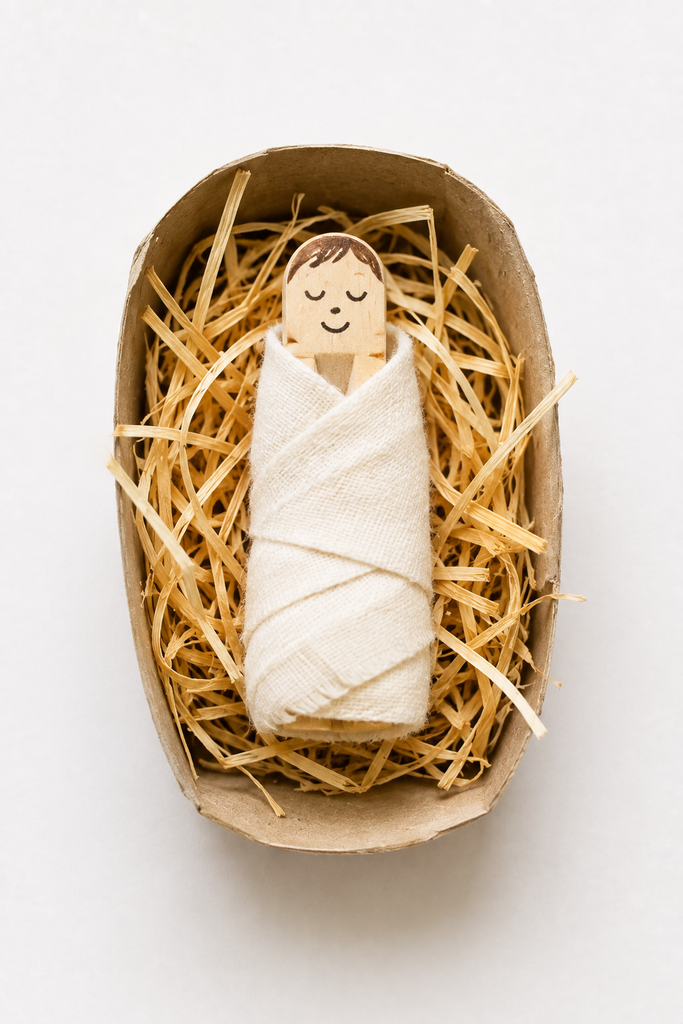
Where the popsicle stick craft is the empty manger, this one is the baby himself, wrapped up small enough to hold. It’s a sweet little figure the children can carry around.
- Wrap a wooden clothespin or peg doll in a strip of soft fabric or felt, leaving the head peeking out.
- Glue the fabric in place so the swaddling stays snug.
- Draw a little sleeping face near the top.
- Make a small bed from half a cardboard tube and fill it with raffia straw.
- Rest the baby down in the manger.
Little ones tend to hold this one very gently, which tells you the story is already doing its quiet work. It’s a tender picture of how God came to us small and helpless, as a baby who needed caring for.
6. Paper angel
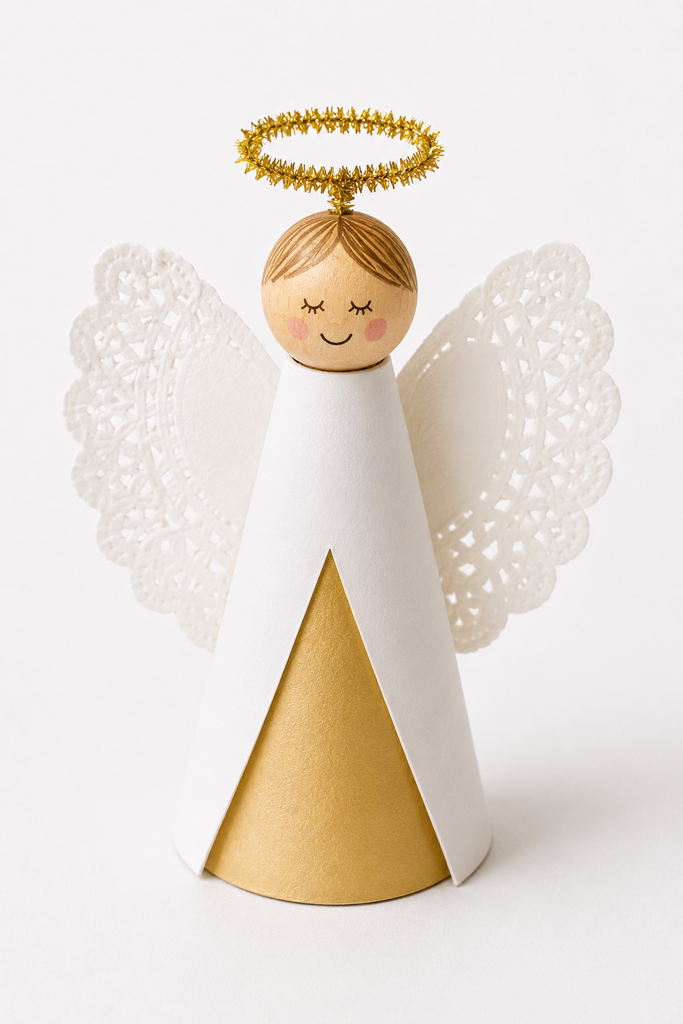
An angel brought the good news to the shepherds, and this cheerful cone angel can stand right up on the table or top the tree. It comes together from just a few pieces of paper.
- Roll a piece of white or gold cardstock into a cone and tape the seam so it stands on its own.
- Glue a paper circle or a wooden bead on top for the head.
- Cut two wings from paper or a folded paper doily and glue them to the back.
- Bend a small pipe cleaner into a halo and rest it above the head.
- Draw on a gentle face.
Because it stands on its own, this angel can watch over the whole nativity scene from the shelf. It’s a bright, happy craft that captures the joy of the announcement.
7. Handprint angel
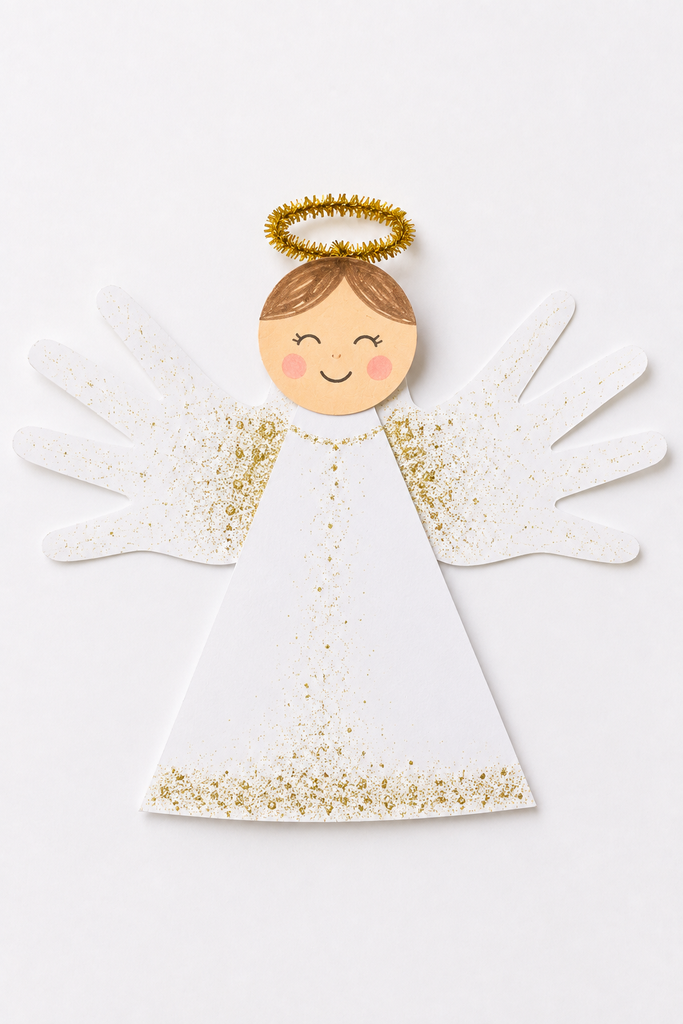
Here’s a second angel, but a flat one made from the children’s handprints for wings, so it reads as a keepsake rather than a figure that stands. It’s a nice companion to the cone angel above.
- Paint or trace and cut two handprints, then glue them at an angle for the wings.
- Add a triangle or half-circle of paper below for the gown.
- Glue a paper circle on top for the head.
- Add a halo with a bit of gold pipe cleaner or a drawn ring.
- Draw a small face and add a little glitter if you like.
Where the paper angel stands up on the shelf, this one lies flat, perfect for the fridge or the front of a Christmas card. Little hands as angel wings is one of those pictures grown-ups treasure.
8. Wise men crowns
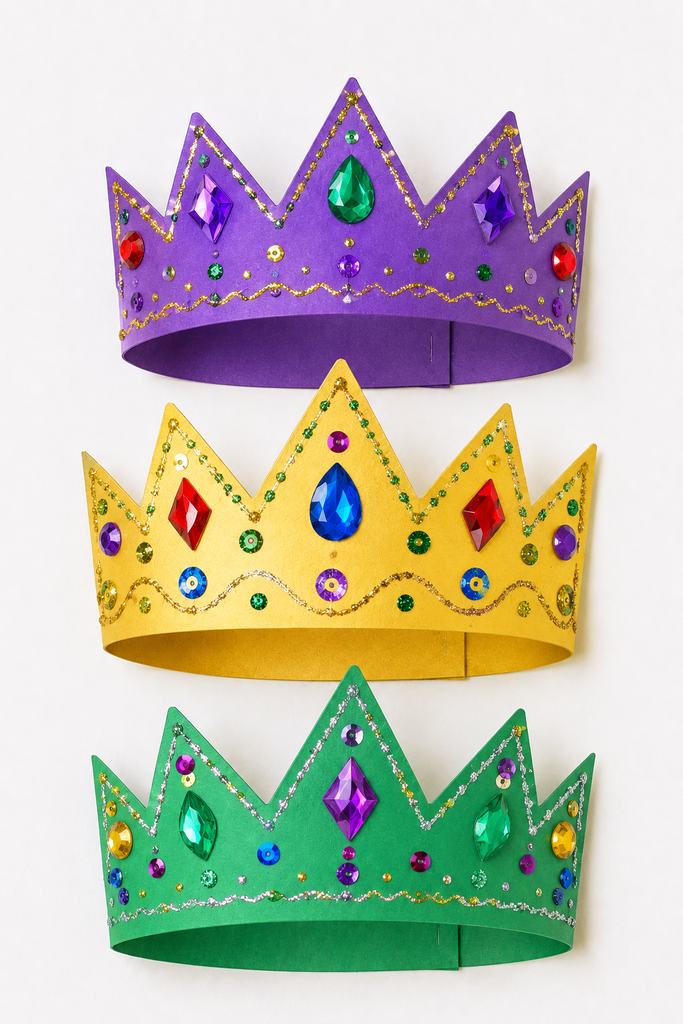
The wise men came from far away to worship the newborn King, and these jeweled crowns let the little ones dress up and join the journey. They’re simple to make and fun to wear.
- Cut a crown shape with points from a strip of colored or gold paper.
- Decorate it with glitter glue, gem stickers, and sequins.
- Fit the crown around the child’s head so the ends meet.
- Tape or staple the ends to size.
- Make three in different colors for the three wise men.
Children love that they can actually wear these, which makes the story something they step right into. It’s a merry way to talk about the gifts the wise men carried to Jesus.
9. Jesus is born nativity hat
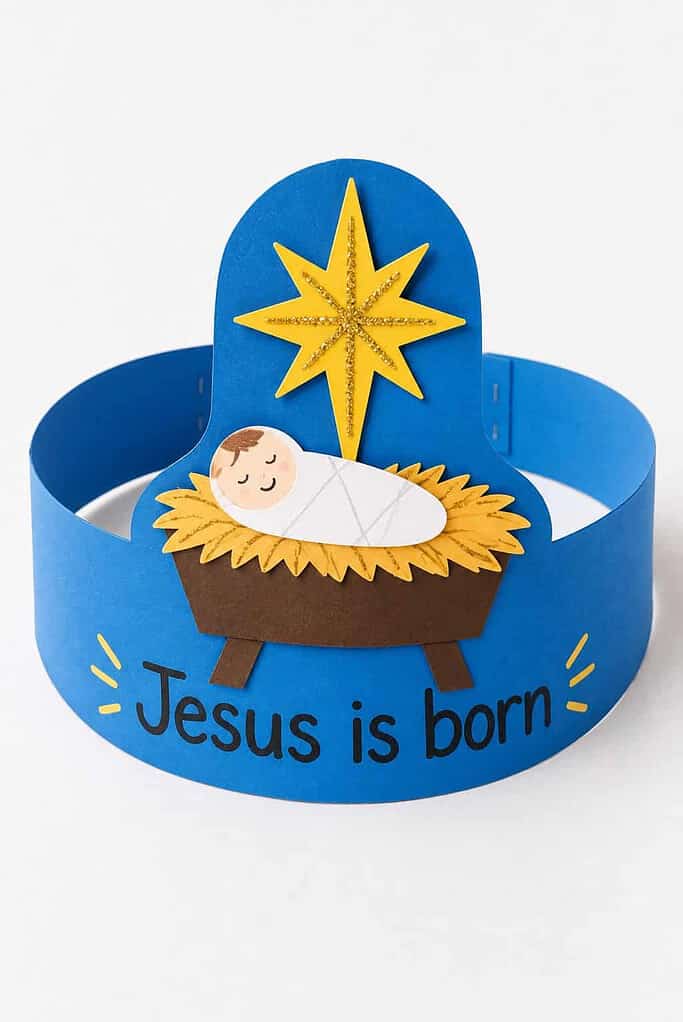
This wearable headband puts the good news right up on the little one’s head, with a manger and a star and the words to match. It’s part craft and part costume.
- Start with a long strip of paper or cardstock for the headband.
- In the middle, color a simple manger with baby Jesus and a bright yellow star above it.
- Write the words “Jesus is born” across the front.
- Fit the band around the child’s head and trim it to size.
- Tape or staple the ends together so it can be worn.
There’s something joyful about a whole room of children wearing the good news across their foreheads. It turns the announcement into something they get to carry and share.
10. Handprint manger
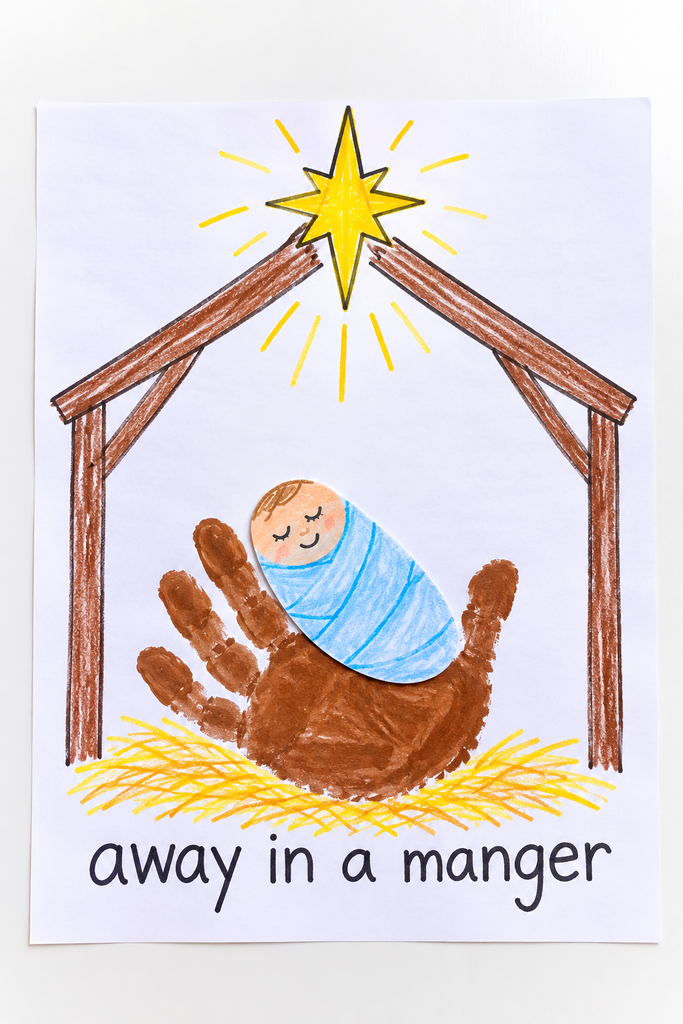
This is the third of the handprint crafts, and here the child’s hand becomes the manger of hay itself, cradling baby Jesus in the palm. It’s a gentle picture of the story’s quietest moment.
- Paint the child’s hand brown or tan and press it near the bottom of the page for the manger.
- Once dry, color and cut a small swaddled baby Jesus.
- Glue him resting in the palm, where the fingers curl around him like straw.
- Add a stable outline and a star above.
- Write a few words like “away in a manger” underneath.
Where the handprint nativity made the whole scene and the handprint angel made wings, here the hand is the cradle. It’s a tender way to show how the manger held the most precious gift of all.
11. Popsicle stick nativity star
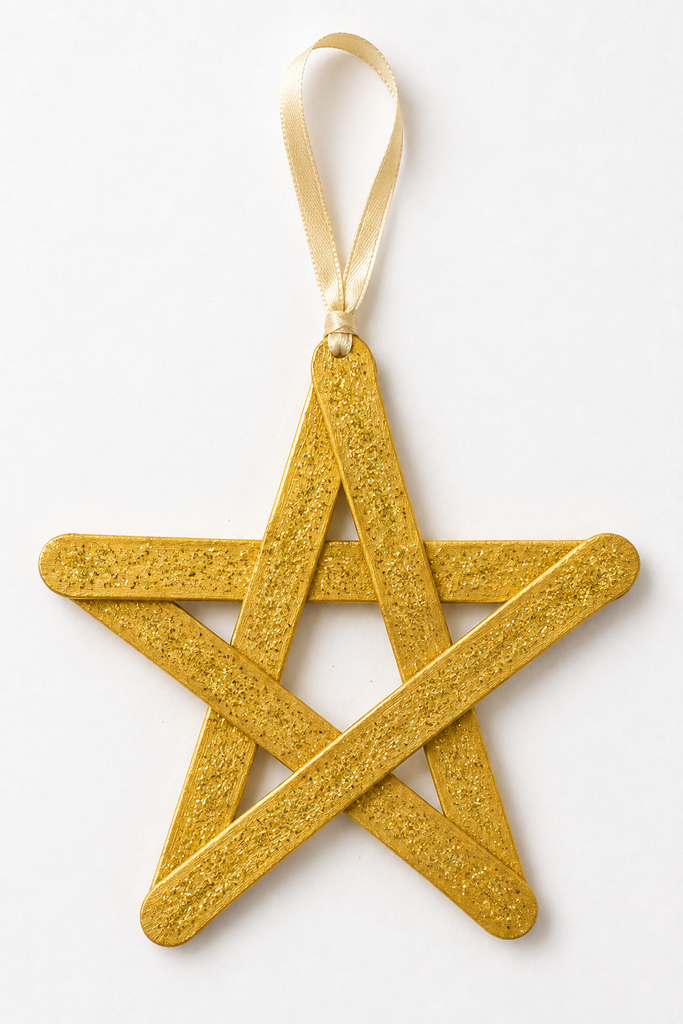
The star of Bethlehem led the wise men to Jesus, and this craft-stick version shines above your whole scene. It hangs nicely on the tree once it’s done.
- Lay five craft sticks out and weave them into a five-pointed star, over and under.
- Add a dab of glue at each place the sticks cross, and let it set.
- Paint the whole star gold or yellow.
- Sprinkle on a little glitter while the paint is still wet.
- Tie a loop of ribbon to one point for hanging.
Little ones are always proud of how this one turns out, since it looks like a real star. It gives you a chance to talk about how God used a light in the sky to lead people to his Son.
12. Nativity ornament
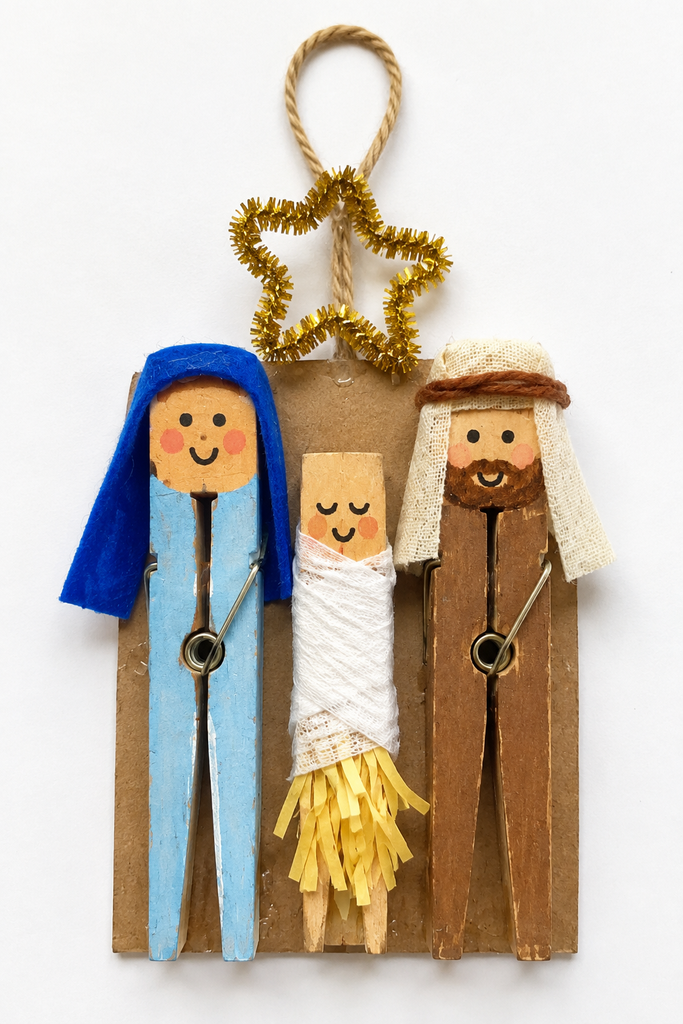
This little hanging keepsake tucks the Holy Family right onto your Christmas tree. Made from a few clothespins, it comes out looking sweet and simple.
- Paint one wooden clothespin light blue for Mary and one brown for Joseph, and leave a third plain for baby Jesus.
- Once dry, draw on the little faces with a fine marker, then wrap baby Jesus in a strip of white gauze with a fringe of yellow paper straw at the bottom.
- Add a blue felt veil for Mary and a small cloth headdress with a yarn band for Joseph.
- Glue the three figures side by side onto a small piece of cardboard, with baby Jesus in the middle.
- Bend a gold pipe cleaner into a star and glue it above them, then add a loop of twine at the top so it can hang.
Every year you hang it, this one will bring the story back around again. If you’d like more little makes that keep Jesus at the center of the season, our sweet jesus crafts are full of ideas.
13. Nativity button
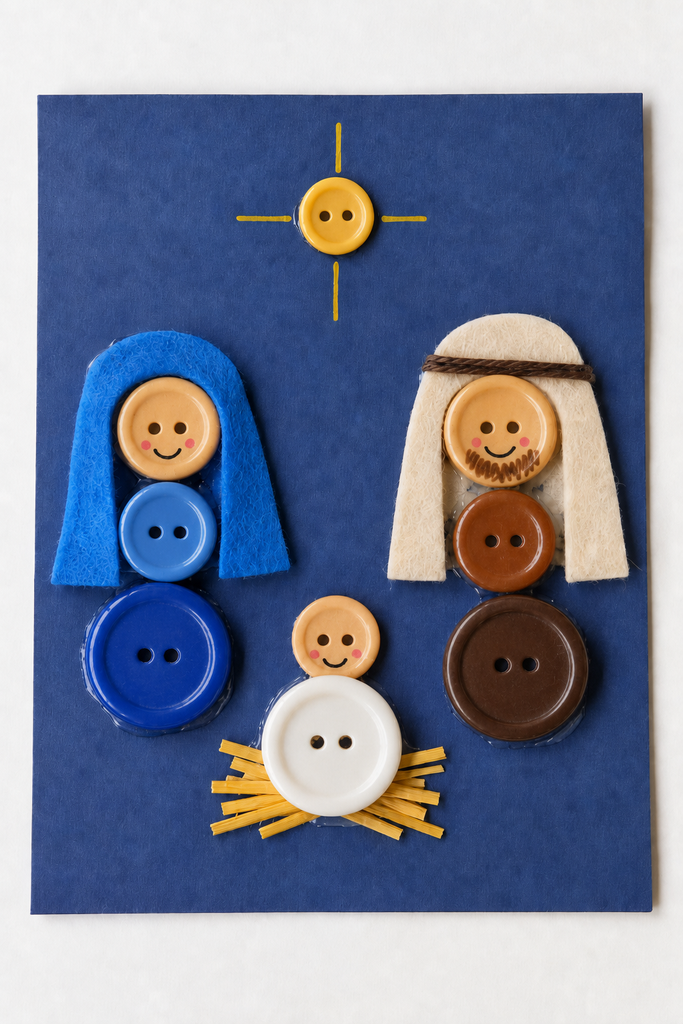
This craft turns a handful of ordinary buttons into the little family at the manger. It’s a good one for using up the odds and ends in your button tin.
- Start with a piece of dark blue cardstock for the night sky.
- For Mary and Joseph, glue three buttons in a stack flat on the card, a large one at the bottom, a medium one in the middle, and a tan button on top for the face, then draw on the faces with a fine marker, adding a beard for Joseph.
- Cut a felt veil for Mary and a felt headdress for Joseph, glue them around the face buttons, and add a bit of brown cord across Joseph’s for a headband.
- For baby Jesus, glue a white button between them with a small tan face button on top, resting on short pieces of yellow raffia for straw.
- Glue a yellow button up above and draw gold rays around it with a marker for the star.
Children enjoy hunting through the buttons to find just the right ones. Do keep an eye on the very little ones, since small buttons are best kept out of reach of anyone who still puts things in their mouth.
14. 3D nativity
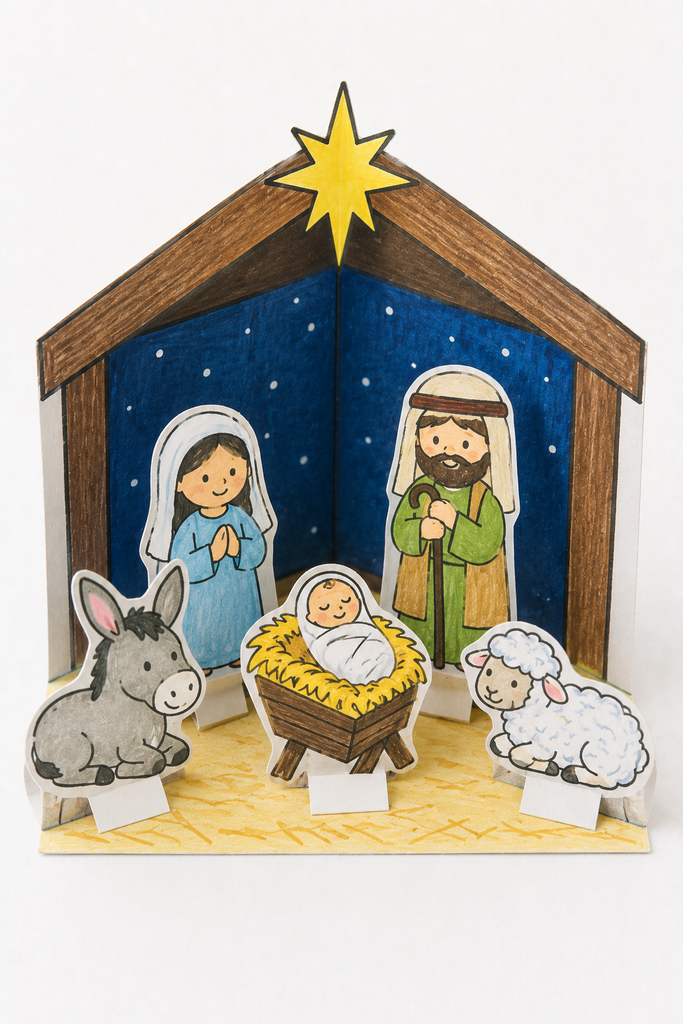
This one stands up in three dimensions, so the children can look right into the stable from the front. It makes a little scene they can set out and play with.
- Draw and color a stable background, then fold it so it stands up like a card.
- Color and cut out the figures of Mary, Joseph, baby Jesus, and the animals.
- Fold a small tab at the base of each figure so it stands on its own.
- Set the figures inside the folded stable.
- Add a star at the top of the roof.
Little ones love that they can move the figures around and tell the story their own way. Once it’s built, it becomes a quiet nativity they can return to again and again.
15. Nativity mason jar
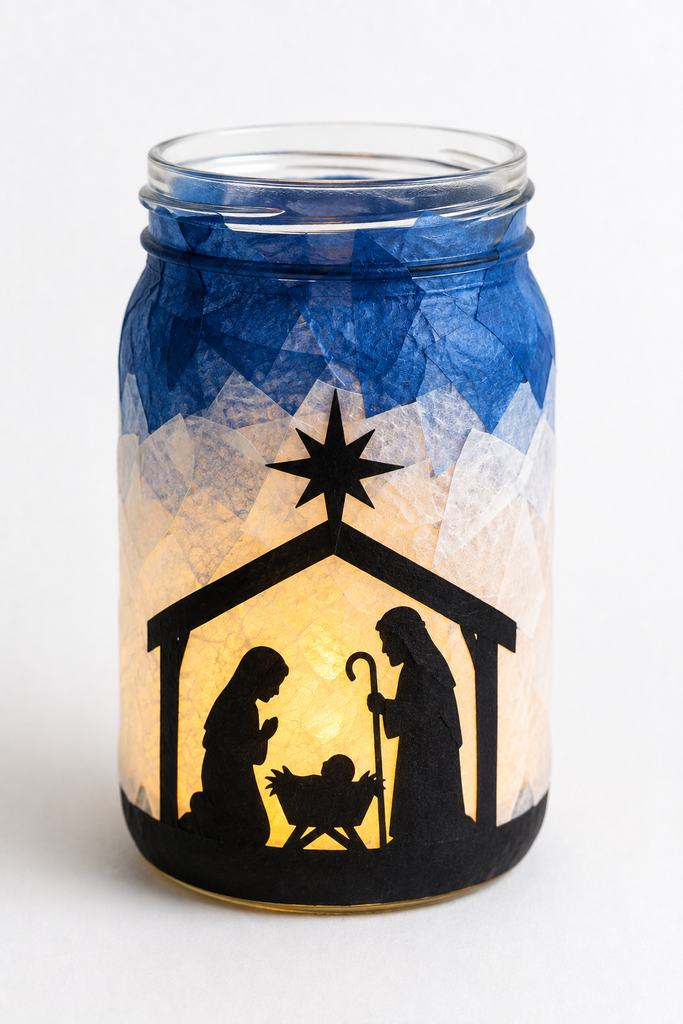
Here a glass jar becomes a glowing little lantern with the nativity shining out from inside. It stays dry, lit softly by a small battery light.
- Cut a little scene of Mary, Joseph, and the manger from black paper.
- Glue the black silhouette onto the outside of a clean glass jar.
- Wrap a layer of white or blue tissue paper around the rest of the jar.
- Drop a battery tea light down inside.
- Turn it on and watch the scene glow from within.
Use a battery light rather than a real candle, since paper and tissue are near the glass. The soft glow makes this a lovely one to set on the windowsill as the evenings grow dark.
16. Nativity snow globe
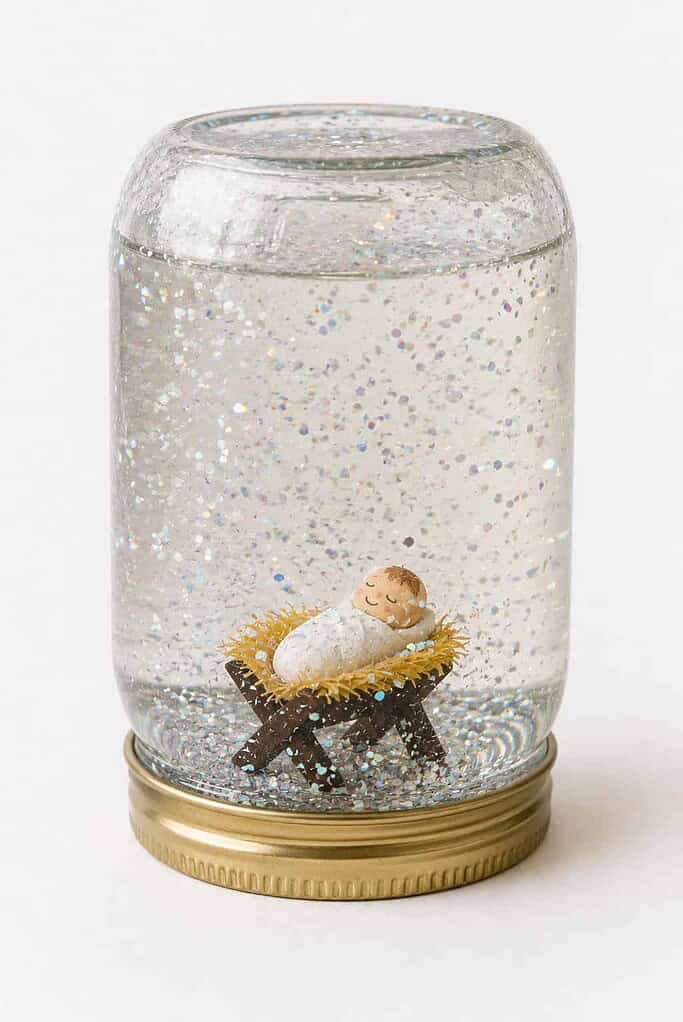
Where the mason jar stays dry and glows, this jar is sealed with water so a little snow drifts down over the scene. It’s the most wintry of the crafts, and the grown-up handles the sealing.
- Glue a small waterproof nativity figure to the inside of a jar lid and let it set fully.
- Fill the jar with water, leaving a little room at the top.
- Add a spoonful of glitter or fake snow and a few drops of glycerin to slow the swirl.
- Screw the lid on tightly, with a ring of strong glue around the rim to seal it.
- Turn it over and give it a gentle shake to let the snow fall.
Children are always delighted the first time the snow swirls up around baby Jesus. It’s worth having an adult seal the lid well and give it a shake over a towel to check for leaks before it’s handed over.
the story behind these crafts
Long ago, Mary and Joseph traveled to Bethlehem to be counted, and while they were there, the time came for Mary to have her baby. There was no room for them at the inn, so Jesus was born in a stable and laid in a manger, wrapped in swaddling clothes. It was the humblest beginning for the King of kings.
That same night, angels appeared to shepherds in the fields and told them the good news, and the shepherds hurried to see him. Later, wise men followed a bright star from far away to worship him and bring him gifts. It’s the story of God keeping his promise and coming near to us, the very reason we have our cross crafts for kids later in the year, and it opens the door to the whole life of Jesus your little ones will go on to learn, like the men he called in our twelve disciples crafts.
simple supplies to keep on hand
Most of these crafts lean on the same everyday things, so you won’t need much. Paper plates, cardstock and plain paper, and a set of craft sticks cover a good many of them, along with crayons or markers, safety scissors, and a reliable glue stick. A bag of cotton balls or a little raffia stands in for straw, and paint takes care of the handprints and the clothespin figures.
From there it’s a few odds and ends you likely already have. Saved cardboard tubes for the standing figures, wooden clothespins for the ornament, a handful of buttons from the tin, and some gem stickers or glitter to make the crowns and the star shine. Gold paper is a nice touch on the angels and the star, though crayons work just as well.
A couple of the crafts call for one special thing each: a clean glass jar and a battery tea light for the glowing mason jar, and a jar with a tight lid plus a little glitter for the snow globe. Most of the rest is probably already sitting in your craft drawer, and anything missing is easy to swap for something similar.
tips for crafting with little ones
Do a bit of prep before you gather the children. Cut the trickier shapes ahead of time, roll a few of the tubes and cones, and set the supplies out where everyone can reach them. A little setup keeps the craft calm instead of hurried.
Then let the story lead. Tell it slowly as their hands work, and pause on the manger, since that quiet moment is the heart of it all. If a child wants to give an angel purple wings or make ten wise men instead of three, let them. The point isn’t a perfect craft. It’s the truth sinking in while they work, and the memory of making it with you.
Keep the grown-up jobs for the grown-ups. An adult should handle any hot glue, use a battery light rather than a flame in the jar, and seal the snow globe and check it over a towel before it’s shaken. And if you’re gathering a few faith crafts for the season, our jonah and the whale crafts make a warm companion for another day.
let this story settle in as they craft
So pick the one that fits your supplies and the ages around your table. You don’t need to do all sixteen. Just one good idea and a little glue is plenty for the wonder of that night to find its way in.
Let the little ones make something with their hands while you tell them how Jesus was born in a stable, how the angels sang and the shepherds came, and how God kept his promise and came near to us. That bit of truth tends to stay with them far longer than the craft itself, and years from now they may not remember the cotton balls or the glitter, but they’ll remember that unto us a Savior was born.
And one more thing before you go. If you and your little ones make any of these, I’d love to see how they turned out. Leave a photo in the comments when you get a chance, or send one our way, and yours might be featured right here on the site to encourage other families celebrating the season at home. There’s no pressure at all. Just a friendly little invitation to share if you’d like.
So glad you’re here.
Warmly,
Betty
Get the FREE 3D Turkey Craft
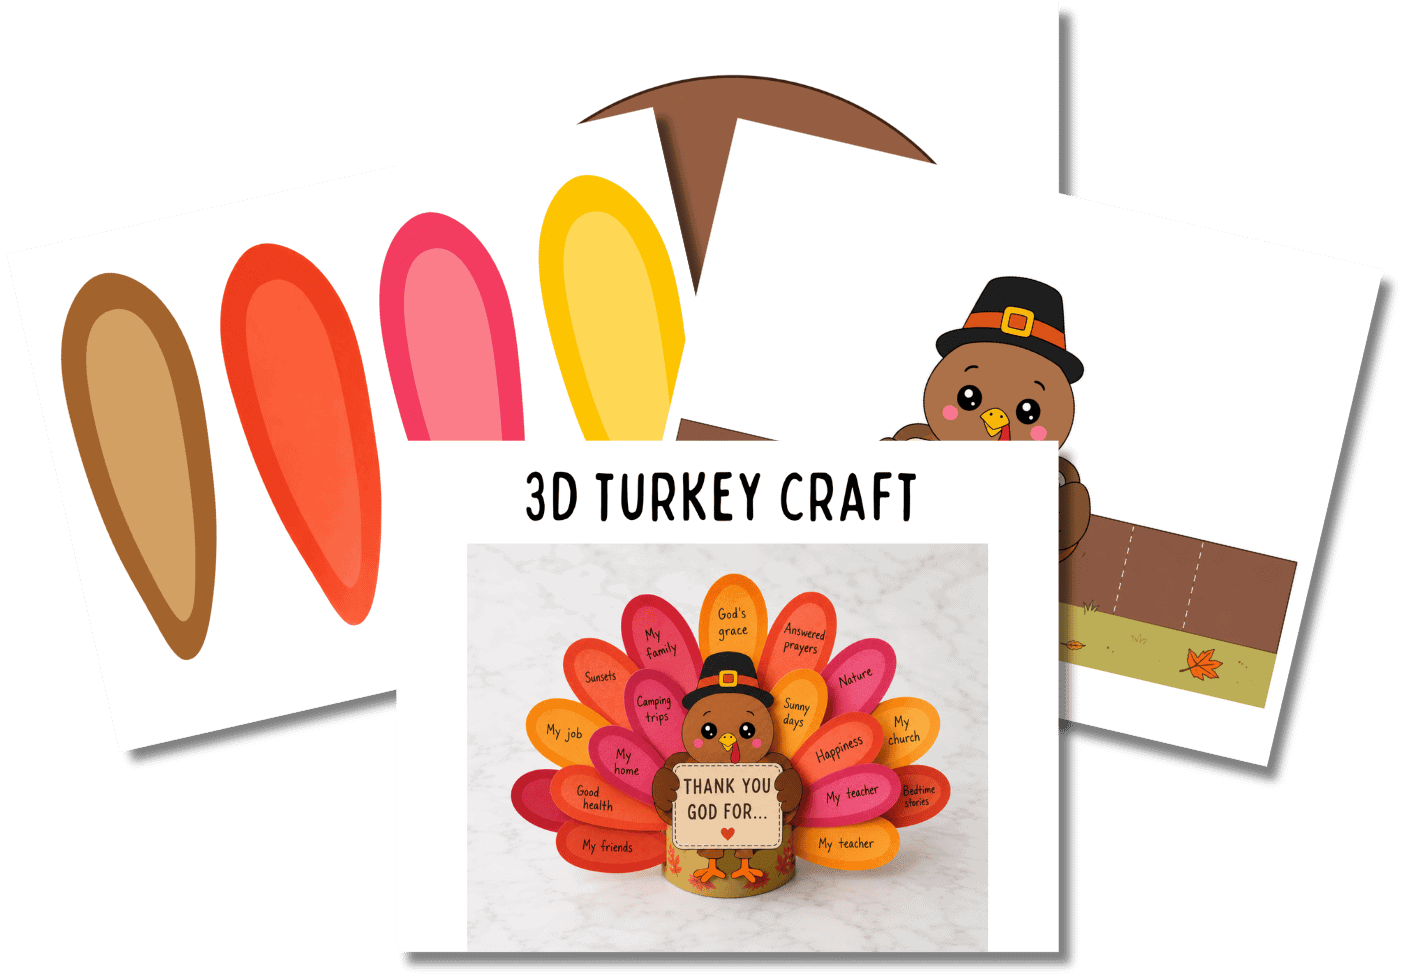
Don’t let your kids just hear that they’re blessed—help them name their blessings one by one.
With this free 3D turkey craft, kids color the turkey and his feathers, then write one thing they’re thankful to God for on each feather. The body wraps around into a base so the turkey stands up on his own, holding a sign that reads “Thank You God for…”
frequently asked questions
what age are nativity crafts best for?
Most of these work well for ages three through ten. The paper plate scene, the handprint crafts, and baby Jesus in a manger are lovely for toddlers and preschoolers with a little help, while the woven star, the mason jar, and the snow globe suit older children who can handle the extra steps.
which bible verse goes with these crafts?
Luke 2:11 fits beautifully, where the angel announces that a Savior is born. Luke 2:12, about finding the baby wrapped in swaddling clothes and lying in a manger, works especially well for the manger and handprint crafts.
which nativity crafts are simplest for a big group?
For a classroom or a large Sunday school group, the paper plate nativity, the popsicle stick manger, the wise men crowns, and the “Jesus is born” hat are the easiest to set up in batches. They use few pieces and little drying time, so a roomful of children can finish together.
how do i make the snow globe without it leaking?
Glue the figure to the lid and let it dry fully before adding water, then run a ring of strong glue around the rim before you screw the lid on tight. Turn it upside down over a towel and let it sit a few minutes to check for drips before the little ones shake it.
can these crafts be kept as ornaments or keepsakes?
Many of them can. The popsicle stick manger, the woven star, the clothespin ornament, and the handprint crafts all make sweet keepsakes to bring out year after year, and the handprint ones especially are treasures once the children have grown.