
Sensory bottles have become one of those slow-afternoon rescues in our little farmhouse. They’re simple, beautiful in their own quiet way, and they hold exactly the kind of stillness little hands need on the wiggly days.
Pour yourself something warm. I’m sharing ten of our most-loved DIY sensory bottles below — the ones we make over and over again, the ones tucked into my apron pocket on long car rides, the ones that have lived through more than one toddler meltdown and a milk spill or two.
why sensory bottles are quiet little wonders
There’s something about a bottle filled with slow, swirling color that pulls a fussy toddler back to themselves. My oldest calls hers her “thinking bottle.” She gives it a gentle shake when her little world feels too big, then sits and watches the glitter settle while her shoulders soften.
Sensory bottles offer the kind of quiet regulation little ones can’t always find on their own. The slow movement, the contained swirl, the tidy magic of it — it’s calm tucked inside a jar. And for a busy mama, it’s a gift of three or four breath-deep minutes you didn’t know you needed.
If you love this kind of slow, hands-on play, you’ll feel right at home with our sensory crafts for kids roundup too.
what you’ll need to get started
Most of these you’ll already have tucked in a drawer or saved on a shelf. The pretty thing about sensory bottles is they ask for very little — just an empty bottle and a few odds and ends.
A few basics worth gathering:
- Empty plastic bottles — water bottles, juice bottles, or the tall pretty ones if you have them
- A hot glue gun or strong super glue for sealing the lids tight
- Baby oil, mineral oil, or warm water depending on the bottle
- Fine glitter, food coloring, and small lightweight bits to float
- A small funnel — it has saved me from so many oily countertop puddles
- A baking sheet to catch the inevitable spills
- A roll of clear packing tape or duct tape to wrap the lid for extra-stubborn shakers
If you’ve been saving bottles and jars from the recycling bin all year long, you’re already halfway there. We use them for so many of our recycled crafts for kids projects, and the leftover lids find their way into our bottle cap crafts basket too. Nothing wasted, sweet friend.
10 easy & super fun diy sensory bottles kids will love
Here’s the heart of it — ten sensory bottle ideas that have earned a permanent spot on our windowsill. Each one is simple to put together, gentle on the budget, and just the right amount of magical for little hands and watchful eyes.
1. calm-down glitter bottle
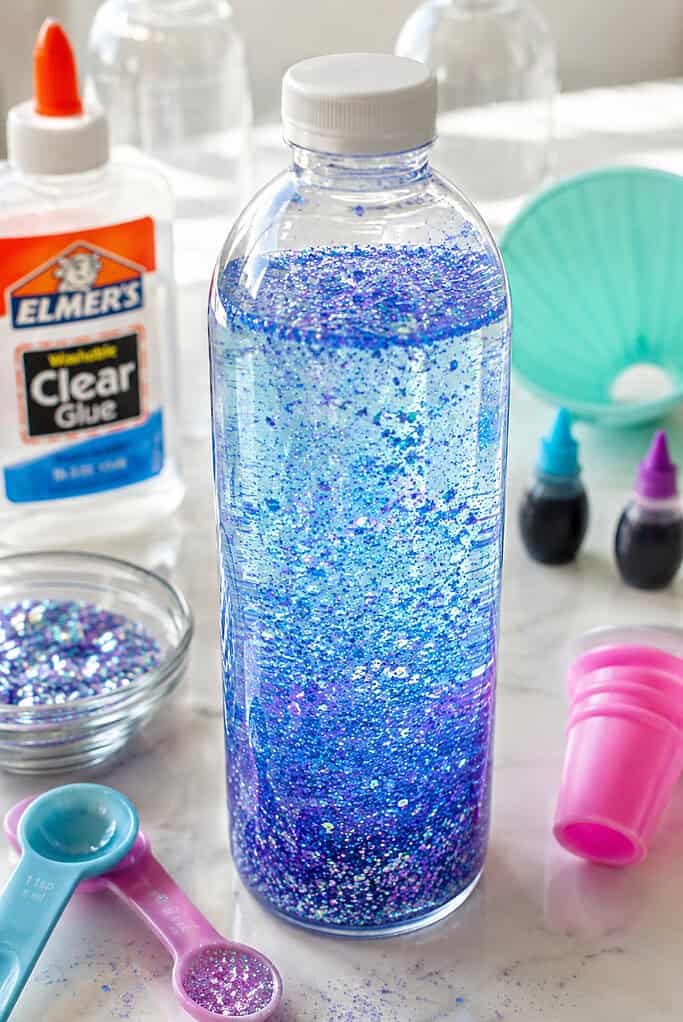
This is the one that started it all in our house. Fill a clear plastic bottle three-quarters full of warm water, squeeze in about two tablespoons of clear school glue, then add a generous pinch of fine glitter and a single drop of food coloring.
Top off with more warm water, glue the lid shut, and give it a gentle shake. The glue thickens the water just enough to make the glitter swirl slowly — almost like watching snow fall in slow motion.
2. ocean in a bottle
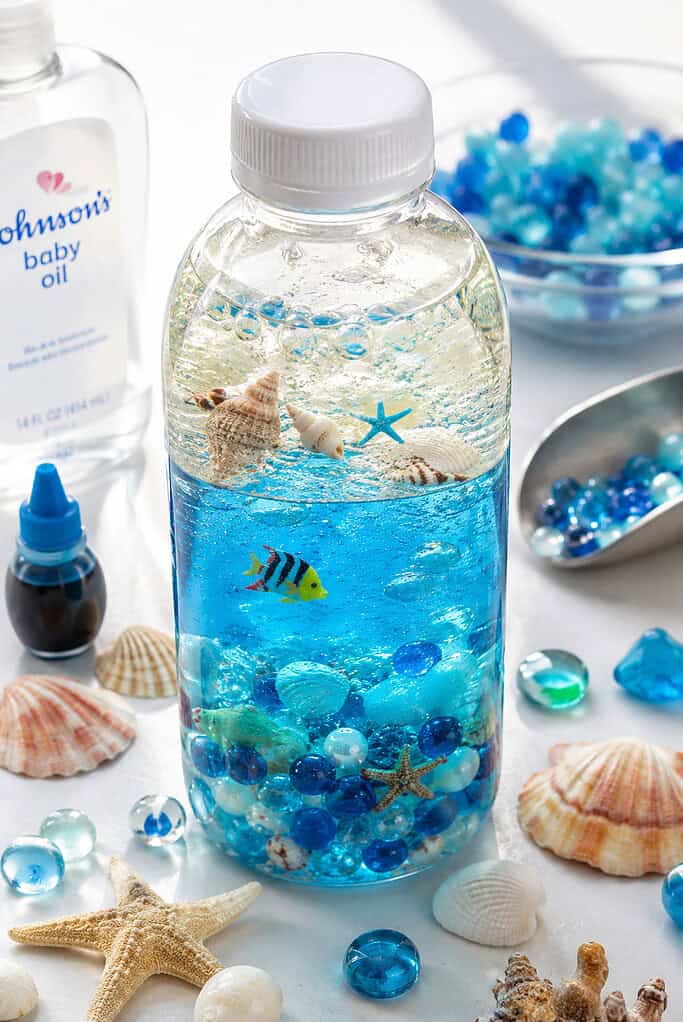
Fill the bottle halfway with water and add a few drops of blue food coloring. Then top it off slowly with baby oil. Drop in a tiny seashell or two if you have them, or a small plastic fish from the toy basket.
Seal it up and tip it gently side to side. The oil and water never mix, so you get little rolling waves every single time — the kind of slow ocean a busy heart can rest in. We took ours on a long car ride last fall and it kept the baby happy from one rest stop to the next.
3. rainbow rice bottle
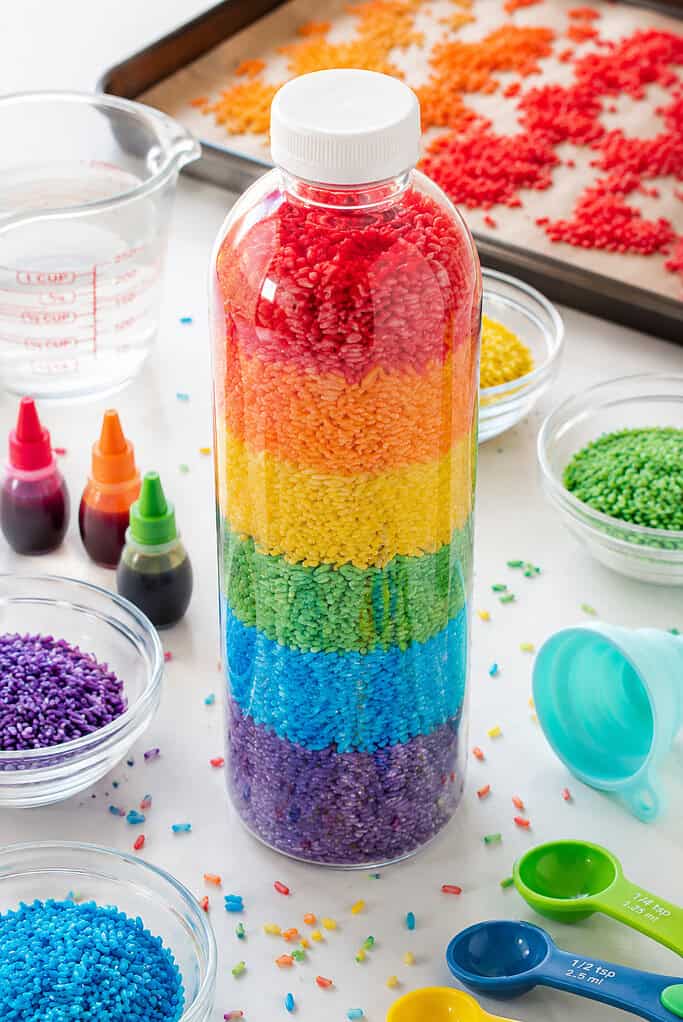
Dye dry rice in small bowls — a few drops of food coloring, a splash of vinegar, and a quick stir until the grains are coated. Spread each color out on a baking sheet to dry for an hour or so.
Then layer the colors carefully into a clean dry bottle, one scoop at a time. The result is the prettiest little rainbow on a shelf, and the soft shushing sound when shaken is so satisfying.
4. bible verse treasure bottle
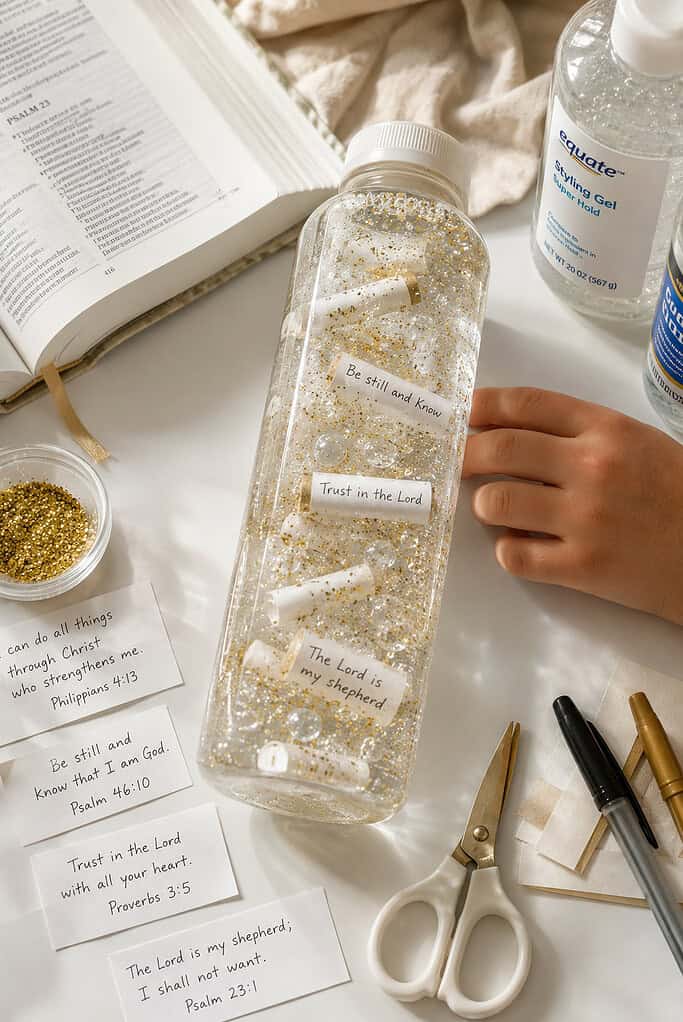
This one is tender and dear to me. Write short, sweet bible verses on tiny strips of paper — “the Lord is my shepherd,” “be still and know,” “trust in the Lord with all your heart.” Roll them up small and tuck them inside a clear bottle filled with water and a touch of clear hair gel.
Add a sprinkle of gold glitter and seal it tight. The verses drift and twirl in the slow gel, and we use ours during morning quiet time. My oldest watches a verse float past and asks me to read it to her — and just like that, scripture becomes part of an ordinary Tuesday.
For more gentle ways to weave faith into hands-on play, our simple Christian crafts roundup is one we come back to again and again.
5. nature walk discovery bottle
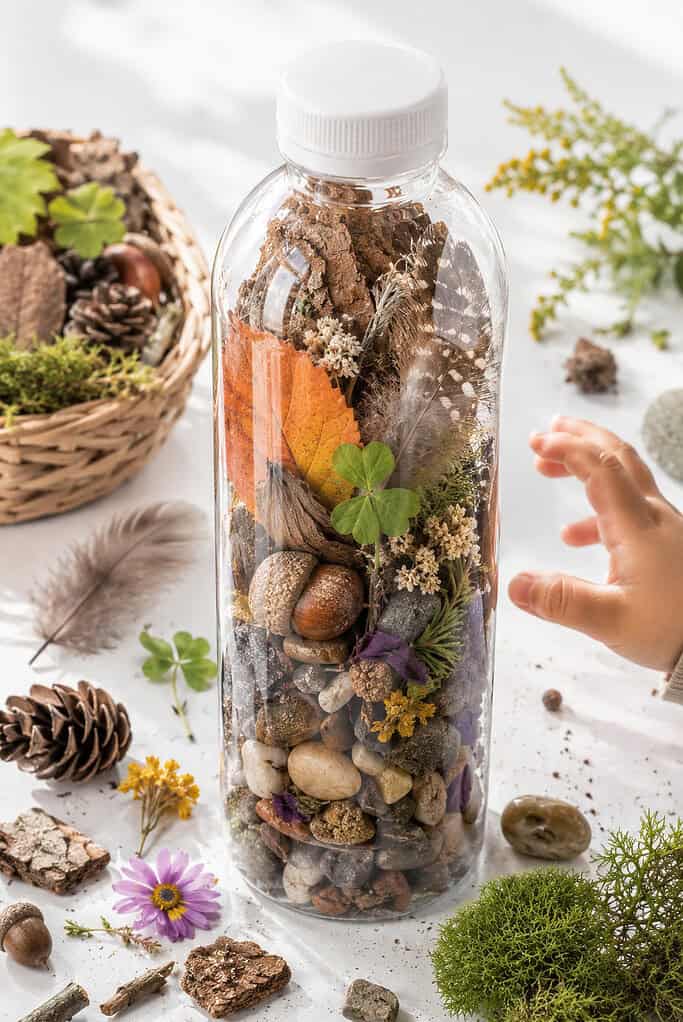
This one is made on the porch after a slow ramble through the yard. Send your littles out with a little basket and let them gather treasures — a smooth pebble, a small acorn, a curl of bark, a feather, a few bright leaves, a tiny sprig of clover.
Tuck the treasures into a dry bottle (no liquid for this one — keeps the bits looking fresh) and seal it up. It becomes a little memory of that morning’s adventure, and the kids carry theirs around like a precious keepsake.
If your little ones love bringing the outdoors in, you’ll find more of these gentle ideas in our nature crafts for kids post.
6. i-spy alphabet bottle
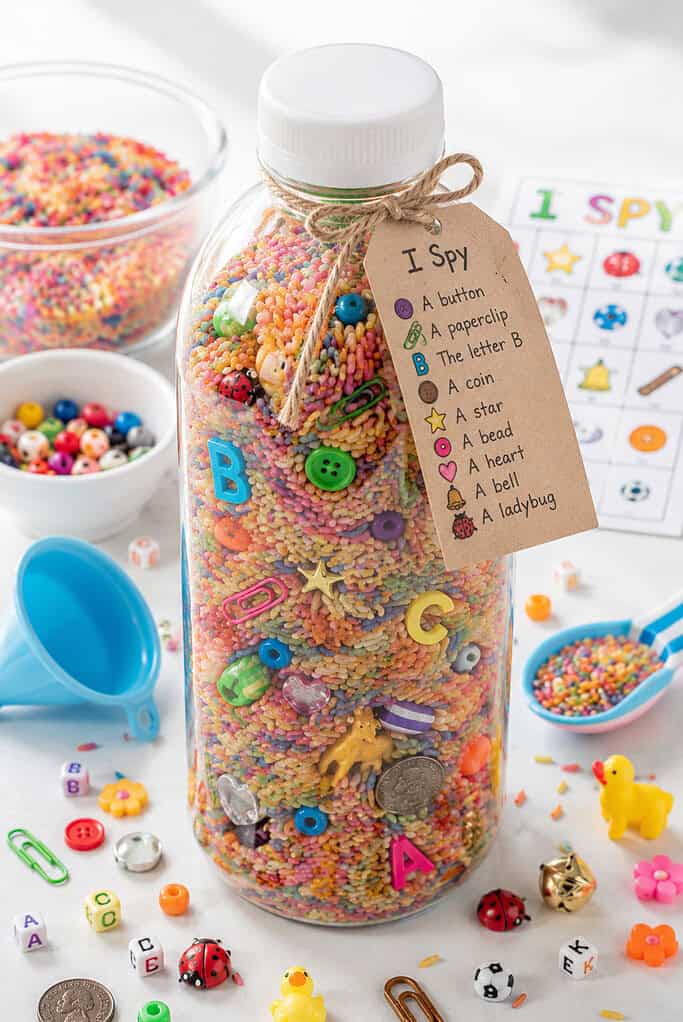
Fill a clear bottle about three-quarters of the way with dry rice or fine sand, then drop in tiny treasures — a button, a small bead, a paperclip, a bit of pasta, a coin, a little plastic letter. Seal it up tight.
Tip and roll the bottle gently and try to spot each item. Make a little list of what’s inside on a card tied to the neck so the kids can hunt for everything.
7. magnetic surprise bottle
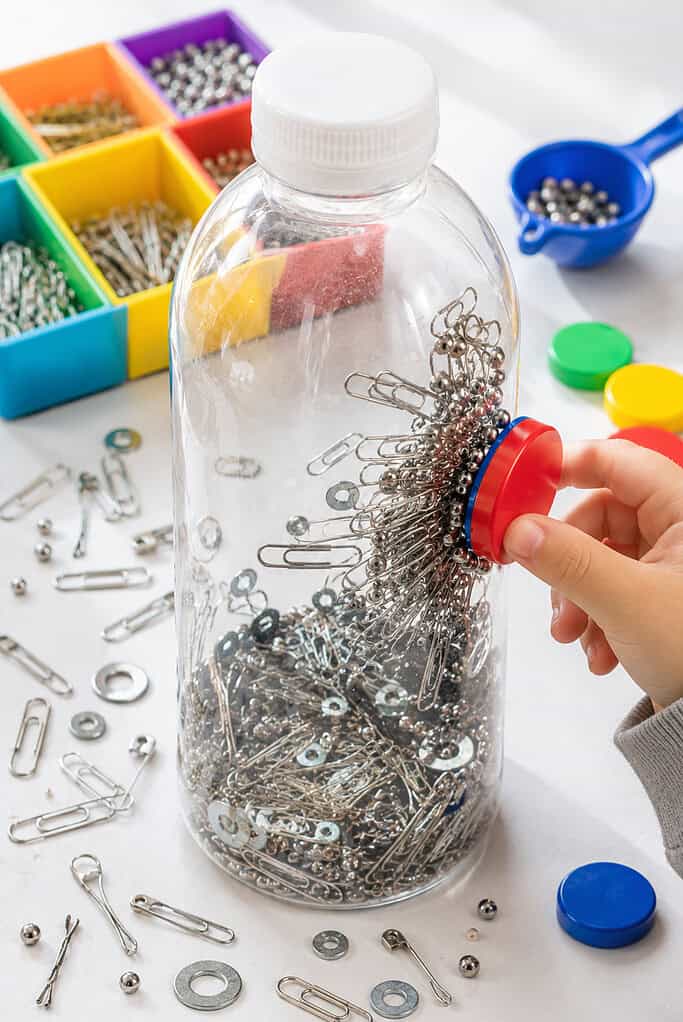
Drop a handful of small metal items into a dry bottle — paperclips, a few washers, a couple of tiny metal beads, a bobby pin or two. Add a bit of rice or sand to bury them, and seal the bottle.
Then run a magnet along the outside of the bottle and watch the metal bits leap and follow. My toddlers think it’s pure magic.
8. wildflower fairy bottle
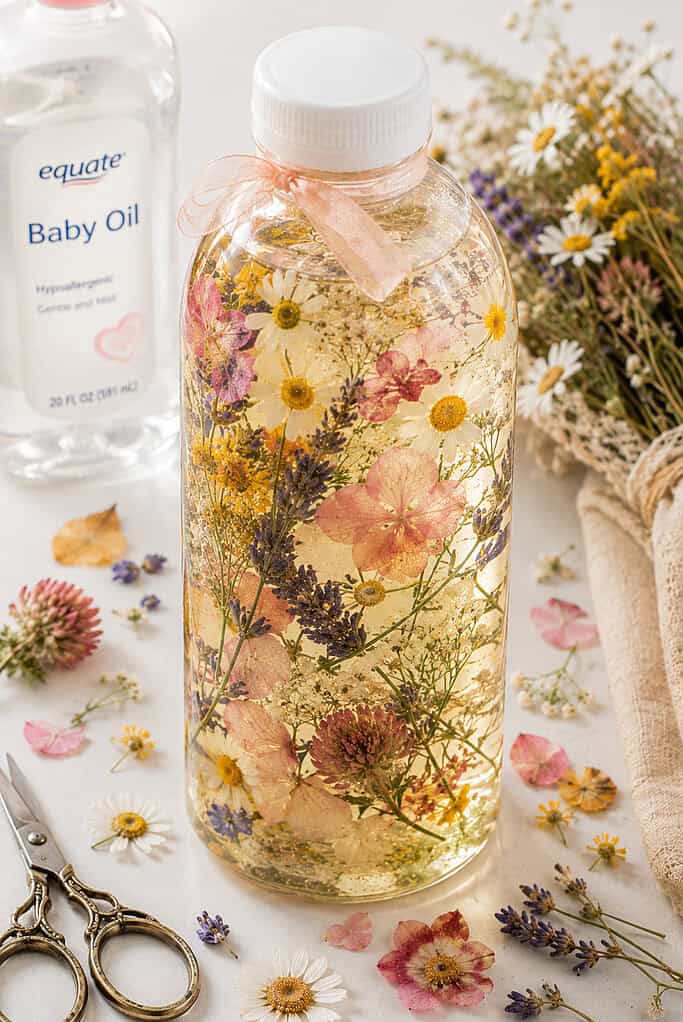
Press a few small wildflowers and dry them well — daisies, tiny clover blossoms, baby’s breath, anything tender. Slide them carefully into a clear bottle and fill with baby oil so they float and drift in the soft golden light.
Seal it tight and hold it up to the kitchen window. The flowers look like they’re caught mid-dance, and the whole bottle glows like something out of a storybook.
9. lava lamp sensory bottle
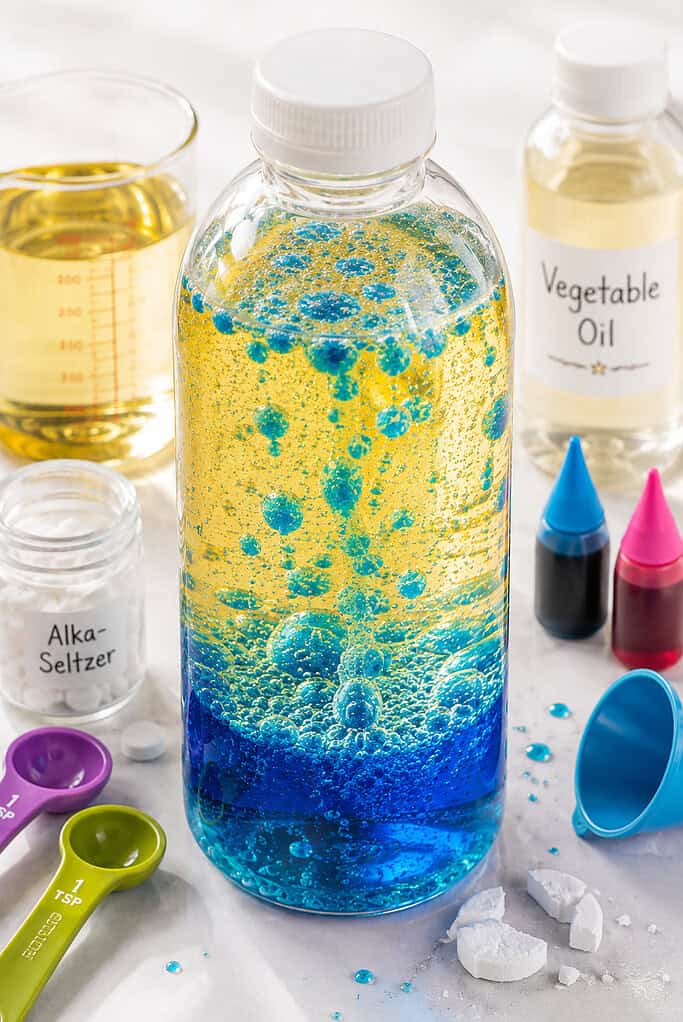
Fill a bottle two-thirds with vegetable oil and the rest with water tinted with food coloring. Wait for the layers to settle — the colored water will sink to the bottom — then drop in a piece of broken-up alka-seltzer tablet.
The reaction sends colorful bubbles dancing up through the oil like a tiny lava lamp. Each tablet gives you about a minute of the show, so we keep a small jar of pieces nearby for repeat performances. (The kids never tire of the “do it again, mama” chorus on this one.)
10. soap and bead bubbly bottle
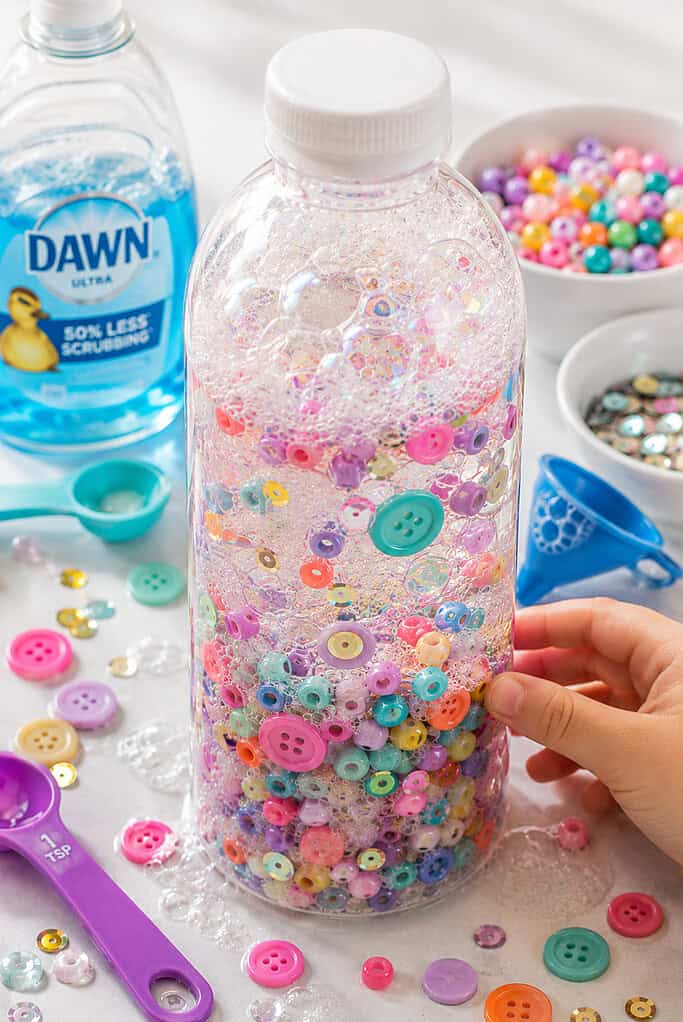
Fill a clear bottle most of the way with warm water and a generous squirt of dish soap. Drop in a small handful of pony beads, sequins, or pretty buttons.
Seal it up and shake gently. The soap creates the softest bubbly suds that swirl with the beads inside — like a tiny snow globe gone bubbly. It’s the one my littlest reaches for first every single time.
a few gentle tips to make your bottles last
A few things I’ve learned the slightly-leaky way after a couple of years of bottle-making with three under three:
- Always glue the lid shut. Always. Even the bottles you swear no one will open will absolutely be opened by a curious two-year-old.
- Wrap the lid with duct tape or a strip of pretty washi tape for extra peace of mind. It also tidies up any glue that squished out the sides.
- Use plastic bottles for little ones under three. Glass is gorgeous, but it’s no friend to a kitchen tile floor.
- Store your bottles up high when little ones are little. The lava lamp and oil bottles especially can get a touch grimy if they roll around in a toy bin.
- Make a fresh batch every few months. The water-based ones eventually cloud, and a quick refill is part of the slow rhythm.
If you want more gentle, low-prep play ideas you can pull together while the kettle warms, our spring crafts for toddlers post is full of slow afternoon favorites. And for the days when the great outdoors is calling, our nature crafts for forest school post is one I keep coming back to.
the slow gift of watching them watch
There’s something tender about watching a small child hold a sensory bottle for the first time. The little inhale. The wide eyes. The way they tilt the bottle this way and that, learning what makes it move and what makes it still.
I think the Lord built our littlest ones for wonder. They notice what we’ve stopped noticing — the slow drift of glitter, the way oil refuses to mix with water, the soft sound of dry rice tumbling against itself.
“Be still, and know that I am God.” — Psalm 46:10
That verse has been sitting with me on the long afternoons. Be still. The bottles teach our little ones a tiny version of that holy stillness, and honestly — they teach us too. There’s a quiet faithfulness in handing your child something slow on a fast day.
make one bottle this week and watch the magic settle
Pick just one bottle from the list above. Just one. Save an empty water bottle from today’s lunch, gather a few odds and ends from the kitchen drawer, and put it together tonight after the dishes are done. Tuck it on the windowsill so it catches the morning light, and let your little ones discover it after breakfast.
I’d love to know which sensory bottle you’re making first — scroll on down and tell me in the comments. And if your family has a favorite sensory bottle I missed, please share it there too. I read every single one and tuck the best ideas into my apron pocket for next week’s slow afternoon.
Warmly,
Betty
Get the FREE Printable Jonah and the Whale Printable Crafts
 - 2026-04-23T022938.212")
Don’t let your kids just hear Jonah’s story—help them step into it.
With these 2 free Jonah activities, children can explore the story in a fun, memorable, hands-on way. They’ll make an interactive pull-tab whale slider craft that reveals five scenes from Jonah’s journey, and follow along with an 8-page coloring storybook that shares the complete story—including God’s important lesson about mercy and compassion that’s so often missed.
frequently asked questions
what age are diy sensory bottles best for?
Sensory bottles work beautifully from about six months all the way through eight or nine. The youngest babies love watching the slow movement and listening to the soft sounds — they don’t need to make the bottles themselves to enjoy them. Older kids can help build them and get really creative with what they tuck inside.
For tiny babies, stick to plastic bottles with the lids glued and taped tightly shut. Always supervise the wee ones with anything they could potentially gnaw on.
are sensory bottles safe if my little one chews on everything?
For a determined chewer, I’d skip glass bottles entirely and stick with sturdy plastic ones. Glue the lid down with hot glue or super glue, then wrap the whole lid with a generous strip of duct tape. Keep an eye out for any wear and tear, and retire the bottle if the seal ever starts to give.
For the very mouthiest stage, the dry-fill bottles (rice, sand, treasures) feel safest to me. They’re still beautiful even if your little one gnaws the cap.
how long do diy sensory bottles last?
The dry-fill ones (rice, nature treasures, magnetic bottles) can last for years if they stay sealed. The water-based and oil-based ones tend to cloud or develop a little film after about three to six months, depending on how often they’re shaken and how warm your house gets.
When that happens, I just snip the lid off, give the bottle a good rinse, and refill with fresh ingredients. Most of the same supplies can be reused.
can i use sensory bottles for sunday school or homeschool lessons?
Beautifully, yes. The bible verse treasure bottle is one of our favorite morning quiet-time tools, and the ocean in a bottle pairs sweetly with the story of Jesus calming the storm. The calm-down glitter bottle is a gentle visual for talking with little ones about giving worries to God and watching them settle.
One small bottle and one small verse is usually enough — sweet friend, you don’t need to dress it up.
what’s the best way to seal a sensory bottle?
The most reliable method around our farmhouse is a generous ring of hot glue around the inside threads of the bottle cap before twisting it on. Once the cap is on, I add a second line of glue around the outside seam where the cap meets the bottle, then wrap the whole thing in a strip of duct tape or pretty washi tape.
It’s a little extra work, but it saves you from finding glitter water on the kitchen floor at five in the morning. (Ask me how I know.)
Wishing you a slow morning, a windowsill of sweet little bottles, and a tiny human watching the glitter drift down beside you.
