
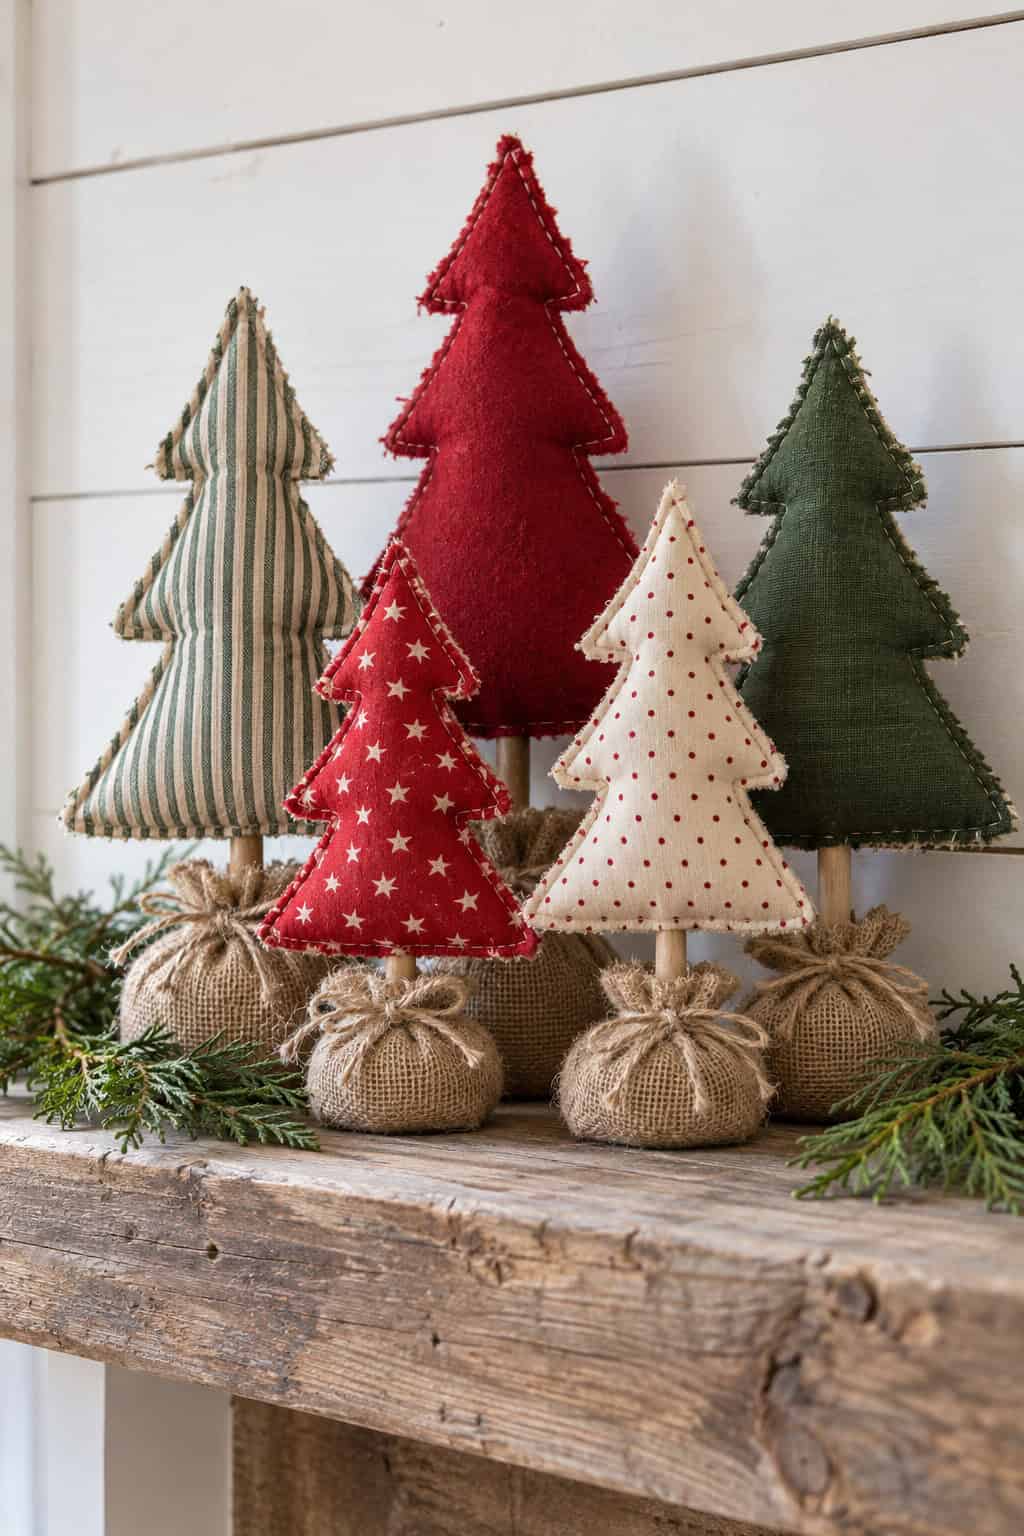
Somewhere around the first cold week of the year, the fabric stash starts to call. The red prints come out of the bin, and every scrap looks like it wants to be something for Christmas.
A handmade stocking or a stack of napkins holds something store-bought things don’t. It holds the hours you spent making it.
So whether you’re new to sewing, a grandmother making gifts for the whole family, a homeschool mama sewing with older kids, or someone who simply loves to decorate by hand, these eighteen projects are for you. Some take an afternoon and a few are weekend projects, but you can finish every one before the holidays.
18 lovely christmas sewing projects
Here are eighteen projects to sew for your home and the people you love, each with real measurements and plain steps.
Unless a project says otherwise, sew with right sides together and use a 1/2-inch seam allowance. And press your seams as you go.
1. Christmas stocking
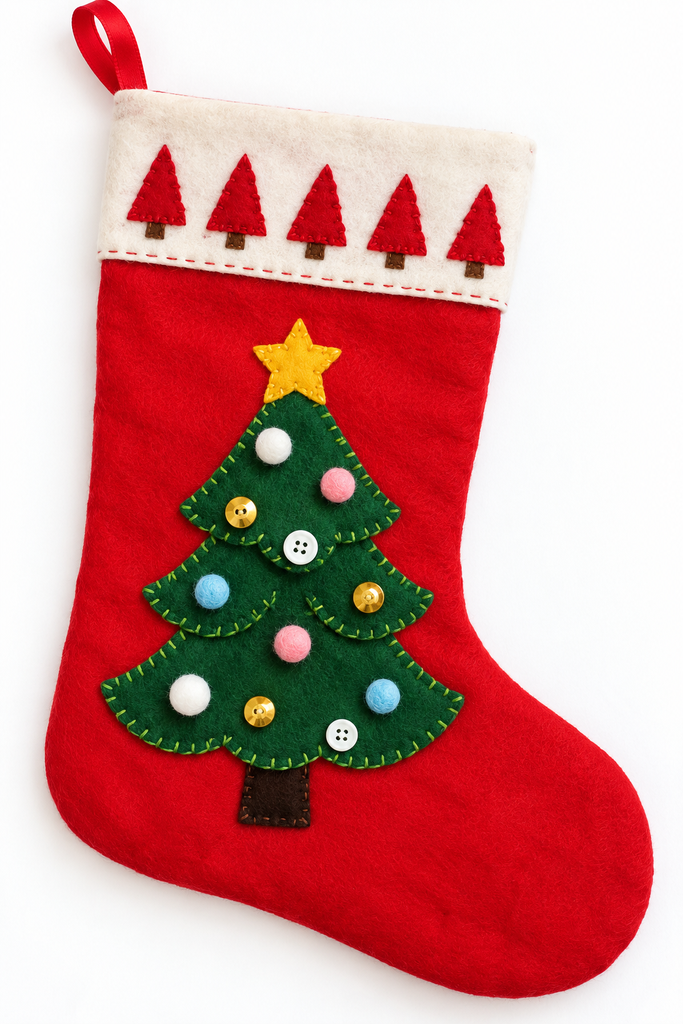
A red felt stocking with a green appliqué tree on the front and a white cuff lined with little red trees is a wonderful first Christmas project. Felt doesn’t fray, so there’s no hemming and no lining to fuss with.
- First, draw a stocking on paper about 16 inches tall, 7 inches wide at the top, and 11 inches long across the foot. Cut two from red felt, flipping the paper over for the second piece.
- Then cut an 8-inch tree with three scalloped tiers from green felt and a small star from yellow felt.
- Next, sew the tree to the center of the front piece with green thread, and sew the star to the top of the tree.
- Hand-stitch small buttons or pom-poms in white, pale blue, pink, and gold across the tree for ornaments.
- Then sew the front and back together with a 1/4-inch seam, leaving the top open. Clip the curves and turn it right side out.
- For the cuff, cut a white felt strip 15 by 5 inches, stitch five or six small red felt trees in a row along it, and sew the short ends together into a loop.
- Slide the cuff over the top of the stocking with the trees facing out and the top edges even.
- Finally, fold a 6-inch ribbon in half, tuck the ends between the cuff and stocking at the back seam, and topstitch around the top 1/4 inch from the edge.
Hang it up, and it’s ready for Christmas morning.
2. Tree skirt
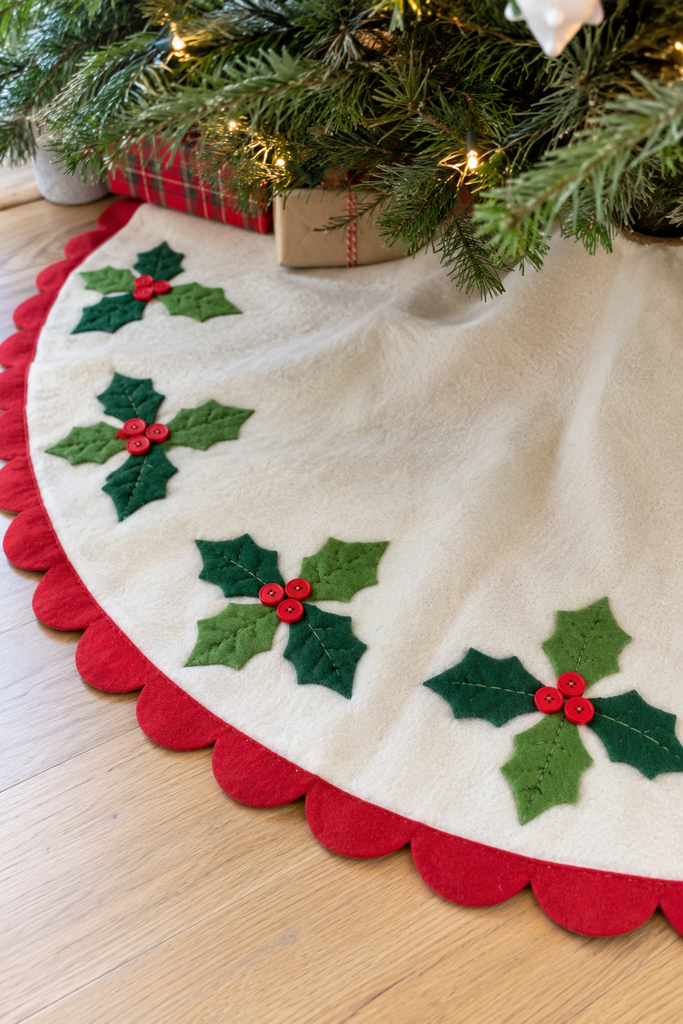
A cream fleece skirt with a red scalloped border and a full ring of holly looks lovely and festive under any tree. It’s made from fleece and felt, so every edge can stay raw and there’s nothing to hem.
- First, fold 1 1/2 yards of cream fleece into quarters. Hold a tape measure at the folded corner and mark an arc 21 inches out, then a small arc 2 1/2 inches out.
- Cut along both arcs and unfold your 42-inch circle. Then cut a slit from the outer edge to the center hole along one fold line.
- Next, fold 1 1/2 yards of red fleece into quarters, mark arcs at 20 and 24 inches from the corner, cut, and unfold into a ring. Cut a slit in the ring too.
- Trace around a 3-inch jar lid along the outer edge of the red ring to mark a row of half circles, then cut along the curves to make scallops.
- Then lay the red ring on the cream circle so it overlaps the cream edge by 1 inch, with the slits lined up, and topstitch along the ring’s inner edge with red thread.
- Cut forty-eight felt holly leaves about 3 inches long, half in a deep green and half in a brighter green. Sew them in groups of three, mixing the two greens, to make sixteen sprigs spaced evenly in a ring about 4 inches in from the red border. Stitch a line down the center of each leaf.
- Next, sew three small red buttons in the center of each sprig for berries.
- Finally, sew two pairs of red ribbon ties along the slit, one pair near the center and one near the outside.
Tie it around the trunk with the opening at the back, and the whole tree looks finished.
3. Christmas table runner
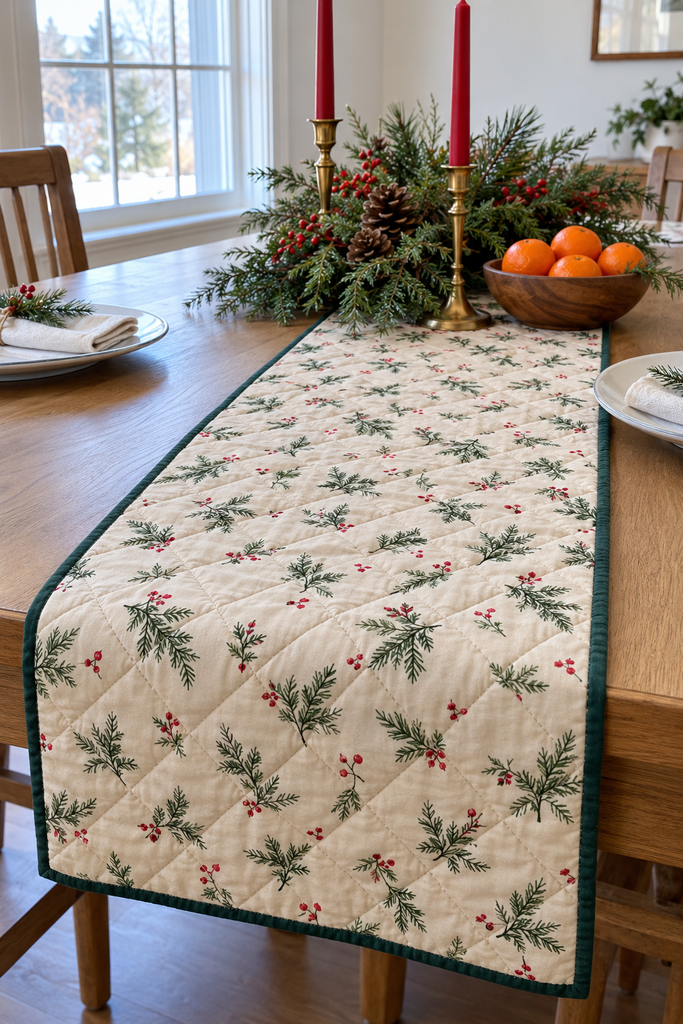
Down the middle of the table, a quilted runner in a cream holiday print of evergreen sprigs and red berries sets the tone for every meal. The diamond quilting gives it that soft, puffy look, and it’s all straight lines.
- First, cut the print to 14 by 72 inches. Cut backing fabric and cotton batting each 2 inches bigger on every side.
- Then lay the backing wrong side up, add the batting, and lay the print on top right side up. Pin through all three layers every 4 or 5 inches with safety pins.
- Next, use a quilting ruler and washable marker to draw 45-degree diagonal lines 2 inches apart across the whole runner.
- Draw a second set of lines going the other direction so they cross into diamonds.
- Then sew along every line, using a walking foot if you have one, and trim all the layers even with the print.
- For binding, sew 2 1/2-inch dark green strips end to end, fold the long strip in half lengthwise, and press.
- Next, sew the raw edges of the binding to the front edge of the runner with a 3/8-inch seam, folding neat corners as you go.
- Finally, wrap the folded edge around to the back and stitch it down by hand or machine.
It will dress the table from the first Advent Sunday to New Year’s.
4. Christmas pillows
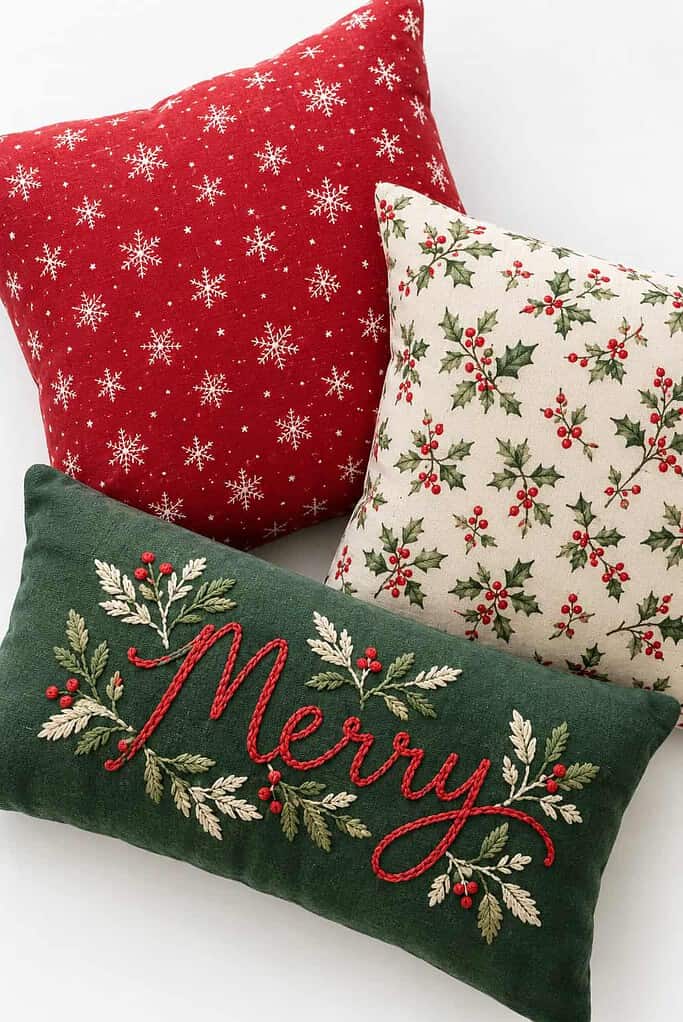
Envelope pillow covers are one of the quickest ways to change a room for Christmas, and one can carry a hand-embroidered “Merry” like the green pillow in the photo. The back simply overlaps, so there’s no zipper, and the covers slip right off after the holidays.
- First, for an 18-inch pillow form, cut one 18-inch square for the front and two 18-by-12-inch pieces for the back.
- Then fold one long edge of each back piece under 1/2 inch, fold it again 1/2 inch, and stitch.
- If you’re embroidering, write “Merry” in cursive across the front with a washable marker, hoop it, and chain stitch over the letters in red floss. Add small cream and sage leaves around the word with straight stitches. (For a lumbar pillow like the green one, cut a 12-by-20-inch front and two 12-by-14-inch backs.)
- Next, lay the front right side up. Lay the two back pieces on top, right sides down, with raw edges lined up with the outer edges and the hemmed edges overlapping in the middle.
- Pin and sew all the way around.
- Finally, clip the corners, turn it right side out through the overlap, and slip in the pillow form.
If you’d like more detail on the basics, our easy guide on how to sew a pillow walks through it step by step.
5. Fabric Christmas ornaments
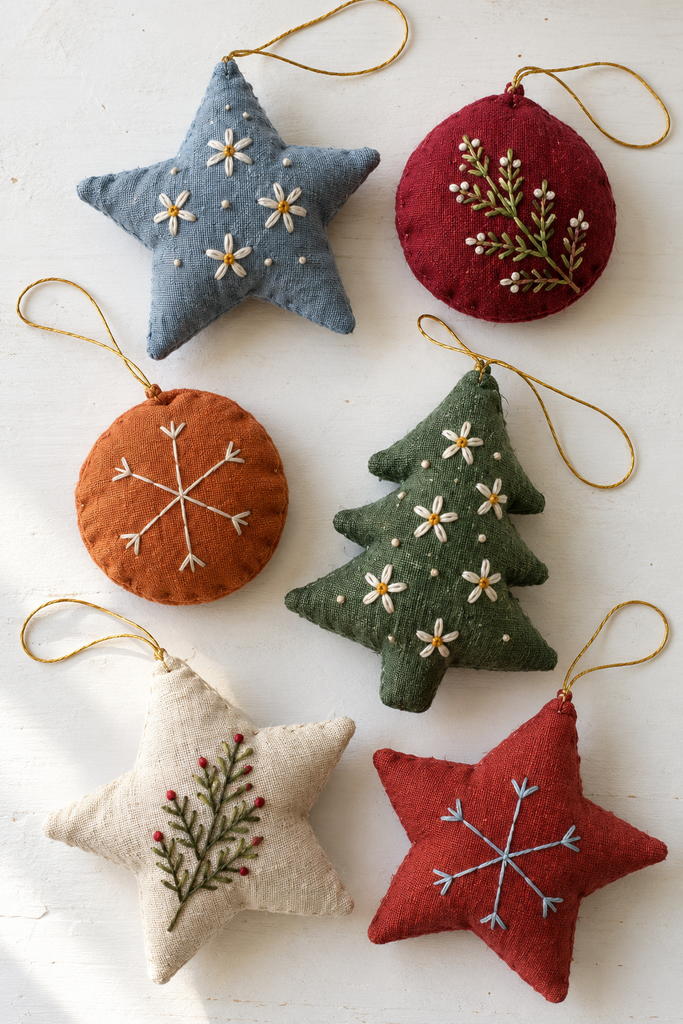
Stuffed stars, little trees, and round ornaments in solid linen colors like burgundy, rust orange, blue-gray, cream, and pine green look lovely on the tree or tucked into a gift. Each one takes only an evening, and the embroidery uses just a few easy stitches.
- First, draw shapes 4 to 5 inches across on paper. Trace each one onto your front fabric, but don’t cut it out yet.
- Then put the fabric in a hoop and embroider inside the traced lines with two or three strands of floss.
- For a sprig, backstitch a straight line and add short slanted stitches up both sides. For a flower, sew five straight stitches out from one center point. For a snowflake, cross three long stitches in the middle and add a small V at each point.
- Next, pin the embroidered piece to plain fabric, right sides together, and sew on the traced line, leaving a 1 1/2-inch gap on a straight side.
- Cut out the shape 1/4 inch outside your stitching, clip into the inner corners, and trim across the points.
- Then turn it right side out, push the points out with a chopstick, and stuff it firmly.
- Finally, sew the gap closed by hand, and stitch the ends of a folded 10-inch gold cord to the top point.
If you love this kind of slow handwork, you’ll find more in our hand sewing projects without a machine.
6. Fabric Christmas trees
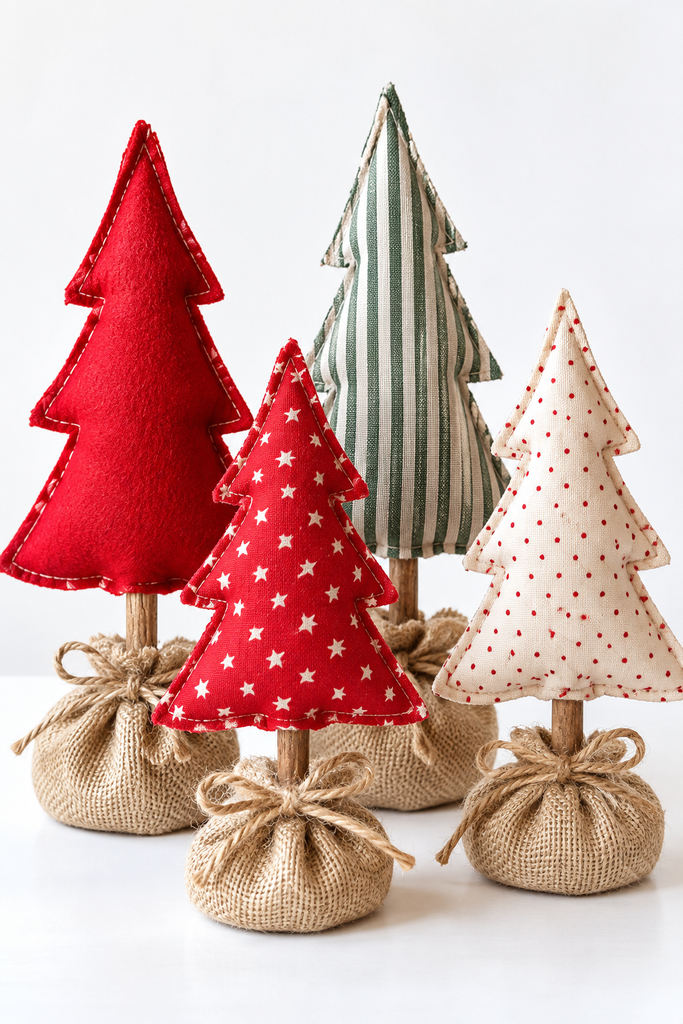
Little stuffed trees standing on wooden dowel trunks in burlap bases make a sweet grouping on a shelf or mantel. Mix the heights and fabrics, like red felt, a red script print, a ticking stripe, and a dark floral, and they look like a tiny forest.
- First, draw a tree on paper 7 to 10 inches tall, with a pointed top, stepped sides like three tiers, and a flat bottom about 5 inches wide.
- Then cut two tree pieces and place them wrong sides together.
- Next, sew all the way around 1/4 inch in from the edge, leaving a 1-inch gap at the bottom center. The stitching and edges stay showing on the outside.
- Stuff the tree lightly through the gap.
- Then cut a 3/8-inch dowel between 5 and 8 inches long. Dab hot glue on one end, push it about 3 inches into the stuffing, and hand-stitch the gap snug around it.
- Glue the other end of the dowel into the hole of a large wooden spool.
- Next, set the spool in the center of a 10-inch burlap circle and pour about a cup of dry rice around it.
- Finally, gather the burlap up around the dowel, wrap it tightly with jute twine several times, and tie a bow.
The spool and rice keep each tree standing straight all season.
7. Christmas coasters
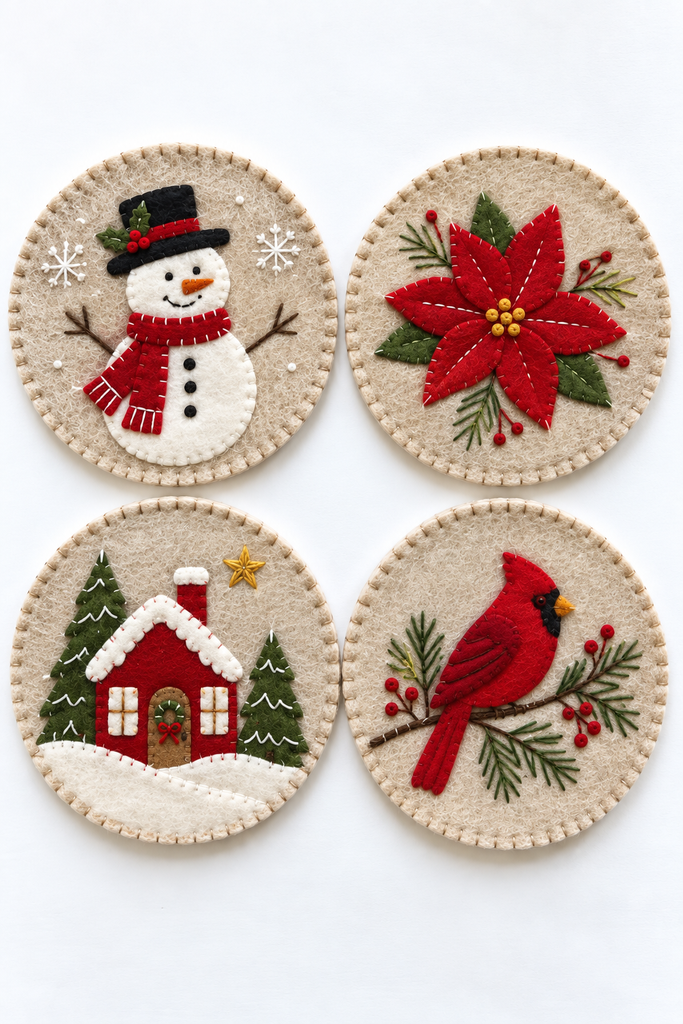
Oatmeal wool felt coasters topped with a snowman, a poinsettia, a snowy little house, and a cardinal on a pine branch make a sweet set for cocoa season. Wool soaks up drips nicely, and a set of four makes a lovely gift.
- First, trace a 4 1/2-inch circle, like a jar lid, onto oatmeal wool felt and cut two circles for each coaster.
- Then cut your designs from colored felt. For the snowman, cut two white circles for the body and head, a black top hat, a thin red hat band, a red scarf with fringed ends, and a tiny orange carrot nose. For the poinsettia, cut seven or eight pointed red petals and three green leaves. For the house, cut a red house with a peaked roof, a wavy white snow roof, a red chimney with a white snow cap, two cream windows, a tan door, two green pine trees, a white hill of snow, and a tiny yellow star. For the cardinal, cut a red bird, a darker red wing, a small black face mask, and a tiny orange beak.
- Next, layer the pieces on one circle, hold them with a dab of glue stick, and sew each one down with tiny blanket stitches or whipstitches.
- Add the small details with embroidery floss. Give the snowman black French knot eyes, mouth, and buttons, brown straight-stitch arms, and a few white snowflakes. Stitch white lines down the poinsettia petals, yellow French knots in the center, and green pine sprigs with red French knot berries. Add white snow lines to the house’s trees and a tiny green wreath on the door. For the cardinal, backstitch a brown branch, add green pine needles in straight stitches, stitch lines on the wing, and add red French knot berries.
- Finally, stack the decorated circle on a plain one and blanket stitch all the way around the edge in cream thread.
Tie a set together with a ribbon, and it’s ready to give.
8. Fabric gift bags
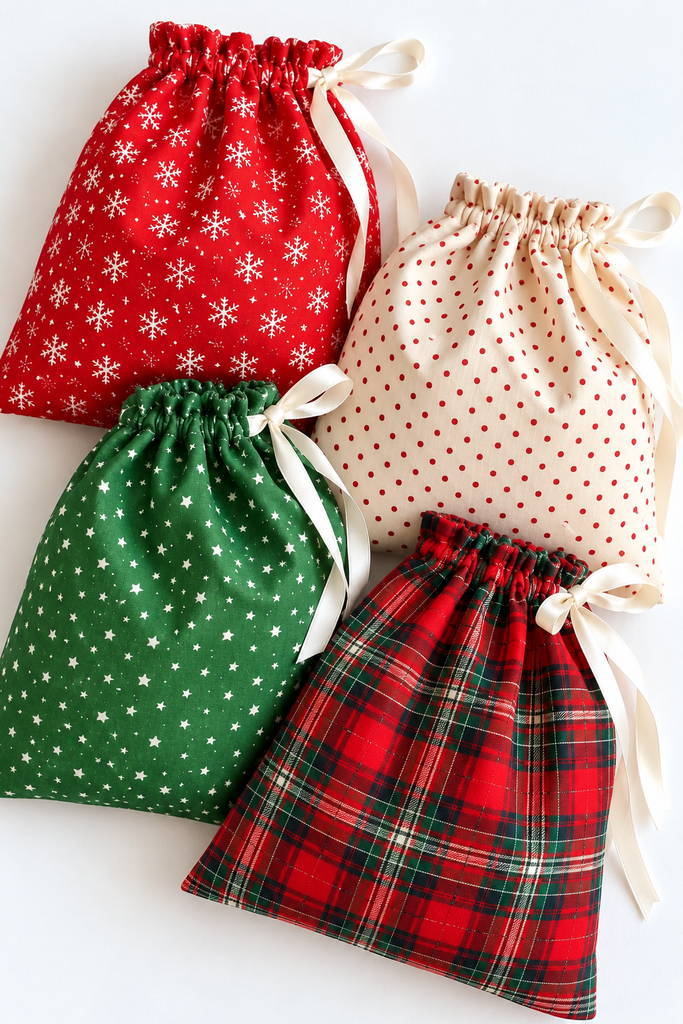
Drawstring bags in holiday cotton prints, gathered with ivory satin ribbon and a wooden bead, can be used again every Christmas. That means no wrapping paper to throw away, and each gift looks a little more special.
- First, cut a cotton print 9 inches wide by 22 inches long and fold it in half so the short ends meet, right sides together.
- Then sew up each side from the fold, stopping 2 1/2 inches below the top.
- Next, press the seams open all the way to the top, including the unsewn part, and stitch those folded edges flat.
- Fold the top edge down 1/4 inch and press, then fold it down again 1 inch and press.
- Then stitch close to the lower fold on the front, and again on the back, to make two channels.
- Attach a safety pin to a 30-inch piece of 3/8-inch ivory satin ribbon. Thread it through the front channel and back through the back channel so both ends come out on the same side.
- Finally, slide a wooden bead onto the ribbon if you like, knot the ends, and pull to gather.
These are a wonderful use for leftover prints, and our scrap fabric projects for beginners has more ideas like them.
9. Fabric napkins
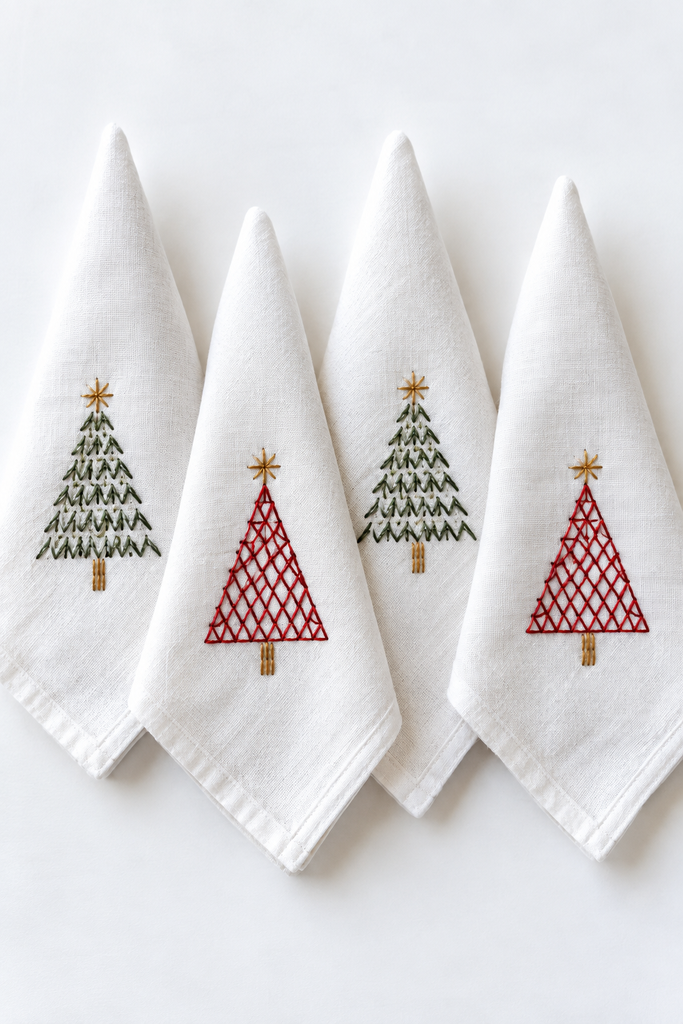
White linen napkins with a small hand-embroidered tree in one corner turn an ordinary dinner into a Christmas table. The tree is placed so it stands upright when the napkin is folded into a point, which looks so pretty with almost no effort.
- First, cut a 21-inch square of linen for each napkin.
- Then fold each edge under 1/2 inch and press, fold it under 1/2 inch again and press, and stitch close to the inner fold.
- Next, draw a tree about 2 1/2 inches tall, 3 inches in from one corner, with the top of the tree pointing toward the corner.
- Put the corner in an embroidery hoop.
- For a red lattice tree, backstitch the triangle outline in red and fill it with diagonal lines crossing both ways. For a green tree, fill the triangle with rows of small V-shaped stitches.
- Finally, add a tiny gold star at the top with five straight stitches and a short gold trunk at the bottom.
A stack of six tied with ribbon makes a lovely gift for a hostess or a grandmother.
10. Fabric wreath
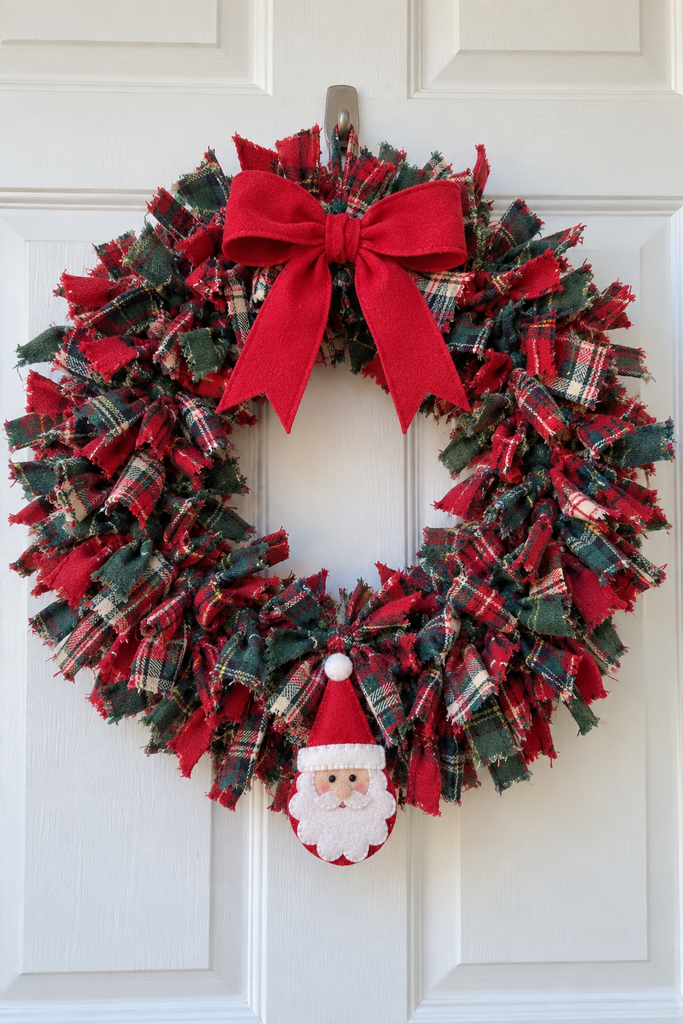
Plaid flannel strips tied around a wire frame make a full, fluffy rag wreath, finished with a big red bow at the top and a little felt Santa at the bottom. You won’t need a sewing machine at all, just plenty of knots and a good pair of scissors.
- First, get a 14-inch wire wreath frame with four rings and about 2 yards of red and green tartan flannel.
- Then cut the flannel into strips 1 1/2 inches wide and 8 inches long. You’ll need about 250.
- Next, tie each strip in a double knot around the two inner rings, with the knot on top. Push each one snug against the last.
- Then tie strips around the two outer rings the same way until the whole frame is covered and fluffy.
- Tie a yard of 2 1/2-inch red wired ribbon into a bow and wire it to the top center.
- For Santa, cut a 1 1/2-inch peach felt circle for his face, a scalloped white half-moon for his beard, a red triangle for his hat, a thin white strip for the brim, and a small white circle for the pom-pom.
- Glue or stitch the pieces onto red felt, add two black French knots for eyes, and cut the red felt 1/8 inch outside the design.
- Finally, tie Santa to the bottom center of the wreath, across from the bow, with one of the plaid strips.
It’s the kind of wreath that makes the front door feel like home.
11. Fabric advent calendar
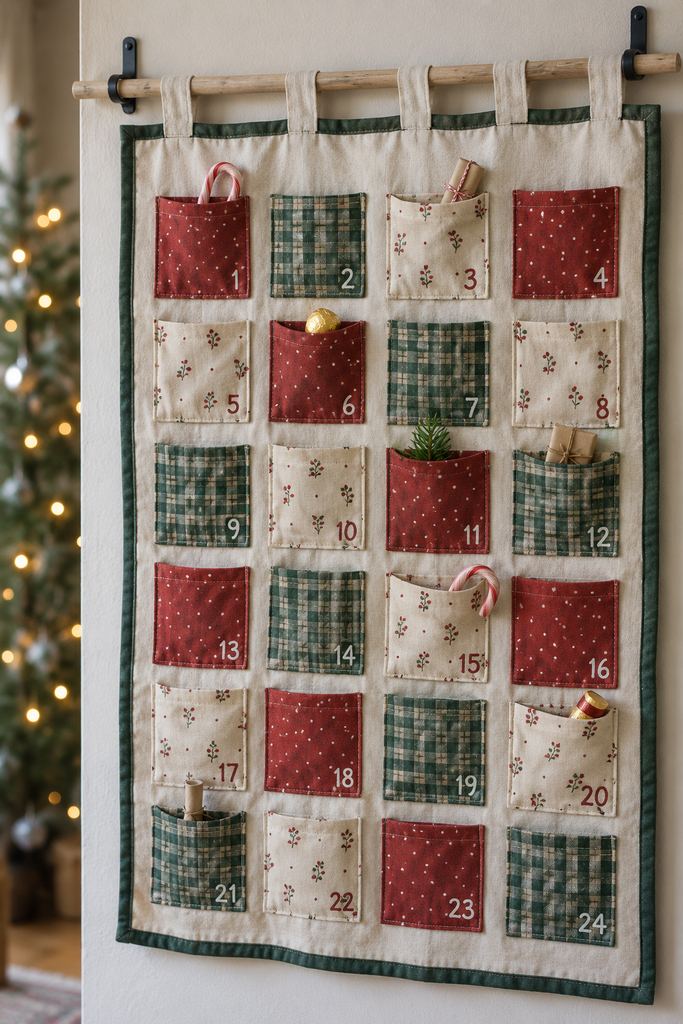
Twenty-four numbered pockets in red, green, and cream prints, sewn onto a cream canvas panel with dark green binding, make an advent calendar you’ll bring out every December. Each little pocket holds a treat, a note, or a verse to read together.
- First, cut a cream canvas panel 20 by 30 inches and twenty-four pockets 4 1/2 by 5 inches from three prints: a brick red with tiny cream dots, a forest green and cream check, and a cream with tiny red sprigs.
- Then fold the top edge of each pocket under 1/4 inch twice and stitch. Press the other three edges under 1/4 inch.
- Next, write a small number, about 1 inch tall, from 1 to 24 in the lower right corner of each pocket with a fabric paint pen, cream on the red and green pockets and red on the cream ones.
- Lay the pockets on the panel, 4 across and 6 down, mixing the three prints. Leave about 3/4 inch between them and about 1 1/2 inches at the top.
- Then pin and topstitch each pocket along its sides and bottom, leaving the top open.
- For the tabs, cut five cream strips 3 by 7 inches. Fold each in half lengthwise, sew the long edge, turn it right side out, and fold it into a loop.
- Pin the loops evenly across the back of the top edge, pointing up.
- Finally, bind all four edges with 2 1/2-inch dark green strips, the same way as the table runner, catching the tab ends in the binding. Slide a 24-inch dowel through the loops.
Fill the pockets on the last day of November, and the countdown is ready.
12. Santa sack
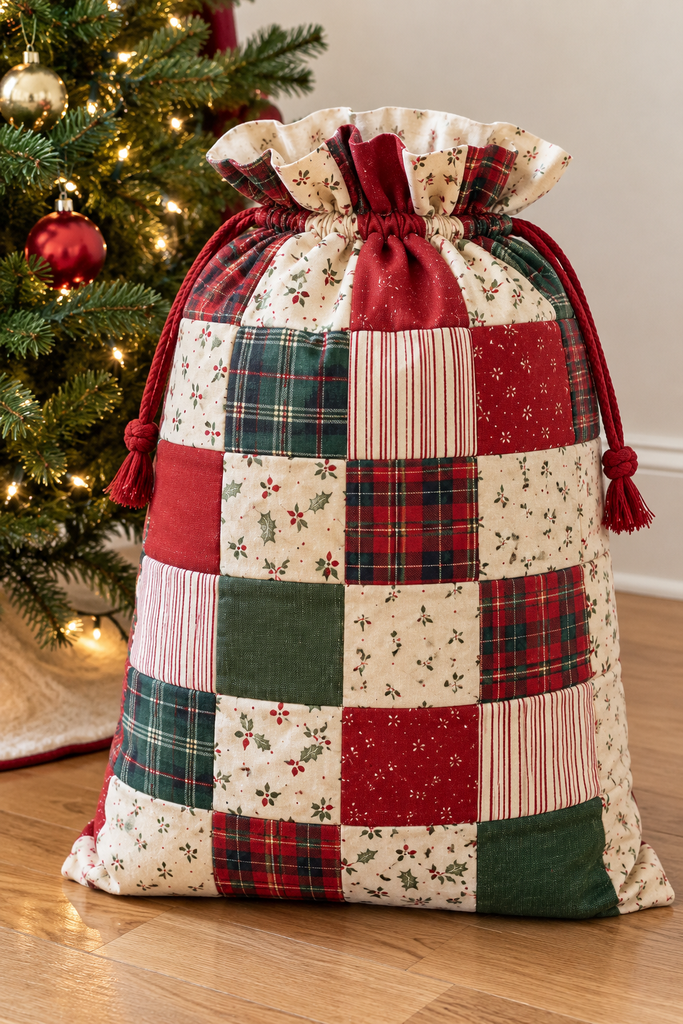
Big enough for a whole pile of gifts, a lined drawstring sack about 18 by 27 inches is pieced from squares of red plaid, green plaid, red stripes, cream prints, and solid red. Red cord ties and a ruffled top finish it off, and it’s sturdy enough to use for years.
- First, cut forty-eight 5-inch squares. Sew them with 1/4-inch seams into rows of four, then sew six rows together to make a panel. Make two panels.
- Then cut two cream lining pieces the same size as the panels.
- Next, sew the two panels together along the bottom. Sew each side, but leave a 1-inch gap on each side starting 3 inches below the top. Backstitch at both ends of each gap.
- Sew the two lining pieces together along the sides and bottom, leaving a 6-inch gap in the bottom.
- Then turn the patchwork sack right side out, leave the lining wrong side out, and slip the patchwork sack inside the lining. Match the side seams and sew around the top.
- Pull the patchwork sack out through the lining gap, sew the gap closed, and push the lining down inside. Press the top edge.
- Next, sew two lines all the way around the sack, one 3 inches below the top and one 4 inches below, so the side gaps sit between them.
- Finally, cut two 60-inch pieces of 1/4-inch red cord. Thread one in and out of the left gap all the way around, and the other in and out of the right gap. Knot each pair about 3 inches from the tips and unravel the tips into tassels.
If you enjoy piecing squares, our patchwork tote bag tutorial uses the same simple method.
13. Santa hat
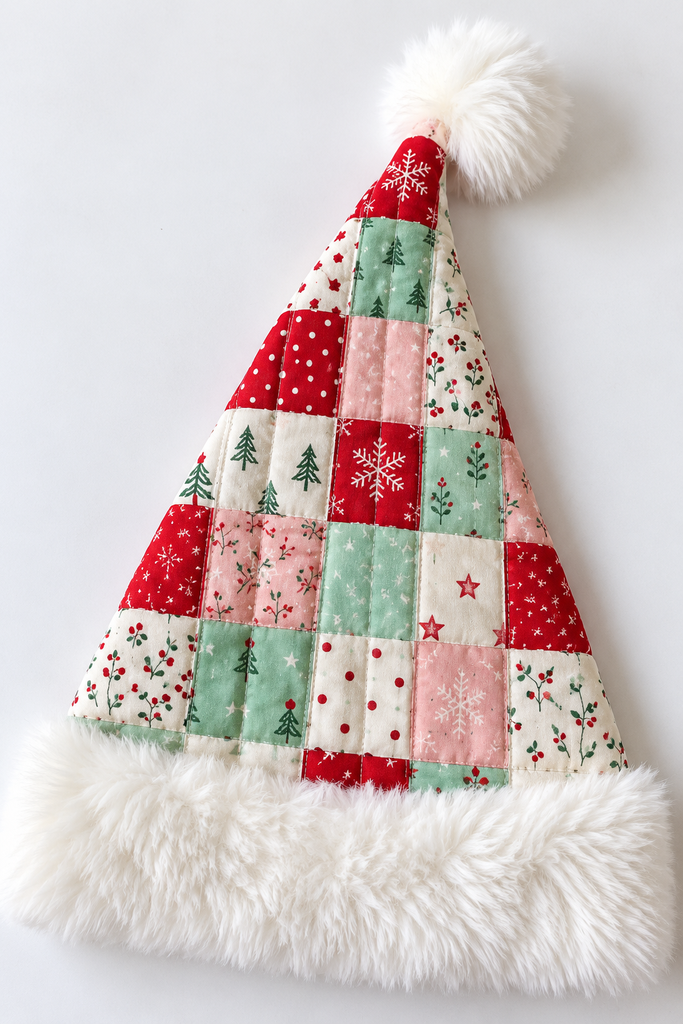
Quilted patchwork in red, mint, pink, and cream holiday prints gives an ordinary Santa hat a handmade twist, with a thick white faux fur band and a fur pom-pom on the tip. The quilting gives it enough body to hold its cone shape.
- First, cut sixty 3 1/2-inch squares and sew them with 1/4-inch seams into 6 rows of 10.
- Then lay the patchwork on thin cotton batting and quilt straight up-and-down lines about 1 inch apart.
- Next, make a paper triangle 12 1/2 inches wide at the bottom and 17 inches tall. Cut two from the quilted patchwork and two from cream cotton for lining.
- Sew the patchwork triangles together along the two long sides and turn it right side out. Sew the lining triangles the same way and leave them wrong side out.
- Then slip the lining inside the hat and baste the bottom edges together.
- Cut a 7-by-24-inch strip of faux fur, cutting from the back with a craft knife so you don’t chop the fur. Sew the short ends into a loop and fold it in half lengthwise, fur on the outside.
- Next, slide the band over the outside of the hat with the fold pointing up toward the tip and the raw edges even with the bottom. Sew around, then flip the band down.
- Finally, sew a running stitch around a 5-inch circle of fur, stuff it with a little fiberfill, pull it closed, and stitch it to the tip.
It may well become the hat everyone wants for the family photo.
14. Hand warmers
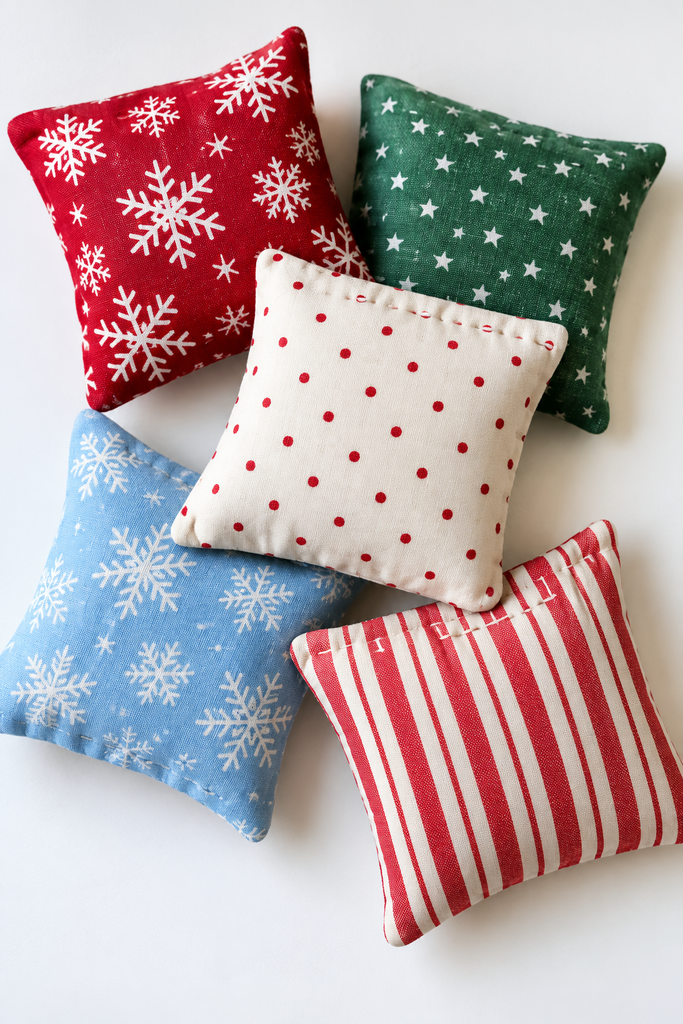
Small rice-filled cotton pouches that warm up in the microwave fit right in a coat pocket on cold mornings. Each one takes about half an hour, and they make a thoughtful little gift for teachers, neighbors, and anyone who waits at the bus stop.
- First, cut two 5-inch squares of 100% cotton. Use cotton fabric and cotton thread only, since these go in the microwave.
- Then sew around the edges, leaving a 2-inch gap on one side.
- Next, clip the corners, turn it right side out, and press.
- Use a funnel to pour in 1/3 to 1/2 cup of dry uncooked rice. Don’t pack it full, so it stays soft and squishy.
- Finally, pin the gap closed and sew it shut with small hand stitches.
Warm it for 20 to 30 seconds and test it on your wrist first, and an adult should always warm it for little ones. Our guide on how to read fabric labels will help you make sure your fabric is really cotton.
15. Christmas apron
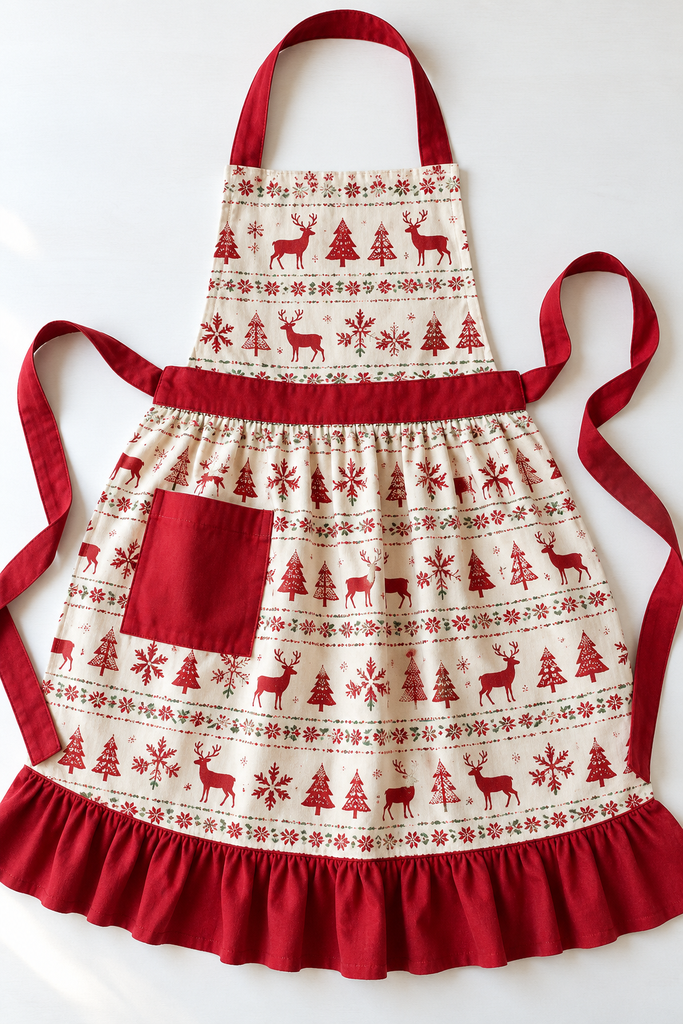
A full bib apron in a cream print with red trees and deer, trimmed with a solid red waistband, neck strap, pocket, and ruffle, is just right for Christmas baking. The red trim is what pulls the whole look together.
- First, cut a 24-by-20-inch skirt and a 10-by-10-inch bib from the print. From red, cut a 3-by-24-inch waistband, two 4-by-30-inch ties, a 3-by-26-inch neck strap, a 7-by-7 1/2-inch pocket, and a 4 1/2-by-44-inch ruffle strip.
- Then fold the sides and top of the bib under 1/4 inch twice and stitch.
- Next, make the neck strap and ties by folding the long edges in to meet in the middle, folding again, and stitching along the open edge. Stitch the strap ends to the back of the bib’s top corners.
- Hem the two sides of the skirt the same way as the bib.
- Then fold the ruffle strip in half lengthwise, wrong sides together, and sew two rows of long loose stitches along the raw edges. Pull the threads gently to gather it until it’s as wide as the skirt.
- Sew the ruffle to the bottom edge of the skirt and finish the seam with a zigzag stitch.
- Next, hem the top of the pocket, press its other three edges under 1/2 inch, and topstitch it to the skirt on the wearer’s right side, about 4 inches below the top.
- Lay the bib on the skirt, right sides together and centered, with the bottom of the bib even with the top of the skirt. Sew, then fold the bib up.
- Finally, press the long edges of the waistband under 1/2 inch and lay it over the seam on the front. Tuck the end of one tie under each end of the band, fold the band’s short ends under, and topstitch all the way around it.
Tie it on, and you’re ready for a kitchen full of cookie dough.
16. Christmas potholders
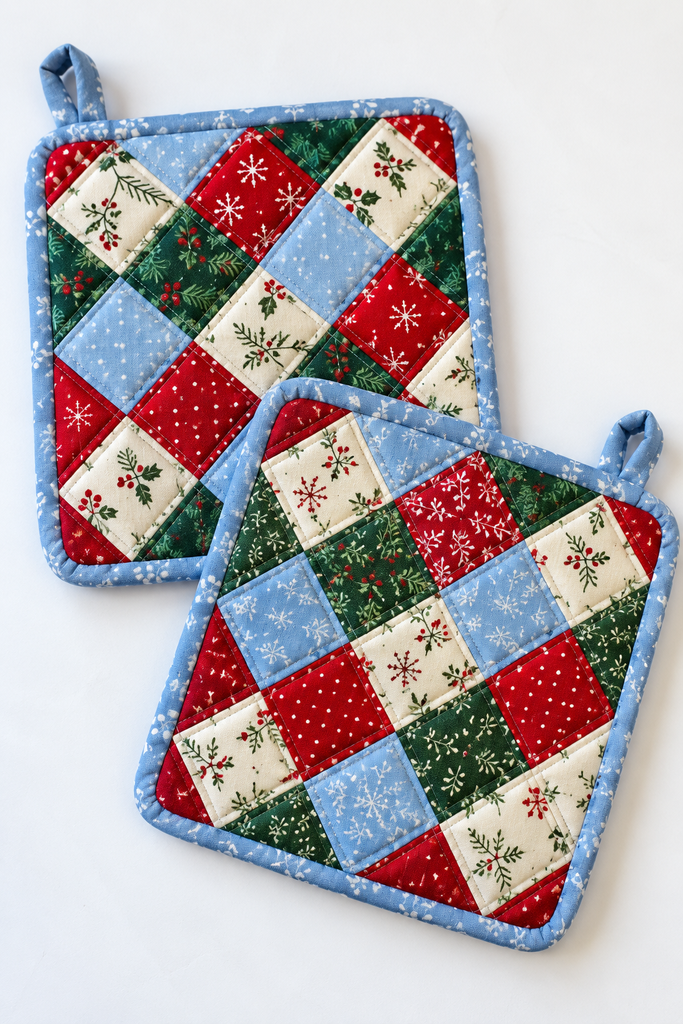
Squares turned on their side into diamonds give a patchwork potholder in red, green, cream, and light blue its cheerful look. The trick is simple: you sew a regular grid of squares, then cut the potholder out on the diagonal.
- First, cut thirty-six 2 1/2-inch squares and sew them with 1/4-inch seams into 6 rows of 6, mixing the colors like a checkerboard.
- Then cut an 8 1/2-inch square from paper and lay it on the patchwork turned like a diamond, with the corners pointing up, down, left, and right.
- Trace around the paper and cut along the lines. The squares now run on the diagonal.
- Next, stack a 9-inch square of backing fabric right side down, a 9-inch square of cotton batting, a 9-inch square of heat-resistant batting like Insul-Bright, and the patchwork on top, right side up.
- Pin, quilt along the seam lines, and trim everything even with the patchwork.
- Finally, bind the edges with a 2 1/4-inch light blue strip, the same way as the table runner.
Use only cotton fabric and batting here, since polyester can melt when it touches a hot pan.
17. Christmas hanging
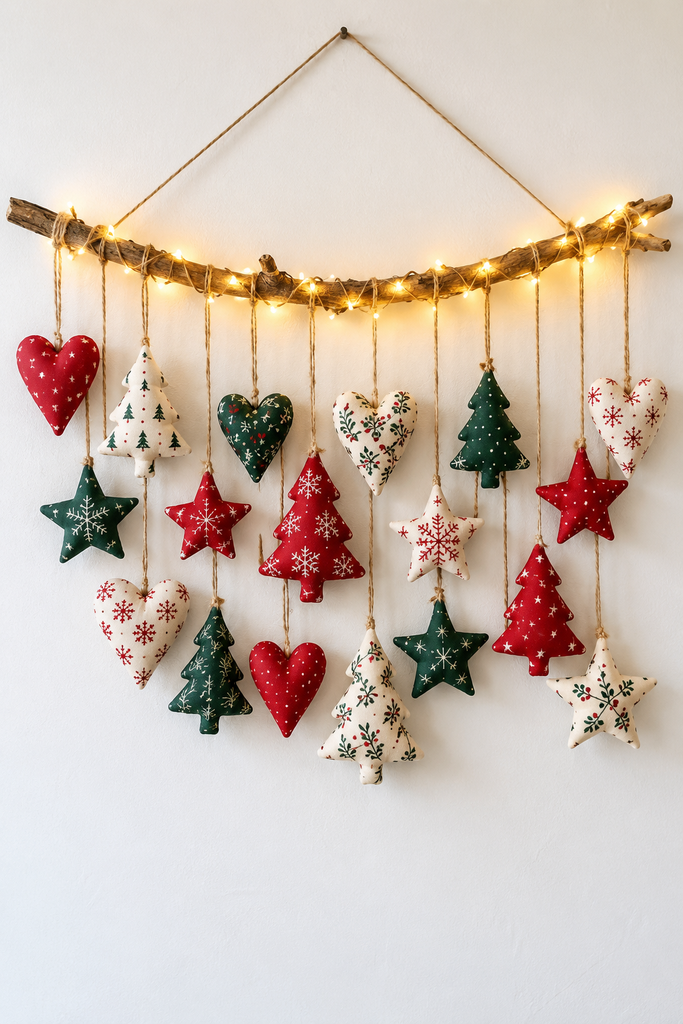
Stuffed fabric hearts, stars, and trees in red, dark green, and white holiday prints hang on jute twine from a branch for a wall hanging that feels warm and homespun. Add a strand of fairy lights, and it glows in the evening.
- First, draw hearts, stars, and trees on paper between 3 and 6 inches tall. Plan on about seventeen shapes.
- Then cut two of each shape and sew them together with a 1/4-inch seam, leaving a 1 1/2-inch gap on a straight edge.
- Next, clip the curves and points, turn them right side out, stuff them firmly, and sew the gaps closed by hand.
- Cut pieces of jute twine between 10 and 24 inches long. Knot one end of each and stitch it firmly to the top of a shape.
- Then tie the shapes along a branch about 30 inches long, 1 to 2 inches apart, alternating short, medium, and long pieces so they hang in three staggered rows.
- Finally, hang the branch from two small nails with twine tied at each end, and wrap battery fairy lights along the branch if you like.
It’s a lovely way to use up the small scraps left from the other projects.
18. Christmas throw blanket
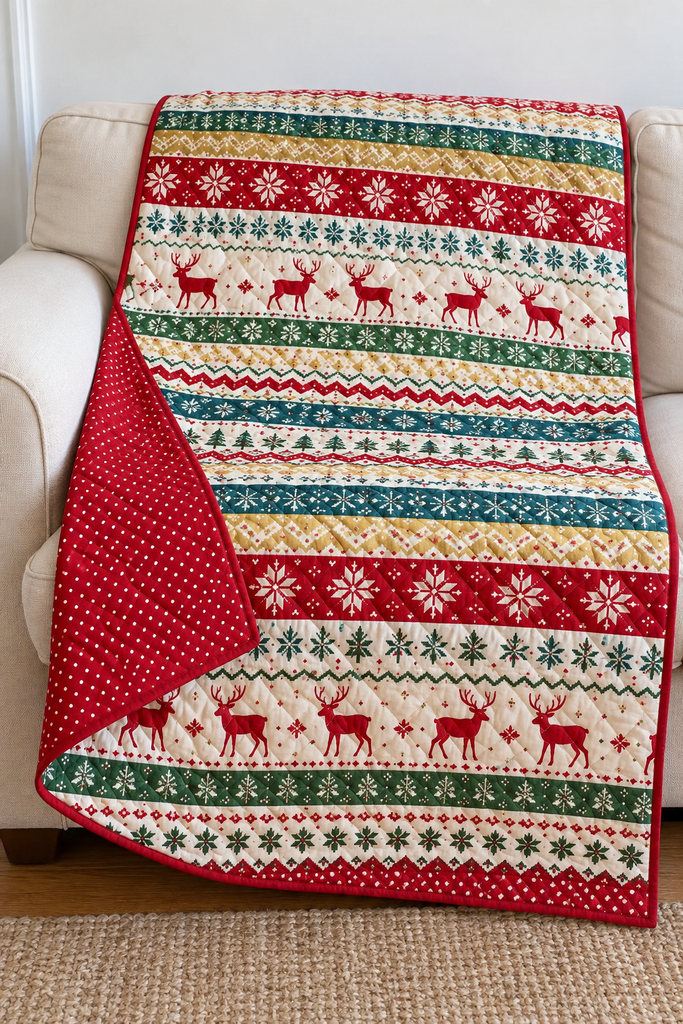
One printed piece of fabric, with no piecing at all, makes the front of a cozy 40-by-60-inch throw in Nordic-style stripes of red, green, teal, and gold, backed with red polka dots. It’s the biggest project here, but it’s straight lines from start to finish.
- First, get 1 3/4 yards of the printed fabric, 1 3/4 yards of red dot fabric for the back, and cotton batting a few inches bigger than 40 by 60 inches.
- Then tape the backing to the floor wrong side up, smooth the batting over it, and lay the print on top right side up.
- Pin through all three layers every 4 to 5 inches with safety pins.
- Next, quilt straight lines across the throw along the stripes in the print, about every 3 to 4 inches, using a walking foot.
- For the star-like quilting in the photo, add two more sets of diagonal lines crossing each other at a 60-degree angle, using the 60-degree line on your quilting ruler.
- Finally, trim everything to 40 by 60 inches and bind it with 2 1/2-inch red strips, the same way as the runner.
It will be on the couch every winter for years to come.
why christmas sewing is worth the time
Anything you sew for Christmas comes out of the box again next year and the year after. The new stocking becomes the one everyone reaches for.
And the very first thing done for baby Jesus was wrapping Him in cloth.
“And she brought forth her firstborn son, and wrapped him in swaddling clothes, and laid him in a manger.” (Luke 2:7)
Mary used what she had to care for the Son of God. When we sew something warm for the people in our home, we get to show that same kind of love. These fit right alongside our cozy fall sewing projects.
the fabrics and supplies I reach for
Good quilting cotton covers most of these, with red, green, cream, and plaid prints plus a few solids. Wool felt is lovely for appliqué because it doesn’t fray.
Beyond that, cotton batting, fiberfill, embroidery floss, a washable marker, a quilting ruler, jute twine, satin ribbon, and red cord cover nearly everything. Most of it is probably already in your sewing room.
tips for sewing before the holidays
Start earlier than you think. Choose your projects in November, cut everything out in one sitting, and keep each project’s pieces in its own zip bag. Then twenty quiet minutes is enough to pick up where you left off.
If your machine keeps fighting you, our list of the best sewing machines for beginners is a good place to start. And don’t let a crooked seam stop you. It’s part of the charm.
pick one christmas project to start this week
So pick the one that fits your fabric, your time, and the people you’re sewing for. You don’t need to make all eighteen. One stocking or one stack of napkins is plenty.
A finished project is nice on its own, but the love stitched into it is what people remember.
And one more thing before you go. If you sew any of these, I’d love to see them. Share a photo in the comments or send one our way, and yours may be featured here to encourage others sewing at home this Christmas. So glad you’re here.
Warmly,
Betty
Get the FREE 3D Turkey Craft
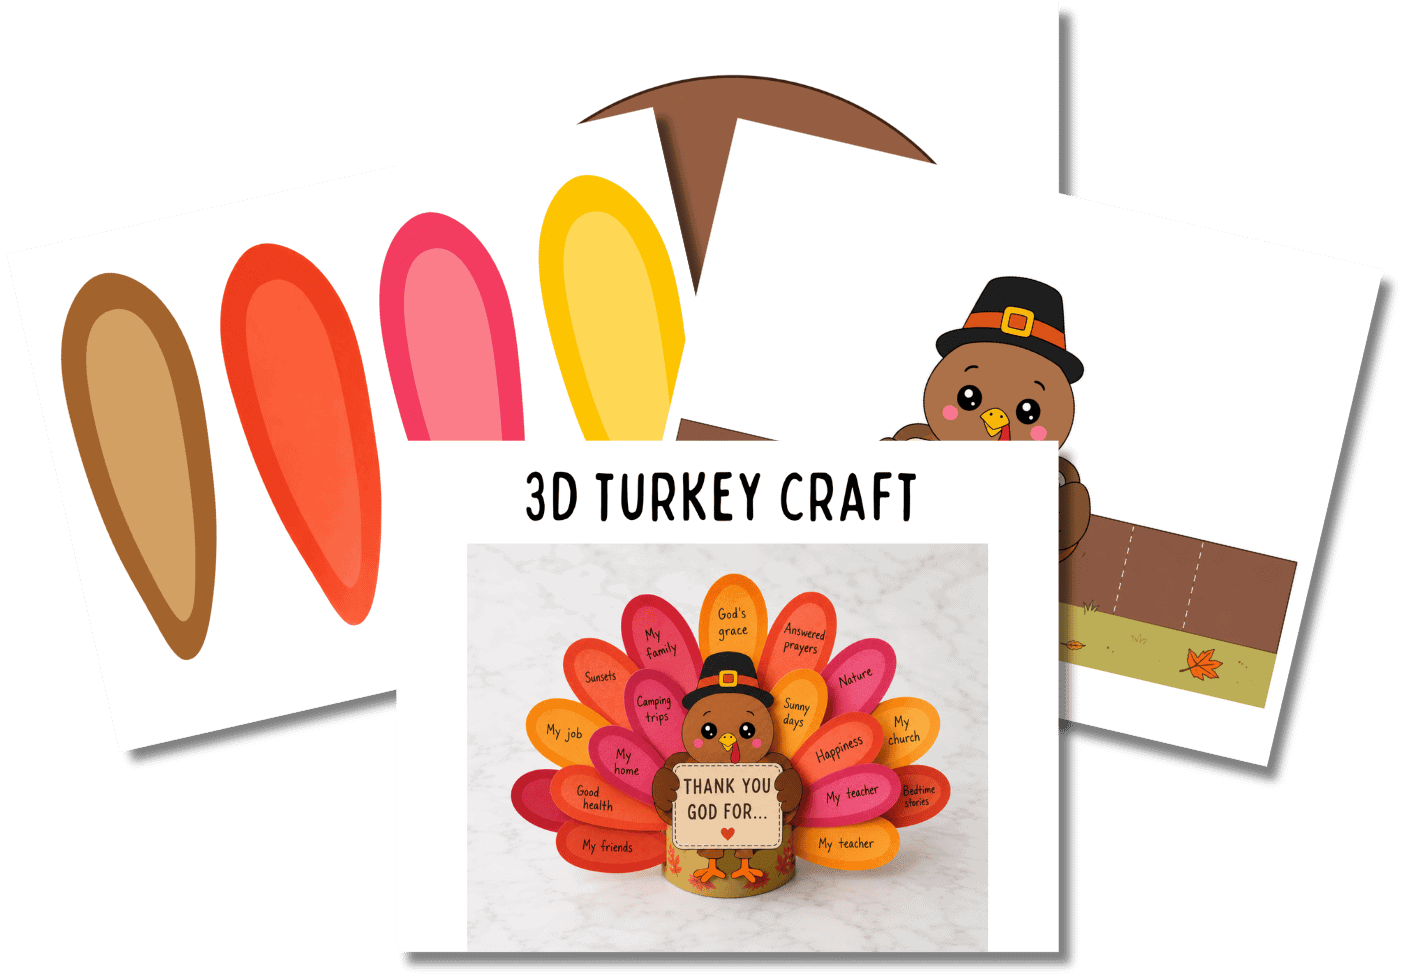
Don’t let your kids just hear that they’re blessed—help them name their blessings one by one.
With this free 3D turkey craft, kids color the turkey and his feathers, then write one thing they’re thankful to God for on each feather. The body wraps around into a base so the turkey stands up on his own, holding a sign that reads “Thank You God for…”
frequently asked questions
what is the easiest christmas sewing project for a beginner?
The gift bags and hand warmers are easiest, with short straight seams and less than an hour of work. The felt stocking is a good next step.
can I make these without a sewing machine?
Many of them, yes. The ornaments, coasters, napkin embroidery, felt stocking, wreath, and hanging can all be done by hand. The quilted projects are much easier on a machine.
what kind of fabric works best for christmas sewing?
Quilting cotton works for almost everything. Use wool felt for appliqué, linen for napkins and ornaments, and 100% cotton for anything near heat.
how long do these projects take?
Gift bags, hand warmers, and ornaments take about an hour. Pillows, napkins, and coasters take an afternoon. The tree skirt, advent calendar, and throw are weekend projects.
how do I wash and store handmade christmas decorations?
Wash cotton pieces gently in cool water and lay them flat to dry. Spot-clean felt and stuffed pieces. Then store everything in a cloth bag or bin until next year.