Somewhere around the middle of November, the question starts coming up at the table. What are you thankful for? And little ones will tell you, often in the sweetest, most unexpected order. The dog. Grandma. Their blanket. Pancakes.
Those answers are worth holding onto. So this craft gives them a place to go, a little pumpkin they can fill with all the things they’re grateful for.
Whether you’re a parent at the kitchen table, a Sunday school teacher with a room full of littles, a grandparent, or a homeschool mama planning a Thanksgiving lesson, this one is simple to set up and gentle to talk through. And the free printable does most of the work for you.
a little about this craft
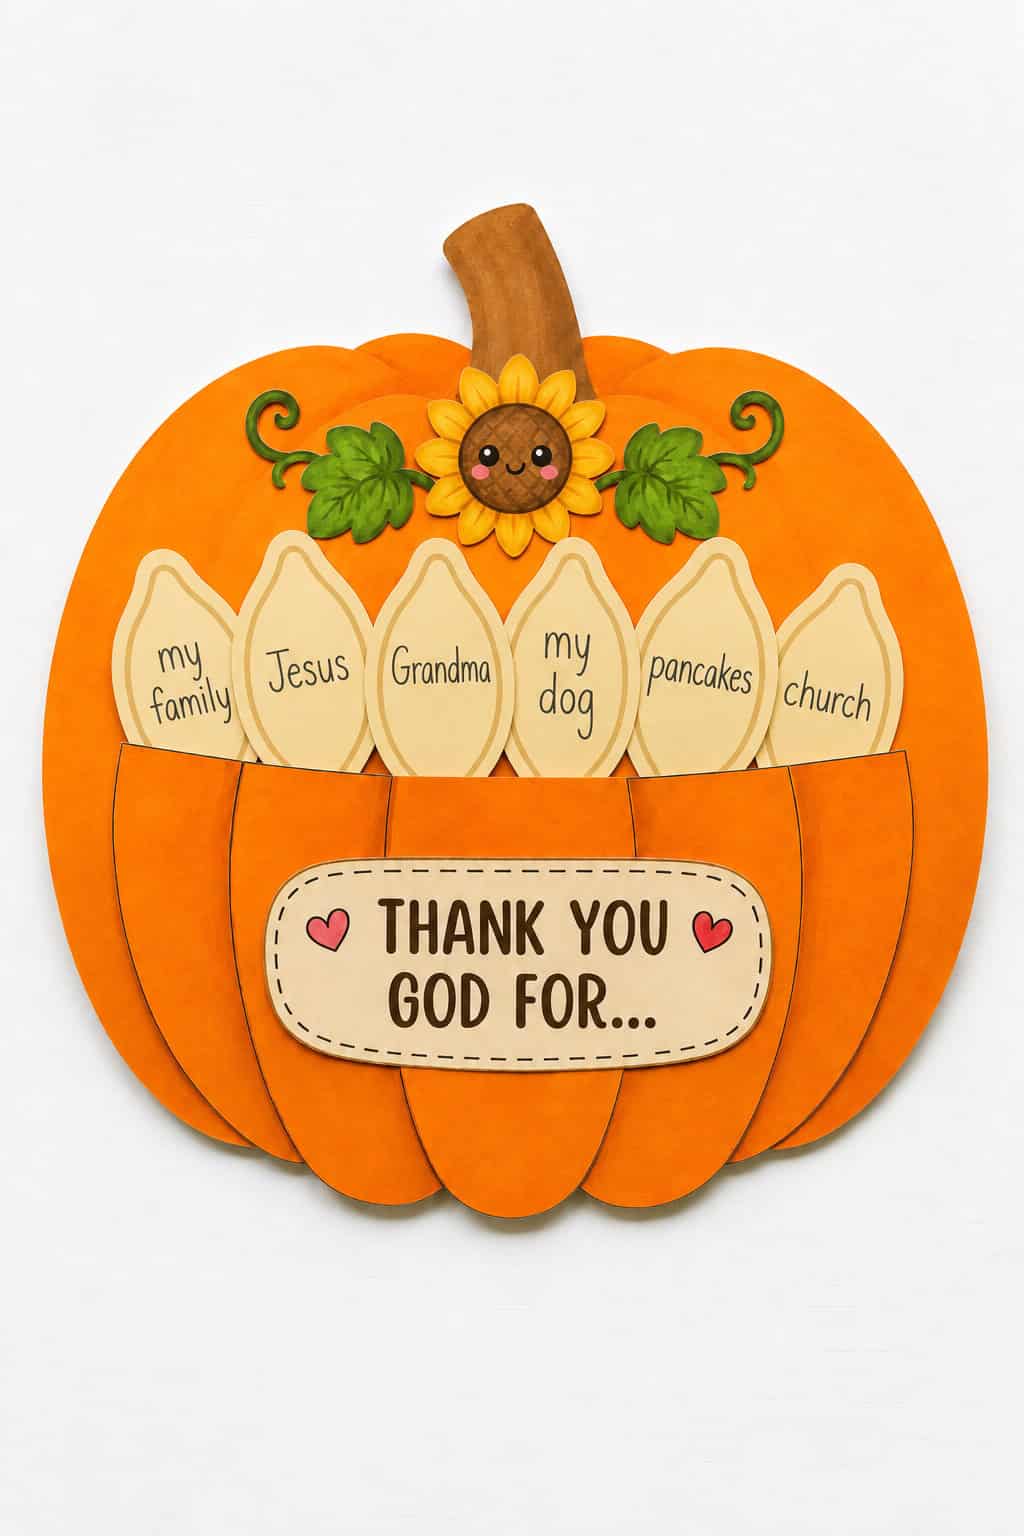
This is a thankful pumpkin. The child colors and cuts out a pumpkin, then writes one thing they’re grateful to God for on each little piece and tucks it inside, so the pumpkin slowly fills up with thanks.
Across the front sits a small sign that reads thank you God for, with a cheerful sunflower to top it off. The whole point is right there in those words. Every good thing the little ones can name, the dog and grandma and pancakes and all, came from God, and this is a simple way to help them say so.
That idea echoes something Paul wrote a long time ago.
“Give thanks in all circumstances.” — 1 Thessalonians 5:18
There are enough little pieces for a good handful of thank-yous, plenty for one child to fill a pumpkin or for a whole class to add to together.
what you’ll need
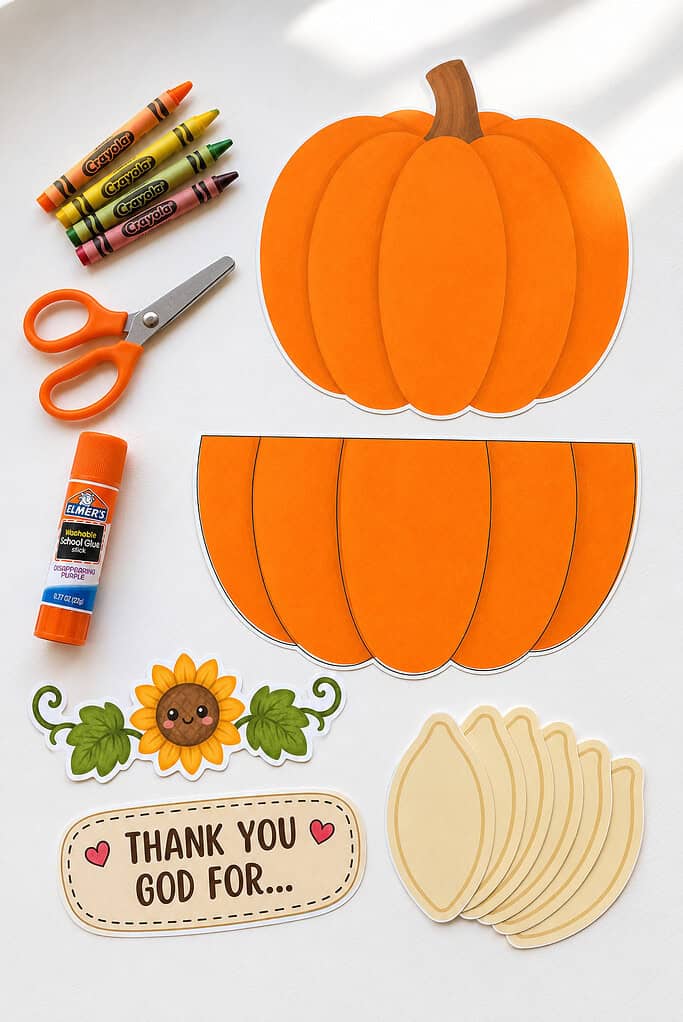
Here is everything you’ll want to gather before you start.
- the free thankful pumpkin printable (linked below)
- cardstock or regular printer paper
- crayons, markers, or colored pencils
- child-safe scissors
- a glue stick
- a pen or pencil for writing the thank-yous
The printable comes in two versions. First, there’s a full-color set, ready to cut out as soon as it prints, which is lovely when you’re short on time. Then there’s a black-and-white set the little ones color themselves, and that coloring is half the fun. If you’d like a few more easy pumpkin crafts for kids to go alongside it, we have a whole basket of them.
how to make the thankful pumpkin
Here’s how it all comes together. If your printable came without printed directions, these are the sensible steps, and you can adjust them to match how your pieces are cut.
1. print and color the pieces
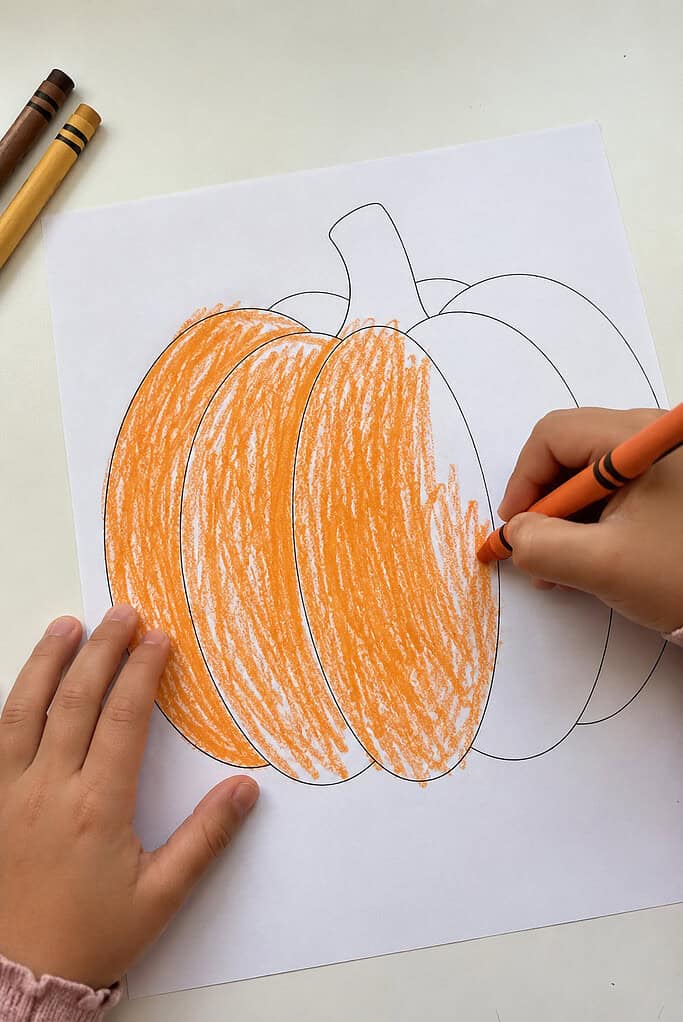
First, print the version you want. If you chose the black-and-white set, this is the time to sit the little ones down and let them color the pumpkin, the sign, and the sunflower however they like.
Leave the small pumpkin pieces plain, since those are for writing on.
2. cut everything out
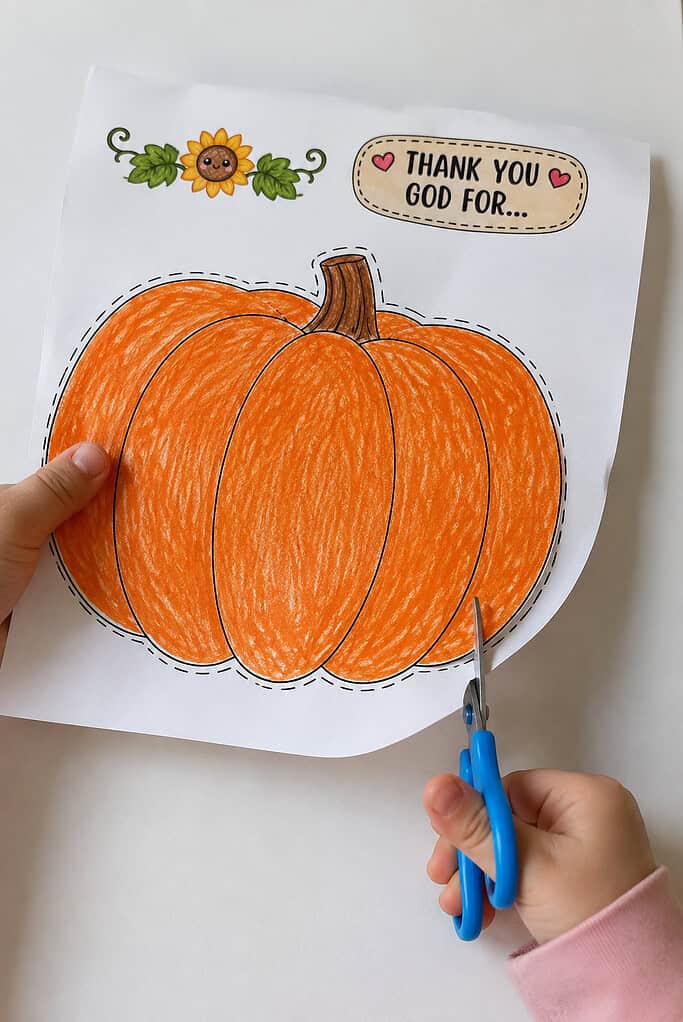
Then cut out the pumpkin base, the thank you God for sign, the sunflower, and the little pumpkin pieces.
Younger children can manage the big shapes while you take the fiddly bits. Crooked edges are part of the charm, so there’s no need to fuss over a perfect line.
3. write down the thank-yous
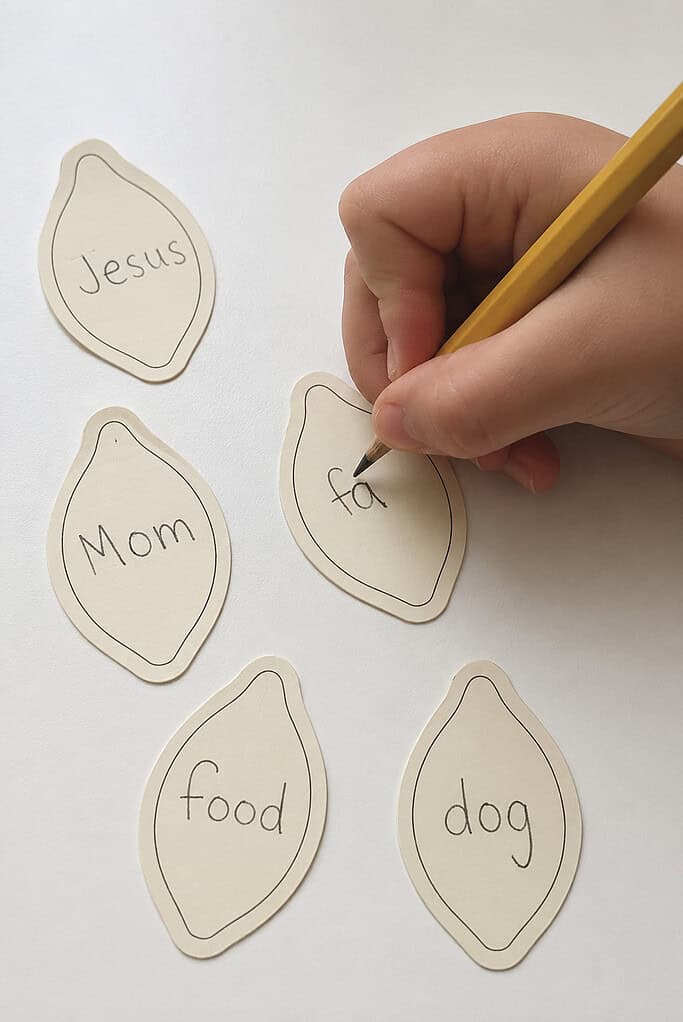
Next, ask the little ones what they’re thankful to God for, and write one thing on each piece. Let them say whatever comes, big or small.
This is the heart of it, the moment a craft turns into a quiet way of naming God’s gifts, and it pairs beautifully with any of our simple bible verse crafts if you want to keep going.
4. make the pumpkin pocket
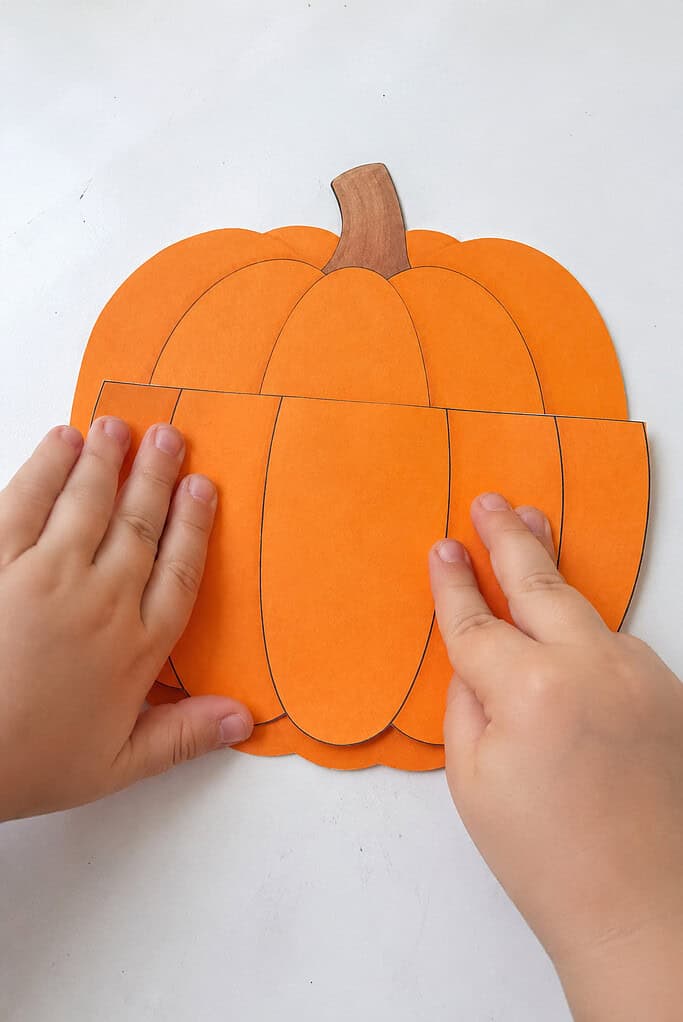
From there, glue the pumpkin base onto a sheet of paper or cardstock, running the glue along the sides and bottom but leaving the top open. That open top turns the pumpkin into a little pocket.
If your printable is meant to be assembled another way, follow how the pieces are shaped. It’s worth a quick check against the real craft.
5. add the sign and the sunflower
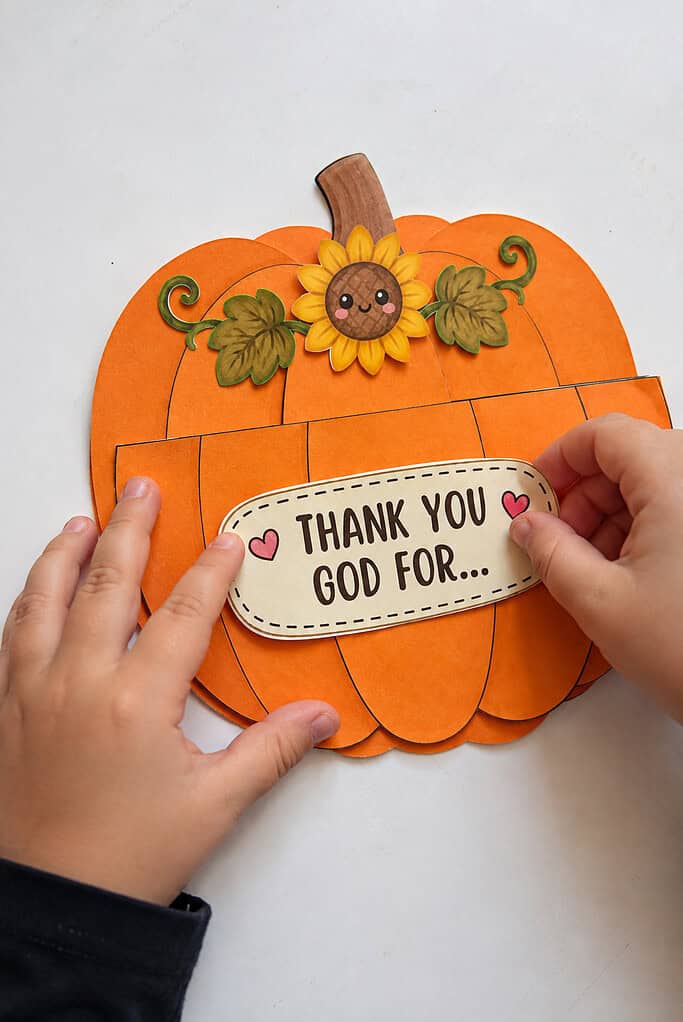
Once the base is down, glue the thank you God for sign to the front and set the sunflower at the top. These are the sweet finishing touches that make it feel done.
6. tuck in the pieces
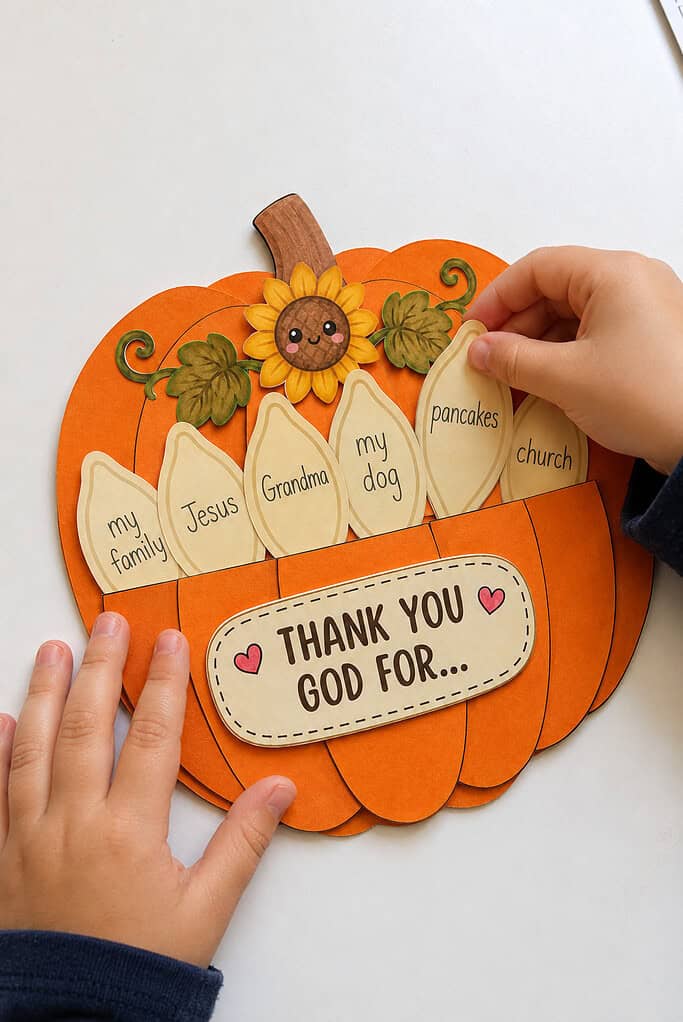
Finally, slide each written piece into the pocket so they fan up out of the top. As they go in, the pumpkin fills out and comes together, one thank-you at a time.
It’s a nice thing to watch happen next to a few other fun harvest crafts for kids on a cool afternoon.
simple ways to use this craft
This little pumpkin fits into more than one corner of your November. Here are a few of the easiest ways to use it.
- at the kitchen table, as a quiet Thanksgiving activity the whole family can add to
- in Sunday school or a co-op group, where each child fills their own or everyone shares one big pumpkin
- at home or in a homeschool lesson, as a gentle way to talk about where good gifts come from
- as a keepsake card for a grandparent, with the thank-yous written just for them
If you’re pulling together a whole morning of it, this sits nicely with our other thanksgiving sunday school crafts and a few more thanksgiving crafts for kids to round out the table.
a gentle thought before you go
A paper pumpkin won’t teach a child to be grateful all on its own. But it gives them a reason to stop and look around at all they’ve been given, and to say thank you to the One who gave it.
That’s a habit worth starting young. And some of those little answers, written in a wobbly hand and tucked into a paper pumpkin, are the kind of thing you’ll be glad you kept.
If you make one with your little ones this year, I’d love to hear what they were thankful for. Leave a comment below and tell me. Those lists are always my favorite part.
With love,
Betty
Get the FREE Thanksgiving Pumpkin Craft
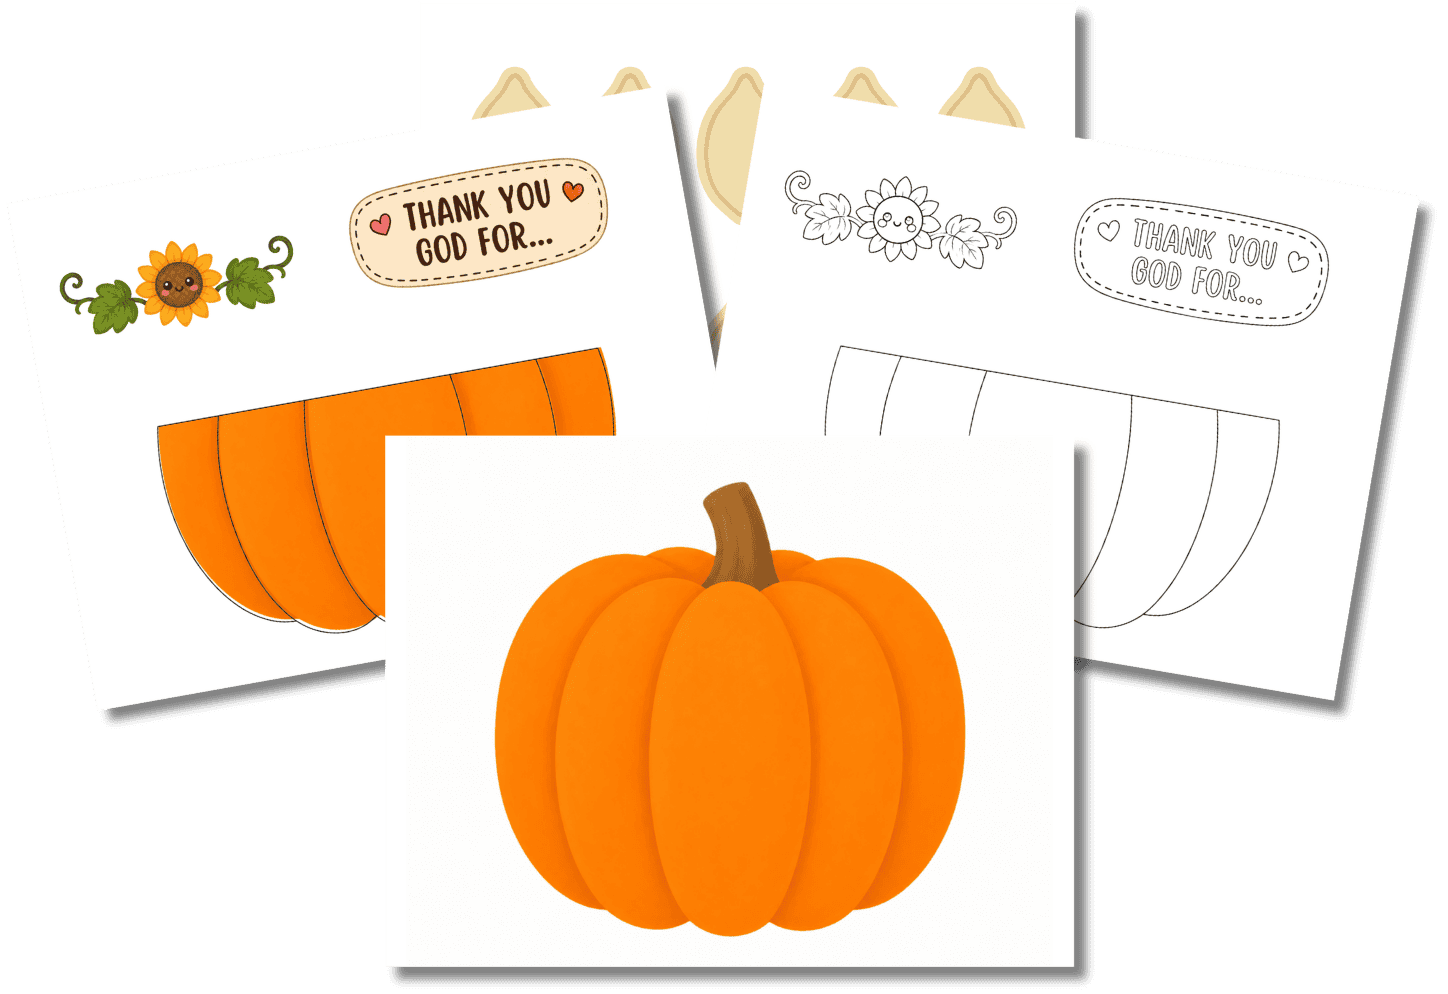
Don’t let Thanksgiving pass without your kids naming their blessings—help them build a pumpkin full of thank-yous to God.
With this free Thanksgiving pumpkin craft, kids color the pumpkin and its segments, write what they’re thankful to God for on each piece, and stack them into a full pumpkin topped with a sunflower.
frequently asked questions
what age is this pumpkin craft best for?
It works well for ages three and up. The littlest ones can color and tuck in the pieces while you do the cutting and writing, and older children can handle the whole thing on their own.
should I use cardstock or regular paper?
Either is fine. Regular printer paper works for a quick craft, but cardstock holds up better if you want the pumpkin to last as a keepsake or stand up to little hands tucking pieces in and out.
what if my child can’t write or cut yet?
That’s no trouble at all. You can do the cutting and writing while they tell you what they’re thankful for, and let them handle the coloring and the tucking-in. The words are theirs even if the hand isn’t.
how long does it take?
Most little ones finish in about twenty to thirty minutes, a bit longer if they’re coloring the black-and-white version. It’s an easy one to stretch out or wrap up quickly, depending on the day.
can I use this with a whole class or co-op group?
Yes, and it’s lovely in a group. You can print one pumpkin per child, or make one big shared pumpkin and have each child add a piece so everyone’s thank-you is part of it.