
There’s something so nice about wearing clothes that feel made just for you.
They sit right, move with you, and somehow bring out your best shape without trying too hard.
That’s what a little tailoring can do.
Learning how to tailor clothes to flatter your body is really about noticing what makes you feel good and adjusting pieces to highlight that.
Maybe it’s adding a bit of shape at the waist, softening a shoulder line, or shortening a hem so it falls just right.
Each time you make a tweak, you learn a little more about your body – how fabric drapes, where you like ease, and what helps you feel your best.
That’s when clothes stop being just clothes and start feeling like they were made for you.
How to Understand Your Body Shape Before Tailoring

Tailoring starts with knowing the structure you’re tailoring for.
Most fitting problems don’t come from poor sewing – they come from incomplete measuring.
So, understanding your body’s lines, proportions, and movement gives you a working map for every adjustment you make.
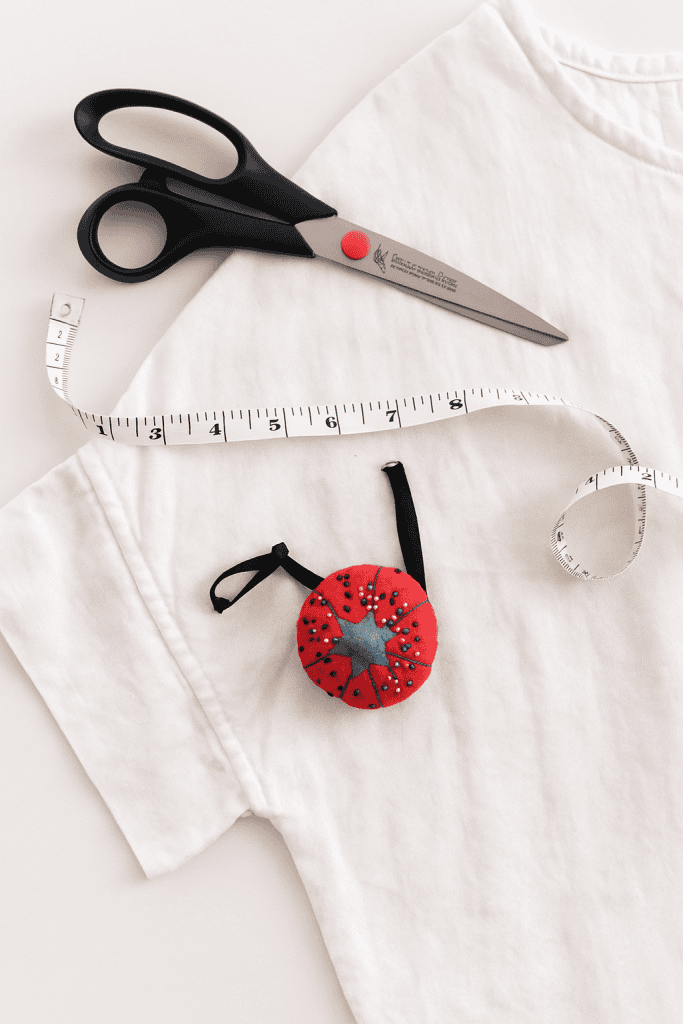
Take Smart, Functional Measurements
Most sewists stop at bust, waist, and hips – but these numbers alone can’t predict fit.
Add these key measurements for professional-level accuracy:
- Shoulder Width: Measure from the outer edge of one shoulder bone to the other. This controls how garments hang and whether sleeves pull or droop.
- High Bust: Measure above the full bust, under the arms. This helps determine dart placement and bust shaping accuracy.
- Torso Length (Front and Back): From the side of your neck to your natural waist. Compare front and back – a longer front often calls for bust shaping; a longer back may need sway-back adjustment.
- Rise (for Pants and Skirts): Measure from the front waist, between the legs, to the back waist. This defines how bottoms actually move when you sit.
- Arm Length and Bicep Width: Critical for sleeve balance and comfort in motion.
Write these down in your sewing journal (check out my post on how to use a sewing journal if you’re starting one) – but more importantly, note how they relate.
A slightly narrower shoulder with a fuller bust means you’ll often shift darts outward.
A shorter torso with long legs benefits from raised waistlines or high-rise pants.
Patterns rarely match these combinations by default; your job as a sewist is to engineer that alignment.
Make sure every garment fits beautifully with this how to take body measurements for sewing clothes guide.
Map Your Balance Points
Balance points are the quiet geometry of fit.
They guide how the eye perceives proportion – the secret behind why some garments “look right” instantly.
To find yours:
- Stand naturally in front of a mirror, arms relaxed.
- Mark three lines with removable tape or chalk: shoulder level, waistline (where your body folds when you bend), and full hip line.
- Step back and observe: is your shoulder-to-waist shorter or longer than your waist-to-hip?
That ratio defines whether garments need visual lengthening or grounding. For example:
- If your upper body appears shorter, add subtle vertical lines (princess seams, front plackets).
- If your lower body carries more visual weight, balanced waist shaping or higher waistlines restore proportion.
Photograph for Proportion Awareness
Mirrors show surface shape; photos reveal alignment.
Take two clear photos – front and side – in fitted, plain clothing.
Print them or overlay tracing paper to sketch:
- Where does the garment naturally balance?
- Where does fullness collect or collapse?
- How do your shoulders slope compared to your pattern’s shoulder line?
This is about precision. Once you see your proportions clearly, you’ll start predicting how patterns behave before cutting.
Observe Movement, Not Just Measurements
A body in motion tells the real story. Walk, reach, or sit while observing where the fabric lifts or drags.
The body doesn’t hold still in real life, so fitting only when standing is incomplete.
Record short videos of yourself turning slowly or performing daily movements; pause to see where tension appears.
That’s how professional fitters train their eye – by studying fabric in motion.
It’s what allows them to build garments that feel effortless all day, not just for a fitting mirror.
Wondering whether your fabric is natural or synthetic? Learn how to do a burn test for natural fabrics to identify materials quickly and safely.
How to Choose and Adjust Sewing Patterns for Your Body Type

Before you ever make a cut, the smartest tailoring decision you’ll make happens on paper.
A sewing pattern is a blueprint that assumes an average body. No one has an average body.
The moment you start reading patterns through the lens of your own proportions, you begin tailoring before you sew.
(If you prefer starting from something that already fits you beautifully, you might enjoy my post on how to draft a pattern from the clothes you love most.)
Study the Pattern’s Architecture
A professional sewist reads a pattern the way a builder studies blueprints – for structure and load points.
When you open a pattern, focus on:
- Shoulder Slope: Compare it to your own. If the pattern’s shoulder angle is flatter than yours, you’ll see pooling fabric near the armhole. If it’s steeper, you’ll see pulling across the upper chest. Adjust by trimming or adding a wedge at the shoulder seam before cutting fabric.
- Dart Placement: Darts are directional – they shape where fullness lives. Hold the pattern against your body and check if the dart points toward your actual bust apex (the fullest point). If it’s off, redraw the dart line so it aims correctly. Misplaced darts create odd shadows that no pressing can fix.
- Waistline Mark: Measure your front waist length against the pattern’s. If the pattern’s waist mark sits higher or lower, shift it accordingly before cutting. This preserves comfort and proportion.
- Ease Distribution: Not all patterns distribute ease evenly. A blouse may have more ease at the back, while a fitted dress might concentrate ease at the side seams. Know where the pattern adds space – it determines where the garment will move with or resist you.
Check the Pattern’s Fit Philosophy
Every pattern has a “fit philosophy” built into its design:
- Classic Fit: follows body shape closely with modest ease (good for tailoring precision).
- Relaxed Fit: adds deliberate volume – you’ll need to control fullness through seams or darts.
- Modern or Boxy Fit: designed to hang from shoulders; ideal for structured fabrics but easy to misjudge length balance.
Choose the fit philosophy that matches your sewing goal.
If your goal is balance and polish, start with classic or semi-fitted bases – they give you measurable points to adjust.
Create a Paper Mock Fit
Before cutting your fabric, perform what professionals call a “paper drape test.”
- Tape the main pattern pieces together at shoulder and side seams.
- Hold the assembly up against your body or dress form.
- Look for alignment: where do shoulder seams fall, how does the waist mark meet your natural waist, and does the armhole sit comfortably under your arm?
This 10-minute step can save hours of fabric correction later.
Mark any obvious misalignments on the pattern itself, not on the fabric.
Blend Between Sizes with Intention
Bodies don’t come in one size from top to bottom.
If your bust, waist, and hips fall in different size columns, blend your pattern lines instead of choosing one size.
Use a curved ruler to connect between sizes smoothly:
- For example, size 10 bust → size 12 waist → size 8 hip.
This technique ensures shape continuity without distorting the garment’s line.
Mark Personal Fit Notes Directly on the Pattern
Once you’ve made these discoveries, record them:
- Your shoulder adjustment (e.g., “-¼ inch slope”)
- Dart realignment (“moved ½ inch toward side seam”)
- Waistline position (“raised ¾ inch for short torso”)
These notes turn a store-bought pattern into your personal block, a reusable foundation for future projects.
Over time, your adjustments form a fit signature – your body’s blueprint in paper form.
Pro Insight: Don’t Rush to Fabric
Experienced tailors treat paper like a test fabric. Each correction you make on the pattern multiplies in precision once you cut. A pattern adjusted to your proportions means every stitch afterward serves design, not damage control. That’s what separates a custom fit from a clever rescue.
Understanding Ease: The Key to Tailored Clothes That Move Naturally

Ease is the quiet negotiator between your body and your garment.
It determines how a piece moves, breathes, and settles on you. Too little ease, and the garment resists motion; too much, and it loses structure.
The key to expert tailoring is knowing how much and where to place ease – deliberately, not by default.
Different Types of Ease
There are two types of ease every sewist must control:
- Wearing Ease: The extra room that allows for movement – reaching, sitting, breathing.
- Design Ease: The intentional volume added for a specific silhouette or style (for example, an A-line skirt or oversized shirt).
Most home patterns combine the two without clearly saying how much of each is included.
As a tailor, you must separate them mentally to understand what you’re actually working with.
Rule of thumb (for woven fabrics):
| Garment Type | Minimum Wearing Ease | Professional Range |
|---|---|---|
| Fitted Bodice | 1–2 inches at bust, ½–1 inch at waist | Up to 3 inches depending on fabric drape |
| Pants or Skirts | 1–1.5 inches at hip | 1.5–2 inches for comfort fit |
| Jackets | 3–4 inches across chest | Adjust based on layering needs |
Where to Place Ease for Natural Movement
Ease placement is never uniform. It must follow the body’s movement zones:
- Across the Shoulder Blades: Add ½ inch total (¼ inch per side) for reach mobility.
- At the Bust Apex: Maintain 1 inch minimum wearing ease to prevent stress lines.
- Waistline: Ease should allow a full breath without breaking seam alignment – typically ½ to ¾ inch.
- Hips and Seat: Allow sitting comfort by pinning a muslin, sitting, and checking that seams don’t strain or distort.
Expert tailors measure ease by testing in motion, not just flat on a table. A standing fit can lie; a seated fit tells the truth.
Want to make your sewing projects extra special? Check out how to sew lace on fabric in 6 easy steps.
How to Check Ease Before Sewing
- Baste First, Fit Later: Always baste the garment with long, removable stitches before committing. It’s faster to remove basting than to unpick precision seams.
- Mark Reference Lines: Draw vertical and horizontal balance lines (center front, waistline, bustline). When you move, watch how these lines shift. If they angle or curve, ease is unevenly distributed.
- Pin-and-Test Method: For woven fabrics, pin out ¼-inch increments at side seams during fitting. Move and note when tension begins – that’s your minimum wearing ease threshold.
This tactile testing trains your hand to feel when ease is functional versus decorative.
Fabric Behavior Dictates Ease
Every fabric carries its own opinion on how much it will give or hold.
- Stable wovens (linen, poplin, denim): Require full wearing ease because they don’t stretch naturally.
- Drapey wovens (rayon, silk, crepe): Can handle less ease due to natural movement.
- Knits or stretch wovens: Rely on fiber recovery – test by stretching 4 inches of fabric and seeing how much it returns. Subtract that percentage from your pattern’s ease allowance.
Tailoring ease correctly for fabric behavior is what separates a custom fit from a “homemade” one.
Pro Tip: Record Your Ease Formula
Each person develops a “personal ease formula” over time. Keep a chart in your sewing notebook with how much ease you prefer at the bust, waist, hip, and sleeve. Over several projects, you’ll start to see a pattern – your signature comfort ratio.
Once you know that number, you can adjust any commercial pattern to your preference before even sewing a test piece. That’s tailoring at a professional level.
Step-by-Step Guide to Fitting Clothes for Your Body Shape
This process turns an ordinary garment into a custom-fit piece that mirrors your shape and moves with you.
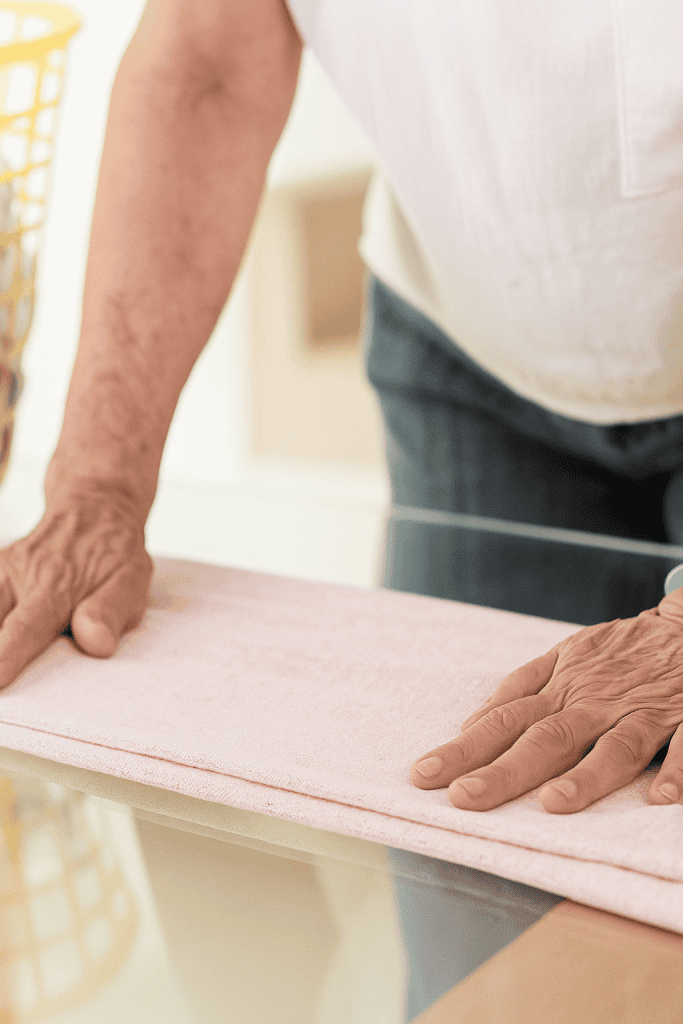
Step 1: Prepare Your Base Fit
Before pinning or stitching, establish a reliable baseline.
- Wear the correct foundation garments. A different bra or undershirt can shift measurements by nearly an inch.
- Use a fitting shell or muslin. Sew the garment once in inexpensive fabric using wide seam allowances (1–1.5 inches). This gives room for adjustments.
- Mark all reference lines – bust, waist, hip, center front, and grainlines – in a contrasting thread or chalk. These will guide your corrections visually.
Step 2: Evaluate Fit in Order of Priority
Fit from the top down – this maintains garment balance.
- Shoulders first.
- The shoulder seam should align with your natural shoulder edge.
- If it falls off the shoulder, trim the seam by ⅛–¼ inch.
- If it rides up, add a small wedge (paper or fabric insert) and adjust the sleeve cap accordingly.
- Neck and Upper Chest.
- Check if the neckline gapes or pulls. Pinch out excess evenly across both sides; record how much you remove for pattern adjustment later.
- Bust Area.
- Look for horizontal pull lines – they mean the bust needs more volume.
- Slash the muslin horizontally at the bust line and insert fabric to add space.
- Mark the new dart direction to point toward the bust apex.
- Waistline.
- Confirm the seam or elastic casing aligns with your body’s pivot point.
- Pinch out or add length evenly until it rests where you naturally bend.
- Hips and Seat.
- Sit and stand several times; if the garment strains, release side seams ¼ inch at a time until drag lines disappear.
- Check side-seam verticality – it should fall straight from underarm to hem.
Step 3: Use Mirror Feedback and Photos

Stand in front of a full-length mirror under even lighting. Examine how the balance lines behave:
- Horizontal lines should stay parallel to the floor.
- Vertical lines should remain straight; diagonal distortion indicates uneven tension.
Take photos from front, side, and back – the camera reveals asymmetry the mirror hides.
Circle or mark areas that lift or collapse. These are your action points for alteration.
Step 4: Refine With Motion Tests
True fit is proven in motion. Perform practical tests:
- Reach Test: Extend arms forward; the back should stretch smoothly without pulling the neckline.
- Sit Test: Sit down fully; the garment should neither ride up nor strain across the hips.
- Twist Test: Rotate your torso gently – seams should stay centered without torque.
Note where comfort changes. Adjust seam allowances or ease zones at those points.
Step 5: Transfer Corrections to the Pattern
Never adjust fabric alone – document every change on the paper pattern.
- Measure the difference between chalk marks and original stitching.
- Add or subtract that amount on your paper pattern piece.
- Blend curves using a French curve ruler to maintain smooth transitions.
Label every adjustment: “raised waist ¾ inch,” “added ½ inch ease at back hip,” etc.
These notes become your personalized fit record.
Step 6: Finalize and Re-Test
After transferring corrections:
- Re-cut the muslin if the adjustments were major.
- Repeat the fitting once more to confirm balance.
- Only then proceed to the final fabric.
A second fitting may feel repetitive, but it’s where precision locks in.
Professional tailors never skip it that’s why their garments move naturally without constant readjustment.
Pro Insight
Every adjustment teaches you something about your posture, proportions, and preferred comfort level. Keep a fit journal – list project name, pattern size, and all modifications. Over time, you’ll notice recurring numbers.
Those are your personal fit constants – the details that make every future garment start closer to perfect.
Tailoring Adjustments That Instantly Flatter Every Body Type
No matter your proportions, there are universal tailoring zones that control how clothes balance on the body.
These small, technical adjustments produce visible transformation – the kind that makes a garment look made for you.
1. Adjust the Shoulders for a Balanced Silhouette
The shoulders set the entire structure of a garment. If they’re off, every seam below will follow suit.
Adjustment method:
- Measure your shoulder width and compare it to the pattern’s.
- If your shoulders are narrower, trim ¼ inch at the armhole edge on each side and reshape the sleeve cap.
- If they’re broader, add ¼–½ inch at the shoulder point and adjust the sleeve cap outward.
Visible effect: Balanced shoulders lift the entire garment, making posture appear straighter and proportions cleaner – a natural frame for the torso.
2. Define the Waistline with Precision, Not Tightness
The waistline determines the body’s focal point. Too high or too low, and proportions shift visually.
Adjustment method:
- Find your true waist pivot point – where your body naturally bends.
- Compare it to the garment’s waist seam. Adjust up or down so they align.
- For more contouring, taper the side seams ⅛ inch per side at the waist and blend into the bust and hip.
Visible effect: A precisely placed waistline creates balance – elongating the torso and defining shape without restriction.
3. Refine the Bust Area with Dart Rotation
Bust fit determines how smoothly a bodice sits across the front. Incorrect dart direction or length causes wrinkles that distract the eye.
Adjustment method:
- Pinch the dart to see if it points directly toward your bust apex.
- If it’s off, redraw it on the paper pattern to aim exactly at that point.
- For fuller busts, perform a Full Bust Adjustment (FBA): cut and spread the pattern at the bust point, adding width and length only where needed.
Visible effect: Clean lines across the bust, improved drape under the arms, and smooth side seams – all of which visually slim and support the natural curve.
4. Balance Hemlines for Proportion and Movement
The hem visually anchors the body. Even slight differences in placement can change the entire silhouette.
Adjustment method:
- Have someone measure from floor to hem while you stand naturally.
- Mark front, back, and side lengths – most figures require ¼–½ inch difference for optical balance.
- Adjust uneven hemlines before final pressing, not after.
Visible effect: A balanced hemline makes legs appear longer, stance more stable, and overall proportion symmetrical.
5. Use Seams and Panels to Sculpt the Body Naturally
Seams aren’t just construction lines – they’re visual contour lines. Their placement can lengthen, narrow, or emphasize shape subtly.
Adjustment method:
- Shift vertical seams (like princess lines) inward by ¼ inch for a slimming illusion, or outward for more balance if the torso appears narrow.
- Introduce curved side seams for gentle shaping instead of relying on darts alone.
- Consider topstitching along vertical seams to reinforce the line visually.
Visible effect: Seam placement guides the eye, shaping the silhouette without altering comfort or structure.
6. Support Structure with the Right Lining and Interfacing
These inner layers hold the garment’s form long after pressing wears off.
Adjustment method:
- Use lightweight fusible interfacing in shoulder areas, waistbands, and facings to maintain crisp lines.
- For softer drape, switch to sew-in interfacing for more fluid support.
- Lining should mimic fabric weight – too heavy, and it drags; too light, and it distorts.
Visible effect: Clothes hold shape throughout the day, maintaining smooth surfaces and body alignment.
Finishing Details That Make Tailored Clothes Look Professional
Finishing is where structure, discipline, and refinement meet.
The goal is clean engineering that lets your craftsmanship speak quietly and clearly.
1. Pressing
Pressing shapes fabric the same way tailoring defines fit. A good press turns seams into structure.
- Press, don’t iron. Pressing is a lift–set–lift motion, never a drag. Dragging stretches seams and distorts shape.
- Use the right tools: a tailor’s ham for curved seams, a seam roll for sleeves, and a clapper for locking in crisp edges.
- Press in sequence:
- Press darts flat first.
- Press seams open or toward the intended direction.
- Press hems last to maintain shape integrity.
- Steam intentionally: Let the fabric cool before moving it – that’s when the fiber “remembers” the shape you’ve set.
Pro insight: True tailoring often involves press-molding – using steam and pressure to sculpt the fabric’s three-dimensional form. It’s invisible work, but it defines the difference between fitted and form-following.
2. Topstitching
Topstitching reinforces seams and clarifies lines – it’s both technical and aesthetic.
- Match stitch length to fabric weight:
- Light fabrics: 2.5 mm for subtle control.
- Medium to heavy fabrics: 3.0–3.5 mm for clean definition.
- Use edge-stitching (1/16″–1/8″ from the seam) to create structure around necklines, collars, and waistbands.
- Keep consistency: Seam alignment and even distance are signs of a disciplined hand.
Pro tip: When topstitching curved seams, reduce speed and pivot gently – mechanical precision reads as confidence in craftsmanship.
3. Seam Finishes
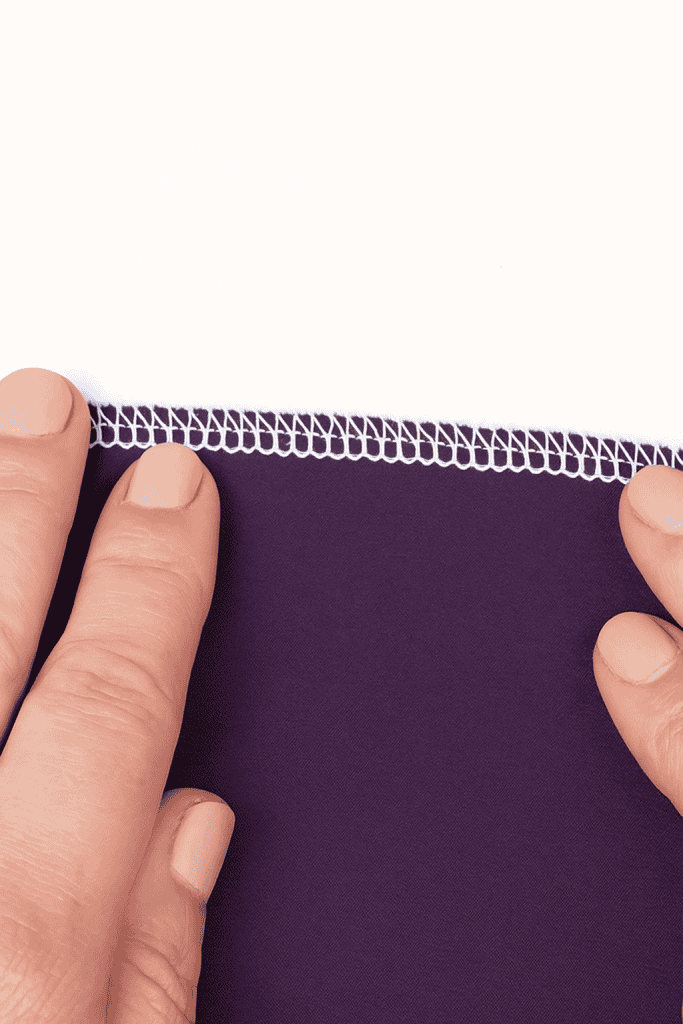
A garment’s inside should look as thoughtful as its outside. Choose seam finishes based on fabric type and longevity.
- French seams: Ideal for lightweight or sheer fabrics. They seal raw edges elegantly and prevent fraying.
- Hong Kong binding: Perfect for jackets or unlined garments – adds color contrast and structure.
- Serged seams: Best for knits and casual wear; keeps stretch without bulk.
- Flat-felled seams: Excellent for high-stress areas like pants or shirts – structured and durable.
Pro insight: Always grade seam allowances before finishing. Layering thickness correctly prevents ridges and maintains smooth drape on the garment’s exterior.
Want professional-looking seams? Check out how to sew a perfect zigzag stitch.
4. Button, Zipper, and Fastener Placement
Fasteners guide the garment’s visual line and physical tension. Their placement subtly influences balance.
- Buttons: Align with high-tension points – at bust apex, waistline, or collar base. Misalignment can distort fit.
- Zippers: Use invisible zippers for curved seams and side placements; use metal zippers only where fabric weight supports them.
- Hooks or snaps: Reinforce waistbands and plackets where garments experience daily stress.
Pro insight: Always install closures while the garment is on a dress form or during a fitting. It ensures that the closure holds tension naturally instead of pulling against fabric lines.
5. Hems
A clean hemline completes the garment’s geometry.
- Measure hem height from the floor, not the pattern. Real bodies and postures shift line balance.
- Use the right finish for fabric behavior:
- Blind hems for formalwear.
- Narrow rolled hems for lightweight wovens.
- Double-fold hems for medium-weight fabrics.
- Press before trimming excess fabric – pressing defines where the hem truly falls in motion.
Pro insight: Add a thin strip of fusible interfacing along the hemline of light fabrics. It stabilizes edge stretch and produces an even, professional fold.
6. Label and Protect Your Work
Tailors label garments not for vanity, but for accountability. Include:
- Date of completion.
- Fabric type and any interfacing details.
- Fit notes (for future reference).
It’s a habit that builds mastery – you’ll track which methods age best over time.
Build Clothes That Truly Fit You!
Take one garment (even a simple one) and apply what you’ve learned here.
Analyze its fit, record your adjustments, and press every seam with care.
That’s how mastery begins: not in complexity, but in repetition done well.
Over time, you’ll create a wardrobe that fits you because you engineered it to.
If this guide inspired you to look at your sewing projects differently, comment below and share one fit challenge you’re ready to solve next – your question or story might guide our next deep-dive tutorial.
FAQs
1. How do I know if a garment needs tailoring or a complete remake?
If more than three major zones (shoulder, bust, waist, and hip) require structural changes, it’s usually more efficient to remake the garment from a well-fitted base pattern. Tailoring refines proportion; it can’t rebuild poor foundation work.
2. What’s the best way to mark alterations during a fitting?
Use tailor’s chalk, safety pins, or removable basting thread in contrasting color. Always mark both sides symmetrically, then measure the difference before transferring it to your paper pattern. Precision markings make future corrections faster and more consistent.
3. How often should I remeasure my body for new projects?
Every 6–8 months is ideal, especially if posture, routine, or muscle tone changes. Small shifts in shoulder angle or waistline position can alter fit noticeably over time – regular measuring keeps your personal block current.
4. How can I tailor store-bought clothes without opening major seams?
Use strategic micro-adjustments:
- Take in side seams only from the waist up or down.
- Add small darts near the bust or back waist.
- Raise hemlines to rebalance proportion.
These changes reshape the silhouette subtly without a full reconstruction.
5. What pressing tools are worth investing in for professional results?
Essential tools include:
- A tailor’s ham (for curved seams and bust shaping).
- A seam roll (for sleeves and trouser legs).
- A clapper (for locking crisp edges).
- A press cloth (to protect delicate fibers).
These tools transform pressing from maintenance into sculpting, giving your clothes lasting structure.
