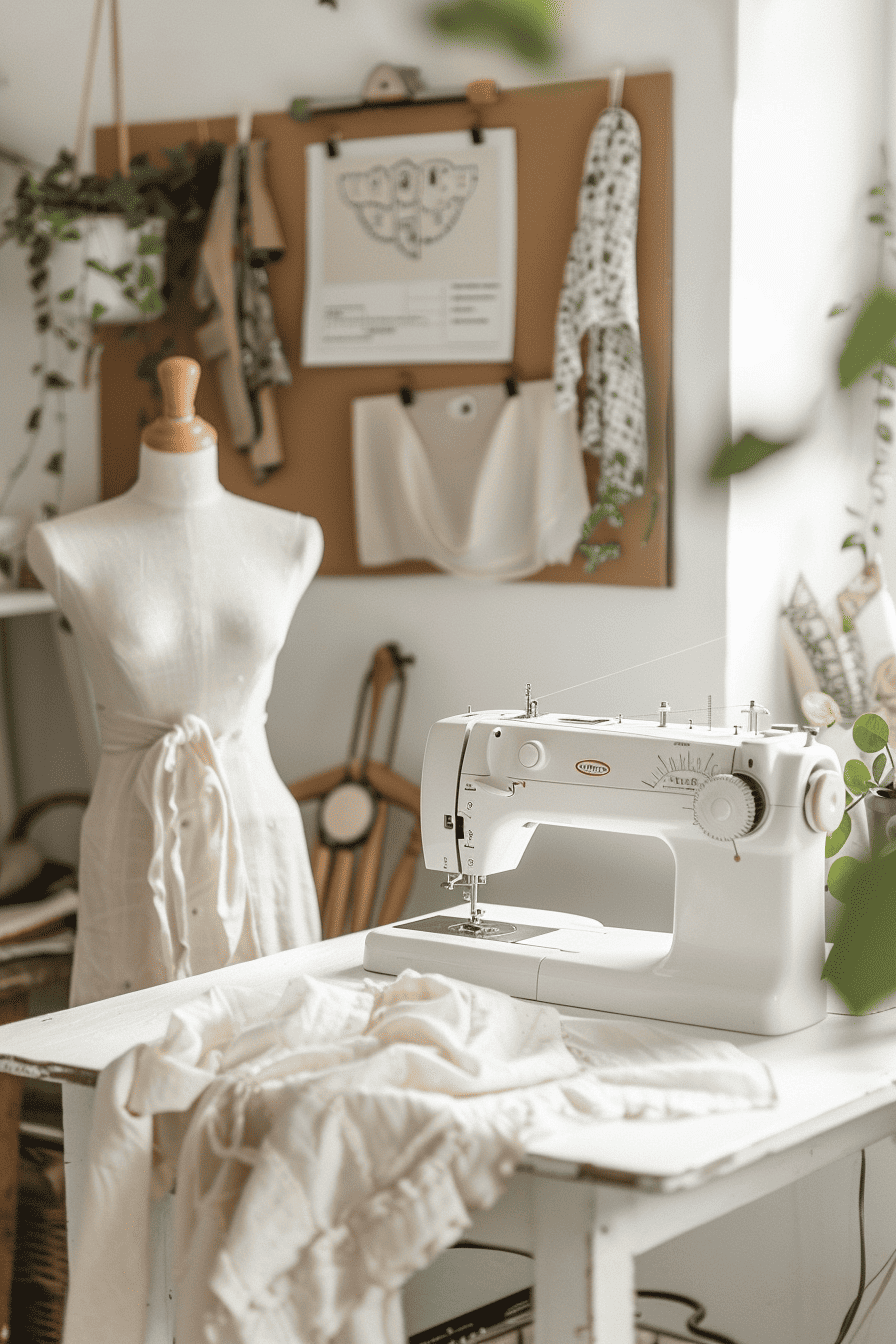
Sewing your own clothes is one of those timeless skills that brings beauty, usefulness, and a little bit of quiet joy into your everyday life.
In a world of fast fashion and overflowing closets, it’s deeply satisfying to make something with your own hands, especially when it’s something you’ll wear often and feel proud of.
If you’ve been craving a slower, more intentional approach to what goes on your body, sewing is a lovely place to start. All it takes is a handful of basic tools, a little space to spread out, and a willingness to learn as you go (wonky seams and all).
In this article, I’ll walk you through the essentials – what you need, how to get started, and how to enjoy the learning curve without getting overwhelmed. Let’s take it one stitch at a time.
Supplies You’ll Need
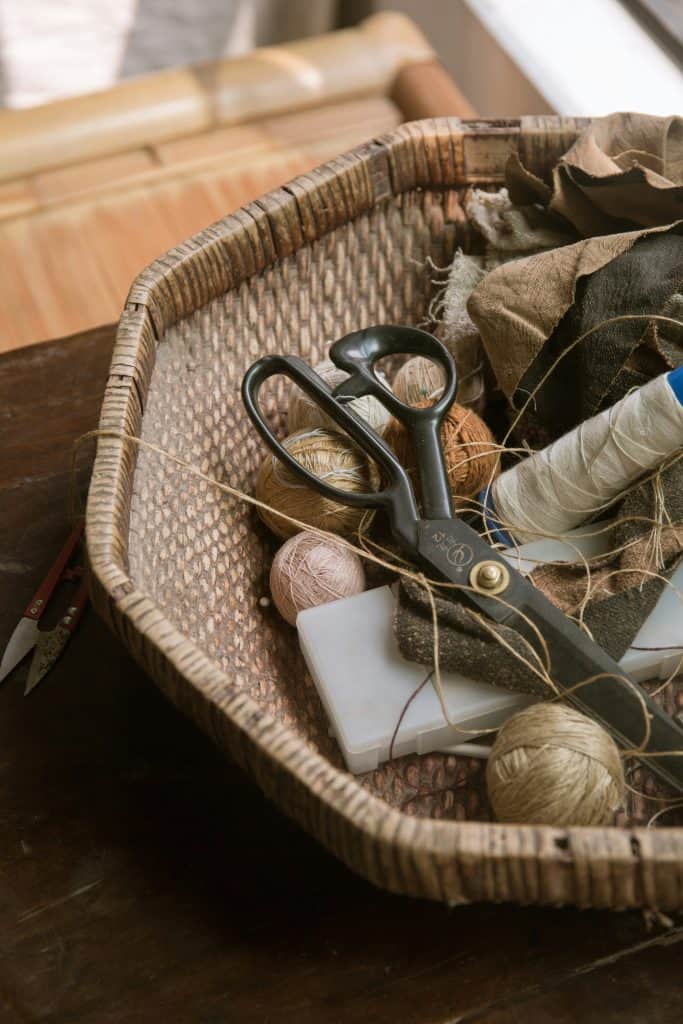
These are just the basic supplies. Think of these as the building blocks for your home sewing kit. Over time, you can add as you go, but for now, here’s what will serve you well (if you’re looking for a complete checklist of sewing tools for beginners, this guide has you covered):
- Sewing machine – A simple, reliable model is all you need. Straight stitch and zigzag are the two most-used functions when you’re beginning.
- Fabric scissors – Keep these sharp and use them only for fabric. They’ll make clean cuts and help keep your edges tidy.
- Pins – Straight pins or clips help hold things in place before you sew. A pin cushion or magnetic dish is handy, too.
- Measuring tape or ruler – Measuring accurately makes all the difference, especially when working from a pattern.
- Stitch un-picker (seam ripper) – Mistakes happen. This little tool will gently undo stitches without damaging your fabric.
- Safety pin or bodkin – Perfect for threading elastic or drawstrings through casings.
- Fabric chalk or washable marker – Helps you mark out seams or darts clearly without permanent lines.
- Iron – Pressing as you go makes your clothes look more polished and helps things line up just right.
- Basic notions – Keep some elastic, bias tape, and a small collection of buttons on hand. These often come in handy for finishing projects.
- Woven fabrics – Start with natural woven fabrics like cotton, linen, or hemp. They don’t slip around as much as knits, and they’re easier to press, pin, and sew.
If you want my full beginner setup in one place, for more help building your kit, check out my essential sewing tools guide.
Easy Patterns to Start With
When you’re learning to sew clothes, the pattern you choose can make all the difference. A good beginner pattern is simple in shape, forgiving in fit, and teaches you just enough to build confidence without being overwhelming.
These three patterns are well-loved in the sewing community and work beautifully with natural fabrics like linen or cotton:
1. Pomona Pants + Shorts by Anna Allen: These are the ultimate chill-at-home (or run-errands-in-style) pants. With a wide leg and an elastic waist, they’re comfortable, unfussy, and totally beginner-friendly. No zippers. No buttons. Just easy seams and a relaxed fit.
2. Essential Linen Tank from Fabrics-Store.com: A breezy sleeveless top that comes together quickly and layers beautifully. You’ll get some practice with curves and hems here, but it’s still simple enough not to stress you out.
3. Wiksten Shift Dress + Top: A great next step once you’ve made a tank or two. This pattern has a bit more shape but is still very beginner-appropriate. The loose, easygoing fit makes it perfect for everyday wear – plus, you can choose between top or dress length depending on your mood (and your fabric stash).
These patterns pair well with the woven fabrics we mentioned earlier. They’re comfortable, wearable, and rewarding to make – and they’ll teach you the basics of sewing straight seams, hemming, and following instructions.
If you’re using printed or downloadable patterns for the first time, take your time. Read everything once before you begin.
How to Start Sewing Your Own Clothes
Starting anything new can feel a little uncertain – but the beauty of sewing is that it welcomes you right where you are. No need to be perfect, no need to rush. Just begin.
1. Choose One Simple Project
Instead of dreaming up a whole handmade wardrobe from the start, pick just one piece to begin with. A simple top, elastic-waist pants, or an unfitted dress will do beautifully.
Look for patterns labeled “beginner” and avoid anything with zippers, darts, or fitted linings at this stage. One well-chosen project will teach you the rhythm of sewing and offer a finished piece you can wear with pride.
2. Gather a Few Essential Tools
There’s no need to invest in a full sewing studio. Start with the basics: a reliable sewing machine, fabric scissors (only for fabric – hide them from the family if needed!), pins or clips, a flexible measuring tape, a seam ripper for the inevitable do-overs, fabric chalk for marking, and an iron.
Keep things simple. You can always add more as you grow in skill and confidence.
3. Select the Right Fabric
Fabric is where so many beginners get tripped up. My advice? Stick to natural, woven materials like cotton, linen, or hemp – the kind that presses well, stays put under your needle, and breathes with you.
I love sewing with these for both myself and my kids. Linen pants that get softer every wash, hemp tunics that handle wild backyard play, even little cotton sleep shirts cut from worn bedsheets. These fabrics are beautiful and beginner-friendly – the best combo.
Always prewash (natural fibers love to shrink!) and take a moment to feel the fabric in your hands. It’ll guide you more than you think.
And if you’re ever not sure whether a fabric is truly natural or it’s a blend pretending to be, my simple burn test for natural fabrics helps you figure it out fast.
4. Read Through the Pattern (Yes, All of It)
Before you snip a single thread, sit down with your pattern and read through it all. I know – it’s tempting to dive in – but this step saves so much heartache.
Patterns are just like recipes. At first, they’re confusing. Then they click. Mark anything that’s unclear, look it up if you need to, and take it one step at a time. You’re not falling behind. You’re learning.
If you want a calm, beginner-friendly walkthrough, for more support, check out my guide on how to read sewing a pattern.
5. Cut Carefully, Take Your Time
This is where your project begins to take shape – literally. Smooth your cotton, linen, or hemp out on a flat surface, pin your pattern pieces in place, and double-check the grainline (that’s the direction of the weave). Then breathe, and cut.
6. Sew Slowly and Follow the Steps
Now comes the stitching. Thread your machine, test a few stitches on scrap fabric, and begin. Expect some mess. Maybe your thread tangles. Maybe the lines go wonky. That’s okay. This is what learning looks like. Keep your seam ripper nearby.
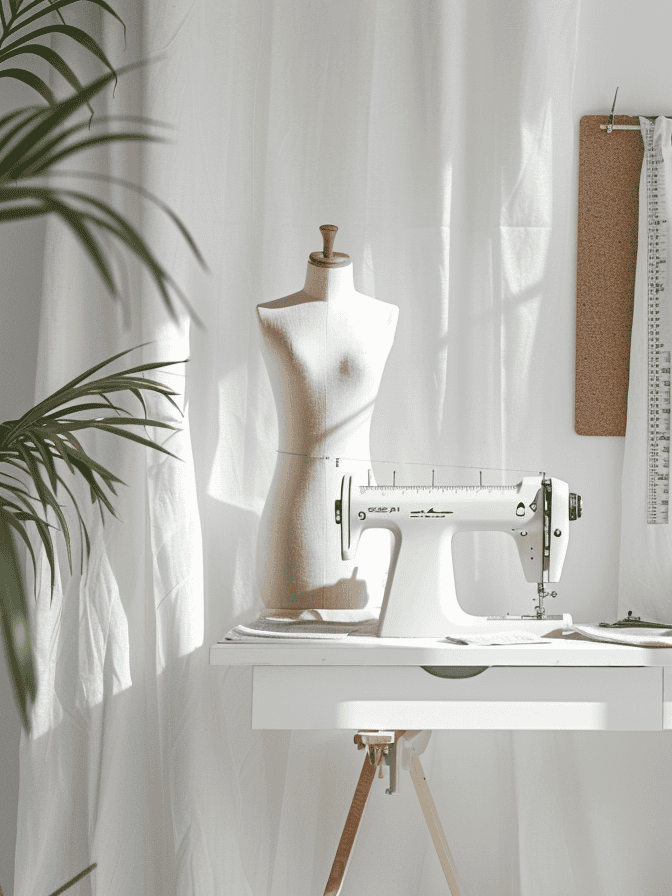
7. Try On Midway
Clothes are made to fit real bodies – not mannequins or measurements alone. As you sew, pause and try on your piece. Check for fit in the shoulders, length, waistband, or neckline. Making adjustments along the way is easier than fixing things at the end.
You’ll also begin to notice what kinds of shapes and styles feel best on you, which is part of the beauty of making your own clothing.
8. Finish Your Seams
Don’t skip the inside. It’s not about perfection.
If you don’t have a serger, use a simple zigzag stitch on raw edges. Or learn flat-felled or French seams. Your garment will last longer and wash better – especially important for kids’ clothes that get worn hard and loved well.
Common Mistakes That Happen When You’re Just Starting Out
Every beginner hits a few bumps. Crooked seams, tangled thread, upside-down fabric pieces… it happens. Sewing is full of little stumbles, especially at the start. Most mistakes aren’t permanent, and all of them are part of the learning.
Here are a few common slip-ups and what to do when they show up at your table:
1. Thread Keeps Tangling or Skipping. Double-check that your machine is threaded correctly (both the top thread and the bobbin). It’s amazing how often a tiny misstep in threading causes big issues. Rethread slowly, and make sure the presser foot is up while you do it.
2. Seams Are Wavy or Puckered. This often means you’re pulling the fabric too much, or your tension is off. Try loosening your grip – let the feed dogs pull the fabric naturally. Pressing the seam with an iron afterward also helps smooth things out.
3. Fabric Isn’t Lining Up Right. Always pin or clip generously, especially with slippery or layered pieces. Mark your notches clearly with chalk or a washable pen. Slowing down while aligning pieces saves time (and unpicking) later.
4. You Sewed the Wrong Sides Together. It happens to everyone. If the fabric doesn’t look right when you flip it inside out, grab your seam ripper and gently undo the stitches. Take a breath, re-pin, and try again. Sewing is forgiving that way.
5. The Finished Piece Doesn’t Fit Right. That’s okay – fitting takes time to learn. Make notes in your sewing journal about what felt too tight or loose, and try the same pattern again with small adjustments. Every make brings more understanding of your shape and style.
6. Feeling Stuck or Frustrated. Walk away for a bit. Have a cup of tea. Go outside. Sometimes a little space is all you need to come back with fresh eyes and steadier hands. You’re not behind, and you’re not doing it wrong – you’re just learning.
So don’t let a setback stop you. Keep going. Unpick the seam, realign the fabric, start again. That’s the rhythm of sewing: not getting it right the first time, but showing up anyway. One stitch, one project, one bit of progress at a time.
You’re learning, and that’s something to be proud of.
Keeping a Sewing Journal
One of the best things you can do as a beginner (or even as someone a little further along) is to keep a sewing journal. Just a notebook, a binder, or even a few pieces of paper tucked in a folder will do. The idea is simple: after you finish a project, write down what you made and how it went.
Include things like:
- What pattern you used
- What size you made
- What kind of fabric it was
- Any changes you made (shortened the hem, added pockets, used elastic instead of a drawstring)
- What you’d do differently next time
This doesn’t have to be long or detailed – just a few honest notes. Over time, you’ll build a record of what works best for your body, your style, and your sewing machine. It helps you remember where you bought that perfect linen, or which pattern ran a little snug in the shoulders.
Most of all, it’s a way to see how far you’ve come. Those early wobbly seams? They’ll make you smile someday. Every note is a little reminder that you’re learning, growing, and making something useful with your own two hands.
If you want a simple setup you can copy (with prompts you can reuse for every project), see my guide on how to use a sewing journal.
The Beauty of Sewing Your Own Clothes
My advice is to start small. I began by sewing clothes for my kids from bandana bib to cloth diaper. It worked. And it felt really good to see them running around in something I made. That kind of satisfaction doesn’t come from a store tag.
Mistakes are part of it. Wobbly hems, uneven seams, and having to unpick the same line three times – that’s normal. It means you’re learning. And you’ll get better, faster, more confident with every project.
You just need a decent machine, some breathable cotton, linen, or hemp fabric, and a clear surface to work on. The rest? You’ll figure it out.
So if you’ve been waiting for the “right time” to start – this is it.
You can absolutely do this.
Grab Your FREE Sewing Pattern Labels Today

As the seasons pass and projects add up, those little paper patterns have a way of piling into drawers and baskets. And when you go to remake something, you end up searching instead of sewing.
That’s exactly why I created these Free Sewing Pattern Labels.
They make it simple to keep every pattern neat, easy to find, and ready whenever inspiration strikes. Just print the labels, fill them out, and attach them to your pattern envelopes.
In a few minutes, your patterns go from scattered to beautifully organized.
A small change that makes your sewing space feel calmer, clearer, and ready for your next project.
FAQs
Do I need an expensive sewing machine to start?
No, you really don’t. A basic sewing machine that can do a straight stitch and zigzag stitch is more than enough for beginners. Many simple machines handle most clothing projects just fine.
If you’re just starting out, focus on learning how the machine works rather than chasing fancy features. A reliable, easy-to-use machine will help you build confidence much faster than a complicated one.
What is the easiest clothing item to sew first?
Elastic-waist clothing is usually the easiest place to begin. Think simple pajama pants, loose shorts, or an unfitted skirt.
These projects avoid tricky closures like zippers and buttons, which can be frustrating for beginners. They also help you practice basic skills like sewing straight seams, hemming, and working with fabric grain.
How much fabric do I need for a beginner sewing project?
It depends on the pattern and size, but most beginner clothing projects use about 1.5 to 3 yards of fabric.
Patterns will always list the exact yardage needed on the back of the envelope or instruction sheet. When in doubt, it’s a good idea to buy a little extra fabric so you have room for mistakes or adjustments.
Should I wash fabric before sewing clothes?
Yes, always prewash your fabric before you cut it.
Natural fabrics like cotton, linen, and hemp often shrink the first time they are washed. If you skip this step, your finished garment might shrink later and end up fitting differently than expected.
Prewashing also removes any chemicals or finishing treatments left from manufacturing.
How long does it take to learn sewing?
Most beginners can complete their first simple clothing project within a few hours to a weekend.
Like any skill, sewing gets easier the more you practice. Your first project might feel slow and awkward, but after a few garments you’ll start to understand how patterns work, how fabric behaves, and how to fix small mistakes quickly.
Progress happens one project at a time.
