Pinning fabric may seem simple, but it’s one of the most important steps in sewing.
When the fabric is secure and smooth, every cut and stitch follows more easily.
The right pinning method keeps your pattern steady, your seams aligned, and your work looking intentional from the very first step.
With a few practiced movements and steady hands, you can learn to pin with ease and precision.
Tension, direction, and placement all work together to create clean, confident seams!
Keep Tension on the Fabric
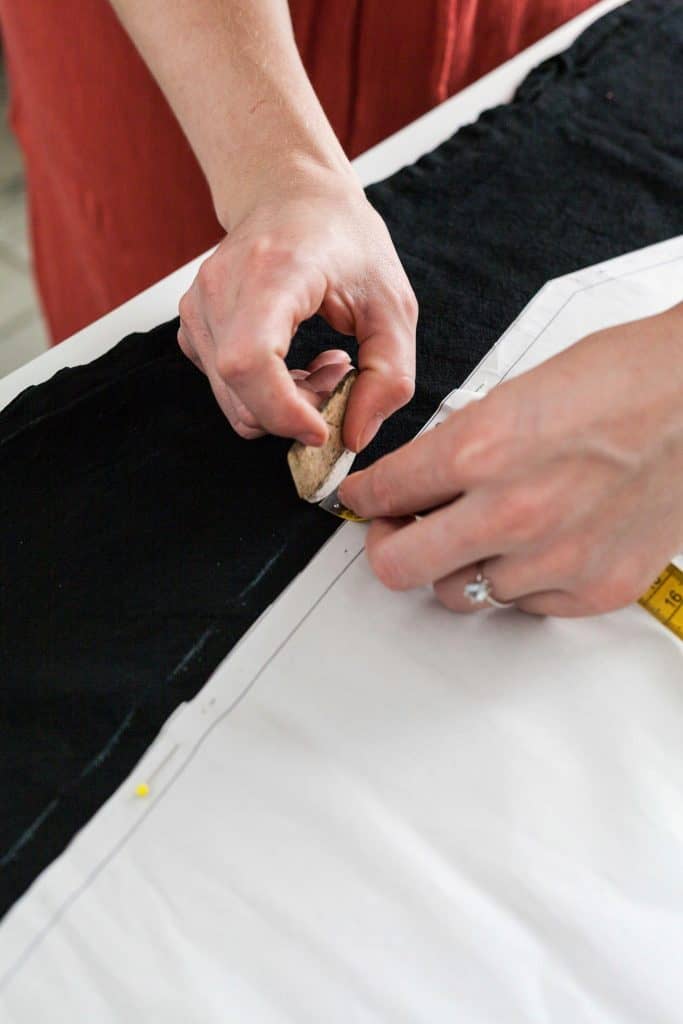
The key to neat, accurate pinning is tension – gentle, steady tension that keeps the fabric flat while you work.
- Lay your fabric on a hard, smooth surface like a table or cutting mat.
- Place one hand flat to anchor the fabric in place, then use your other hand to hold the pin.
- Slide the pin in at a slight angle so it passes through both layers of fabric.
- As you insert it, pull the fabric lightly between your hands to remove any looseness.
You’ll feel the difference – the pin glides in cleanly instead of pushing or puckering the fabric.
If you’re working with slippery materials like rayon or silk, use finer pins and keep that gentle stretch steady as you go.
For thicker fabrics like denim or canvas, apply a bit more tension and insert the pin in one smooth motion.
A small lift of the fabric helps the pin travel through evenly without bending.
This simple hand tension technique keeps your layers aligned, your seams even, and your pinning process quick and consistent.
It’s also one of those small skills that makes a big difference when learning how to tailor clothes to flatter your body, especially when precision really matters.
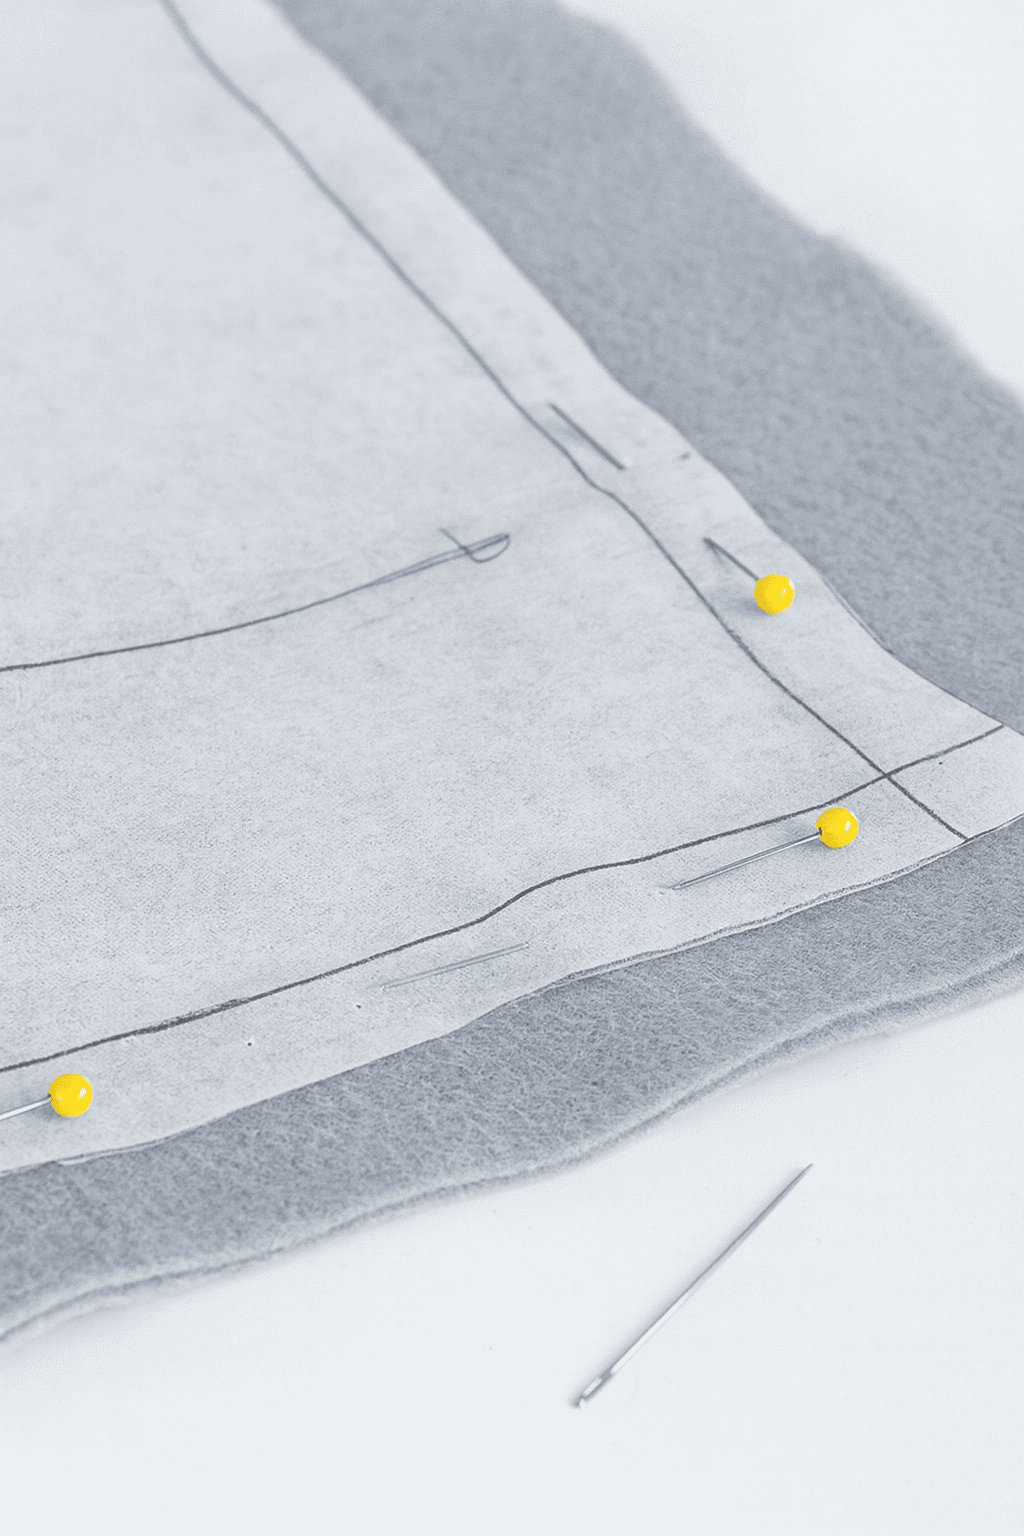
Always Pin on the Seam Allowance
When you pin, aim to place each pin within your seam allowance – about ½ inch (or 1.5 centimeters) from the edge, depending on your pattern.
This area is where your stitching will go, so the pinholes stay hidden inside the seam once it’s sewn.
Avoid pinning inside the main body of the fabric.
That’s the part everyone will see, and even fine pins can leave small impressions on delicate weaves like linen or cotton lawn.
Instead, align your pins just along the edge where you’ll stitch.
This keeps your visible fabric smooth and your seams easy to follow at the machine.
If you’re not fully confident about how wide your seam line should be, take a quick look at our essential guide to seam and hem allowances – it’ll help you pin and sew with better precision.
The Two Main Directions to Pin Your Fabric
There are two main directions you can use to pin your fabric.
- The first is along the length of the seam edge – what I call lengthwise pinning.
- The second is the complete opposite, where the pins go crosswise, or perpendicular to the seam.
Both are useful, and once you get a feel for them, you’ll naturally switch between the two depending on what you’re sewing.
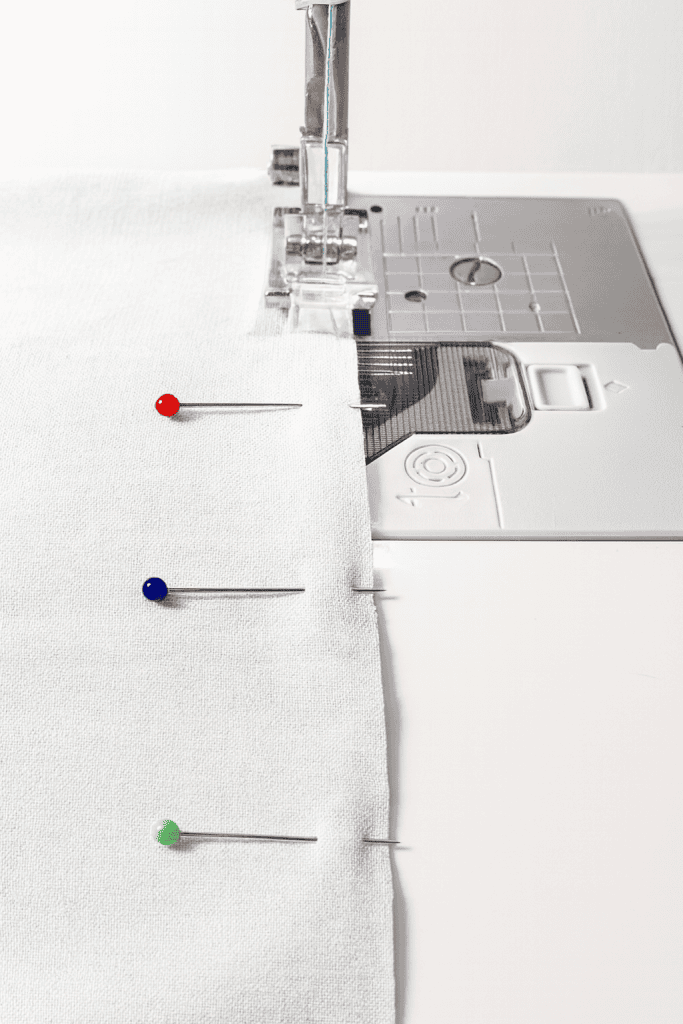
1. Pin Fabric Lengthwise for Clean, Accurate Seams

Lengthwise pinning runs right along the seam edge of your fabric.
I like this method because it gives me a clean line to follow as I sew – almost like a built-in guide.
Here’s what I do:
- Lay your fabric flat on the table, edges lined up.
- Use one hand to hold the fabric steady and the other to guide the pin. Keep a little tension between your hands so the fabric stays smooth.
- Pop the pin in using your finger as a lever underneath – just lift the fabric slightly so the pin slides through both layers.
- Place your pins at about 1.5 centimeters (½ inch) from the edge – right where your seam allowance sits, or just inside it.
- Keep the pins in the same direction you’ll be sewing, so you can pull them out easily as they reach the machine needle.
- I like to keep the pinheads facing toward me with the fullness of the fabric on the left. That way, as I sew, I can pull them out toward myself without breaking rhythm.
You don’t want to pin too far out – if your stitch line is close to the edge and your pins are way off to the side, you might end up with tiny pin marks showing on your fabric.
When you pin close to your actual stitch line, it holds the fabric exactly where it should be and keeps everything smooth and accurate.
This same kind of precision is especially helpful for detailed techniques like smocking, which I explain step by step in my simple guide to hand smocking.
2. Pin Fabric Crosswise for Perfect Pattern Matching
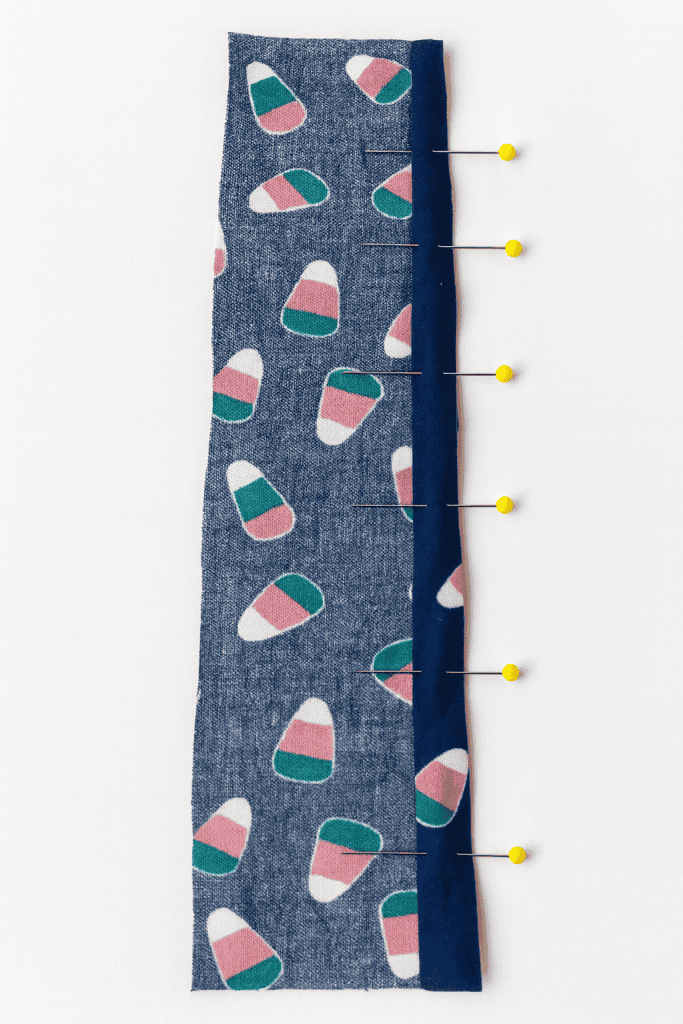
Now, the second direction is crosswise pinning, where the pins go in completely perpendicular to the edge.
These are the little “cross pins,” or what I like to call crosshair pins.
They’re great when you need accuracy – matching waist seams, notches, or pattern lines that must stay in place.
Here’s how I do it:
- Hold the fabric flat and firm with one hand.
- Use your finger underneath as a lever to help guide the pin up and through – your thumb gives it that small bit of pressure so it slides cleanly.
- Push the pin straight down through both layers, then angle it up slightly to form a clean cross over the seam line.
- Keep these pins close together, especially around matching points or curves – about an inch apart works well.
- Always have the pinheads facing you, so you can see them clearly and pull them out easily while you sew.
Cross pins hold fabric layers firmly in place.
They’re especially helpful when you’re sewing something that needs to line up perfectly, because the pin crosses the seam and locks both sides together.
I still prefer my pins lengthwise most of the time, but cross pins are my go-to when precision really matters.
Lengthwise vs Crosswise Pins: Which Method Works Best?
So, which way is better – lengthwise or crosswise? Honestly, there isn’t one “right” answer.
Both have their place, and once you’ve pinned a few projects, you’ll naturally start to use one or the other depending on what you’re doing.
Lengthwise Pinning
Lengthwise pinning runs parallel to your seam line. It keeps the fabric flat and steady and helps you follow a clean sewing path.
When to use it:
- Long, straight seams that need smooth, even tension.
- Projects where you want a clear visual guide for sewing.
- Situations where you want fewer pins and faster prep.
Things to keep in mind:
- You’ll need to remove the pins as you sew – don’t stitch over them.
- Position the pinheads toward you so they’re easy to pull out.
- Keep the fullness of your fabric on the left side, away from the needle, for better control.
Lengthwise pinning gives your seams a professional, polished look. It’s quick, efficient, and ideal for most everyday sewing.
Crosswise Pinning
Crosswise pins go perpendicular to the edge of your fabric, forming a small “T” shape across the seam line.
This direction is especially helpful when precision matters – like when matching seams or aligning patterned fabric.
When to use it:
- Areas that need exact alignment, such as waist seams, corners, or notches.
- Curved seams or small sections that shift easily.
- Projects where extra stability helps you keep everything in place.
Things to keep in mind:
- Crosswise pins can stay in longer as you sew, but always move slowly near them.
- Keep the pins close together – about an inch apart for best control.
- Stay within the seam allowance to avoid visible pin marks.
This method takes a little more time but gives you excellent accuracy, especially when sewing details that need to stay perfectly lined up.
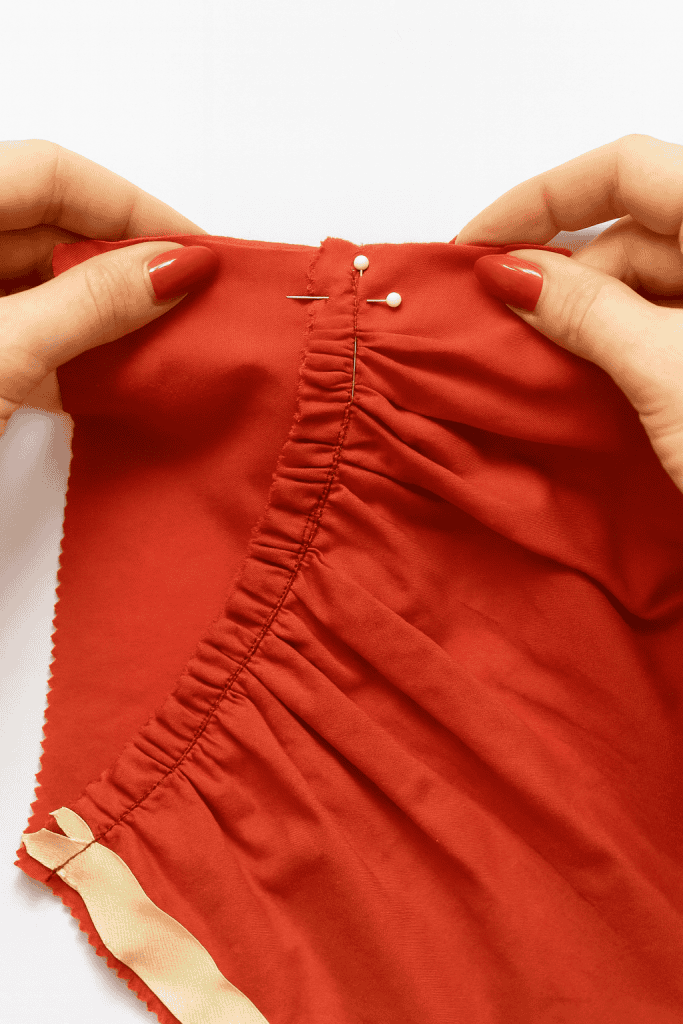
When to Combine Both Methods
You can absolutely use both techniques together – many sewists do.
For example:
- Use lengthwise pins down the full seam to hold everything in place.
- Then add a single cross pin at key match points to lock layers together.
This creates a small “crosshair” where seams meet, keeping them perfectly aligned while still letting you sew smoothly along the rest of the edge.
Can You Sew Over Pins? Safe Pinning Tips for Beginners
A quick word of caution – you don’t want to sew over your pins all the time.
Even though it might seem convenient, it’s a habit that can cause trouble if you’re not careful.
If you do need to stitch over a pin, go very slowly and very carefully. The needle can still hit the metal and bend or break, even with crosswise pins.
That impact can damage your machine or throw off the timing just enough to affect your stitches.
I wouldn’t recommend sewing over pins as part of your regular routine.
It’s best saved for moments when accuracy matters most – like matching up seams or keeping small sections perfectly aligned.
When I do it, I move at the slowest speed possible and make sure the pin is angled so the needle can slip past it, not strike it.
It’s one of those techniques you use only when really necessary.
A few extra seconds to remove your pins will always protect your fabric, your needle, and your machine.
If you want to go deeper into choosing the right tools for cleaner, safer sewing, I’ve shared more practical needle and thread tips that make a real difference at the machine.
How Many Pins Should You Use When Sewing?
The short answer: use as many pins as you need to feel in control – and as few as you can while keeping the fabric stable.
The right number depends on your experience, the fabric type, and what you’re sewing.
Start with More Pins When You’re Learning
When you’re just starting out, it’s completely normal to use a lot of pins.
- Use more pins for lightweight or slippery fabrics like silk or rayon.
- Pin every two inches or so for curves and corners that need extra control.
- Don’t rush this step – precise pinning at the beginning saves time at the machine.
More pins mean more security while you’re still getting familiar with fabric behavior.
As your confidence grows, you’ll naturally start using fewer.
Use Fewer Pins as You Gain Experience
With time, you’ll learn to manage fabric with your hands – guiding, easing, and smoothing as you sew.
That’s when you’ll notice you don’t need as many pins.
Experienced sewists often:
- Pin only where the fabric needs to stay aligned.
- Use hand pressure to maintain tension between pins.
- Trust the sewing machine’s feed dogs to help move fabric evenly.
This doesn’t mean rushing or skipping steps – it simply means you’re letting skill replace extra tools.
When in doubt, add an extra pin. Once the fabric feels stable and smooth under your hands, you have enough. With practice, you’ll find that sweet spot where everything stays in place – and the process feels effortless.
Simple Fixes for Common Mistakes

Even with practice, small pinning issues can happen. Here’s how to spot and fix them quickly:
- Fabric keeps shifting:
Keep a bit more tension between your hands as you pin. Add an extra pin or two near the edges for better hold. - Pins leave small marks:
Always pin within your seam allowance. For delicate fabrics, use extra-fine pins or a fabric clip instead. - Pins bend or snag the fabric:
Replace dull or bent pins. Use finer pins for lightweight fabrics and stronger ones for denim or canvas. - Pins won’t slide through easily:
Try inserting them at a slight angle and use your fingertip underneath to lift the fabric a little – it helps the pin glide through smoothly. - Uneven seams after sewing:
Check that your pins follow the same direction as your sewing. Align pinheads so you can pull them out easily and keep your stitching line steady. - Too many or too few pins:
Use more when you need stability (like curves or slippery fabric), fewer when you’re sewing straight seams with confidence.
Small corrections like these make a big difference – they keep your fabric smooth, your seams straight, and your sewing experience calm and steady.
If you’re still feeling stuck or discouraged, these little fixes are exactly the kind of mindset and technique shifts I share in how to overcome beginner sewing frustrations.
Start Practicing Today
Pinning shapes everything that follows. The steadier your pinning, the smoother your sewing.
Start practicing on scraps of fabric until the rhythm feels natural – tension in your hands, pins angled just right, and every seam sitting flat and secure.
Each time you sew, aim for consistency rather than speed.
The more intentional your pinning becomes, the less you’ll need to adjust or rework seams later.
Small, careful habits add up to confident, clean results every time.
What’s your biggest pinning challenge?
Share your thoughts or tips in the comments below. Your experience might help another beginner find their rhythm too.
FAQs
1. What type of pins should I use for sewing?
Choose fine, sharp pins with smooth shafts.
- For delicate fabrics: use extra-fine glass-head or silk pins.
- For medium-weight cotton or linen: regular glass-head pins work perfectly.
- For heavier fabrics: use long, sturdy quilting pins for better grip.
2. How should I store my pins to keep them sharp?
Keep your pins in a magnetic pin cushion or pincushion filled with emery sand (the red tomato-style ones). The emery helps clean and sharpen pin tips over time. Avoid leaving them in fabric between projects – it can dull or rust the metal.
3. How do I pin curved seams without puckering the fabric?
Use more pins, closer together – about every inch. Gently guide the outer layer around the curve while keeping the inner layer smooth. If the curve is tight, clip the seam allowance slightly before pinning to help it lie flat.
4. Should I pin on the right or wrong side of the fabric?
Always pin on the side that faces you at the machine – usually the right side. This way, you can see and remove each pin easily as you sew, and your fabric layers stay aligned throughout the seam.
5. What’s the best alternative to pins for delicate or stretchy fabrics?
Try fabric clips for thick or stretchy materials like knits, fleece, or leather. They hold layers without leaving marks. For sheer fabrics, use silk pins or fine quilting pins – they glide through fibers without snagging.
