You already own the perfect fit.
The shirt that falls just right on your shoulders. The shorts that hit your waist exactly where you like them.
Instead of searching for something similar, you can simply clone what already works – and it only takes a few minutes once you know how to draft a pattern from the clothes you love.
You trace what you love, note its proportions, and recreate it with your own hands. The result: a pattern that matches you better than anything off the rack.
In this article, I’ll walk you through every step – from choosing the right pieces to tracing, cutting, and assembling them into wearable duplicates.
It’s practical, straightforward, and deeply satisfying to do.
Once you learn it, you’ll never wonder if something will fit again – because you’ll know exactly how to make it fit.
Gather Your Tools
Before you begin tracing and shaping, take a few minutes to set yourself up well.
Here’s what to gather:
- Large craft paper or tracing paper
- A pencil or pen
- Scissors
- Pins
Keep your tools within reach. If you want a broader checklist, this guide to essential sewing tools can be helpful.
You’ll be tracing, marking, and flipping the fabric as you go, and a clear setup makes the process smooth.
How to Clone Your Clothes Step-by-Step
Cloning your clothes is part observation, part tracing, and part creative control.
The goal is to capture the exact fit and proportions of your favorite pieces so you can make them again anytime you want.
The process is straightforward once you understand how each piece is shaped and how it fits together.
Step 1: Start with a Closet Raid
Begin by picking two pieces that already fit you beautifully – a top and a pair of shorts. These will be your reference garments.
Top

For the top, look for one that sits comfortably at your shoulders.
The seam should land right where your shoulder ends – this gives you an accurate marker for future fits.
Choose a fabric that’s not stretchy, since stretch can distort the true shape.
Using a woven or stable knit gives you a clear, honest outline of your body’s proportions.
Shorts
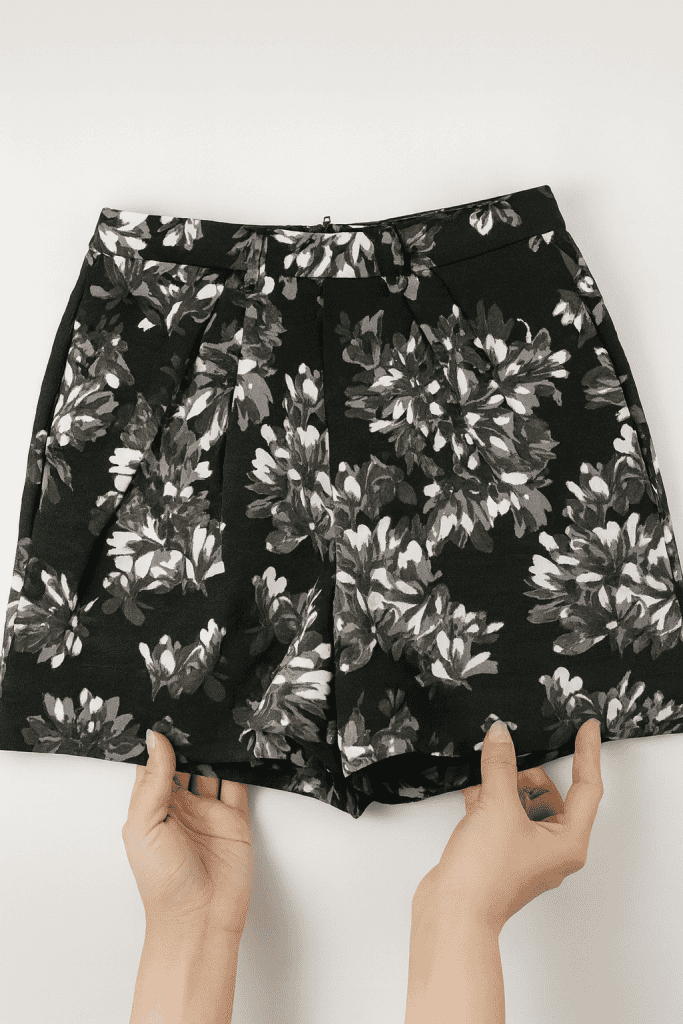
For the shorts, reach for a high-waisted pair – one that reaches your bellybutton naturally.
This will help you measure the rise accurately, so you know exactly where your waistband should sit.
Take note of the length too: how short or long they are determines your preferred hemline for future pairs.
Once you’ve selected your top and shorts, set them aside and prepare your tracing surface.
Now you’re ready to begin tracing your first template – the starting point for cloning your clothes perfectly.
Step 2: Trace the Top (Front Side)
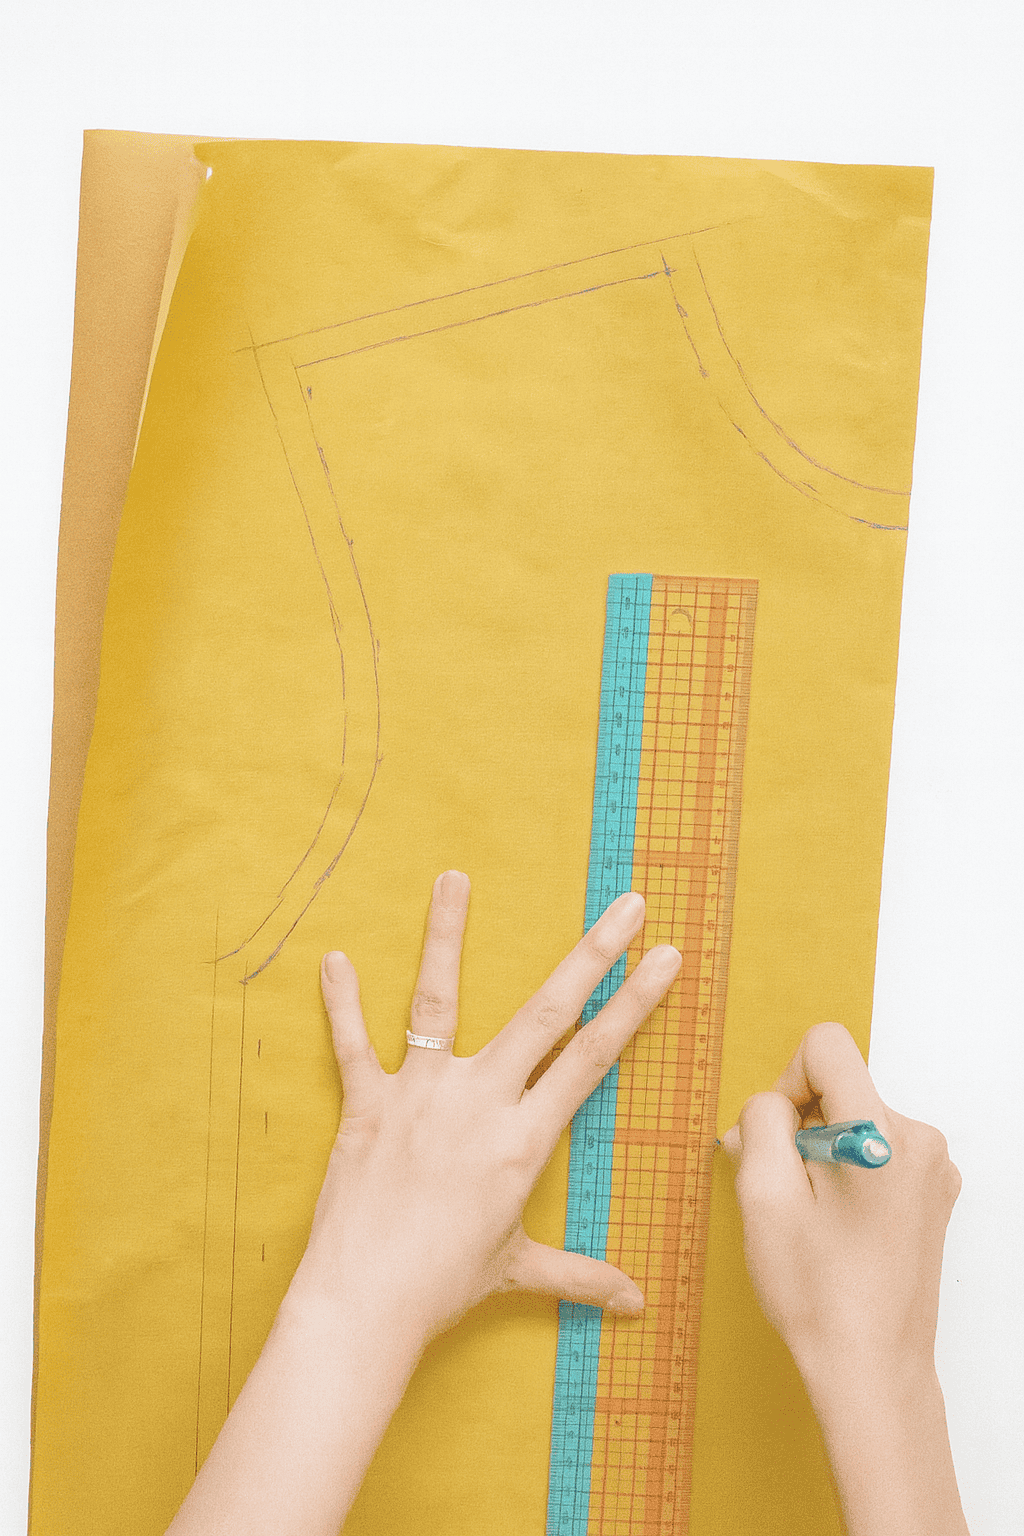
Lay your folded paper flat on your workspace.
The fold running down the middle will be your guide for symmetry – it represents the center of your shirt.
Now place your chosen top on the paper so that its front center seam or fold sits exactly along that paper fold.
Smooth the fabric gently so it lies flat and aligned.
Using your pencil or pen, begin tracing around the shirt with dotted lines. Keep your marks about half an inch away from the fabric edge.
This extra space gives you a built-in seam allowance, so your finished piece maintains the same proportions as the original. (If that term is new, this quick guide explains what is seam allowance.)
Continue tracing all the way around the body of the shirt, following each curve and corner with steady, even motion.
Once you’ve finished the dotted outline, connect the dots with a solid line to create a clean, continuous border.
This gives you the final shape of your front pattern piece.
Before lifting the shirt, add a small mark along the fold at both the top and bottom – these reference points will help when you flip the paper to trace the back side later.
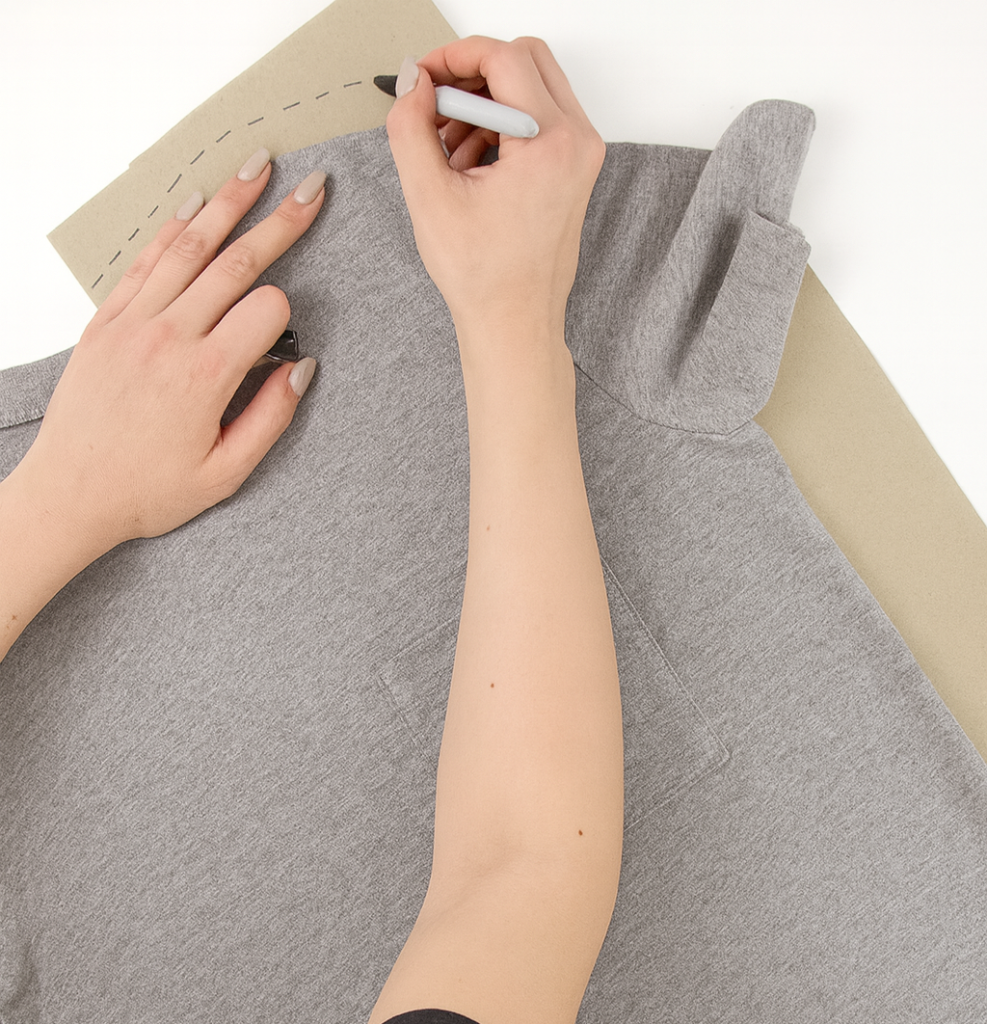
Step 3: Trace the Back of the Top
With your front traced and marked, it’s time to move on to the back.
Keep the same sheet of paper folded – this maintains your center alignment.
Flip your shirt over so the back now faces up, and line up its center once again along the fold of the paper.
Use the same tracing method: dotted lines spaced about half an inch away from the edge of the fabric.
Work slowly around the outline, paying special attention to the shoulders and the armholes.
The back of a shirt is shaped differently than the front, and capturing these differences is what makes your clone fit naturally.
For the armholes, try this technique: lift the fabric slightly with one hand and, using your fingernail or pencil tip, make small dotted marks about every inch along the curve. When you’re done, connect those dots with a smooth line – this gives you a precise armhole curve without distorting the fabric.
As you trace, notice the key details:
- The back neckline is higher and more level.
- The front neckline (which you already traced) dips lower.
- The shoulder seams you marked from the front tracing will guide where the back piece connects, ensuring both sides match perfectly.
Once the outline is complete, check that your top and bottom fold marks align. This helps you confirm the pattern stays continuous across the front and back.
In the next step, you’ll fine-tune the neckline, shoulders, and length so the cloned piece fits exactly how you want it to.
Step 4: Adjust the Fit and Shape
Now that you have both the front and back outlines, it’s time to refine the details – the parts that make the garment truly your own.
Neckline
Start with the neckline.
On most tops, the back neckline sits higher, while the front neckline curves lower.
If you prefer a deeper scoop or a wider opening, simply draw a new curved line on your front template.
Go lower for depth, or move outward from the center for width.
Shoulders
Next, look at the shoulders. The lines you traced mark where the seam should naturally land.
If you like a relaxed or drop-shoulder style, extend the shoulder line outward slightly.
This adjustment shifts the sleeve position and gives the shirt an easier drape.
Bottom Edge
At the bottom edge, you can change the overall length or shape.
Draw a new hemline if you want a cropped top, or extend the line if you prefer a longer, more comfortable fit.
You can even curve the hem slightly for a rounded or high-low finish.
Width
Finally, adjust the width along the sides.
Move your side lines outward for a looser fit, or inward for something more fitted.
Keep your adjustments even on both sides so the pattern stays balanced when cut.
These simple edits give you full control over how your cloned top will look and feel.
Step 5: Trace the Sleeves
With your front and back templates ready, it’s time to create the sleeve pattern.
This part may look a little more detailed, but once you understand how the curves work, it becomes surprisingly straightforward.
Start by folding the sleeve of your shirt in half lengthwise so that the top seam runs along the fold.
Lay it flat on a new folded sheet of paper, keeping the fold of the sleeve aligned with the paper fold – this ensures the sleeve will be symmetrical when unfolded.
Now begin tracing with dotted lines, just as before, about half an inch away from the fabric edge for your seam allowance.
Follow the curve of the shoulder carefully, pausing to lift and flatten the fabric as you go.
This helps capture the natural shape of the sleeve without stretching or distorting it.
When you’ve traced the top section, flip the paper to trace the other side.
Add two small marks to note where you stopped and started – these keep your lines continuous.
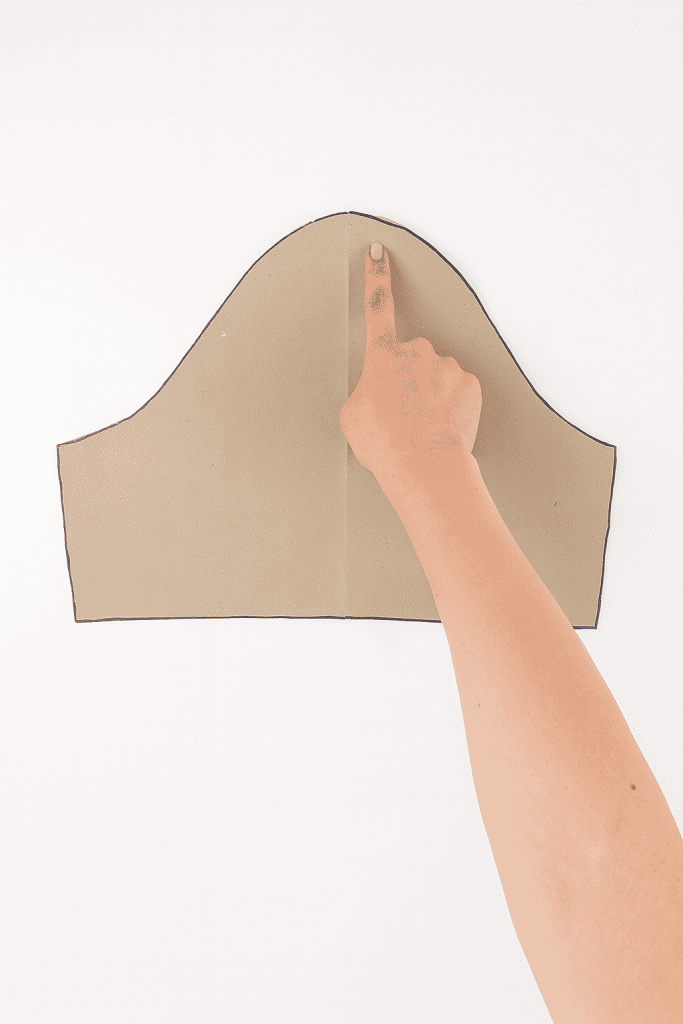
Connect your dotted marks with solid lines for a clean outline.
Once you unfold the paper, you’ll notice a key difference:
- The front side of the sleeve has a steeper curve, allowing for arm movement and comfort.
- The back side has a gentler slope, which helps the sleeve sit smoothly against your shoulder blade.
Cut along your outline to finish the sleeve pattern.
Remember that when you cut your fabric later, you’ll need two sleeves (one traced with the pattern facing up and one facing down) to ensure they mirror each other while still following the fabric’s grain.
You can also make simple design changes at this stage:
- Lengthen the sleeve for a sweater or long-sleeve tee.
- Shorten it for a T-shirt or cap sleeve.
- Widen it slightly from the underarm if you prefer a more relaxed or roomy fit.
With your sleeves traced and ready, you now have the three essential templates for your top: front, back, and sleeve.
The next step brings us to the lower half of your outfit – your perfectly cloned shorts.
Step 6: Trace the Shorts (Front and Back)
Now that your top pattern is complete, let’s move on to the shorts.
The approach is nearly the same – observe, fold, trace, and mark with care.
Front Side
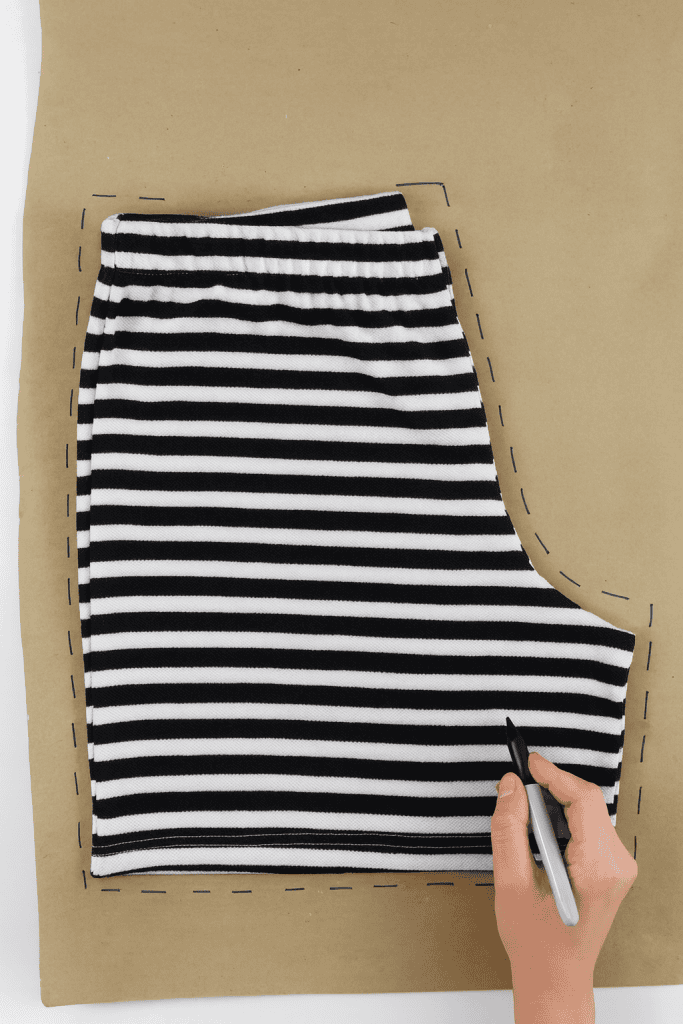
Start by folding your shorts in half so you’re only looking at one side – the front. Smooth out any wrinkles and align the edges as best you can.
Lay them on your folded sheet of paper, with the fold of the shorts running along the fold of the paper.
Using your pencil or pen, trace around the shape with dotted lines, keeping your marks half an inch away from the fabric edge for your seam allowance.
Follow the curve of the crotch, the line of the waistband, and the slope of the hem.
If your shorts have a waistband, add a mark half an inch above that seam – this helps you remember where the waistband sits so you can recreate it later.
Once you’ve finished the dotted outline, connect the dots with solid lines to form a smooth, complete shape.
Back Side
Next, move on to the back side. This part can feel a bit trickier since the back is shaped differently, but the same tracing method applies.
Fold the shorts again so you’re seeing the back half. Line up the center back seam along the paper fold.
One side will naturally lie flat, while the other may need to be gently pulled outward – just enough to reveal the full side seam without stretching the fabric.
Trace with the same dotted lines, keeping that half-inch distance consistent. When both sides are done, you’ll notice a few important differences:
- The inner leg seam on the back is longer than on the front. That’s intentional – it allows the fabric to shape comfortably around the curve of your body.
- The side seams on both pieces should be the same length – this ensures they’ll line up perfectly when sewn together.
After tracing, connect your lines, and cut out your paper templates for the front and back. These will form the foundation for your custom shorts or pants.
At this stage, you can also start thinking about simple modifications:
- Lengthen the leg lines to create longer shorts or pants.
- Lower the waistline slightly if you prefer a mid-rise fit.
- Widen both side seams if you want a relaxed, flowy silhouette.
This pattern gives you flexibility – it’s your base to build from.
Once you’ve confirmed your outlines are even and clean, you’re ready for the next step: refining your patterns before you cut into fabric.
Step 7: Refine and Compare
Now that all your templates are traced, take a few minutes to check that everything lines up.
Place the front and back pieces of your shorts side by side. The side seams should be the same length – they’ll meet when sewn.
The inner leg seam on the back will be longer than the front, and that’s correct – it shapes naturally around the body.
Do the same with your top pieces. Match the shoulder seams and side seams, and make sure the armholes curve smoothly between the front and back.
If anything looks uneven, lightly adjust your lines until they flow cleanly.
Label each piece clearly – front, back, sleeve – and your templates are ready to use.
A few quick checks now make the sewing step much easier later.
Step 8: Cut and Assemble Your Fabric
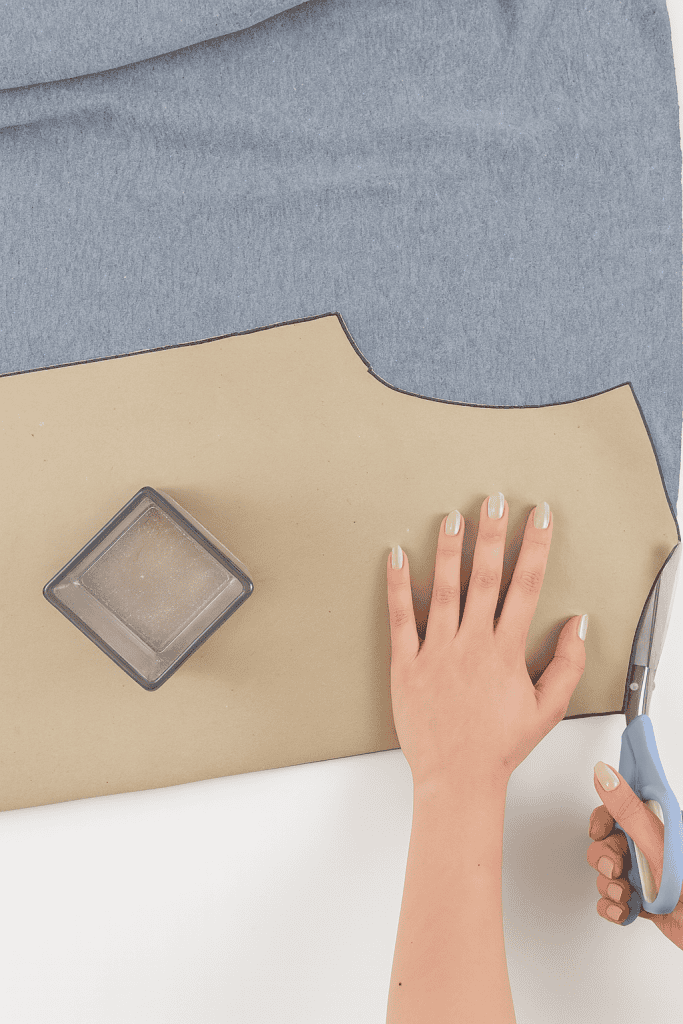
With your paper templates ready, it’s time to bring them to life.
Lay your fabric flat and smooth out any folds or wrinkles.
Place the front and back shirt templates along the fabric’s fold line, then trace and cut around each shape.
Do the same with the sleeve template, remembering to flip it once so you get both a right and left sleeve.
For the shorts, position the front and back templates on the fabric and cut carefully, keeping your seam allowance consistent.
Each cut should follow the clean, solid lines you refined earlier.
Next, cut a narrow strip of fabric along the stretchy direction – this will become your collar trim.
If you’d like to personalize the design, now’s the time: widen the sleeves, extend the hem, or add small side slits for movement.
Once everything is cut, you can begin assembling – joining front to back, attaching sleeves, and finishing with the collar or waistband.
You’ve now turned simple outlines into wearable pieces that fit you exactly right.
Step 9: Sew and Celebrate Your Fit

Now comes the rewarding part – turning your cut pieces into a finished outfit.
- Begin by sewing the front and back together along the shoulder and side seams.
- Attach the sleeves, matching the curves where they meet the armholes.
- Then add your collar trim or waistband, keeping your stitches even and steady.
- As you sew, pause to try the pieces on.
Small adjustments – like trimming a seam or slightly deepening a neckline – can fine-tune the fit.
When you finish, you’ll have a recreated version of your favorite outfit – familiar, comfortable, and made entirely by you.
The best part? You now have a custom pattern you can reuse anytime to make more pieces in different fabrics or styles.
That’s the beauty of cloning your clothes – you know they fit before you even start.
If you want to go deeper into garment construction, you can check out my guide on how to start sewing your own clothes.
Pro Tips for Success
A few small habits make the whole process smoother and your results more accurate.
- Work on a flat surface. It keeps the fabric from shifting and helps your lines stay even.
- Use dotted tracing lines. They’re easier to adjust and prevent pulling on the fabric.
- Label everything. Mark front, back, sleeve, and grain direction on your templates before storing them.
- Keep your fold marks visible. They’re your guide for symmetry and will save time later.
- Reuse your patterns. Once you’ve made one that fits perfectly, you can trace it again and again in new fabrics or styles.
Consistency is what makes this method powerful.
Each project builds your confidence – and soon, tracing and adjusting will feel second nature.
If your goal is better fit and proportion, this guide on how to tailor clothes to flatter your body is a great next step.
Make, Wear, Repeat
Cloning your clothes is a skill that grows with you.
Once you’ve traced, cut, and sewn your first set, you’ll start to notice how each line, curve, and seam teaches you about your own fit.
The process becomes intuitive.
You’ll reach for your favorite fabrics, make small design tweaks, and know exactly how to shape each piece for comfort and confidence.
Raid your closet, pick that perfect-fitting top or pair of shorts, and start tracing.
Once you see how simple it really is, you’ll wonder why you ever waited.
Have you tried cloning your clothes before? Comment below and share your experience or any adjustments you made to personalize your pattern.
Your insights might help another beginner take the leap!
FAQs
1. Can I use stretchy fabric when tracing my clothes?
It’s best to start with non-stretch fabric when tracing your first pattern. Stretchy fabrics can shift while tracing and distort the true fit. Once you’re comfortable with the process, you can adapt your pattern slightly to work with stretch materials.
2. How do I add seam allowance if I forgot to trace half an inch out?
If you traced right along the fabric edge by accident, you can simply add a half-inch border around your existing lines before cutting your fabric. That extra space ensures your final garment keeps the correct fit after sewing.
3. What’s the best paper to use for tracing?
Use craft paper or tracing paper – both are durable and easy to fold. Craft paper works well if you want to store patterns for reuse, while tracing paper helps you see through layers for adjustments.
4. How can I make sure my patterns stay symmetrical?
Always fold your paper in half before tracing and keep the garment’s center aligned along that fold. Mark the top and bottom of the fold each time you flip or reposition the fabric – this keeps your template consistent on both sides.
5. Can I use this same method for pants or dresses?
Yes, absolutely. The tracing principle stays the same – you’ll just be working with longer or more detailed pieces. Start simple with shorts or a basic top, then move to pants, skirts, or dresses once you’re confident in aligning seams and curves.
