Kids are naturally drawn to butterfly, which makes butterfly crafts one of the most joyful and natural creative outlets you can offer a child.
Whether you’re a mom at home looking for a meaningful afternoon activity, a teacher planning a spring unit, or just someone who loves keeping little hands busy with something beautiful, this list of butterfly crafts for kids has you covered.
These projects use simple, budget-friendly supplies, and most of them can be done in under an hour. From painting to folding to cutting and gluing, there’s a little something for every age and skill level here.
So spread out some newspaper, get the craft supplies ready, and let’s make something wonderful together.
Why Butterfly Crafts Are So Good for Kids
Beyond being fun (and honestly, so pretty), butterfly crafts offer a surprising amount of developmental value. When kids work with their hands – cutting, painting, gluing, folding – they’re building fine motor skills that directly support their writing and coordination later on.
Crafts also encourage creativity, patience, and the satisfaction of finishing something they started.
Butterflies are also a rich entry point into nature conversations. You can talk about metamorphosis, the life cycle from caterpillar to chrysalis to butterfly, and why different species have different wing patterns.
Learning and creating at the same time is one of the most natural, effective ways children absorb information – and it’s far more memorable than sitting with a worksheet. This is actually part of why forest school activities for spring lean so heavily into nature-based art and crafting.
10 Adorable Butterfly Crafts for Kids to Make This Season
These butterfly craft ideas are as simple as they are sweet.
Each one below comes with ideas for how to adapt them for different ages, so no one gets left out of the fun.
And if your kids love getting their hands into colorful flower crafts for kids, they are going to absolutely love these butterfly projects too.
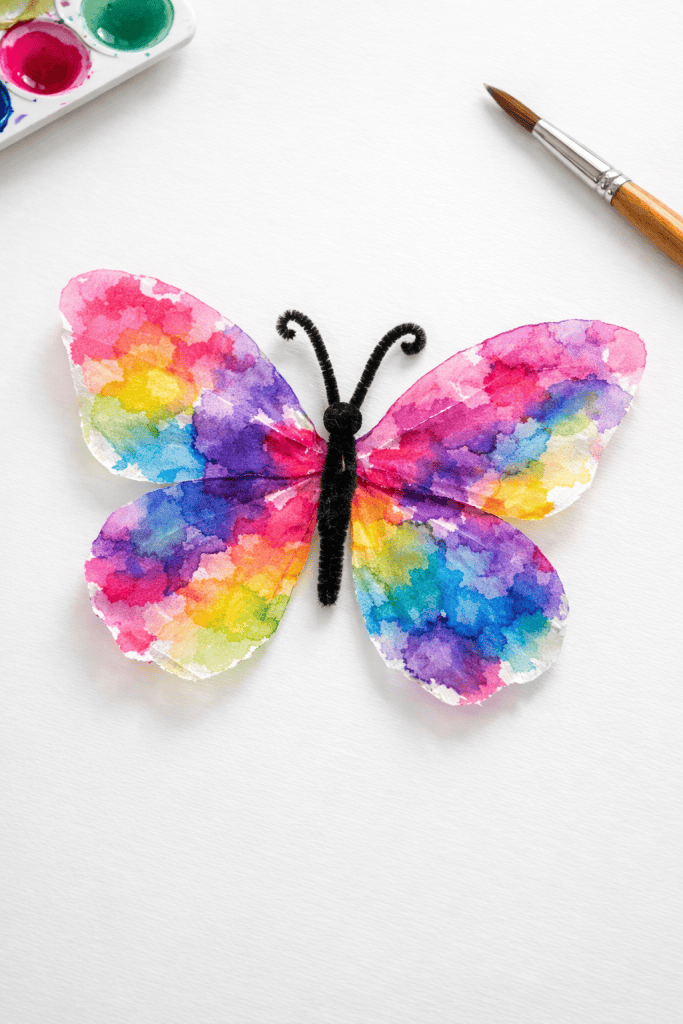
1. Coffee Filter Butterfly
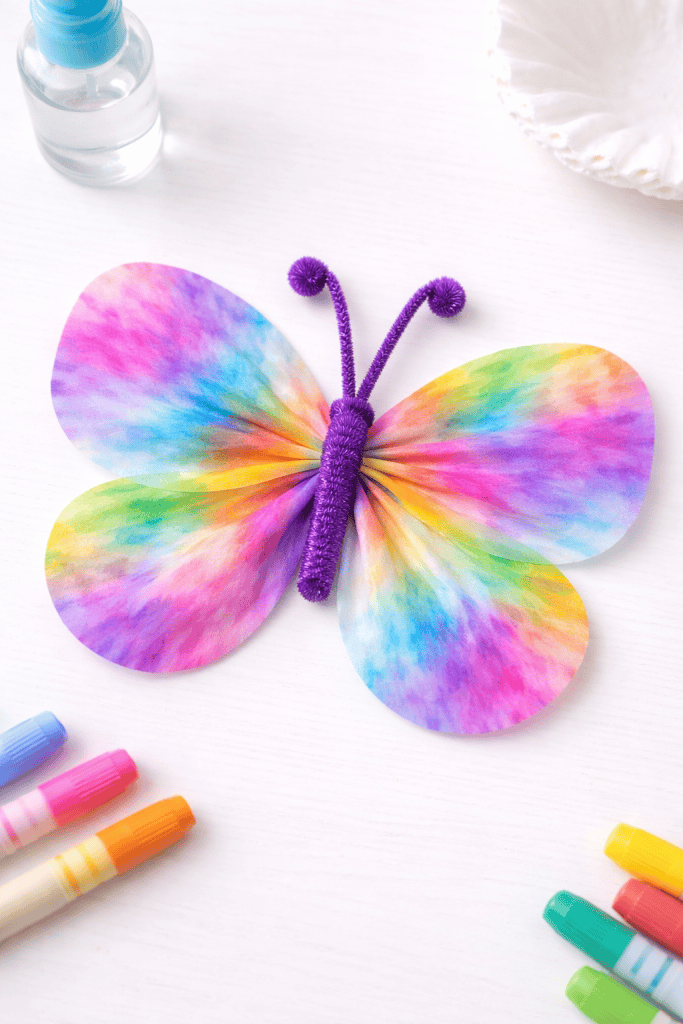
This is a classic for a reason. All you need are white coffee filters, washable markers, a spray bottle of water, and a pipe cleaner.
Have kids color the coffee filters in any pattern they love, then mist lightly with water and watch the colors bleed together in the most gorgeous way.
Once dry, pinch the middle and twist a pipe cleaner around to form the body and antennae.
These turn out so beautifully – they look almost like stained glass.
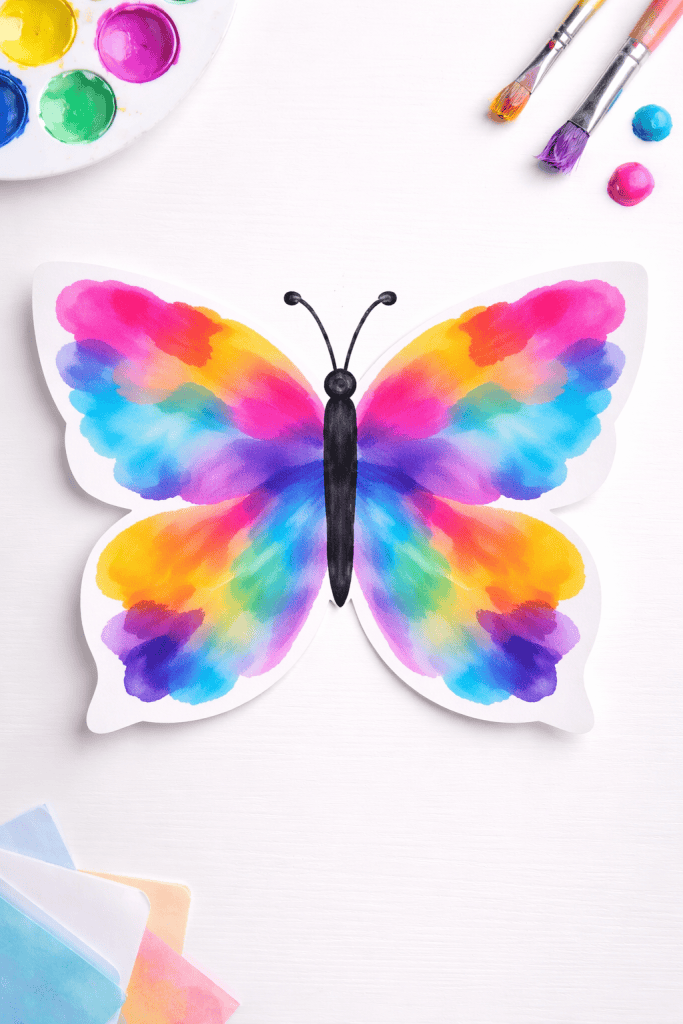
2. Handprint Butterfly Painting
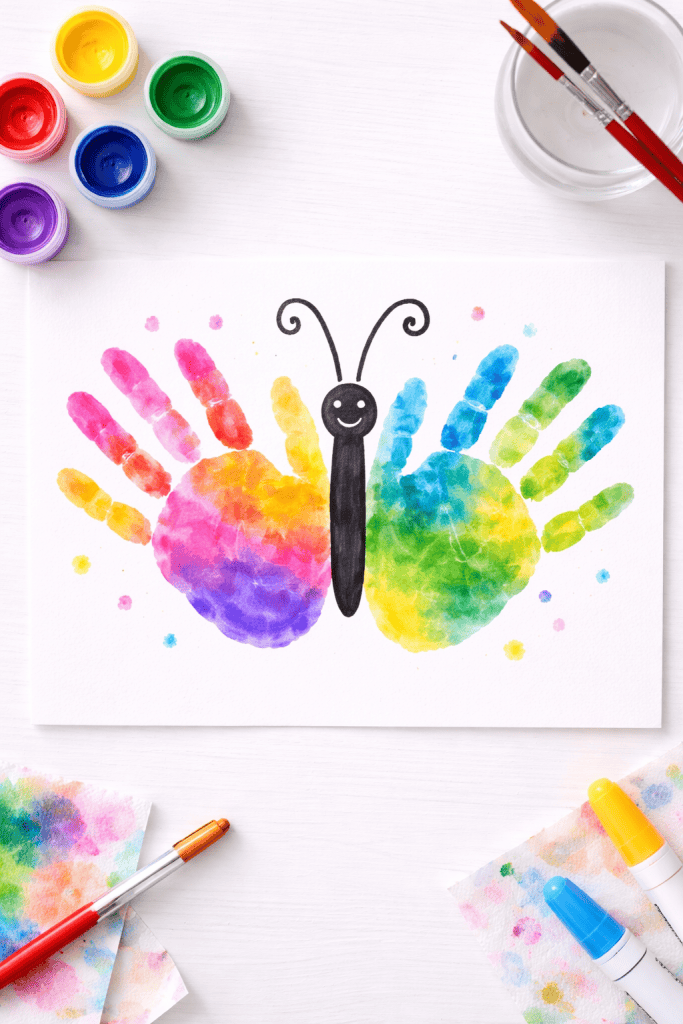
There is truly nothing more precious than a child’s handprint preserved in a craft.
Paint both of your child’s hands in bright colors – one hand per wing – and press them onto paper with the thumbs touching in the middle to form the butterfly shape.
Add a simple painted body down the center, and draw on antennae with a marker once dry.
This one is especially sweet to keep or frame, and it doubles beautifully as a thoughtful gift – a lot like these sweetest Mother’s Day gifts from kids.
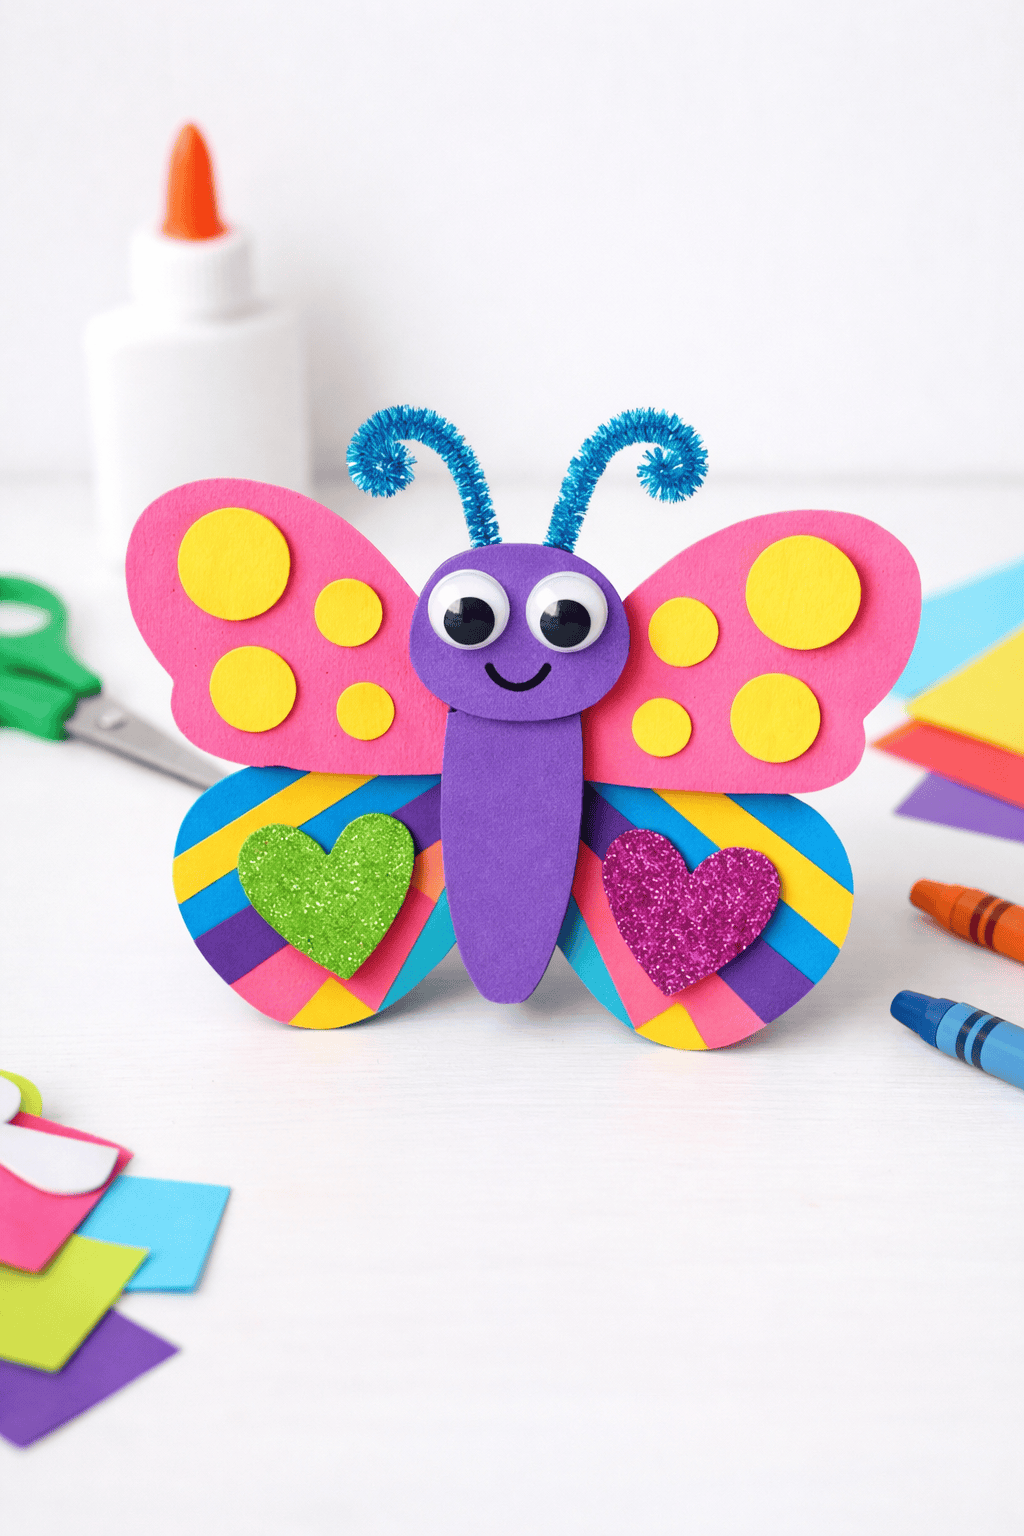
3. Cupcake Liner Butterfly
Cupcake liners are wildly underrated as a craft supply.
Use two large and two small liners per butterfly – the large ones form the top wings, the small ones form the bottom wings.
Arrange them on paper, glue down, and add a clothespin body painted in black or brown down the middle.
Draw on a little face with a marker and add pipe cleaner antennae. Simple, adorable, and done in minutes.
4. Watercolor Butterfly on Wax Paper
Cut butterfly wing shapes out of wax paper and let kids paint freely using liquid watercolors.
The watercolors bead and blend in the most beautiful, unpredictable ways on the wax paper surface, creating a stunning effect.
Once dry, tape them to a window and watch the light filter through.
It looks like a real stained glass butterfly, and kids feel so proud seeing their work displayed like art.
If your little ones enjoy this kind of sensory-style creating, they’ll also love exploring easy spring crafts for kids that use similar techniques.
5. Paper Plate Butterfly
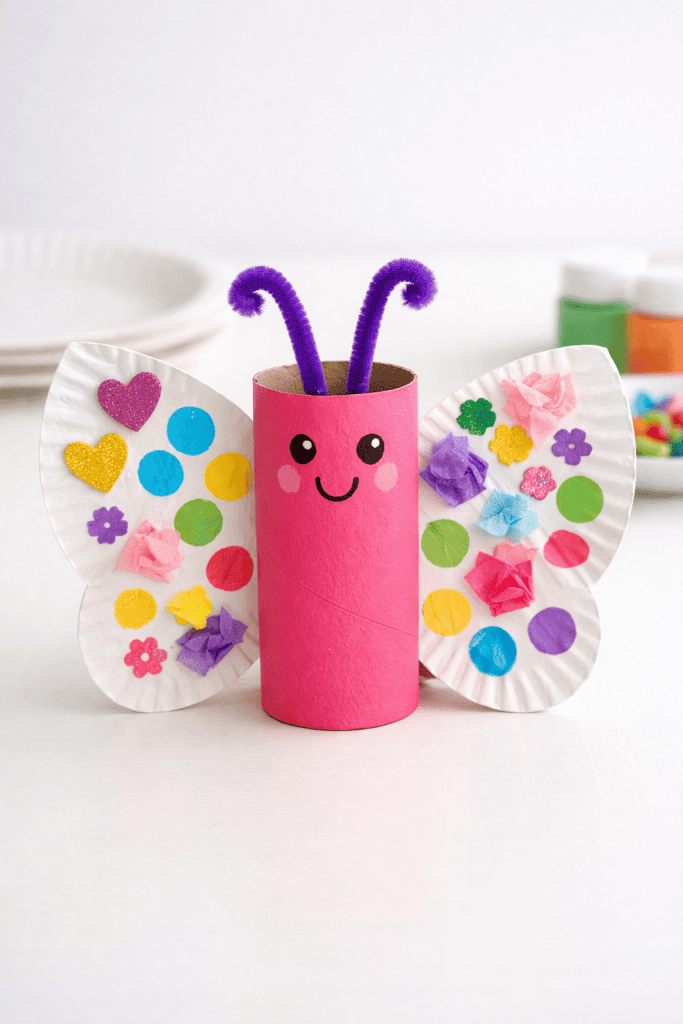
Paper plates are another trusty craft staple.
Cut a paper plate in half to create two wings, then decorate with paint, dot markers, stickers, or tissue paper.
Attach both halves to a painted toilet paper roll body, add pipe cleaner antennae, and you’ve got a three-dimensional butterfly that stands or hangs beautifully.
Great for toddlers and older kids alike – just adjust the decorating method to suit the age.
6. Butterfly Symmetry Painting (Ink Blot Art)
This one also doubles as a gentle science lesson!
Fold a piece of paper in half, open it back up, and have your child drop or paint blobs of color on one side.
Refold the paper and press firmly, then open to reveal a perfectly symmetrical butterfly wing pattern.
Cut into a butterfly shape and add a body.
The results are always completely unique and always stunning – every single time.
7. Tissue Paper Butterfly Sun Catcher
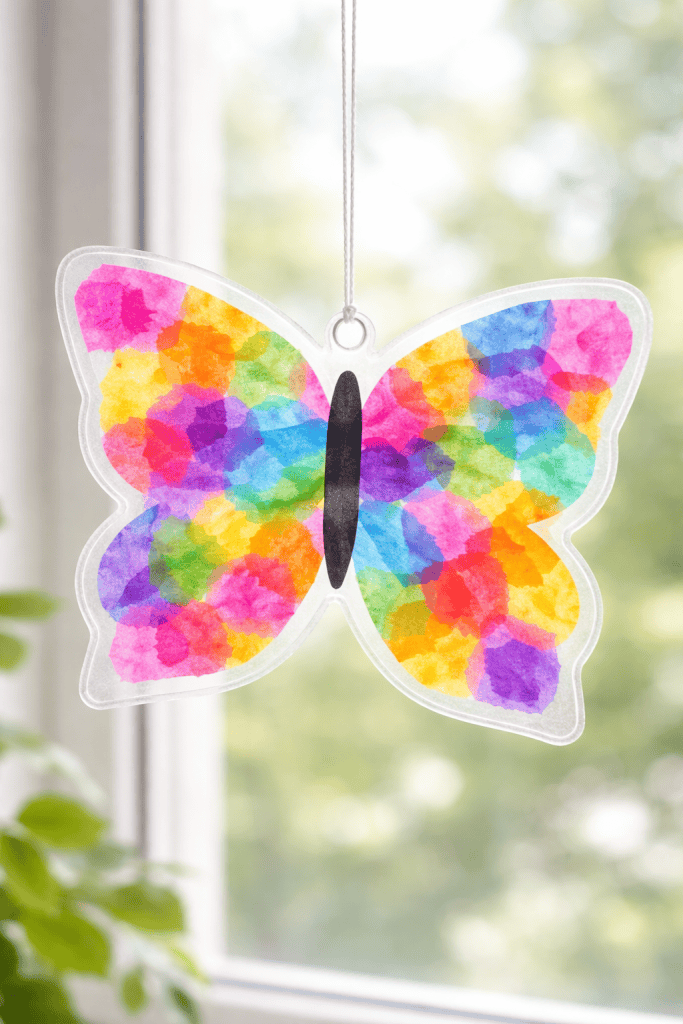
Cut butterfly shapes out of clear contact paper (sticky side up), then let kids press torn pieces of colored tissue paper all over the wings.
Once covered, place another piece of contact paper on top to seal it in.
Trim around the shape, punch a hole at the top, and hang with string in a sunny window.
The light glows right through the tissue paper and it is absolutely breathtaking.
This is one of those crafts that looks like it took so much more effort than it did.
8. Egg Carton Butterfly
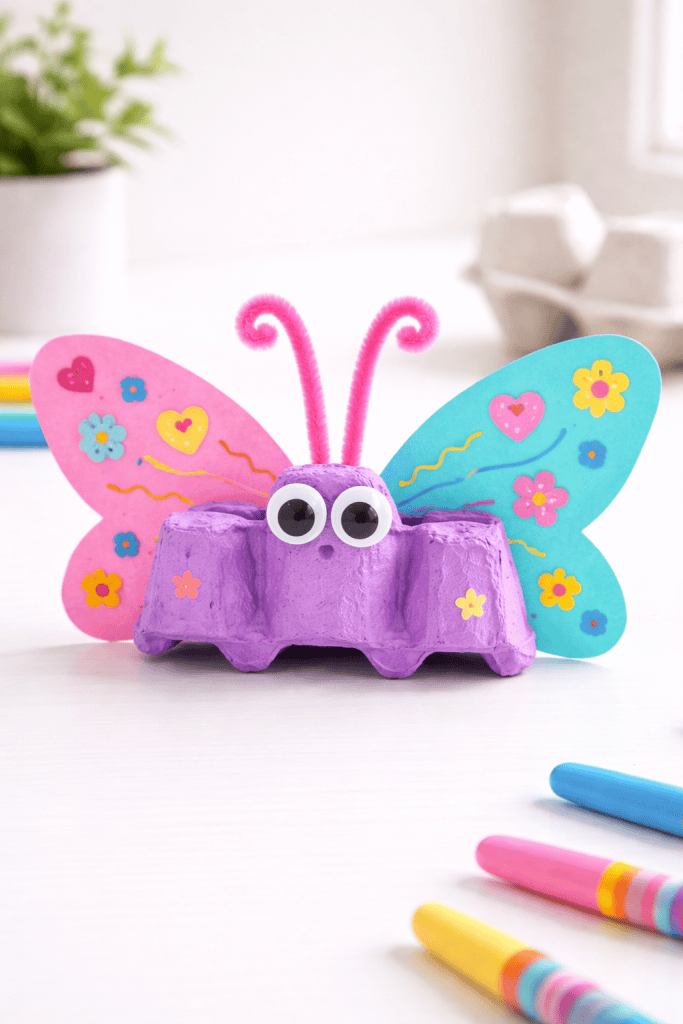
Save those egg cartons!
Cut a section of two or three cups to use as the butterfly body, then paint it bright and let dry.
Cut wing shapes from cardstock or foam sheets, decorate with markers or stickers, and attach to the egg carton body.
Add pipe cleaner antennae and googly eyes for the cutest little bug you’ve ever seen.
This is a wonderful way to use up supplies you already have on hand – similar to how we love these adorable nature crafts for kids using things from your backyard.
9. Butterfly Spin Art Painting

This one is pure fun (and a little bit magical).
Cut a butterfly shape out of cardstock and place it inside a salad spinner or spin art machine. Drop a few blobs of washable paint onto the wings, then spin it.
When you open it up, the paint spreads out into the coolest streaks and patterns – almost like tie-dye, but faster and way more exciting for kids.
Let it dry, then add a simple body down the center using paint, a marker, or even a glued-on craft stick. Finish with pipe cleaner antennae.
Every single one turns out completely unique, and kids love the surprise of seeing their design appear.
10. Nature Butterfly Collage
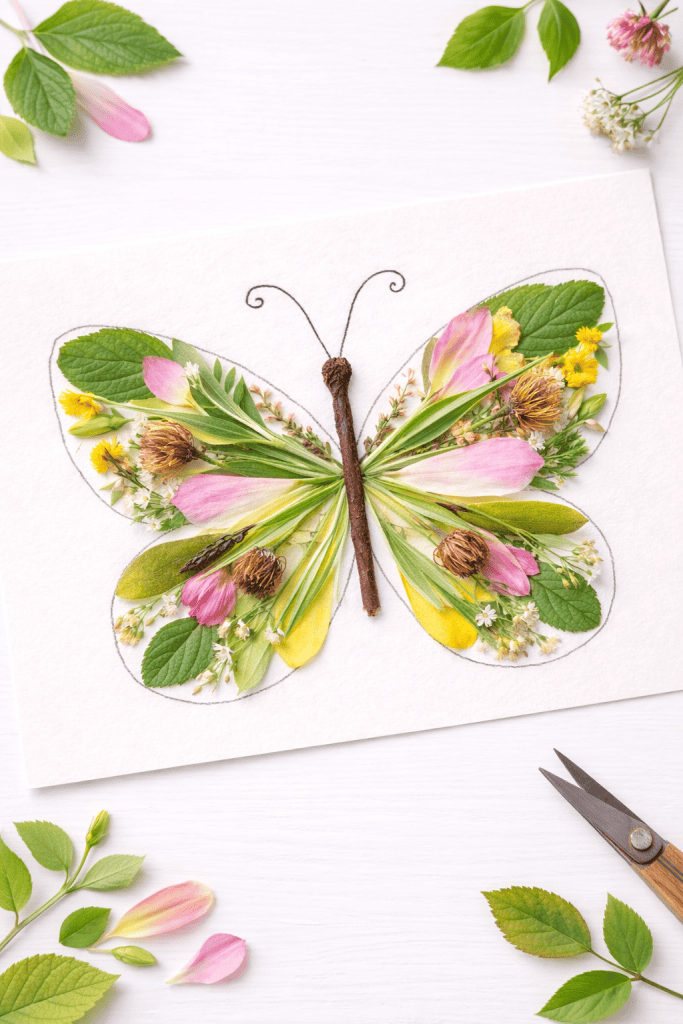
Head outside first and collect interesting natural treasures – leaves, flower petals, small twigs, grass blades, and anything else that catches your eye.
Back inside, arrange these finds into butterfly wing shapes on paper and glue them down.
Add a painted or drawn body in the center. Every nature butterfly will look completely different and totally unique to the child who made it.
For even more inspiration using found natural materials, browse through these fun nature crafts for forest school – they pair so well with outdoor exploration.
Helpful Tips for Setting Up the Perfect Butterfly Craft Session
Here are a few things that make these butterfly crafts go more smoothly and (bonus!) make cleanup a lot less stressful.
- First, cover your workspace. A layer of newspaper, a plastic tablecloth, or even an old sheet does the trick.
- Second, set out all your supplies before you call the kids over.
- Third, embrace the mess. The most creative results come from kids who feel free to experiment, drip, smudge, and layer without worrying about making a mistake.
- For younger kids, pre-cut shapes ahead of time so they can focus on the decorating part.
- For older kids, let them cut their own shapes and make more independent choices about colors and materials. You can always set out a few extra supplies and let them freestyle once they’ve completed the main project.
And if you love bringing craft time into a broader learning rhythm at home, you might enjoy reading about forest school activities for beginners – a beautiful approach that weaves creativity right into everyday outdoor learning.
The Best Supplies to Keep on Hand for Butterfly Crafts
Most of the supplies are things you likely already have around the house, and anything you’re missing is easy to find at a dollar store or craft shop without spending much at all.
- Washable paints in a variety of colors
- Coffee filters
- Pipe cleaners (different colors)
- Tissue paper
- Watercolor paints
- Paper plates
- Egg cartons
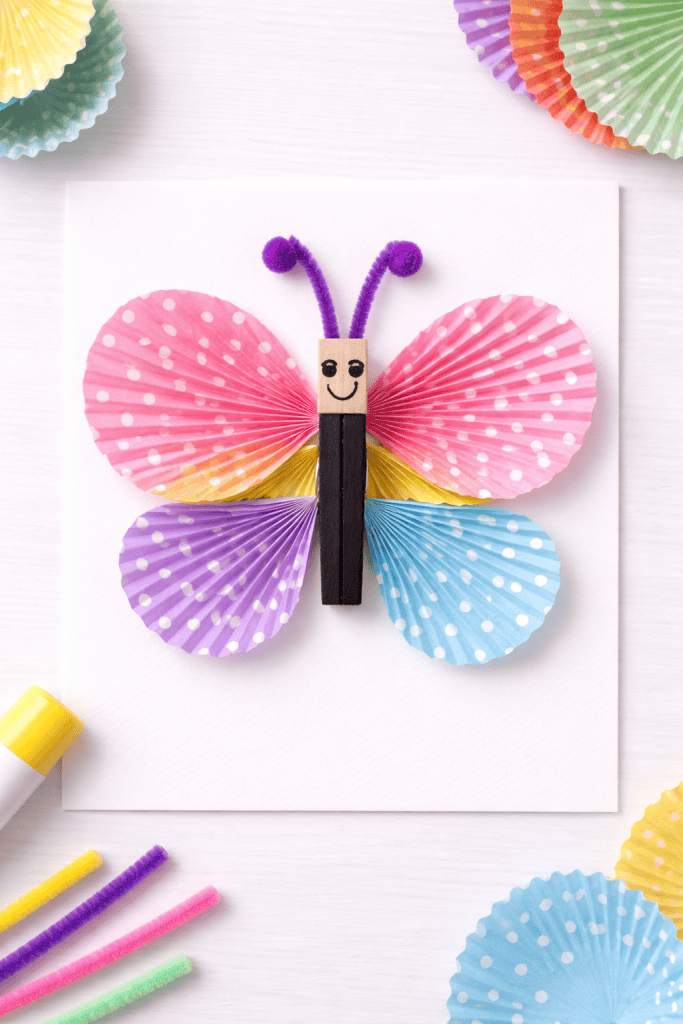
- Wooden clothespins
- Cardstock
- Googly eyes
- Hot glue gun (for adult use only)
- Markers (regular and dot markers both work great)
- Kid-friendly scissors for safe, independent crafting
- Fabric scraps (optional, but highly recommended for texture and creativity)
If you love working with fabric scraps for crafts (which you absolutely should try – it’s so satisfying), check out these ideas for clever scrap fabric crafts to use up every last piece. Small fabric snippets can add incredible texture to butterfly wings and make your collages look really special.
Butterfly Crafts Across the Seasons and Occasions
One of the best things about butterfly crafts is that they’re not locked into one season.
Yes, spring is a natural fit – butterflies are blooming everywhere and kids are eager to get outside and notice them. But butterflies make wonderful summer crafts too, especially when paired with garden exploration or outdoor painting.
In fall, you can adapt the color palette to warm oranges and browns to mimic a Monarch butterfly. Even in winter, a butterfly craft feels cheerful and bright on a grey afternoon.
Butterflies also show up beautifully in themed crafting for Mother’s Day (this roundup of Mother’s Day crafts for kids is full of beautiful options), spring school events, church activities, and birthday parties. The handprint butterfly in particular makes a stunning keepsake gift that mamas will treasure for years.
If you’re planning a craft for a classroom or group setting, the coffee filter butterfly and the ink blot symmetry butterfly are your best bets – they’re fast, reliable, and every single child ends up with something uniquely beautiful to bring home.
Ready to Start Crafting? Grab Your Supplies and Make Something Beautiful Today
Whether you pick one butterfly craft or work your way through all ten, I hope this inspires a genuinely lovely afternoon of creating with your kids.
If your kids fall in love with crafting this season, there is so much more waiting for you here on the blog. Browse through all the easy spring crafts for kids for even more seasonal inspiration, or explore the full felt craft ideas for kids collection for projects you can use all year long.
Which butterfly craft are you most excited to try first? Do you have a favorite supply or technique I didn’t mention? Drop a comment below and let me know! I read every single one and love seeing what you’re making with your little ones.
Get the FREE Fruit of the Spirit Playdough Mats + Coloring Pages

Make your Fruit of the Spirit lesson hands-on with this FREE printable set that includes a playdough mat and a bonus coloring page—two activities in one.
Kids can build and color their way through love, joy, peace, patience, kindness, goodness, faithfulness, gentleness, and self-control from Galatians 5:22–23. For easy re-use, laminate the mat (or slide it into a page protector) and pull it out anytime for Bible time, Sunday School, or quiet time at home.
Click below to grab both printables.
Frequently Asked Questions
What age is best for butterfly crafts?
Butterfly crafts can be adapted for almost any age, from toddlers to older elementary kids. For children ages 2–3, focus on simple stamping, painting, or pressing pre-cut shapes. Children ages 4–6 can handle cutting, gluing, and more detailed decorating with some guidance.
Kids ages 7 and up can take on more complex projects independently, like the wax paper sun catcher or nature collage. The key is choosing a project (or adapting it) to match where your child is developmentally – not where you want them to be.
Can I do these butterfly crafts without buying anything special?
Absolutely! Most of the butterfly crafts in this list rely on everyday household supplies – coffee filters, egg cartons, paper plates, clothespins, and things you likely already have in your junk drawer or recycling bin. For the nature collage, everything you need is right outside your door.
The only items you might want to pick up if you don’t have them are washable paint and pipe cleaners, both of which are very affordable and available at any dollar store or craft shop.
How do I make butterfly crafts more durable so kids can keep them longer?
To help butterfly crafts last, let each layer of paint or glue dry fully before moving on to the next step – rushing this is the most common reason crafts fall apart. For paper-based butterflies, a light coat of Mod Podge or clear craft sealant over the finished piece helps preserve the colors and adds a little stiffness.
For 3D crafts like the clothespin or egg carton butterfly, a hot glue gun (used by an adult) creates a much stronger hold than regular school glue. Storing finished crafts in a box rather than letting them sit out also extends their life significantly.
Are there butterfly crafts that work well for large groups or classrooms?
Yes! The coffee filter butterfly and the symmetry ink blot painting are both excellent for classrooms or group settings because they require minimal adult assistance, use inexpensive supplies in bulk, and can be completed in a single session.
The cupcake liner butterfly is also a great group option – cupcake liners come in bulk packs and kids can personalize their butterflies with stickers and markers without needing paint at all. For groups, it helps to pre-cut any wing shapes ahead of time and set up each station with everything already laid out.
How can I use butterfly crafts to teach kids about the life cycle of a butterfly?
Crafting is actually one of the most effective ways to teach the butterfly life cycle because it makes each stage tangible and memorable.
Consider making four separate crafts – one for each stage: an egg (a small painted rock or dot on a leaf), a caterpillar (a painted egg carton strip), a chrysalis (a wrapped toilet paper roll), and the butterfly itself.
You can do all four in one session as a “life cycle craft set” and display them together. Reading a picture book about metamorphosis alongside the crafts adds another layer of learning that kids retain really well.
