If you have been collecting pile of bottle caps in a jar on your windowsill (no judgment – we all do it), this list is your sign to finally put them to use.
Bottle cap crafts have been around for a while, but most tutorials recycle the same tired ideas: glue a few caps together, call it art. Not here. These ten projects are genuinely clever, surprisingly functional, and honestly a lot of fun to make – whether you are crafting solo on a quiet afternoon or pulling the kids in for a weekend project.
If you love making beautiful things from materials most people toss away, you are going to feel right at home here. And if you want even more inspiration for turning everyday scraps into something lovely, check out our round-up of 12 Clever Scrap Fabric Crafts to Use Up Every Last Piece – the same spirit of resourcefulness, just with fabric instead of metal.
Why Bottle Cap Crafts Belong in Every Handmaker’s Toolkit
Bottle caps are free, abundant, and endlessly versatile – and they carry a certain charm that store-bought craft supplies simply cannot replicate. Each cap has its own color, logo, and history, which means every project you make with them is genuinely unique.
Beyond the aesthetics, there is real value in building a crafting practice around rescued materials. It teaches resourcefulness, trains your eye to see potential in overlooked things, and keeps a little more out of the recycling bin.
If you are building a handmade home life and looking for ways to live more creatively and intentionally, bottle cap crafts fit right into that ethos.
This same spirit of making something beautiful from humble materials runs through everything we share here at Homesteading with Betty. If you are new to that world, our post on sustainable handmade goods is a wonderful place to start exploring.
10 Bottle Cap Craft Ideas That Are Actually Worth Making
These 10 bottle cap projects are actually worth making – and most of them don’t take more than an afternoon.
1. Mosaic Stepping Stones with Bottle Caps
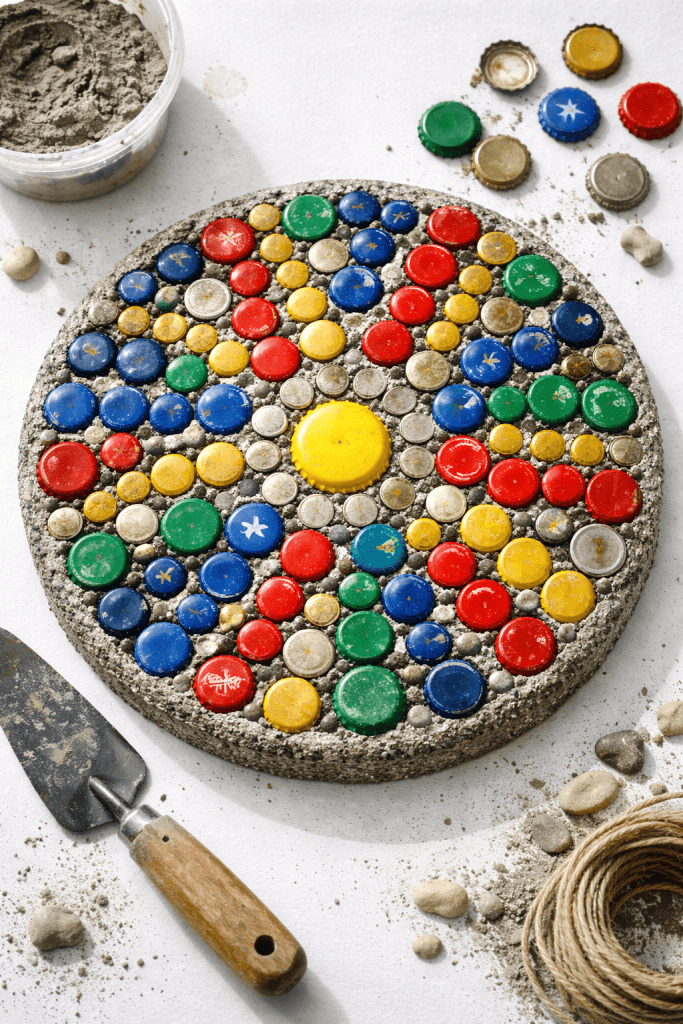
This one is a slow, meditative project that pays off in a big way. Press colorful bottle caps into wet concrete or plaster to create mosaic stepping stones for your garden path. Arrange them in sunburst patterns, spirals, or just a free-form arrangement that feels right to you.
The caps act like tiles – sturdy, waterproof, and beautifully colorful. Once sealed, they hold up remarkably well through the seasons. It is a wonderful way to bring handmade personality into your outdoor space, and no two stones will ever look exactly alike.
2. Bottle Cap Wind Chime
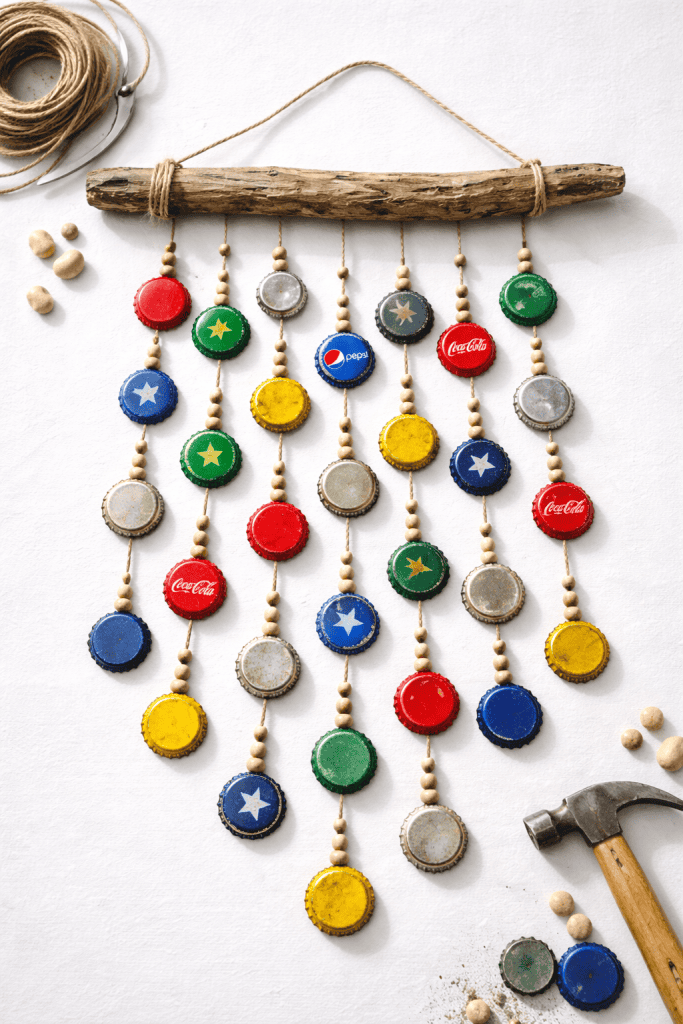
This is one of those projects that looks like it took forever but genuinely comes together in an afternoon. Use a sturdy stick or a piece of driftwood as your base, then hang strings of bottle caps from it at varying lengths.
Punch a small hole through each cap (a nail and a hammer do the trick), thread them onto jute twine or fishing line, and add a few wooden beads between caps for color and sound. Hang it on your porch and let it do its thing. The gentle clink of metal caps in the breeze is surprisingly soothing.
3. Tiny Bottle Cap Terrarium Lids
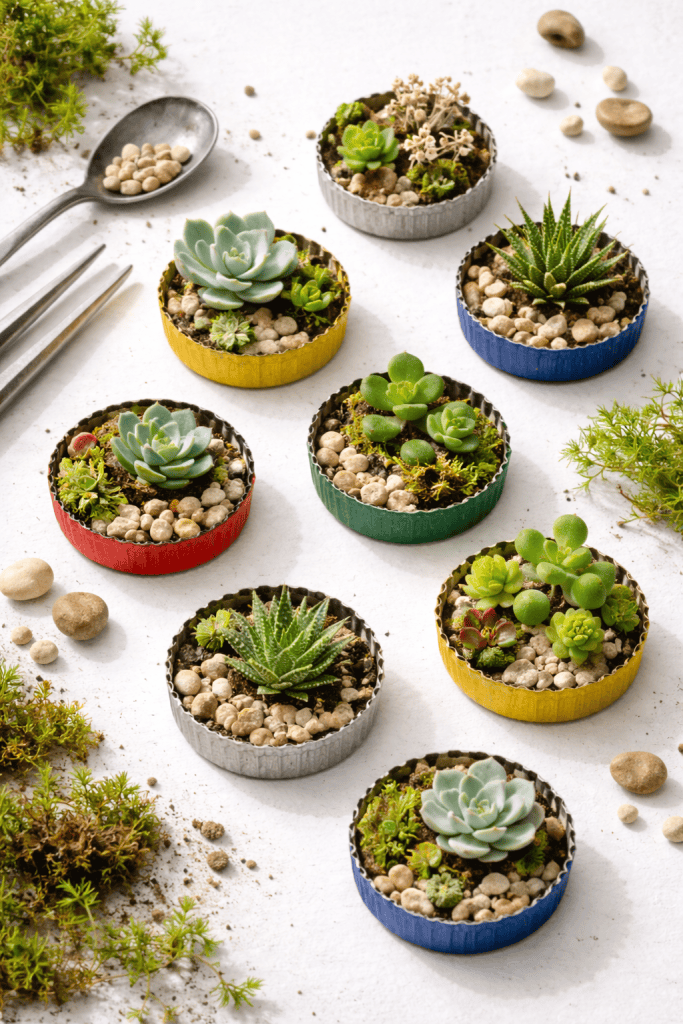
Here is a whimsical one: use oversized caps (think juice or wide-mouth bottle caps) as miniature terrarium bases. Add a tiny layer of pebbles, then a pinch of moss or soil, and tuck in a small succulent cutting or a sprig of dried botanicals.
These make enchanting table decorations, party favors, or gifts. They also look darling lined up along a windowsill. Because they are small and self-contained, they require almost no maintenance – which, honestly, is the best kind of plant project.
4. Bottle Cap Stamping Art
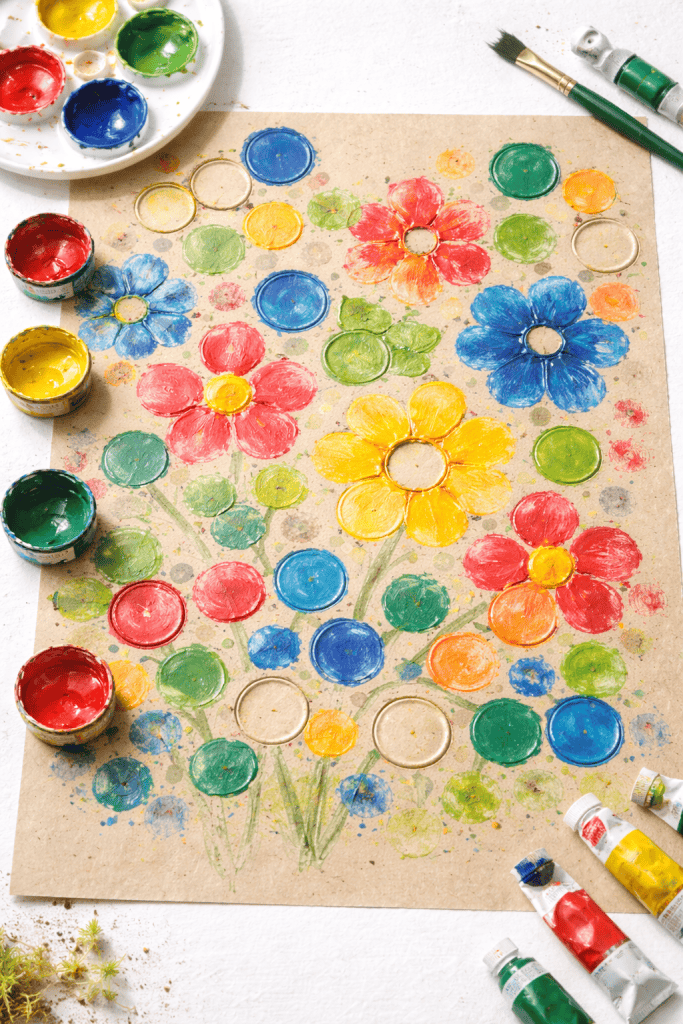
The rim of a bottle cap makes a perfect circle stamp.
Dip it into acrylic paint and press it onto canvas, kraft paper, or fabric to create polka dot patterns, overlapping bubble effects, or even impressionistic flower fields. Use caps of different sizes for variety, or layer colors while they are still wet for a watercolor-like look.
Kids absolutely love this one, but the results can be genuinely sophisticated enough to frame and hang. Pair this activity with 11 Adorable Nature Crafts for Kids Using Things From Your Backyard for a full afternoon of creative fun.
5. Magnetic Spice Labels
This is a practical craft that solves a real problem. Glue a small circular label inside the cap (or write on it with a paint pen), attach a strong magnet to the back, and press it onto your refrigerator or a metal spice rack.
Fill a shallow jar, tuck the cap on top, and you have an organized, magnetic spice system that looks charming and costs almost nothing. You can also use these to label little containers of craft supplies, seeds, or buttons. Functional and adorable – the best combination.
6. Bottle Cap Portrait Mosaic
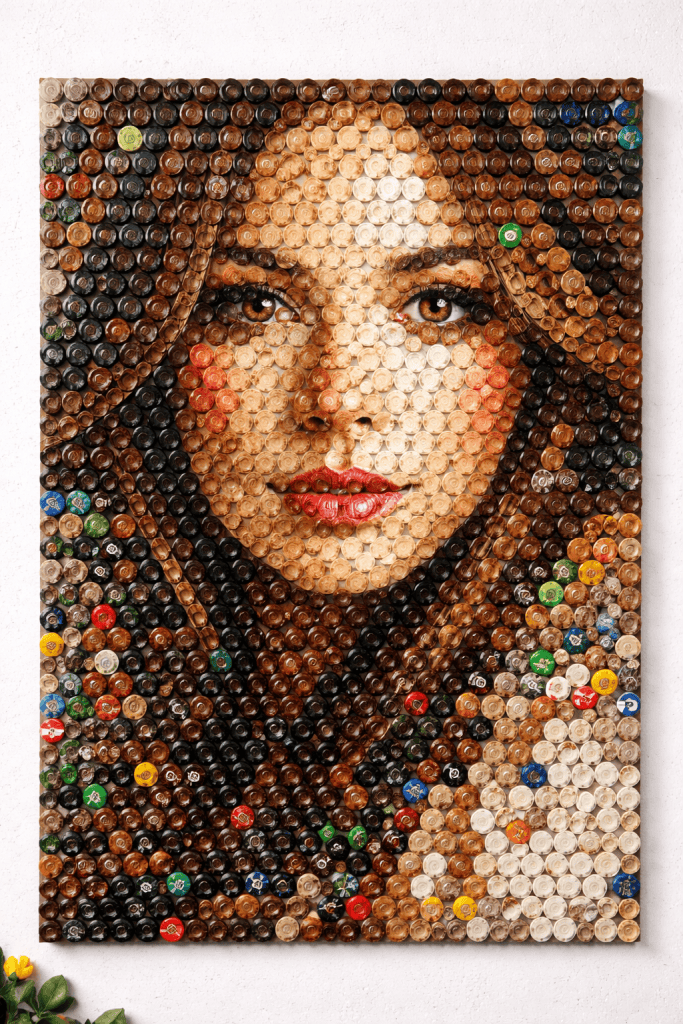
This is a larger, more ambitious project – and completely worth it. Print a high-contrast photo or illustration onto paper.
Tape it to a backing board as a guide, then glue bottle caps (painted or in their natural colors) directly over the image, using the color and value of each cap to match the corresponding section of the image.
Step back and you will see the portrait emerge from the grid of caps. It is genuinely magical. This works beautifully as a family portrait, a pet tribute, or even a landscape. Think of it as pixel art, but physical and permanent.
7. DIY Bottle Cap Jewelry
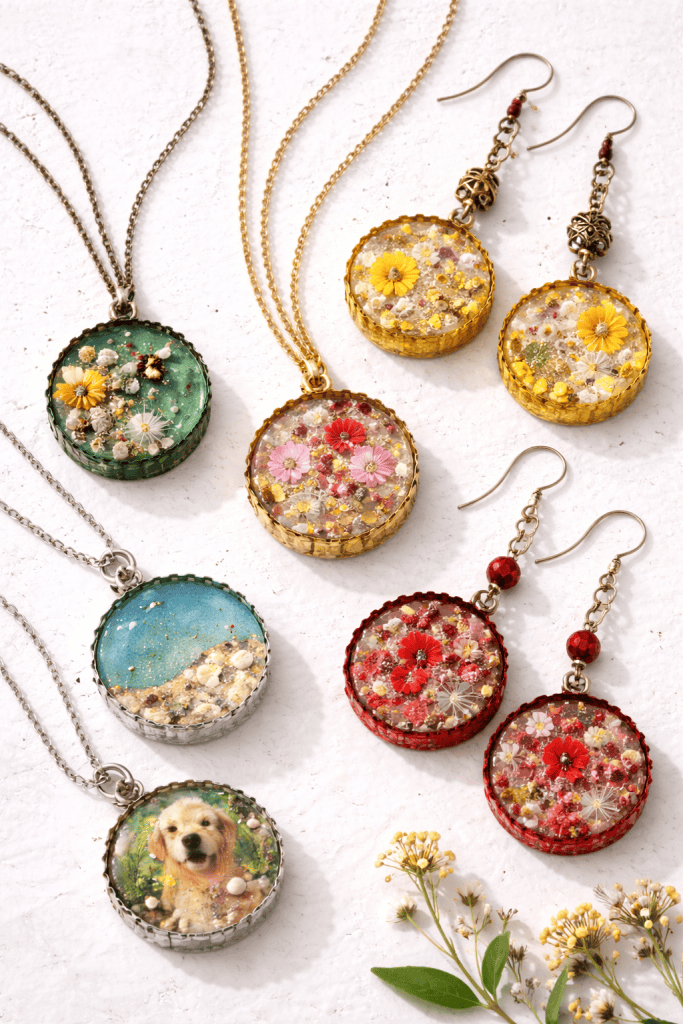
Bottle caps make surprisingly elegant jewelry when treated with intention. Fill the inside of a cap with resin and embed tiny pressed flowers, fabric scraps, photos, or glitter before it sets. Once cured, attach a bail to the top and thread it onto a chain for a one-of-a-kind pendant.
You can also drill a hole through the side and use them as bold, bohemian earring bases. The result is something that looks artisan-made and tells a little story – especially if the flowers or fabric pieces come from meaningful sources.
If you love working with fabric scraps in your crafts, our post on useful fabric craft ideas is full of complementary inspiration.
8. Bottle Cap Bird Feeder Garland

String together a garland of bottle caps filled with peanut butter and birdseed. Use a needle and heavy thread or thin wire, punching holes through the caps first, then spooning in a small amount of the mixture and threading them together at intervals.
Hang the garland between two branches or along a fence rail and watch the birds discover it. It is a beautiful intersection of crafting and nature connection, and it is a wonderful activity to do with kids.
Combine this with outdoor exploration ideas from our guide to forest school activities for beginners for a truly immersive nature day.
9. Bottle Cap Memory Game
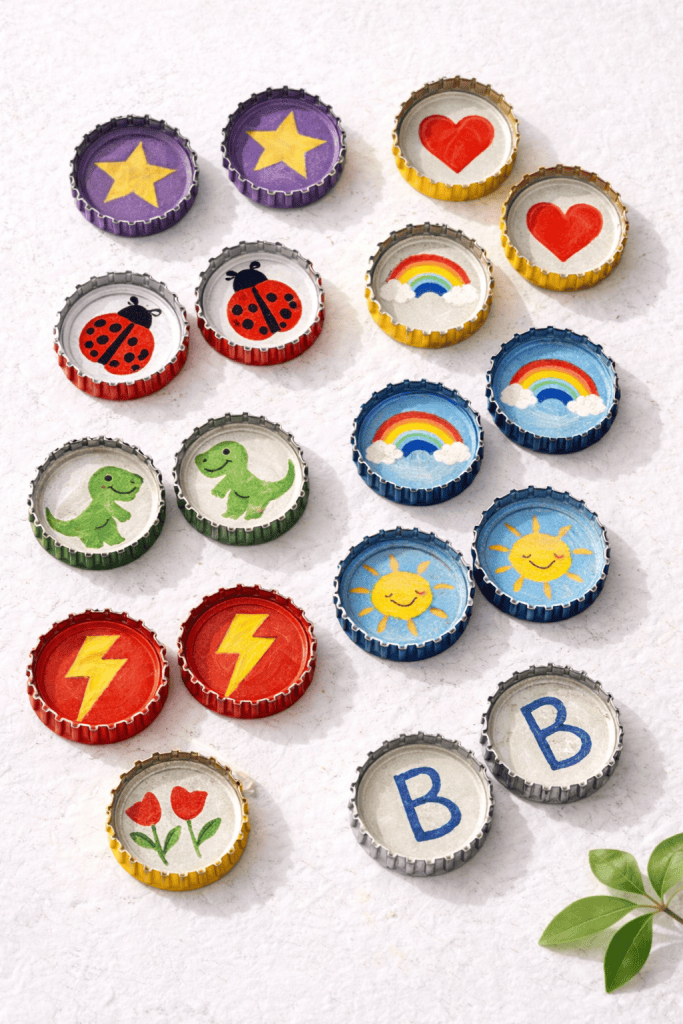
Make a matching memory game entirely from bottle caps. Paint the insides with small symbols, animals, or simple shapes – you need two of each design. Let them dry, then flip them all face down and play the classic memory matching game.
Because they are metal and sturdy, they hold up far better than paper card versions. You can customize the set for a child’s interests – dinosaurs, flowers, letters, numbers – making it a genuinely thoughtful handmade gift.
Pair it with some of the ideas in our post on fine motor activities for toddlers for even more hands-on play.
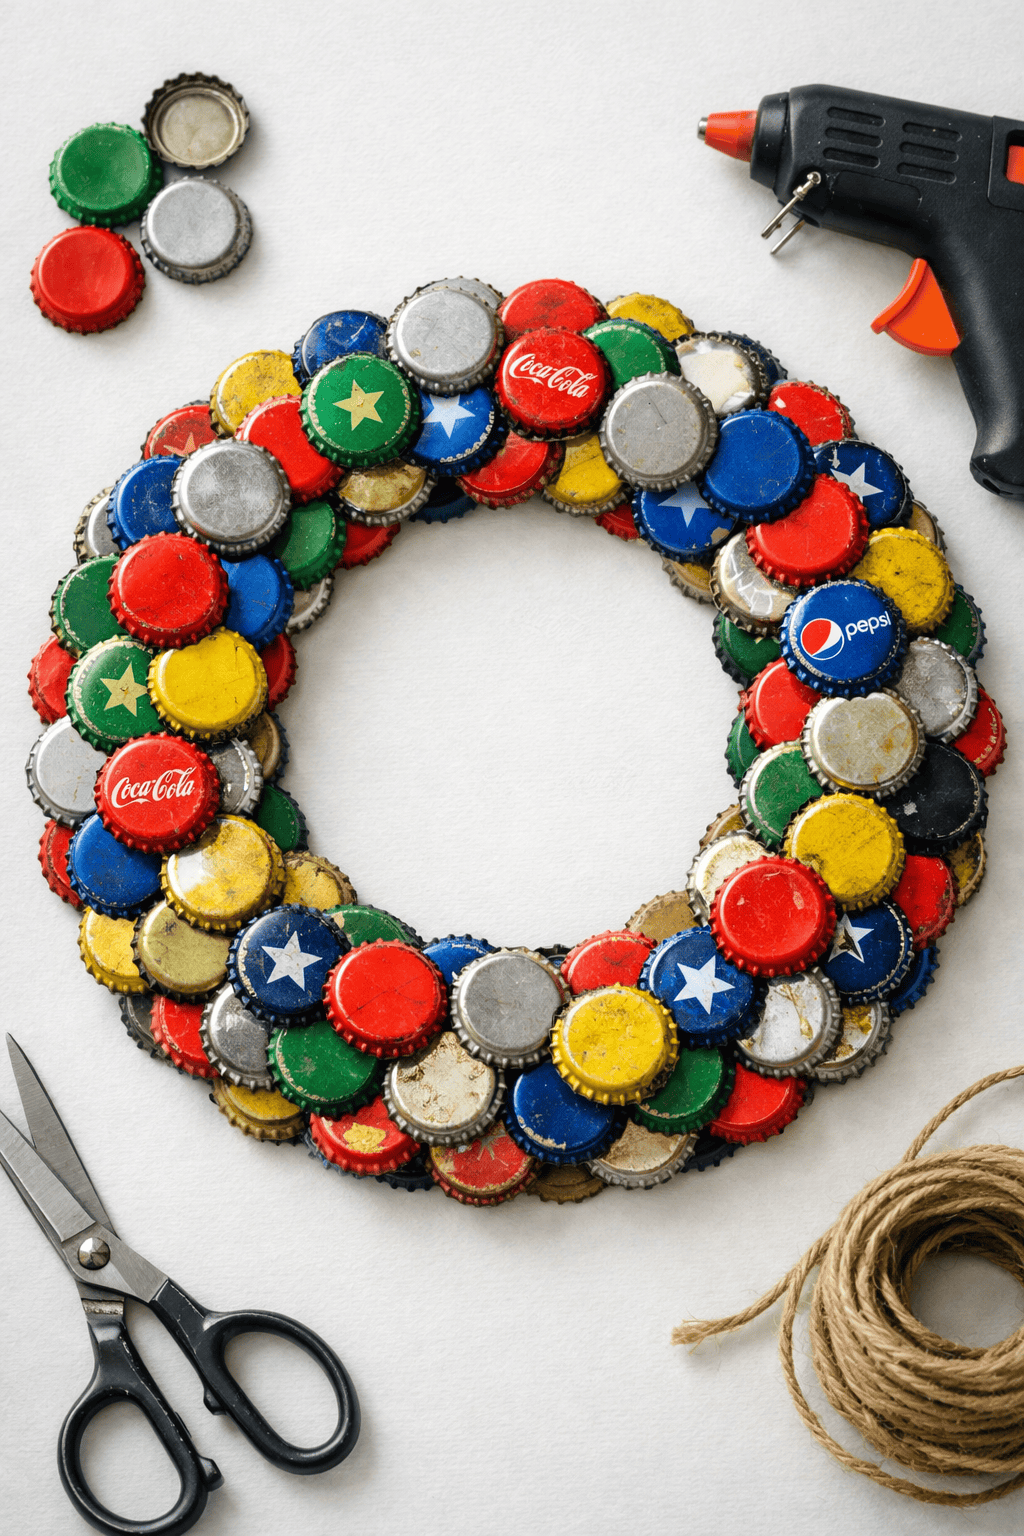
10. Bottle Cap Wreath
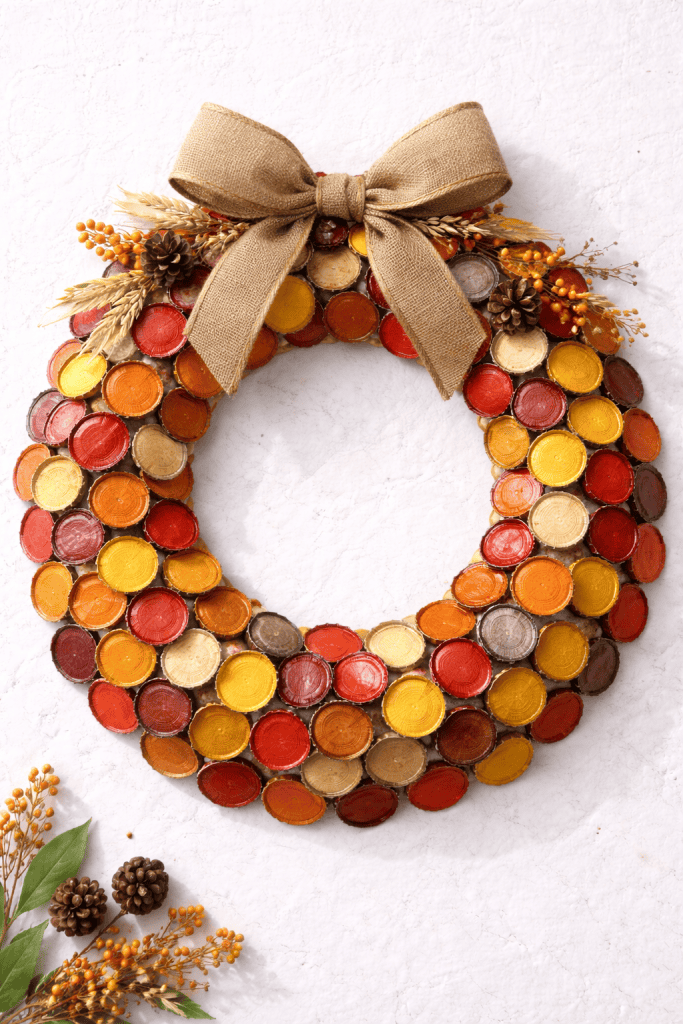
This is the show-stopper of the list. Collect enough caps to cover a foam wreath form (usually around 80–100 caps depending on the size), paint them in coordinating colors, and hot-glue them onto the form in overlapping rows.
Add a ribbon or bow, some dried florals, or even small pine cones between the caps for texture. The result is a wreath that looks like folk art – rustic, colorful, and completely handmade.
It works for any season depending on your color palette: warm reds and oranges for fall, cool blues and whites for winter, soft pastels for spring. Hang it on your front door and prepare for compliments.
Helpful Tips for Getting the Best Results from Your Bottle Cap Projects
A few simple practices will make your bottle cap crafts look more polished and last longer.
- Clean thoroughly: Soak caps in warm, soapy water to remove residue – this helps paint and glue stick better.
- Prep before painting: Lightly sand or prime caps for a cleaner, more vibrant finish.
- Seal outdoor projects: Use weatherproof varnish or outdoor Mod Podge on items like stepping stones, wind chimes, or bird feeders to extend their life.
- Keep food-safe surfaces untouched: For projects involving food or birds, skip paint or sealant on inner surfaces.
- Collect intentionally: Ask friends and family to save caps, but choose ones that aren’t bent, rusted, or scratched.
- Organize by color: Store caps in jars or compartment boxes – it makes crafting more fun and visually inspiring.
- Create an inspiring workspace: A tidy, well-arranged crafting area makes projects easier and more enjoyable.
The Joy of Making Something From (Almost) Nothing
There is a quiet, grounding kind of joy in sitting down with a pile of caps, a few supplies, and no particular agenda – just the pleasure of making something. Bottle cap crafts are the perfect entry point for that experience because the materials cost nothing, the learning curve is low, and the results are so varied.
One afternoon you might make a functional spice organizer, the next a whimsical garden stepping stone, the next a piece of art you actually want to hang on the wall.
That kind of creative flexibility is rare, and it is one of the reasons handmaking is so deeply satisfying. It is not about perfection or precision. It is about engaging your hands, slowing down, and building something with care.
If you have children, these projects are also a wonderful way to bring them into your creative practice – the tactile nature of working with metal caps, paint, and glue is rich with sensory appeal.
Take a look at our collection of 20 brilliant clay craft ideas for more projects that engage kids and adults alike in hands-on making.
And if you are just getting started with crafting in general, do not let the variety overwhelm you. Pick one project from this list – just one – gather your supplies, and start there. You might be surprised how quickly one finished project turns into five.
Start Your Bottle Cap Collection Today – Your Next Favorite Craft Is Waiting
Now that you have ten genuinely fresh ideas in your back pocket, all that is left is to start saving those caps with a little more intention. Put a jar on your kitchen counter, ask your neighbors, raid your recycling – you will be amazed how quickly a collection grows once you are paying attention.
The beauty of bottle cap crafting is that you can start small and scale up. A handful of caps is enough for the terrarium lids or the magnetic spice labels. A few dozen opens the door to the wind chime or the bird feeder garland. And when you have a truly impressive collection? That is when the wreath and the portrait mosaic come into their own.
Which of these bottle cap crafts are you most excited to try? Have you already made something clever with bottle caps that we haven’t mentioned here? Drop your thoughts, photos, and questions in the comments below – this community loves seeing what your hands create.
Get the FREE Easter Egg Story Printable Craft

Make Easter more meaningful for your kids with TWO free printables that bring the resurrection story to life in a simple, hands-on way.
When you sign up, you get both the Easter Egg Story Craft and the Easter Tomb Craft — no need to sign up twice!
The Easter Egg Craft has kids color four eggs and fold them into a 3D keepsake, walking through the story from the Last Supper to Jesus rising again. The Easter Tomb Craft features a colorable tomb with doors that open and close to reveal the risen Savior inside.
Click below to grab both printables and start crafting together.
Frequently Asked Questions
Can I use bottle caps from plastic bottles, or do they need to be metal?
Both work, but they behave differently. Metal bottle caps (from glass beer or soda bottles) are sturdier, hold paint better, and work well for outdoor projects or anything requiring drilling.
Plastic caps (from water or juice bottles) are lighter and easier to cut, making them ideal for softer, decorative crafts like wreaths and stamping projects. Many crafters keep both types and choose based on the specific project at hand.
What type of paint works best on metal bottle caps?
Acrylic craft paint is the most accessible and works well on metal caps, especially if you lightly sand the surface first and apply a base coat of metal primer.
For a more durable finish – especially for outdoor projects – spray paint formulated for metal gives excellent coverage and longevity. Always finish with a clear sealant to prevent chipping and fading over time.
How do I punch holes in bottle caps without cracking them?
The easiest method is to place the cap face-down on a piece of scrap wood, then use a sharp nail and a hammer to tap a hole through the center or edge. Go slowly and use a firm, confident strike rather than lots of light taps.
For a cleaner hole (especially if you are threading wire or a jump ring through), follow up with a small drill bit and a hand drill. Always wear eye protection when working with metal.
Is resin safe to use in bottle cap jewelry projects at home?
UV or epoxy resin can be used safely at home as long as you follow basic precautions: work in a well-ventilated area, wear nitrile gloves to avoid skin contact, and keep it away from children until fully cured.
UV resin is particularly beginner-friendly because it cures quickly under a UV lamp rather than requiring a long wait time. Once fully cured, the resin is completely safe and non-toxic to handle.
How many bottle caps do I need to collect before I can start a big project like a mosaic or wreath?
It depends on the project scale, but as a general guide: a small mosaic or decorative panel (around 12 x 12 inches) typically requires 50–80 caps. A full-sized door wreath on a 12-inch foam form usually takes 80–120 caps.
A large stepping stone takes 30–60 caps depending on size. If you are actively collecting and have a few people contributing caps for you, most people reach a wreath-worthy stash within two to three months.
