Rich. Soothing. Moisturizing.
This whipped shea butter lotion is everything dry skin needs – thick without being greasy, nourishing without a long list of ingredients. It goes on smooth, melts right in, and actually keeps your skin soft.
No preservatives. No fillers. Just shea butter, a couple of carrier oils, and optional essential oils if you want a light, natural scent.
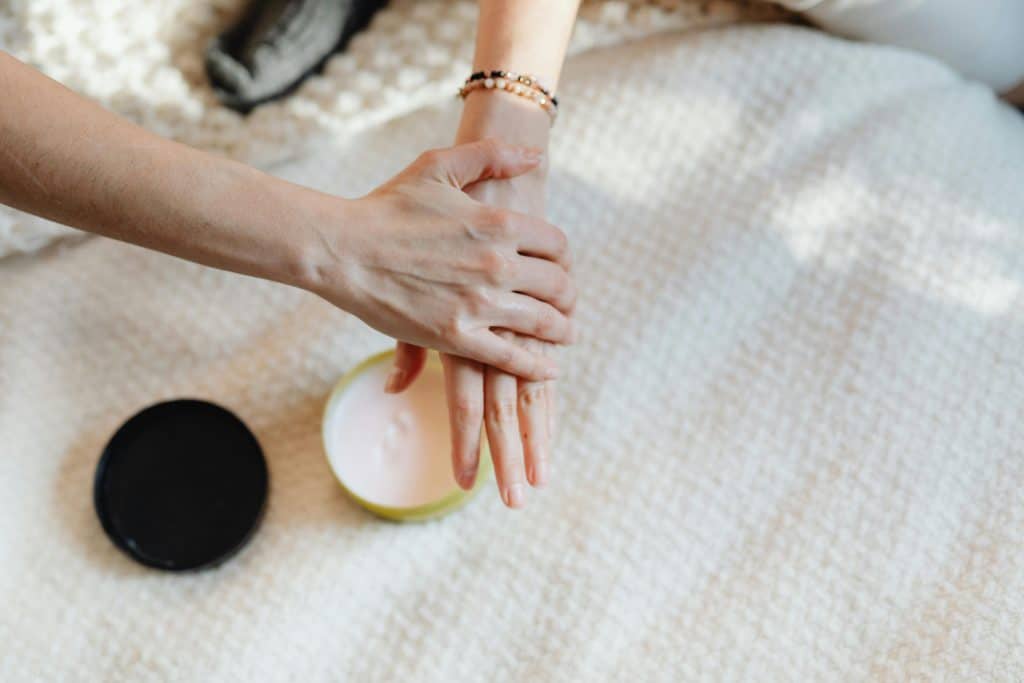
It’s gentle enough for everyday use – perfect for dry hands, elbows, heels, or anywhere that needs a little extra care. Simple to make. Easy to love. A great staple for your natural skincare stash.
Why Make Your Own Instead of Buy

As a mom of two, I’ve become really careful about what goes on my family’s skin – especially my kids. Most store-bought lotions are full of ingredients I don’t recognize – and I’m not comfortable with that.
When I make my own, I know exactly what’s in it: just oils, butters, and nothing extra. It works better, costs less in the long run, and I can trust it on even the most sensitive skin in our house.
It’s thick, rich, and does the job better than anything I’ve ever picked up at the store. And I can tweak it to suit our skin needs – like skipping essential oils for the baby or adding calendula for extra soothing.
It’s simple, affordable, and something I feel good about using daily on my kids, my hands, and even my face when it’s dry.
What Goes Into This Whipped Goodness
This recipe makes about 1 cup of whipped body butter – just enough to fill two small jars for your bedside table and kitchen sink.
Base Ingredients:
- Raw Shea Butter – 1 cup (about 8 oz): Unrefined shea is best – it’s rich in vitamins A and E, and deeply moisturizing. This is the creamy foundation of the lotion.
- Sweet Almond Oil – 2 tablespoons: Light, soothing, and full of vitamin E. Perfect for sensitive or dry skin.
- Rosehip Seed Oil – 1 tablespoon: A favorite for mature skin – rosehip brings natural vitamin A and supports cell renewal.
- Olive Oil – 1 tablespoon: Moisturizing and protective. Use what you have on hand – jojoba or argan oil also work well here
- Wheat Germ Oil – 1–2 teaspoons: High in vitamin E and omega-6s. This helps the skin retain moisture and stay supple.
- Sea Buckthorn Oil – 1 teaspoon (optional): A deeply nourishing antioxidant oil. Its rich orange hue adds glow and healing benefits in even the smallest amount.
- Vegetable Glycerin – 1 teaspoon (optional): A humectant that draws moisture into the skin – especially helpful during dry or windy seasons.
Optional Essential Oils (for scent and skin benefits):
Use a total of about 15–20 drops in the final mixture.
- Frankincense – regenerative, anti-aging
- Neroli – calming, brightening, and gentle on mature skin
- Lavender – soothing, balancing, and gentle enough for sensitive skin
- Patchouli or Jasmine – warming and aromatic
A little goes a long way. Choose oils that speak to you, or skip entirely for an unscented version perfect for little ones.
How I Make The Whipped Shea Butter Lotion

This recipe follows a simple process to create a rich, whipped moisturizer. The steps are easy, and the result is a soft, fluffy lotion that melts right into your skin.
1. Melt the Shea Butter
Start by scooping your raw shea butter into a heat-safe bowl or the top of a double boiler. Place it over a pot of simmering water (medium-low heat works best).
Let it melt slowly, stirring occasionally, until it’s about 90% melted and soft enough to mix. You don’t want it to be scorching hot or completely liquefied. Overheating shea butter can damage the natural vitamins and fatty acids that make it so healing for the skin.
Tip: If you see a few small unmelted bits, that’s okay. Just remove it from the heat and let the residual warmth finish the job.
2. Stir in the Carrier Oils
Once the shea butter is melted and off the heat, it’s time to stir in the other oils: sweet almond, rosehip, olive, wheat germ, and a dash of sea buckthorn if you’re using it.
I add them one at a time, stirring gently with a silicone spatula to combine. These nourishing oils lower the butter’s melting point slightly, helping the finished product feel soft and spreadable – like a rich, velvety mousse.
3. Cool Until Semi-Solid
Next, place the bowl in the refrigerator for about 15–25 minutes. You’re looking for a semi-solid texture, like room-temperature butter. It should look opaque and hold its shape when you poke it, but still be soft enough to whip.
This cooling step is what gives the final product that creamy, airy finish – skip it, and you’ll get more of a balm than a whipped lotion.
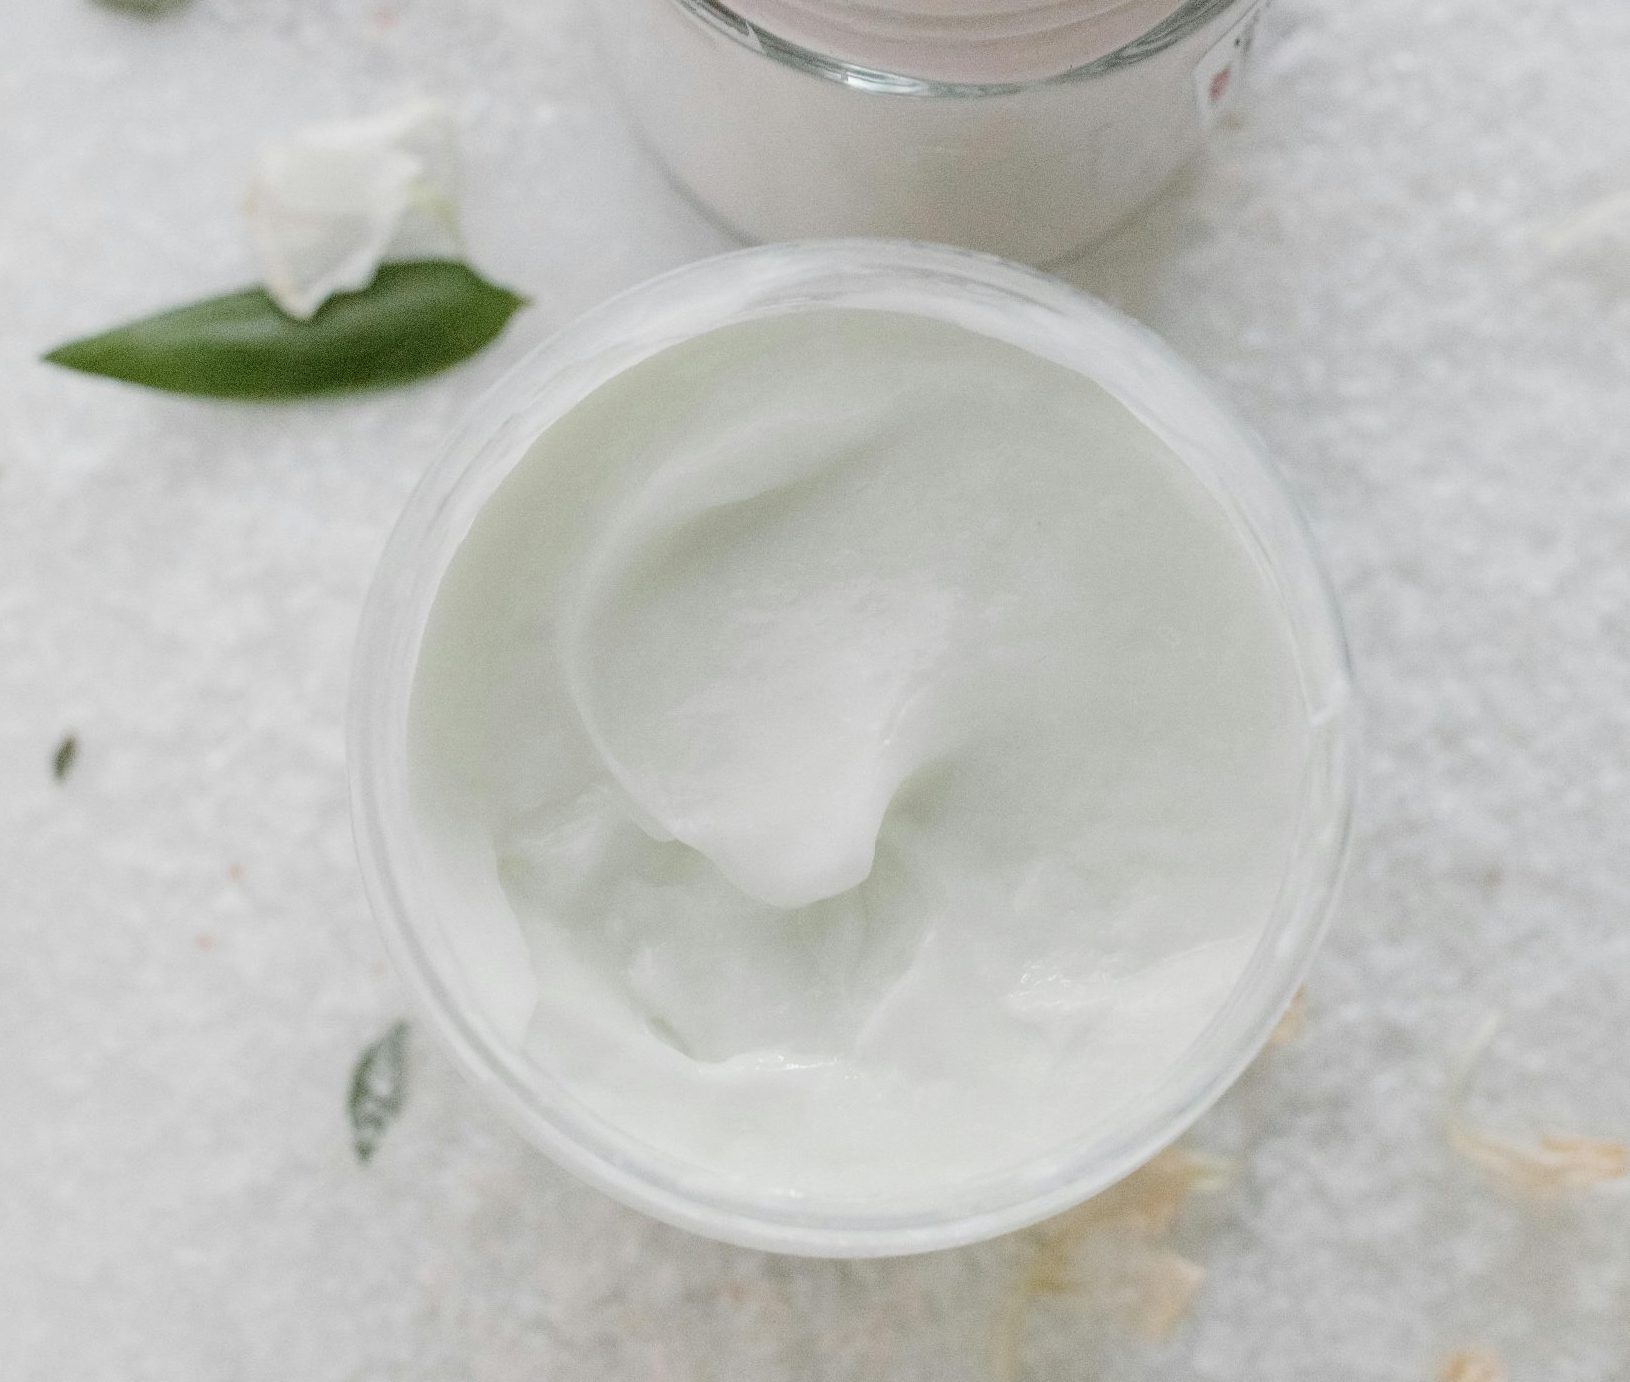
4. Whip It Until Light and Fluffy
Using a hand mixer (or a stand mixer with the whisk attachment), whip the cooled mixture for 5–8 minutes. Start slow, then increase speed as it thickens. Scrape down the sides often to make sure every bit gets blended.
It should start to lighten in color and look more like frosting – smooth, pillowy, and soft with peaks that hold their shape. If it still looks a little soft, don’t worry – it will continue to firm up slightly as it cools completely in the jar.
5. Add Glycerin and Essential Oils (Optional)
Once it’s fully whipped, you can add a splash of vegetable glycerin if you like (about a teaspoon per cup of butter). It adds a bit of humectant power, helping your skin hold onto moisture longer.
Then, blend in your essential oils – lavender and frankincense are a favorite pair of mine for a calming, spa-like scent. Add only a few drops at a time and mix briefly until incorporated.
Tip: Always research dilution rates for essential oils and avoid adding too much.
6. Spoon Into Jars and Store
Use a clean spoon or spatula to transfer your whipped butter into glass jars or metal tins. The final texture should be stable – soft and spreadable, but not runny.
Avoid getting water into the jars (it shortens shelf life), and always use clean, dry hands or tools when scooping it out.
Store your finished lotion in a cool, dry place – like a bathroom drawer or pantry shelf. Since it contains no water, it should stay fresh for 6 to 12 months without preservatives.
What Each Ingredient Brings to the Table
Each oil in this whipped lotion serves a specific purpose. Together, they hydrate, protect, and support skin that’s been through everyday wear and tear. Here’s why these simple, natural ingredients have earned a place in our homestead routine:
Shea Butter
- Thick, buttery base loaded with vitamins A and E
- Deeply moisturizing and long-lasting (clings to skin)
- Softens stubborn dry spots like elbows, knees, and hands
- Helps improve skin elasticity over time
Sweet Almond Oil
- Lightweight and fast-absorbing
- Softens skin without leaving a greasy finish
- Naturally rich in vitamin E
- Soothes irritation – great for post-shave or exfoliation
Rosehip Seed Oil
- Targets stretch marks, sun damage, and breakouts
- High in vitamin C and trans-retinoic acid (gentle retinoid)
- Brightens, firms, and evens out skin tone
Olive Oil
- Deeply softens and nourishes rough or dry skin
- Strengthens the skin barrier
- Adds richness to the blend without making it too oily
Wheat Germ Oil
- A thick, golden oil rich in natural vitamin E
- Supports skin repair and elasticity
- Especially helpful for stressed or mature skin
Sea Buckthorn Oil (optional)
- Bright orange and packed with omega-7s and antioxidants
- Boosts skin tone, helps fade scars, and reduces redness
- Use sparingly – a little goes a long way (unless you want orange lotion)
Vegetable Glycerin (optional)
- Acts as a humectant – pulls moisture into the skin
- Great for locking in hydration in dry or winter weather
- Adds slight tackiness, which some people love for overnight use
How to Store Your Whipped Shea Butter Lotion
Because this lotion is anhydrous (meaning there’s no water in it), it’s naturally shelf-stable and doesn’t need a preservative. But how you store it still matters if you want to keep it fresh and lovely for months.
Here’s what I do:
- Use clean, dry jars with tight lids. Moisture is the enemy here. Even a few drops of water can invite mold.
- Store in a cool, dark place. A cabinet or drawer is perfect. Direct sunlight or a warm bathroom can cause the oils to melt or go rancid over time.
- Avoid dipping in with wet hands. Instead, use a small spoon or clean spatula to scoop out what you need. This keeps bacteria out and your lotion fresher longer.
- Shelf life: Typically, whipped shea butter lotion lasts anywhere from 6 to 12 months. If it starts to smell off or change color significantly, it’s time to make a fresh batch.
- In hot climates: If you live somewhere tropical (or just don’t love the idea of your lotion melting), you can store it in the fridge during summer months. It’ll stay firm, though slightly less fluffy – but still perfectly usable.
Make a Jar, Share a Jar
At the end of the day, this is just a simple thing that works. It keeps your skin from cracking, it’s easy to make, and it doesn’t come with a list of ingredients you can’t pronounce.
Store it in a jar with a tight lid and keep it somewhere you’ll use it often – like by the kitchen sink or on your nightstand. If it ever feels too firm, just warm a bit between your hands. If it’s too soft, pop it in the fridge for a little while.
This is just a small way to care for your skin using ingredients you can trust – and that’s worth a lot.
