If you’ve ever admired how store-bought clothes look crisp inside and out, there’s a good chance an overlocker (also called a serger) was behind that clean finish.
This hardworking machine trims, stitches, and seals fabric edges all in one smooth motion.
It’s a reliable partner for anyone who wants strong seams and neat results without extra effort.
Learning what an overlocker does opens the door to faster sewing, durable garments, and projects that look refined from every angle.
Once you understand how it works, you’ll see it not as an intimidating tool, but as an essential step toward mastering your craft.
Whether you sew for daily wear, home projects, or pure enjoyment, an overlocker quietly elevates everything you make.
Overlocker vs. Serger: What’s the Difference?
An overlocker and a serger are the same type of machine.
The only difference lies in geography and terminology.
- Overlocker is the term used in the United Kingdom, Australia, and most Commonwealth countries.
- Serger is the term used in the United States and Canada.
Both names refer to a specialized sewing machine that trims fabric edges, encloses them with thread, and creates strong, flexible seams – all in one step.
The machine uses multiple threads (usually three or four) and loopers instead of a traditional bobbin to create the signature overlocking stitch.
This design was first developed in 1881 for industrial use, where speed and durability were essential in garment factories.
Today’s home overlockers are scaled-down versions of those industrial machines, bringing the same clean, professional finish to everyday sewing.
So, whether the box says overlocker or serger, you’re getting the same tool – one built for strength, efficiency, and polished results.
For those just starting out, it’s also helpful to familiarize yourself with sewing terminology every beginner needs to know so you can follow instructions and understand machine settings with confidence.
Why You Need an Overlocker in Your Sewing Space

An overlocker may not replace your regular sewing machine, but it easily becomes the one you reach for most.
Its strength lies in doing several steps at once – trimming fabric edges, stitching seams, and finishing them cleanly in one motion.
The result is a professional look that lasts through wash and wear.
1. Stronger Seams That Last Longer
Overlockers create stitches that wrap around the raw edge of fabric, locking it securely in place.
This helps prevent fraying and adds strength to every seam, especially in clothes that see daily use.
2. Faster Sewing with Fewer Steps
What normally takes two or three passes on a standard machine (stitching, trimming, and zigzagging) takes one pass with an overlocker.
It saves time without sacrificing precision, making it ideal for busy home sewists.
3. A Clean, Professional Finish
Edges finished with an overlocker lie flatter and look smoother, inside and out.
Even unlined garments and home projects appear neat and well-crafted, giving your handmade pieces a polished look.
Once you start using one, your sewing workflow feels lighter, faster, and more dependable.
For more on getting those crisp, clean results, explore our essential guide on seam and hem allowances.
How an Overlocker Works and What It Can Do
An overlocker is built to do three things at once: trim the fabric edge, sew the seam, and wrap the edge with thread to prevent fraying.
It achieves this through a specific mechanical setup that’s different from a standard sewing machine.
How It Works
- Multiple Threads: Instead of one needle and a bobbin, an overlocker uses two loopers (upper and lower) and one or two needles. Most domestic models use three or four threads at a time.
- Looping Mechanism: The loopers move in a synchronized motion, interlacing the threads around the fabric edge. This forms a flexible chain-like stitch that stretches slightly with the fabric.
- Cutting Blade: A built-in knife trims excess fabric just before the stitches are formed, ensuring a perfectly even edge every time.
- Feed System: The differential feed uses two sets of feed dogs to move the top and bottom layers of fabric evenly, preventing stretching or puckering – especially important when working with knits or lightweight fabrics.
What It Can Do
- Finish Raw Edges: The overlocker’s main job is to seal and tidy raw edges on woven fabrics, preventing fraying and giving garments a clean interior finish.
- Sew and Finish in One Step: It can join two pieces of fabric while simultaneously trimming and sealing the seam, creating durable results in less time.
- Handle Stretch Fabrics with Ease: The flexible overlock stitch allows knits, jersey, and spandex fabrics to retain their natural stretch without breaking seams – perfect for activewear or baby clothes.
- Create Narrow or Decorative Hems: With minor adjustments, it can produce rolled hems or decorative finishes that look delicate yet hold up well in everyday use.
In short, an overlocker is designed for speed, precision, and durability.
It simplifies the sewing process while giving every project a clean, factory-quality edge that lasts through repeated wear and washing.
If you want to get a visual sense of how all these parts work together, check out our detailed anatomy of a serger guide.
How to Set Up and Thread an Overlocker
Threading an overlocker looks complex at first, but once you understand the order and structure, it becomes a smooth, repeatable process.
The key is to take it step by step and follow the color guides on your machine.
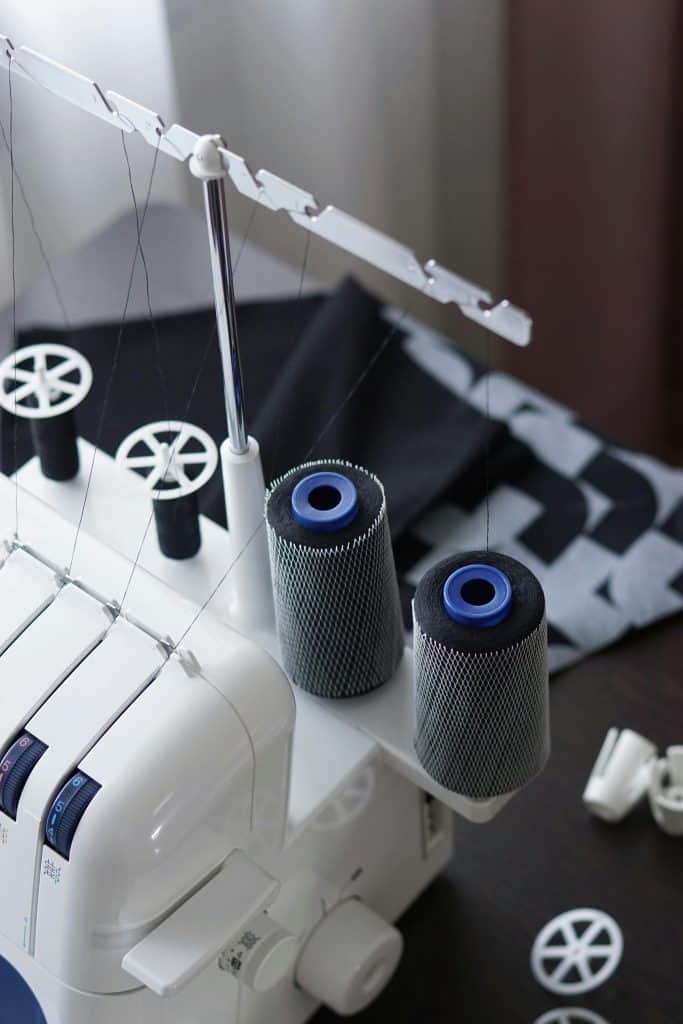
1. Raise the Thread Guide Bar
Start by lifting the thread guide bar fully upward.
This keeps the thread tension even and prevents tangles while threading.
2. Lift the Presser Foot
Raising the presser foot releases the thread tension discs.
This ensures each thread slides smoothly into place while you’re setting up.
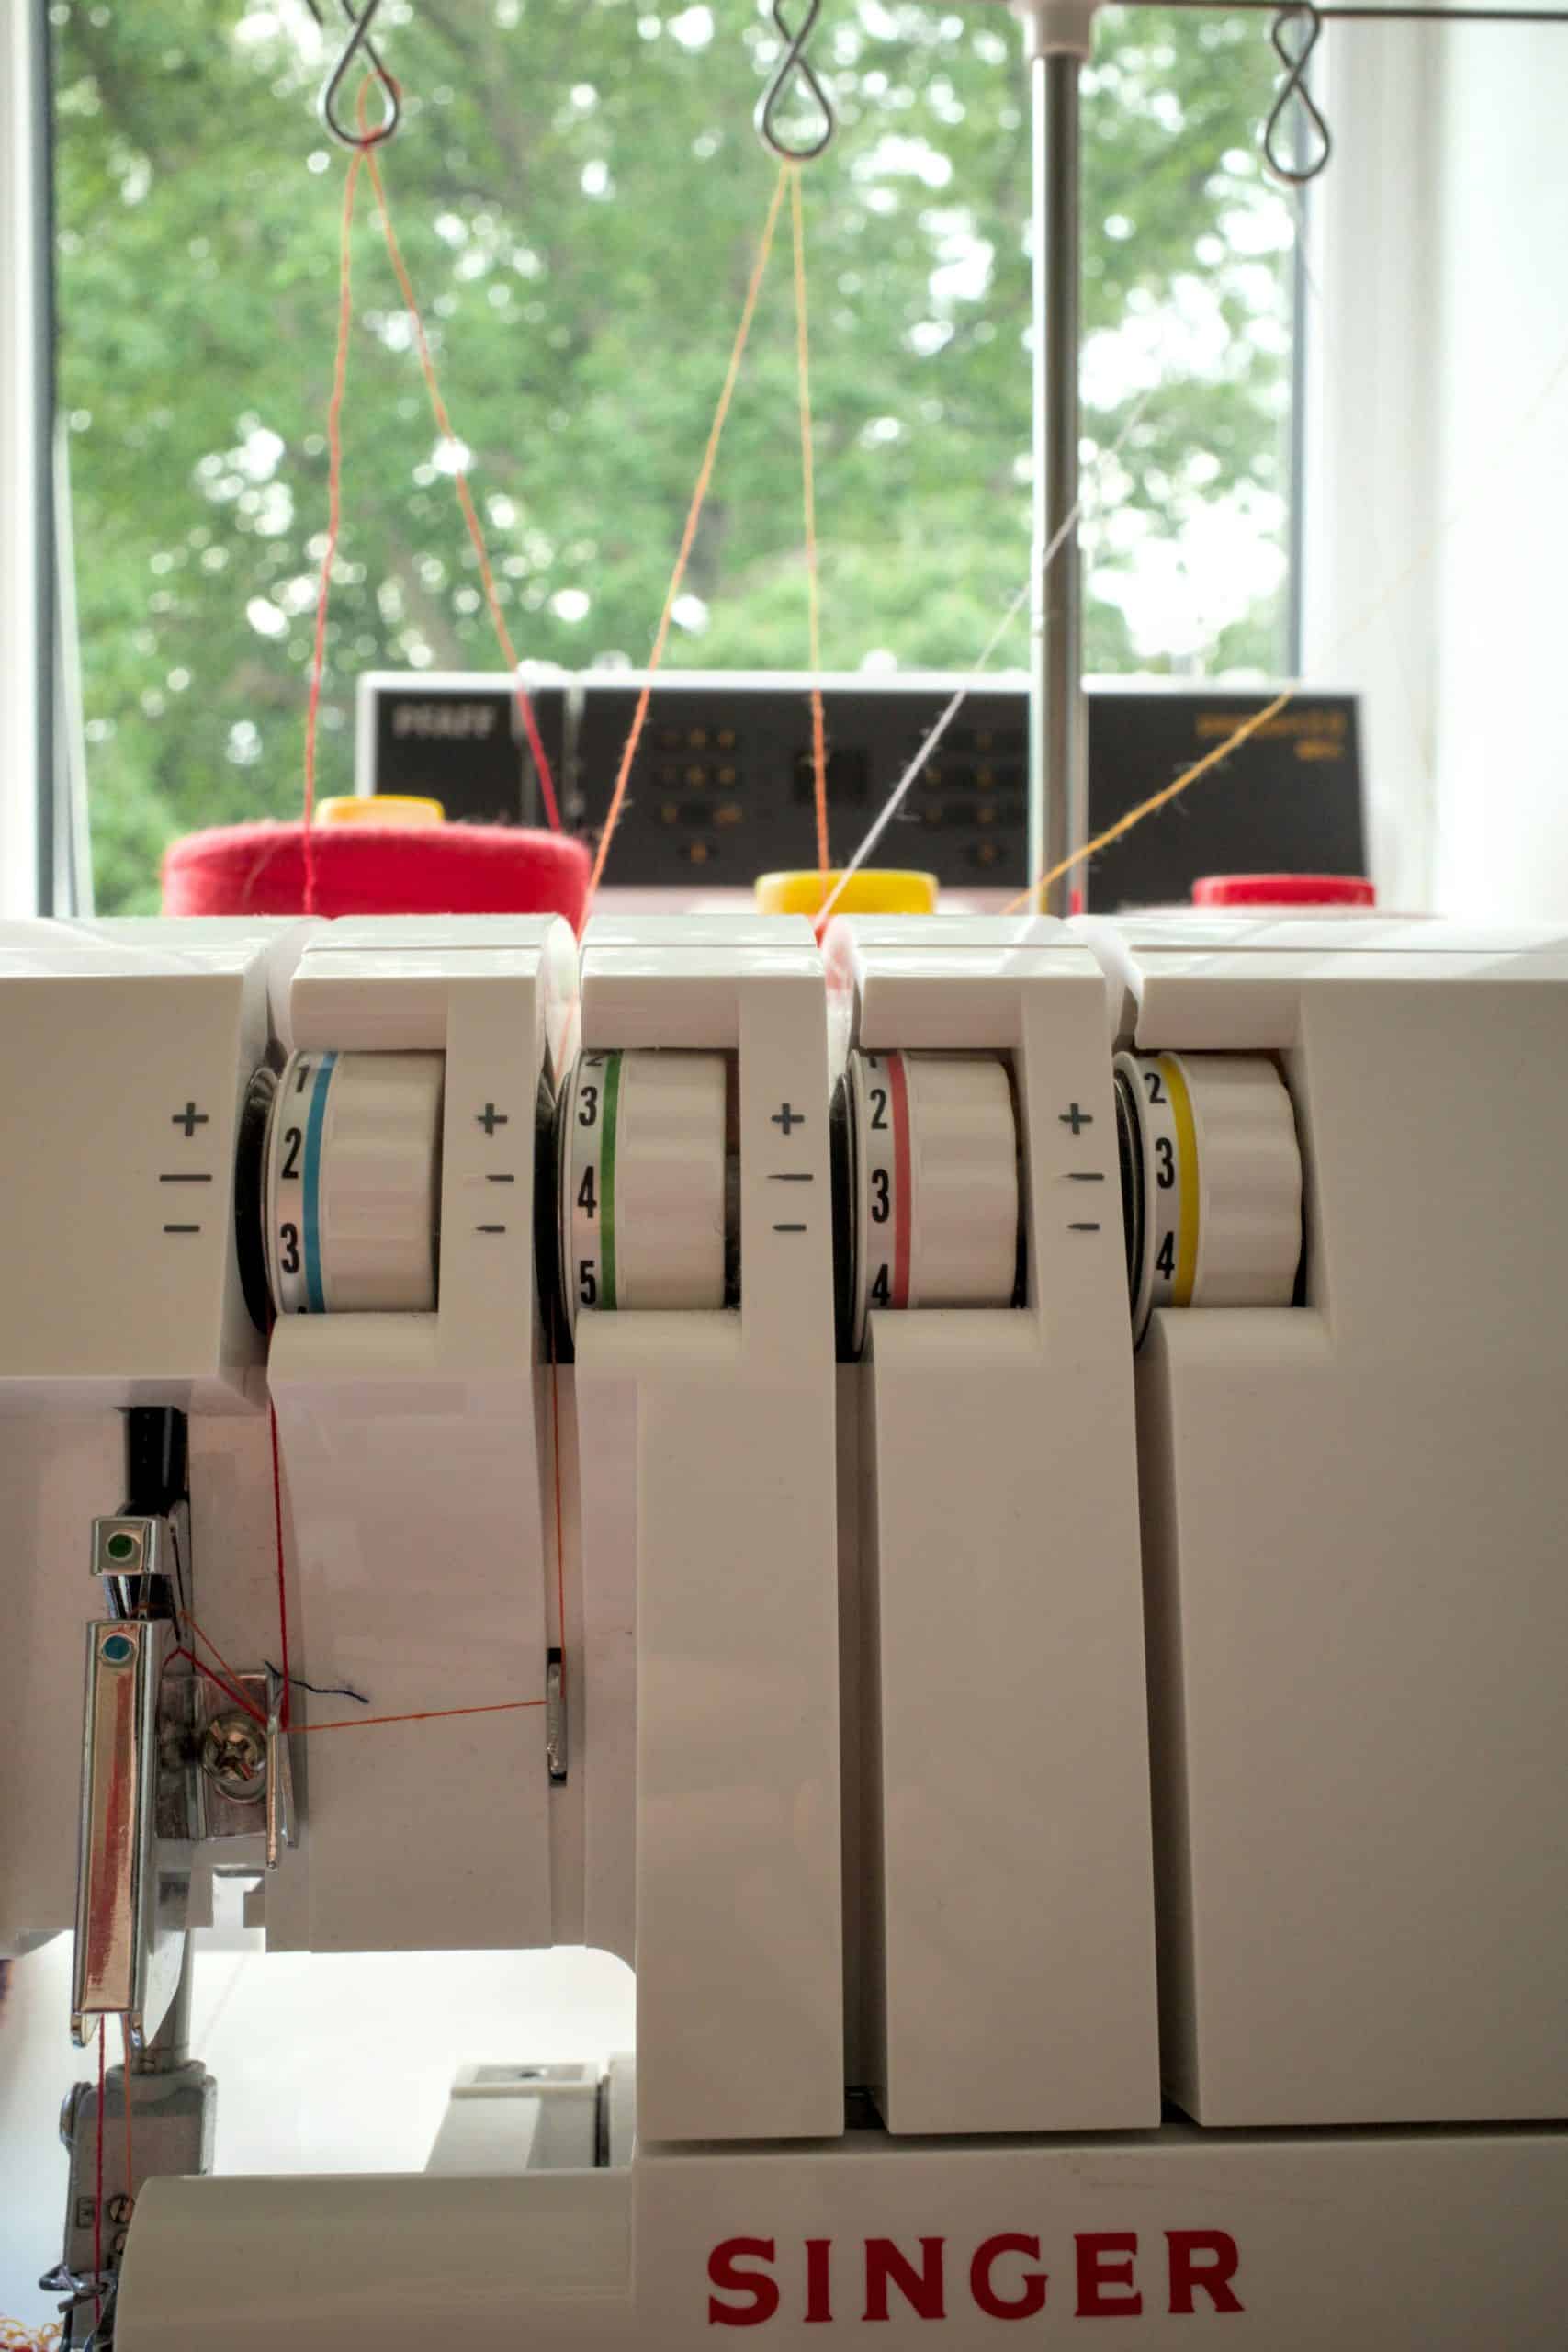
3. Follow the Color-Coded Paths
Most overlockers use color-coded guides for each thread.
Begin with the upper looper, then move to the lower looper, followed by the right needle, and finally the left needle.
Threading in this order ensures the loopers interlock correctly once you start sewing.
4. Check the Tension Dials
For most fabrics, keeping each dial set around “4” works well. You can make small adjustments depending on fabric weight:
- Slightly higher tension for thin or slippery fabrics
- Slightly lower tension for thick or stretchy fabrics
5. Test on Scrap Fabric
After threading, sew on a scrap of fabric similar to your project material. Check that:
- The stitch wraps evenly around the edge
- No loose loops or tight puckers appear
- The thread tails are secure
6. Keep a Reference Sample
When you find a combination of settings that works well (especially for specific fabrics) keep a small stitched sample with your tension notes.
It’s a practical way to save time next time you sew.
You can organize these notes and fabric swatches in a simple sewing journal to track what works best for each project and fabric type.
How to Quickly Change Threads on an Overlocker (or Serger)
Want to change your thread colors fast?
There’s a neat little method that makes it feel effortless – and it keeps everything running beautifully so you can dive right back into sewing.
Fast Thread-Swap Method
This method works best for the two right-hand threads (usually the loopers).
Because the two left-hand threads pass through the needles, knots can get caught in the needle eyes – so it’s usually quicker to rethread those manually.
- Snip the existing threads near the top of the cones. Leave the rest of the threads in place so the path through the machine stays intact.
- Take the end of each new thread and tie it to the cut end of the old one using a small, secure knot. Now your old and new threads are connected.
- From the presser-foot area, gently pull the old threads until the knots (and the new threads) travel completely through the machine. Once the new threads appear at the foot, trim off the knots. Your new threads are now threaded in correctly.
Tip: Always run a test on a scrap piece of fabric before you start your next project. This ensures your tension is even and that the threads are feeding smoothly after the change.
Serger vs. Sewing Machine: What’s the Difference?
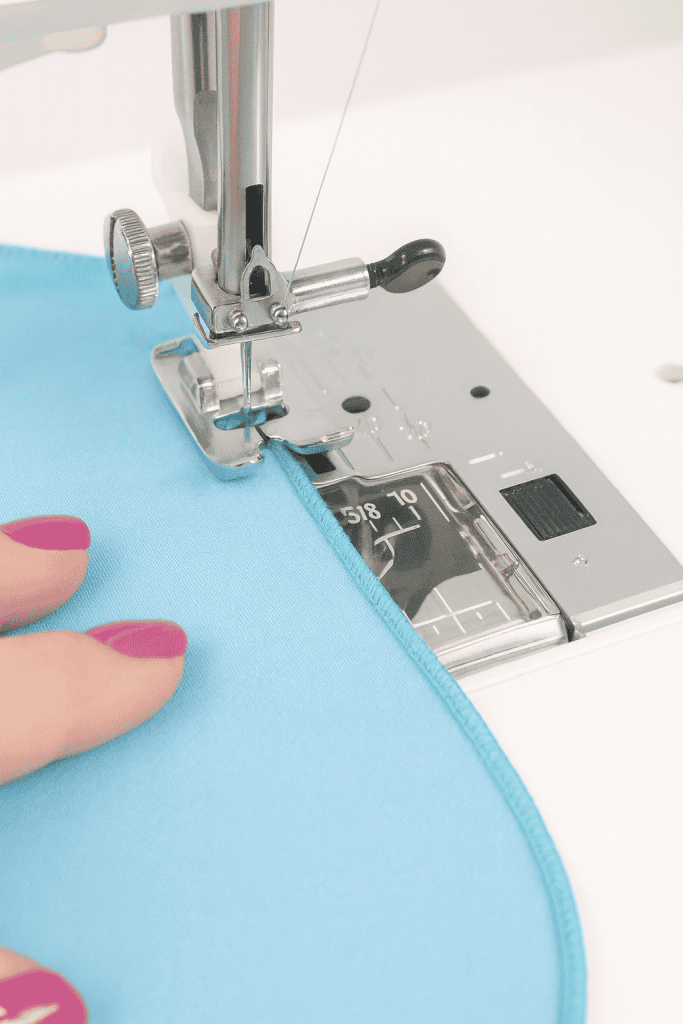
While an overlocker (serger) and a regular sewing machine often work side by side, they serve very different purposes in the sewing process.
What a Sewing Machine Does Best
A standard sewing machine is built for construction and detail work. It excels at:
- Straight and zigzag stitching
- Topstitching and decorative seams
- Buttonholes and zipper installation
- Sewing corners, curves, and precise areas like collars and facings
A sewing machine uses one needle and a bobbin, which gives you control and accuracy for structured sewing tasks.
For a closer look at how all the parts work together, check out our anatomy of a sewing machine guide.
What an Overlocker Does Best
An overlocker is designed for speed, strength, and clean finishes. It specializes in:
- Trimming raw edges as you sew
- Enclosing seams to prevent fraying
- Creating stretch-friendly seams for knits
- Finishing garments quickly with a professional interior look
Instead of a bobbin, it uses loopers and multiple threads to wrap the fabric edge securely.
Do You Need Both?
Most sewists find that the two machines complement each other rather than compete.
- Use the sewing machine to build the garment
- Use the overlocker to finish seams, join knits, and speed up production
If you sew clothing regularly, especially with knit fabrics, an overlocker becomes a time-saving upgrade rather than a replacement.
Think of it this way: the sewing machine gives you structure and precision, while the overlocker gives you strength, stretch, and a polished finish.
Together, they create garments that look clean, durable, and professionally made inside and out.
5 Creative Overlocker Techniques You’ll Want to Try
An overlocker can do so much more than just finish seams.
Once you get the hang of it, you’ll discover a whole new world of creative tricks that add texture, polish, and personality to your projects.
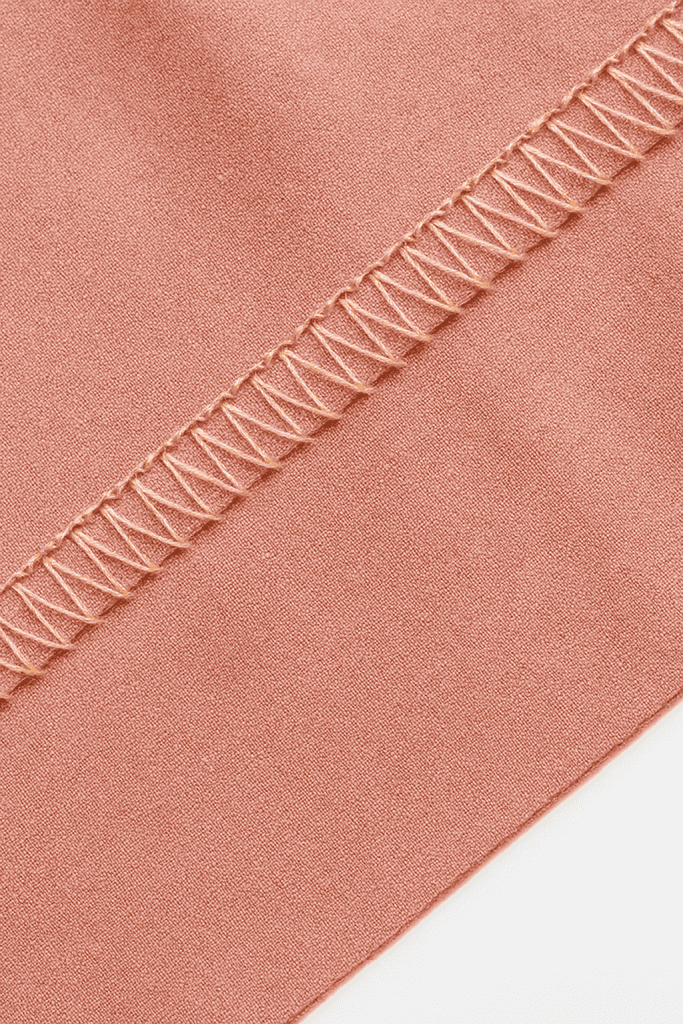
1. Rolled Hem
A rolled hem is a narrow, tightly stitched edge that’s ideal for lightweight fabrics such as chiffon, voile, or linen.
To create it, switch your overlocker to the rolled hem setting – this usually involves removing the left needle, tightening the thread tension, and shortening the stitch length.
The result is a crisp, tiny hem that neatly encloses the edge without bulk.
2. Lettuce Hem

This hem adds a gentle, wavy edge often seen on knit tops, children’s clothes, or ruffles. (For an extra touch of dimension, you can learn how to make gathers for beautiful ruffles, which pairs perfectly with the lettuce hem to create soft, flowing details on your garments.
It’s made using the rolled hem setting while slightly stretching the fabric as it feeds through the machine.
The tension between the stitch and the pulled fabric creates a soft, decorative wave.
The tighter the fabric is stretched, the more dramatic the wave becomes.
3. Flatlocking
Flatlocking joins two pieces of fabric edge-to-edge or with one edge folded under.
After stitching, the seam can be gently pulled open to lay completely flat, creating a low-bulk finish often used in sportswear and decorative topstitching.
This requires adjusting the thread tension – loosening one looper and tightening the other for balance.
4. Decorative Edging
Use specialty threads such as woolly nylon or metallic varieties in the upper looper to create colorful, textured edges that highlight seams or hems.
This technique is popular for home décor items, napkins, and visible stitching on garments.
5. Gathering with Differential Feed
An overlocker with adjustable differential feed can also gather fabric evenly.
When you set the feed ratio higher (usually between 1.5 and 2.0), the front feed dogs move faster than the rear ones, gently creating gathers – perfect for ruffles, skirts, and other soft details.
These features make the overlocker a creative partner that lets you achieve professional effects with precision and control.
What to Look for When Buying an Overlocker (or Serger)
Choosing an overlocker is easier when you know which features actually make a difference.
Most domestic overlockers perform the same core functions – trimming, stitching, and finishing edges – but the right features can make setup smoother and your sewing more precise.
1. Thread Capacity: 3-Thread vs. 4-Thread Machines
The main distinction lies in how many threads the machine can use.
- 3-thread overlockers are ideal for lightweight fabrics or decorative edges.
- 4-thread overlockers are more versatile, combining strength with stretch—perfect for knitwear, everyday clothing, and home sewing.
If you plan to sew a range of projects, a 4-thread machine is the better investment since it can also be converted to a 3-thread setup when needed.
2. Disengaging Knife
An overlocker’s built-in blade trims fabric as you sew, but some models allow you to disengage the knife.
This feature is helpful when you want to overlock without cutting the fabric edge – useful for sewing seams or finishing pre-cut edges.
3. Rolled Hem Function
If you want to create rolled or lettuce hems, make sure your machine includes a rolled hem setting or conversion lever.
This saves time and eliminates the need for extra attachments.
4. Differential Feed Adjustment
A must-have feature for anyone sewing different types of fabric.
Differential feed prevents puckering on lightweight fabrics and stretching on knits.
It also enables controlled gathering when you want it.
5. Ease of Threading and Tension Control
Threading is often what intimidates beginners most, so look for color-coded threading paths and a clearly marked thread guide bar.
Machines with automatic or simplified tension dials make it easier to adjust for fabric thickness without trial and error.
6. Build Quality and Accessibility
Choose a sturdy machine with accessible parts for cleaning and oiling.
A clear cover over the loopers is helpful for troubleshooting, and a bright LED light improves visibility when sewing detailed seams.
The best overlocker is the one that fits your workflow. Look for a model that feels intuitive to set up, offers basic versatility, and helps you work confidently with both woven and stretch fabrics.
Troubleshooting Common Overlocker Problems

Even the best-maintained overlocker occasionally needs a quick adjustment.
Most issues come down to tension, threading, or settings – and they’re easy to fix once you know what to look for.
1. Uneven or Loopy Stitches
If the stitches look uneven or one side forms loops off the edge, check the threading path first.
One thread might have slipped out of its tension disc.
- Rethread the machine completely, following the correct order (upper looper, lower looper, right needle, left needle).
- Test on a scrap of fabric and adjust each tension dial slightly until the stitch looks balanced.
2. Fabric Puckering or Stretching
When the seam ripples or gathers unintentionally, adjust the differential feed.
- Increase the feed ratio to reduce stretching on knits.
- Decrease it slightly to prevent puckering on lightweight woven fabrics.
Also, check that you’re not pulling the fabric – let the feed dogs guide it naturally.
3. Thread Breaking
If threads snap while sewing:
- Ensure the machine is properly threaded with the presser foot raised.
- Replace old or low-quality thread with smooth, strong cones.
- Check that the needle is sharp and the correct type for your fabric (ballpoint for knits, universal for wovens).
4. Stitches Skipping or Missing
Skipped stitches often point to a dull or bent needle. Replace both needles at the same time for consistent results.
If the issue continues, slightly reduce presser foot pressure – too much pressure can prevent the needles from forming clean loops.
5. Knife Cutting Too Much or Too Little
If the machine trims too deeply or leaves fabric uncut, check the knife alignment or stitch width setting.
Adjust the cutting width knob until the stitch sits right at the edge of the fabric – clean but not cutting into the seam.
6. Stitches Unraveling at the End
To prevent unraveling, sew a few extra stitches off the fabric before cutting the thread tails.
Trim them later or weave them back into the seam for a clean finish.
Most overlocker issues have simple solutions. Regular cleaning, sharp needles, and correct threading prevent nearly all common problems.
Make the Most of Your Overlocker
An overlocker is a tool that transforms the quality and durability of your sewing.
Once you understand how it works, you’ll see that its purpose is simple: strong seams, clean edges, and a more efficient workflow.
Whether you’re sewing everyday clothes, gifts, or household pieces, the overlocker helps you finish them beautifully and fast.
If you’ve been hesitant to use one, start small. Practice on scraps, experiment with different fabrics, and get familiar with how the stitches form.
Each project will build your confidence and show you why this machine is worth having in your creative space.
Have you tried sewing with an overlocker or serger yet? Share your favorite tips or questions in the comments below!
FAQs
1. Can I use an overlocker to sew an entire garment?
Yes, in many cases you can. A 4-thread overlocker creates strong, stretchable seams that are perfect for knit garments such as T-shirts, leggings, and activewear. For woven fabrics or areas that need precision topstitching (like necklines or hems), you’ll still use your regular sewing machine to finish.
2. What types of thread work best in an overlocker?
Polyester thread is the most versatile choice for overlockers because it’s strong, flexible, and works well with both knits and wovens. Woolly nylon is great for loopers when you want extra stretch or a softer finish, especially for underwear or activewear. Metallic and specialty threads can be used for decorative edges, but they usually perform best in the upper looper only and may need slower speeds and adjusted tension.
3. How often should I clean and oil my overlocker?
Because overlockers cut fabric as they sew, they collect lint quickly. Clean the blades, loopers, and feed dogs after every few projects, especially if you sew with linty fabrics like fleece or linen. Lightly oil the moving parts according to your machine’s manual – usually every few weeks of regular use.
4. Can I use decorative threads in my overlocker?
Absolutely. Decorative threads like woolly nylon, rayon, or metallic can be used in the upper looper to create colorful edges or decorative hems. For best results, reduce the upper looper tension slightly and test on scrap fabric until the stitch lays evenly.
5. When should I not use a serger (overlocker)?
A serger isn’t ideal for every sewing task. You’ll want to switch to a regular sewing machine for precise topstitching, buttonholes, zippers, or detailed construction like facings and collars. Sergers also aren’t great for very tight corners or sewing directly over bulky layers. In those cases, using a standard machine first and finishing the edges with the overlocker gives the best result.
