Vanilla extract is one of those kitchen staples that’s always worth having on hand.
Store-bought bottles are pricey and often filled with additives or imitation flavor.
So I made this article so you can make your own at home with just two ingredients: vanilla beans and either alcohol or food-grade glycerin.
It’s simple, cost-effective, and the flavor is far better than anything you’ll pick up at the grocery store.
In this article, I’ll walk you through how to make alcohol-based vanilla extract, step by step.
Why Vanilla is So Expensive
Vanilla is one of the most labor-intensive crops in the world. Every single vanilla flower has to be hand-pollinated by people, not bees.
Once pollinated, the beans take about 12–14 weeks to develop, and then they still need to be harvested, cured, and dried before they’re ready to use.
All that careful, hands-on work is why real vanilla beans cost so much.
When you buy a bottle of pure vanilla extract at the store, part of that price is covering the months of labor that went into growing the beans.
But when you buy vanilla beans in bulk and make extract at home, you stretch your money much further.
For example, about 25 beans can make around 10 jars of extract – enough to last you years or to share as gifts.
If you enjoy bringing back traditional kitchen skills, you might also appreciate my step-by-step guide on how to make tallow from beef fat (another simple staple that lasts and saves money).
Alcohol vs Non-Alcohol Extracts
When making homemade vanilla, the first choice is whether you want to use alcohol or not. Both work well, but they serve slightly different needs.
Alcohol-Based Vanilla Extract
- Most traditional and widely used.
- Vodka is the most common choice because it has a neutral flavor, but you can also use rum, spiced rum, or even grain alcohol.
- Alcohol pulls the flavor out of the beans and helps preserve the extract, giving it a long shelf life (it basically lasts forever).
Non-Alcohol Vanilla Extract
- Made with food-grade vegetable glycerin.
- Glycerin is plant-based and naturally sweet, which makes it a good alcohol-free option for families who prefer it.
- Flavor is softer compared to alcohol-based, and the shelf life is shorter, but it still works well in cooking and baking.
Both methods are simple to make at home.
The main difference comes down to personal preference and how you plan to use it – but this time, we’ll be making the classic version with alcohol for the best flavor and longest shelf life.
What You’ll Need (Ingredients + Supplies)
To make vanilla extract at home, you will need a few basic items:
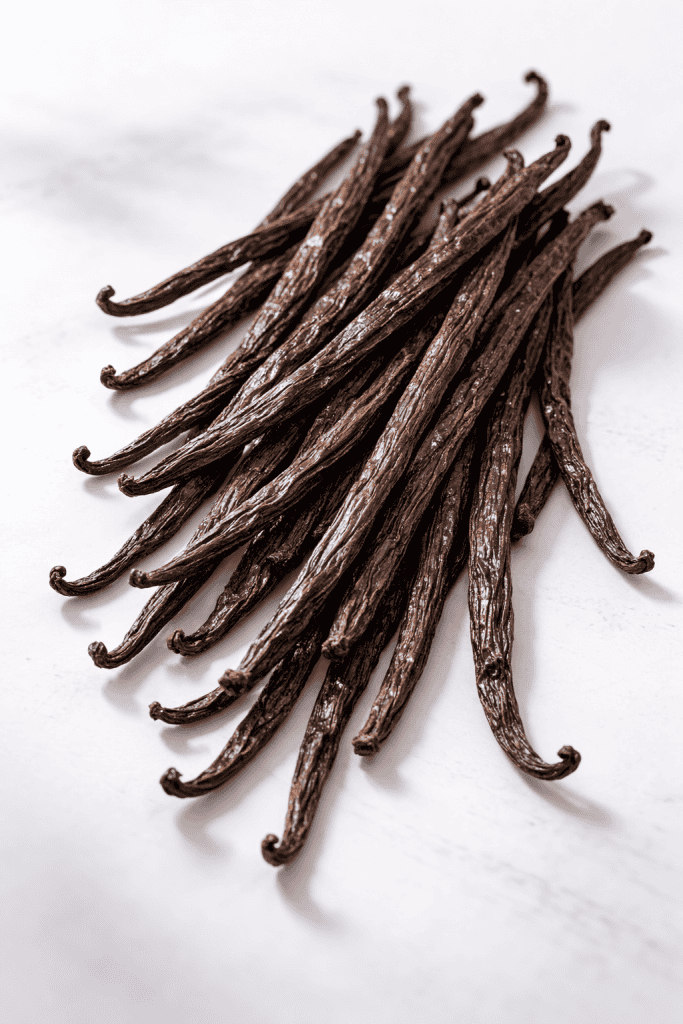
- Vanilla beans (Madagascar beans are classic, but Tahitian or Mexican beans work too. About 5 beans per pint jar.)
- Alcohol (vodka for a neutral flavor, or rum/spiced rum if you want something warmer. If making non-alcoholic extract, use food-grade vegetable glycerin instead.)
- Glass pint jars with tight-fitting lids
- Sharp knife and cutting board (for splitting the beans)
- Wax paper (for sealing under the lid)
- Marker or label (to date your jars so you know when they’ll be ready)
If you’d rather avoid alcohol, you can swap it out for food-grade vegetable glycerin instead (it’s a plant-based sugar alcohol and works well for cooking or baking) but just keep in mind the flavor won’t be quite as deep and the shelf life will be shorter.
That’s it. Once you have your beans and liquid of choice, you’re ready to start.
Let’s Make Homemade Vanilla Extract (Step-by-Step)

Making homemade vanilla is pretty easy. Once you set it up, the jar mostly sits on the shelf doing the work for you.
Here’s exactly how to do it.
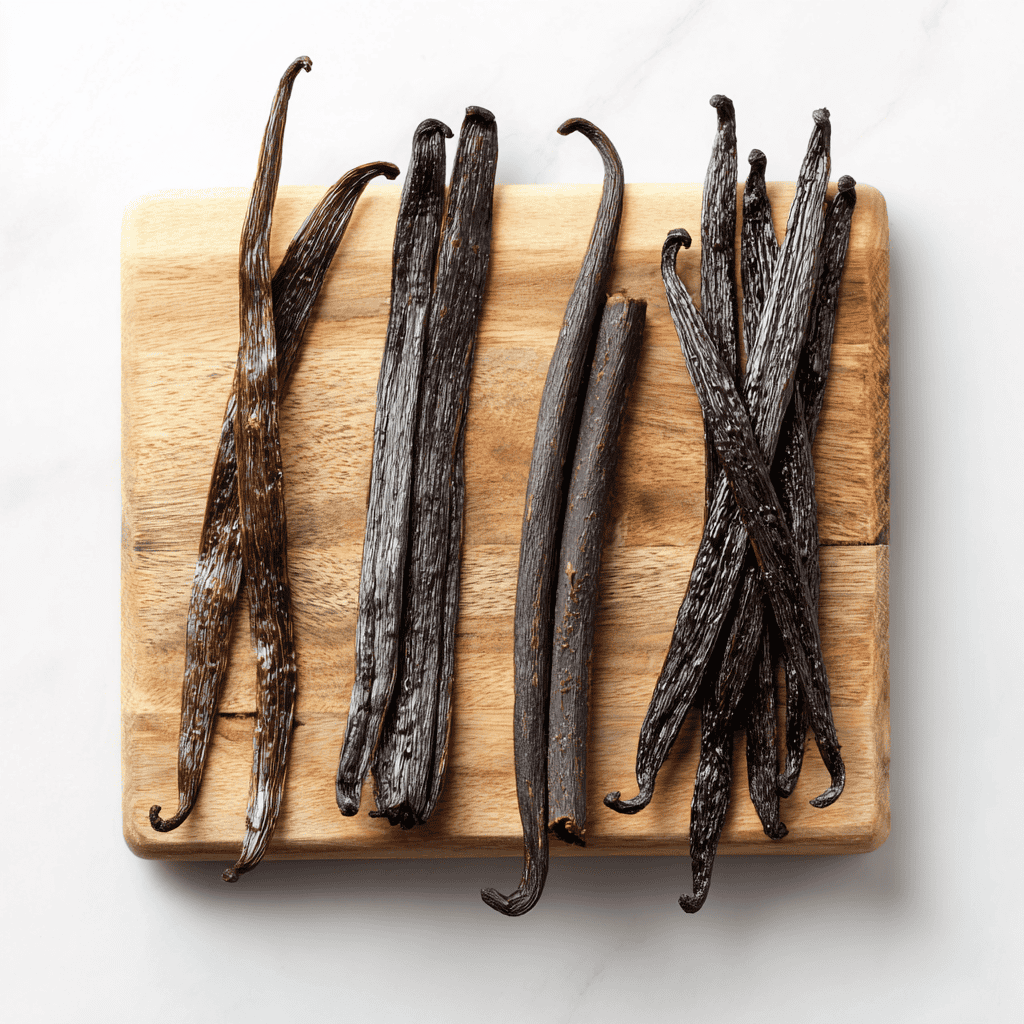
Step 1: Prepare the Beans
Use 5 whole vanilla beans for each pint jar.
Cut them in half so they fit, then slice each piece lengthwise to open them up.
You don’t need to cut all the way through – just enough to expose the seeds inside. This is what gives your extract its flavor.
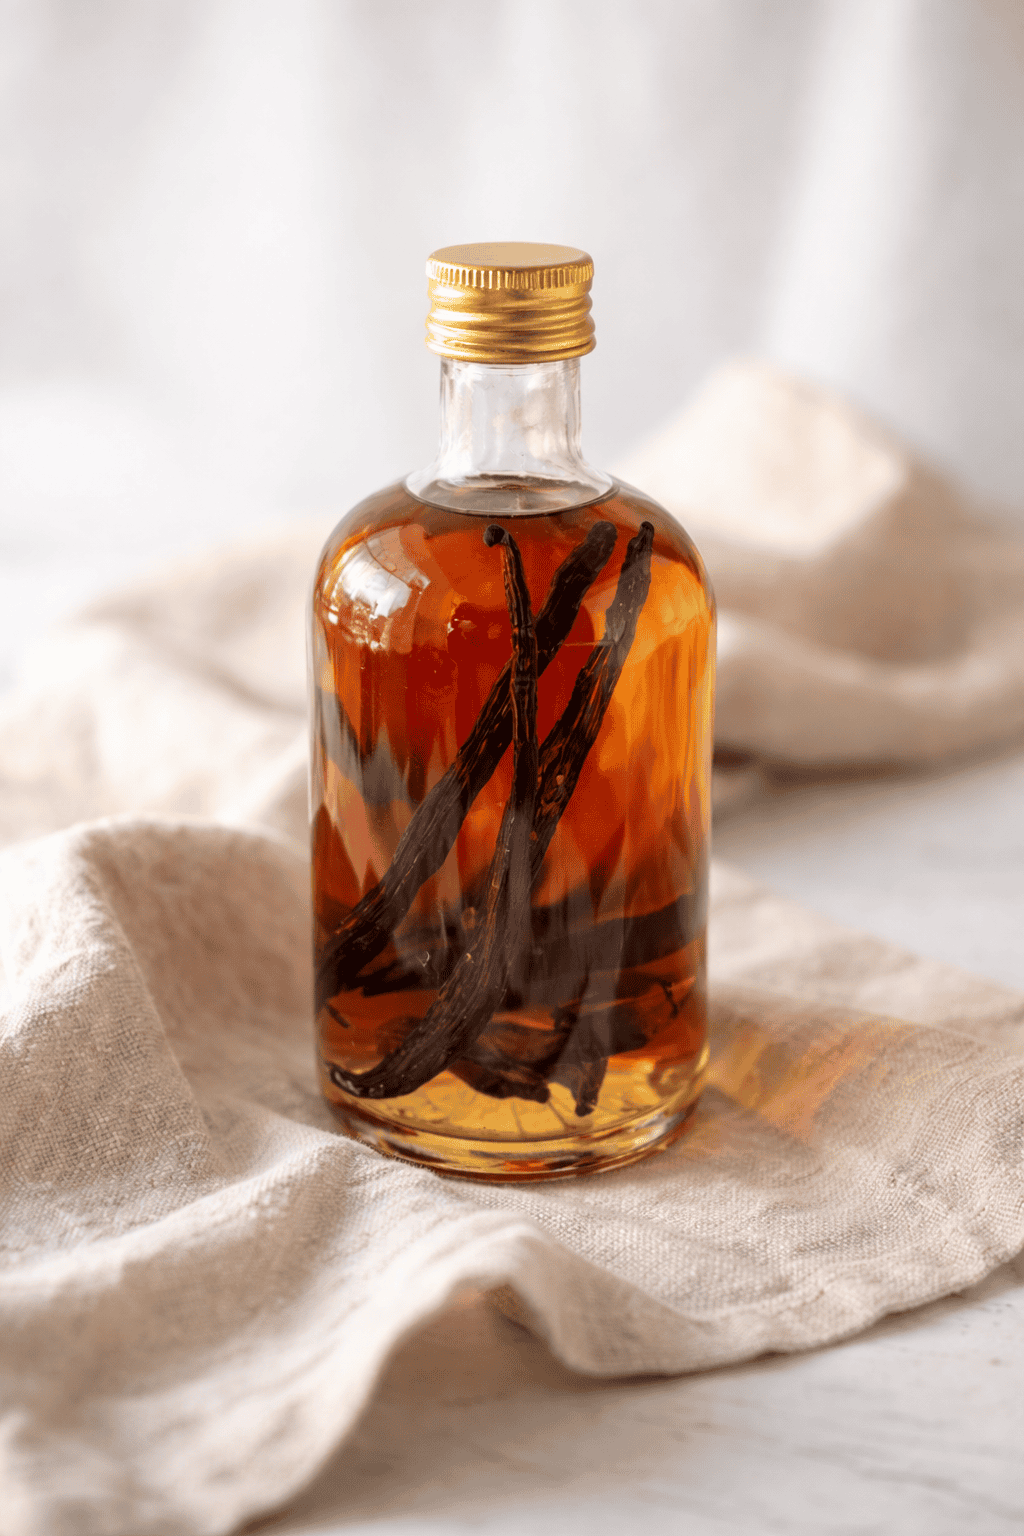
Step 2: Fill the Jar
Place the beans in a clean glass jar.
Pour in vodka (or rum/spiced rum if you’d like a warmer flavor) until the beans are completely covered.
Leave about an inch of space at the top.
Make sure no beans are sticking out above the liquid or they could spoil.
Step 3: Seal the Jar
Tighten the lid well so nothing leaks.
I also recommend add a small piece of wax paper between the lid and the jar to keep the alcohol from touching the metal.
Step 4: Shake Regularly
Shake the jar once a day for the first two weeks.
After that, once a week is enough. Around the four-month mark, you can switch to shaking once a month.
This keeps the beans moving and helps the alcohol pull out the flavor.
Step 5: Label and Wait
Write the date on the lid or on a piece of tape.
This way you won’t lose track of how long it’s been sitting.
The extract will start to look darker and smell like vanilla within a couple of months, but it’s best to let it steep at least 8 months.
For the strongest flavor, aim for 12–18 months before using.
Helpful Tips for Best Result
Making vanilla extract is simple, but a few small habits can make the process smoother and your results even better.
Keep these tips in mind as you go:
- Buy beans in bulk – You’ll save a lot of money if you buy vanilla beans in larger quantities instead of just a few at a time. Store the extras in an airtight bag in the freezer until you need them.
- Keep beans submerged – If any part of the bean is sticking out above the liquid, it can mold. Always top off the jar so the beans stay fully covered.
- Label clearly – Write the date on the lid so you don’t lose track of how long it’s been steeping. It also helps if you’re making multiple jars.
- Store in a dark place – Keep your jars in a cupboard or pantry, away from direct sunlight. Light can break down the flavor over time.
- Reuse the beans – Once you’ve used some extract, you can refill the jar with more alcohol or glycerin to keep pulling flavor out of the same beans.
- Filter if needed – Over time, little vanilla seeds (the caviar) may float around in your extract. They’re harmless and full of flavor, but if you prefer a clear extract, strain it through a coffee filter before bottling.
Do you love baking from scratch and working with wholesome ingredients? My freshly milled pizza dough recipe is a great one to keep in your rotation.
Creative Ways to Use Vanilla Extract
Once you’ve got a jar of homemade extract in your kitchen, you’ll find yourself reaching for it in all sorts of unexpected ways.
Here are some easy (and fun) ideas:
- Morning coffee or tea – A few drops add warmth and natural sweetness without extra sugar.
- Smoothies – Blend into fruit or green smoothies for that little something extra.
- Homemade whipped cream – Just a splash takes whipped cream from good to wow.
- Oatmeal or overnight oats – Stir in a teaspoon for a cozy, dessert-like flavor.
- Savory cooking – Believe it or not, vanilla can round out tomato sauces, marinades, and even chili by adding a subtle depth.
- DIY gifts – Pour into pretty glass bottles, add a ribbon, and you’ve got a thoughtful homemade gift.
- Non-food uses – A drop mixed with carrier oil can be used as a natural perfume or added to homemade cleaning sprays for a warm scent.
With homemade vanilla on hand, you’re not just baking better cookies – you’re adding a flavor to everyday life.
If you’re craving a simple homemade dessert that feels nostalgic but a little healthier, try my homemade sugar-free rice crispy treats.
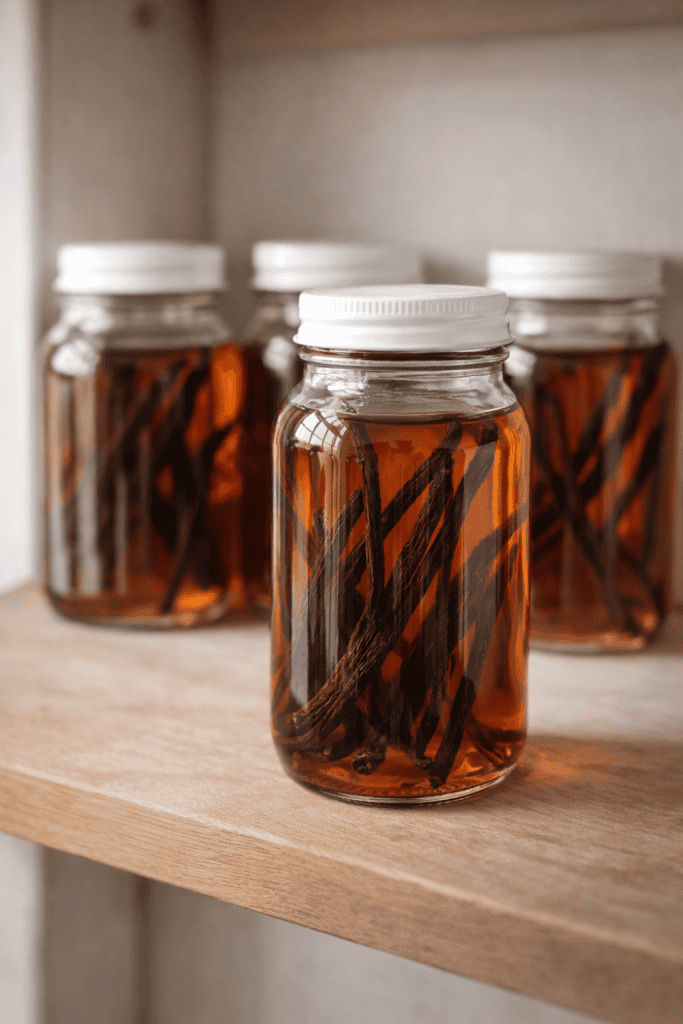
How to Store Your Homemade Vanilla Extract
It’s to easy to store homemade vanilla extract.
The key is to use a dark glass bottle or jar since that helps protect the extract from sunlight, which can weaken the flavor over time.
Amber or brown glass is usually the go-to.
You’ll also want to tuck it away in a cool, dark spot, like a pantry or cupboard that isn’t near the stove or any other heat source.
If you’re still in the steeping stage, giving the bottle a gentle shake every now and then helps the beans infuse more evenly.
With this method, you can keep one bottle going for quite a long time.
As for shelf life, properly stored vanilla extract doesn’t really expire. In fact, it usually tastes even better the longer it sits, deepening in flavor as time goes by.
If you enjoy making simple pantry staples from scratch like I do, you might also love my guide on how to make pumpkin puree from scratch.
Bring Homemade Vanilla Extract Into Your Everyday Kitchen
Homemade vanilla extract takes almost no effort to make, yet the flavor it brings to your kitchen is miles beyond the store-bought kind.
Whether you’re stirring it into pancake batter, cookies, or even your daily coffee, it’s the kind of ingredient that quietly upgrades everything.
And once you’ve started, you’ll never look at baking the same way. A jar tucked in the pantry – reliable, natural, and endlessly useful.
The best part is you can keep it going with just a splash more alcohol and a few fresh beans.
So why not give it a try and see the difference for yourself?
And if you do, I’d love to hear how it goes! Share your first batch (or your favorite recipe to use it in) in the comments below.
FAQS
How long does homemade vanilla extract need to steep before it’s ready to use?
You can technically use it after about 8 weeks, but the flavor will be light. For a rich, deep vanilla taste, let it steep at least 8 months. If you can wait 12 months or longer, it gets even better. The longer it sits, the stronger and smoother the flavor becomes.
Can I use different types of alcohol besides vodka?
Yes. Vodka is the most common because it has a neutral flavor, but rum adds warmth and sweetness, and bourbon gives a deeper, slightly caramel-like note. Just make sure the alcohol is at least 70 proof or higher so it properly extracts and preserves the vanilla.
What if I see tiny black specks floating in the extract?
That is completely normal. Those are vanilla seeds, often called vanilla caviar. They are full of flavor and safe to use. If you prefer a clearer extract, you can strain it through a coffee filter before transferring it to smaller bottles.
How do I know if my vanilla extract has gone bad?
Properly made alcohol-based vanilla extract does not really expire. If the beans stay fully submerged and the jar is sealed well, it should last for years. If you ever notice mold (usually from beans sticking out above the liquid) or an unusual sour smell, discard it and start fresh.
Can I keep refilling the same jar with more alcohol?
Yes, you can top off the jar once or twice as you use it. Over time, the beans will weaken, so after a year or two it is best to add a few fresh beans to maintain strong flavor. Keeping the beans fully covered is key to preventing spoilage and maintaining quality.
