Valentine’s Day is a wonderful time to get crafty with your little ones.
Whether you’re a parent or a teacher, these fun Valentine crafts will delight kids from preschool to early elementary (around ages 3–8).
Each project is low-mess, uses everyday or recycled materials, and is easy to adapt for younger crafters.
The best part is, you’ll be making sweet memories together while also helping children practice motor skills and creativity.
Valentine crafts can even be a chance to teach kids about caring and sharing love with others.
So grab those paper scraps and glue sticks – let’s spread some love through crafting!
Why Valentine Crafts Are Great for Kids
Valentine’s Day is a chance for kids to explore creativity, practice fine motor skills, and express kindness.
Crafting together encourages:
- Creativity & Imagination: Kids learn to design, mix colors, and invent their own creations.
- Fine Motor Skills: Cutting, gluing, folding, and drawing all help little hands grow stronger and more coordinated.
- Emotional Expression: Making cards, gifts, or decorations helps kids show love and care for family, friends, and classmates.
- Family Bonding: Crafting together creates fun memories and teaches the value of shared time.
With just a few simple materials and a little guidance, Valentine crafts turn ordinary afternoons into meaningful, hands-on learning experiences.
You can also check out our creative Christmas crafts for kids for more holiday-inspired ideas.
10 Sweet Valentine Crafts for Kids Using Everyday Materials
I’ve rounded up 10 sweet and easy Valentine crafts that kids will love making, from paper hearts to adorable keepsakes.
These projects are perfect for home, school, or just a cozy afternoon of crafting together.
1. Love Bug Headband
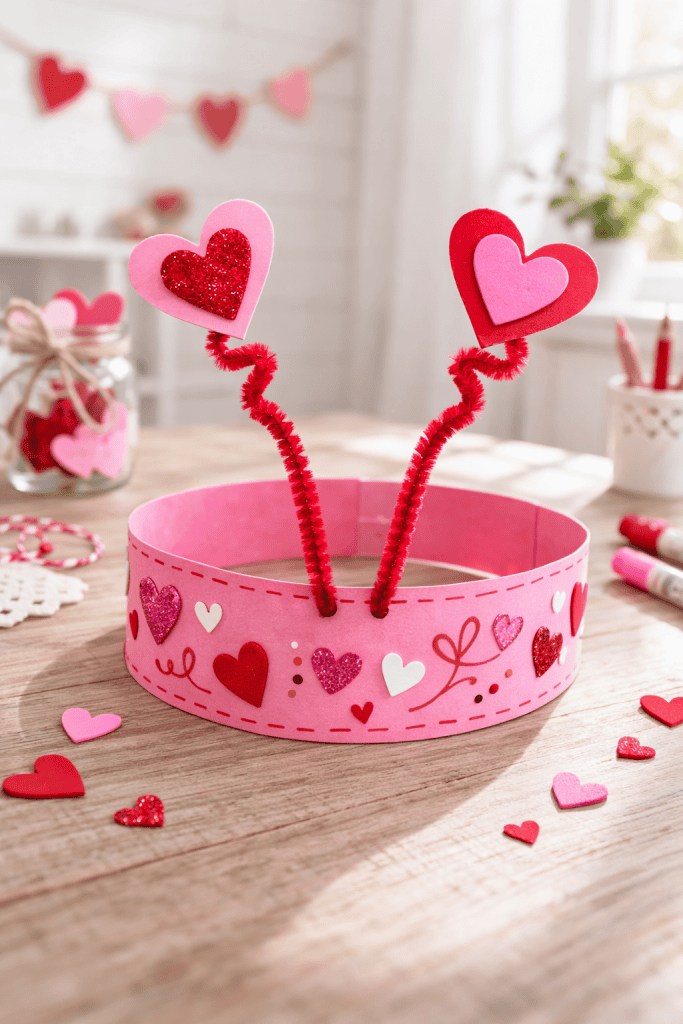
Transform your kiddo into a “love bug” with a cute heart antenna headband.
Materials: A strip of cardstock or construction paper (for the headband), 2 pipe cleaners (or paper strips) for antennas, craft foam or paper cut into heart shapes, tape or glue, crayons or stickers for decoration.
Instructions:
- Make the Headband: Cut a long strip of cardstock about 2 inches wide to fit around your child’s head. Join the ends to form a circle (use tape or glue). This is the headband base.
- Create Antennas: Take two pipe cleaners and curl one end of each into a small spiral (these will hold the hearts). If you don’t have pipe cleaners, you can fold thin strips of paper into a spring shape.
- Add Hearts: Cut out two medium-sized hearts from colored paper or craft foam. Tape or glue a heart to the curled end of each pipe cleaner. These are your love bug’s antenna toppers.
- Attach to Headband: Tape or glue the pipe cleaner antennas onto the front of the headband (inside the band so the hearts stick up). Tip: For extra security, you can staple them (grown-ups only), then cover the staples with tape for safety.
- Decorate: Let your child decorate the headband with crayons, stickers, or additional heart cut-outs. They can draw swirls, write “Be Mine,” or add their name – whatever makes them smile.
Once the glue is dry, crown your little love bug! Kids adore wearing their creations – expect some heart antenna head-bobbing and giggles.
This craft is simple, wearable, and fuels imaginative play (“buzz, buzz!”). For younger toddlers, you can prep the heart shapes in advance and let them handle the fun part – stickers and coloring – so they feel proud to wear their own artwork.
Looking for more fun projects like this? Check out our easy Sunday school crafts on a budget for more simple, creative ideas that kids love.
2. Pom-Pom “Warm Fuzzies” (Love Bugs)
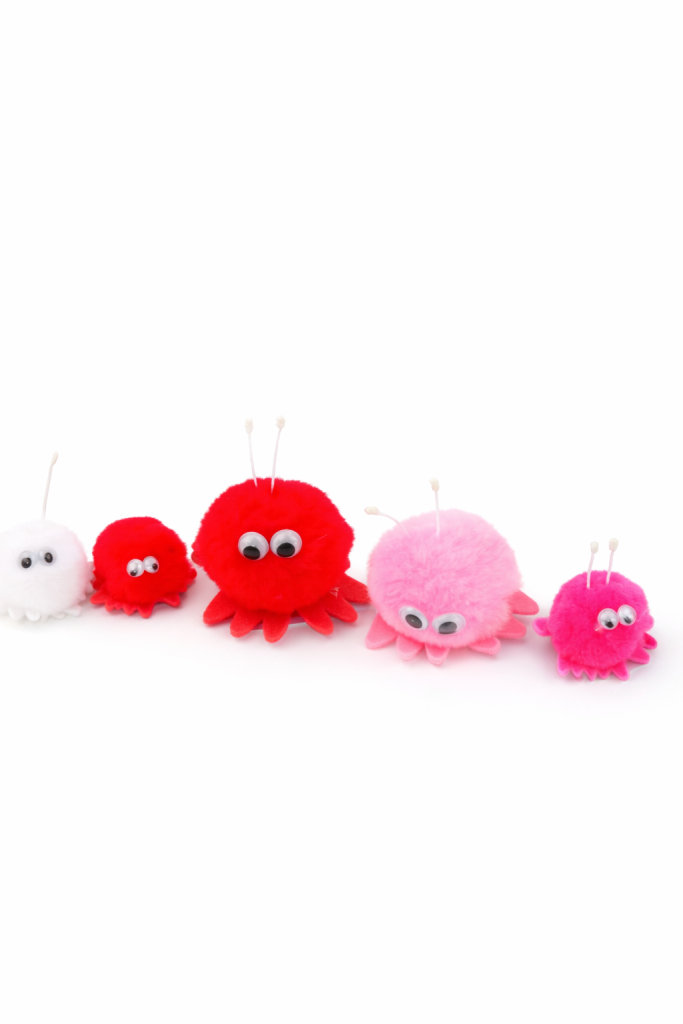
These fuzzy little pom-pom critters carry big love and are perfect to give as valentines!
Materials: Large pom-poms (store-bought or DIY yarn pom-poms), googly eyes (or paper to draw eyes), child-safe glue, small foam or paper hearts for decoration (for noses, antennae or “feet”), optional: clothespins or pencils if making clips or pencil-toppers.
Instructions:
- Prepare the Pom-Poms: If you have ready-made pom-poms, great! Otherwise, you can make your own by wrapping yarn around your fingers and tying it off (an adult can do this). Each pom-pom will be a “warm fuzzy” love bug body.
- Add Faces: Glue two googly eyes onto each pom-pom to give your creature a face. No googly eyes? No problem – draw little eyes on paper, cut them out, and glue those instead.
- Decorate Your Fuzzy: Stick a tiny heart on top as a “nose” or on the bottom as feet. You could also glue on two short strips of pipe cleaner as antennae with hearts at the ends. Be creative – each love bug can be unique!
- Let It Dry: Allow the glue to dry so the eyes and decorations stay put. Meanwhile, talk with your child about who they might give their warm fuzzy to – it makes a cute little gift to “share a warm fuzzy” with someone they love.
- Optional – Make it a Gift: Glue or tape the finished pom-pom creature onto a clothespin or the eraser end of a pencil to turn it into a fun Valentine’s gift (for example, a pencil topper bug or a clip for a note). If using a clothespin, you can clip a small valentine card or love note in it. (Skip hot glue – a glue dot or double-sided tape with adult help works well to attach the pom-pom.)
These “warm fuzzies” are essentially cuddly little pets that don’t make a mess. Kids will love making a whole family of fuzzy bugs in different colors.
They’re quick to create, so even short attention spans can make several. Plus, children enjoy giving them to friends or family – spreading that warm, fuzzy feeling all around!
3. Paper Plate Heart Wreath
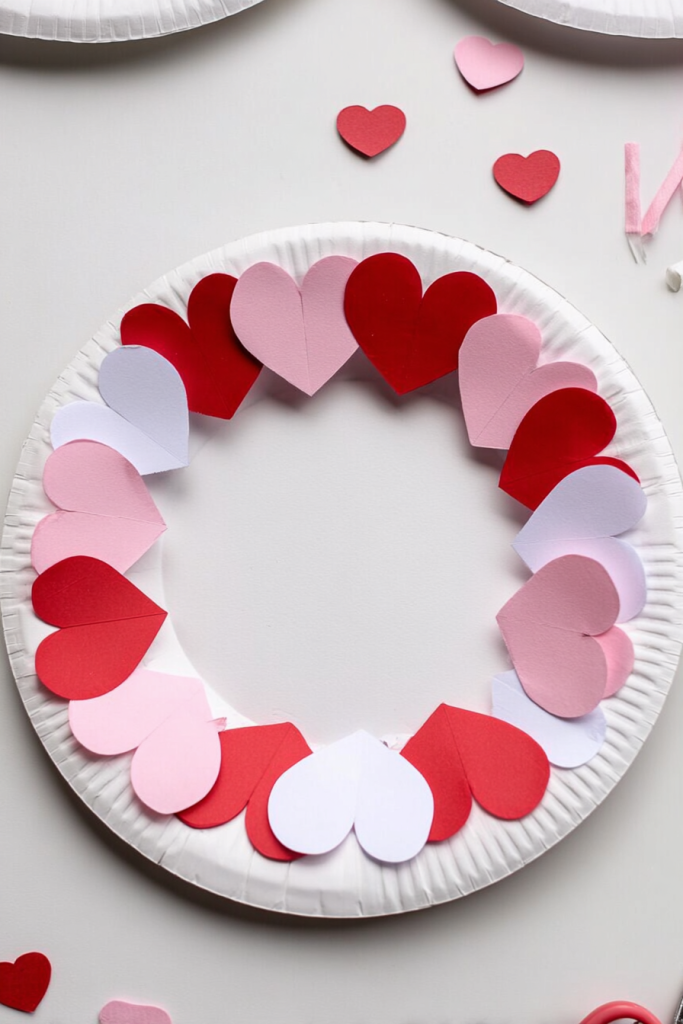
Turn a humble paper plate into a beautiful heart wreath to decorate your home for Valentine’s Day.
Materials: Paper plate, construction paper or scrap paper (for hearts), safety scissors, glue stick or school glue, ribbon or yarn for hanging, optional: stickers or pom-poms for extra decor.
Instructions:
- Plate Base: Take a paper plate and cut a wide hole in the center, leaving the outer rim intact (adult help recommended for cutting the thick plate). You’ll get a ring shape – this is the base of your wreath.
- Heart Cut-outs: Cut out lots of hearts from construction paper or even old magazine pages. Hearts about 2–3 inches wide work well. Kids can draw heart shapes for you to cut, or use heart-shaped cookie cutters as a stencil. If your child is practicing scissor skills, let them try cutting some of the simpler heart shapes (with supervision).
- Cover the Wreath: Using a glue stick, attach the paper hearts all around the paper plate ring. Overlap them at different angles so the plate gets fully covered. It’s fine if hearts stick out – that gives a nice frilly look. Little ones can just freely glue while you rotate the plate to help them cover all areas.
- Decorate: Add extra flair if you like – maybe a few Valentine stickers, or glue on cotton balls or pom-poms among the hearts for texture. Keep it fairly lightweight so it hangs easily.
- Add a Hanger: Punch a hole at the top of the wreath and loop a ribbon or yarn through it. Tie the ends to make a hanger. Now find the perfect spot (door, wall, or fridge) to display your child’s heart wreath.
This craft lets kids see their work become real decor. They’ll beam with pride seeing their wreath hung up for all to admire. It’s also a wonderful fine-motor workout (all that gluing and placing).
For younger kiddos, the process is forgiving – if they glob too much glue or place hearts “imperfectly,” the wreath still turns out charming. Parents love that it uses up scrap paper and comes out looking festive without any need for paint or glitter.
4. DIY Heart Garland

Deck the halls (or the playroom) with a cheerful Valentine’s heart garland made by your kids.
Materials: Colorful paper (construction paper, old art drawings, even junk mail envelopes – anything pink, red, or pretty), scissors, a hole punch, string or yarn. (Alternative: use pre-cut foam hearts or paper heart doilies for convenience.)
Instructions:
- Cut Out Hearts: Help your child cut out a bunch of hearts from your paper. They can be all one size or various sizes. This is a great use for children’s paintings or drawings – cut heart shapes out of their old artwork to upcycle it into Valentine decor! If cutting is challenging for your kid’s age, you do the cutting and let them count or sort the hearts.
- Hole Punch: Using a hole punch, make a small hole near the top of each heart. (Tiny kids might need an adult to do this step, or you can instead tape hearts onto the string in the next step.)
- String Them Up: Take a length of yarn or string and have your child help weave it through the holes in each heart. Older kids can practice an AB pattern (red, pink, red, pink) or any sequence as they string the hearts. If you prefer not to use a hole punch, simply lay the hearts on a table under the string and tape the backs to the string at intervals.
- Adjust Spacing: Slide the hearts along the string to space them out as desired. You can cluster a few and then leave a gap, or keep them evenly spaced. This doesn’t have to be precise – let your child decide what looks nice to them.
- Hang the Garland: Find a fun spot – across a window, above a bed, on the mantle – and hang the garland. Tie the ends of the string to thumbtacks or tape them down securely. Step back and admire the Valentine cheer!
A heart garland adds instant party vibes to their space. Children enjoy seeing a long string full of hearts they crafted, and they might even insist on making multiple garlands for different rooms.
It’s a collaborative project too – siblings or friends can each contribute hearts to one long chain. And since this craft is basically paper and string, cleanup and setup are a breeze.
For more fun and cozy creations, check out our irresistible felt craft ideas for kids – perfect for hands-on Valentine fun that keeps little fingers busy.
5. Tissue Paper Heart Suncatchers

Catch some winter sunlight with “stained glass” hearts made of tissue paper – a colorful window craft.
Materials: Thin paper hearts or cardstock heart frames, tissue paper (assorted colors, cut or torn into small pieces), clear contact paper or wax paper, child-safe scissors, hole punch and ribbon (for hanging) or tape for window mounting.
Instructions:
- Prepare the Heart Frame: Cut a large heart shape out of construction paper. Then cut out its center, leaving a heart-shaped outline ~1 inch thick (so it looks like a hollow heart frame). This will frame your suncatcher. For younger kids, an adult can prep the frames, or you can skip the frame and make the whole heart from the tissue on wax paper.
- Sticky Surface Ready: If using clear contact paper, cut a piece a bit larger than your heart frame, peel off the backing and lay it sticky-side-up on the table. Tape the corners down so it stays put. Place the paper heart frame onto the sticky contact paper so that the center of the heart is now a sticky area to fill. (If you’re using wax paper instead, you’ll do a slightly different process: lay the wax paper down and have kids brush a thin layer of clear school glue inside the heart shape area as their “sticky surface.”)
- Tissue Collage: Now the fun part – have your child stick bits of tissue paper all over the sticky heart area. They can overlap pieces, use various colors, and cover the entire space. There’s no wrong way to do it: layer colors to see what new shades you get when light shines through! If any tissue piece hangs over the edge of the frame, just fold or trim it off. (For wax paper method, kids will press tissue pieces onto the glue-coated wax paper. You might want to put an old newspaper under the project to protect your table from any glue seeping out.)
- Seal it Up: If contact paper, you can seal the collage by adding another sheet of contact paper on top (sticky side down) over the heart before cutting it out – this traps the tissue pieces. If wax paper, optionally brush another thin layer of glue on top of the tissue pieces to help them lie flat; it will dry clear.
- Finishing Touch: Cut out the finished tissue collage heart (if there’s excess contact paper or wax paper around the edges). Punch a hole at the top and tie a ribbon for hanging. Now hang your suncatcher in a window or glass door where the sunlight will shine through.
This craft is essentially a sticking frenzy – and what kid doesn’t love that? Tearing up tissue paper and placing the colorful bits feels a lot like making a beautiful mess (but it’s a contained, no-paint mess!).
Even toddlers can participate, and the result looks impressive hanging in the light. Parents love that this keeps little hands busy and results in a pretty decoration you can actually keep up for a while.
(Craft Hack: No contact paper? Try coating a heart shape cut from wax paper with a thin layer of glue and follow the same steps – it works almost as well!)
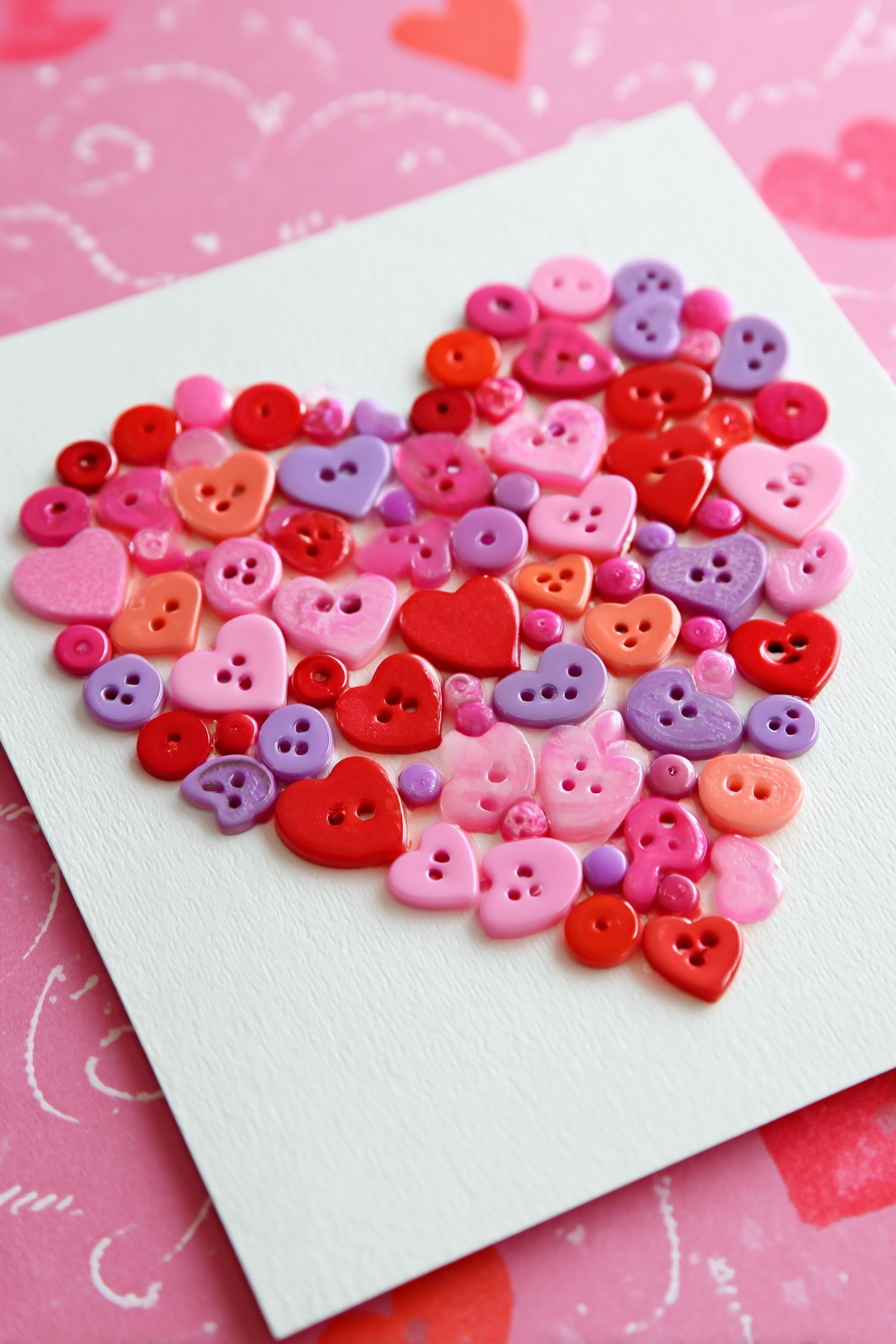
6. “I Love You to Pieces” Mosaic Heart Card
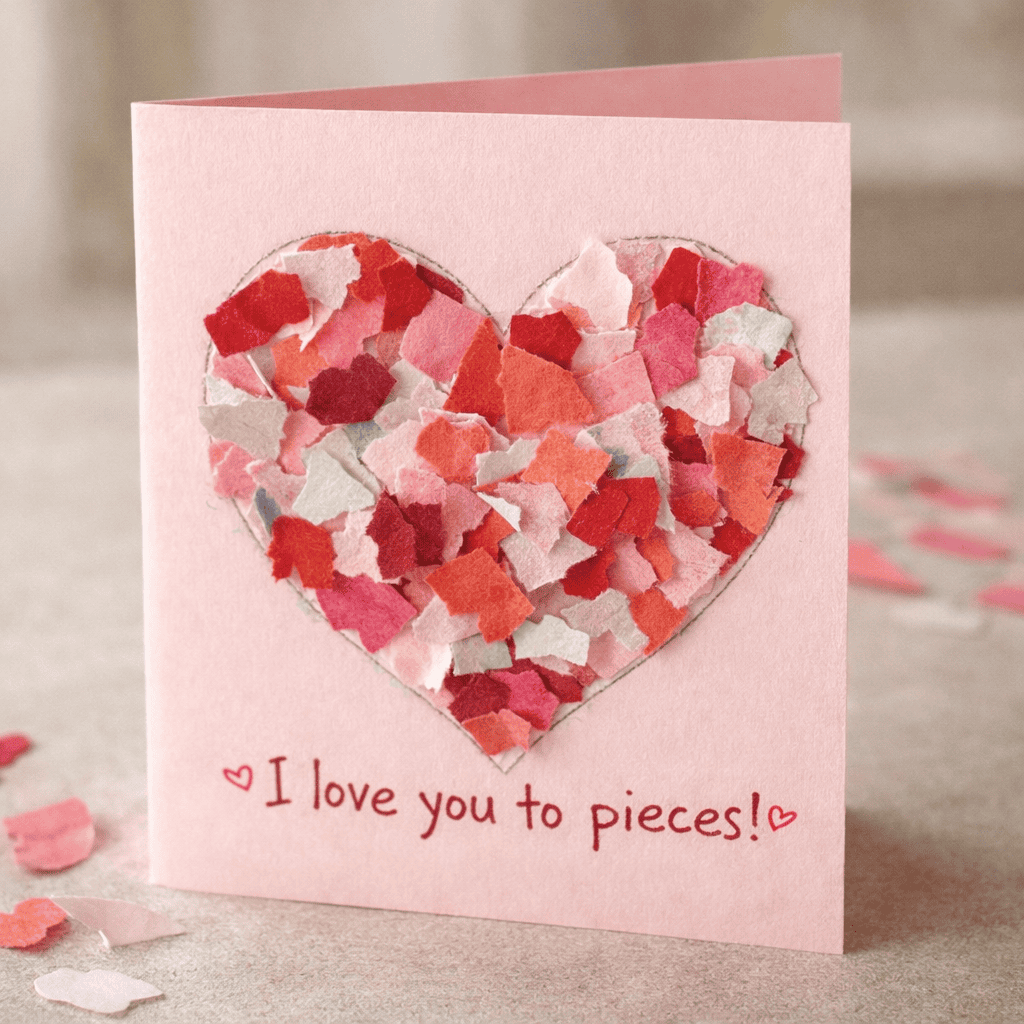
This heartfelt card says “I love you to pieces!” literally – with a mosaic heart made from paper scraps.
Materials: Construction paper or cardstock (for the card), colored scrap paper (could be old artwork, magazines, tissue paper, etc.), child scissors or just hands for tearing, glue stick, marker.
Instructions:
- Make the Card Base: Fold a sheet of construction paper or cardstock in half to create a card. Any color is fine, though light colors make it easier to read text.
- Draw a Heart Shape: Lightly sketch a big heart on the front of the card with pencil. This will be the area your child will fill in with paper pieces. (If the child prefers, you can draw the heart for them as a guide, or cut a heart shape and glue it on as a base to cover.)
- Tear or Cut Paper Pieces: Give your child some red, pink, white, or assorted colored paper scraps. Have them tear the paper into small pieces (roughly the size of a quarter or smaller). Kids love tearing paper – it’s great for fine motor strength and no perfect cuts needed! If they’re comfortable with scissors, they can also cut the scraps into little squares or bits.
- Fill the Heart: Apply glue stick all inside the drawn heart shape (or spread glue on one small section at a time for younger kids). Now let your child place the paper pieces onto the glued area, one by one, like a collage. They can overlap pieces and cover the heart completely. It’s okay if pieces go a bit over the outline – you can trim the edges later, or leave it for a rustic look. Keep adding glue and paper until the whole heart shape is filled with colorful pieces.
- Add the Message: Once the mosaic heart is complete, use a marker to write “I love you to pieces!” on the card. Older kids can copy the phrase themselves in their best handwriting, while younger ones might just sign their name or add extra doodles inside. You can also date it on the back as a keepsake.
It’s artsy but achievable – no fancy drawing skills required, just ripping and sticking. Kids feel a great sense of accomplishment seeing a bunch of torn scraps turn into a big heart. This card makes a perfect gift for grandparents, parents, or teachers. And because it’s homemade, it’ll be treasured.
Bonus: this craft uses recycled paper bits you already have, truly turning trash into heartfelt treasure.
Want even more creative projects for little hands? Check out our DIY New Year crafts for kids for simple, fun, and festive ideas you can make together.
7. Heart Flower Bouquet Craft
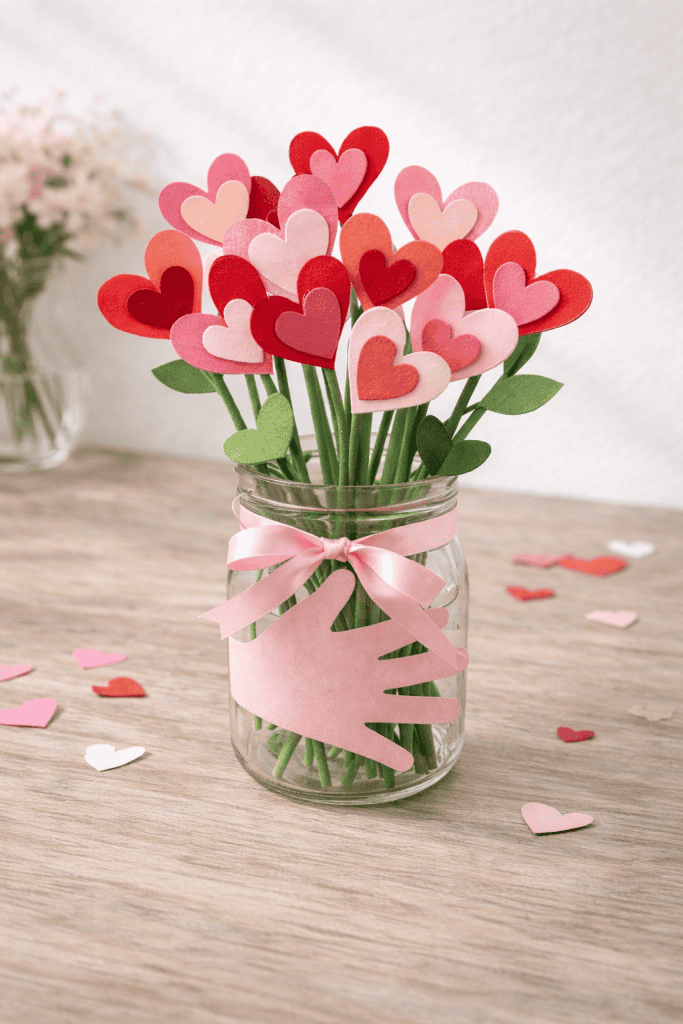
Who needs real flowers when you can make an everlasting Valentine bouquet from paper hearts and little hands?
Materials: Colored construction paper (reds, pinks for hearts; green for stems/leaves), pencil, scissors, glue or tape, a sheet of paper or cardstock for assembling the bouquet (or an empty jar if making 3D flowers), optional: a child’s hand for tracing (for a cute twist).
Instructions:
- Create Heart “Petals”: Cut out several hearts in different sizes. For each flower, you’ll use 3–5 small hearts as the petals. Kids can help trace heart shapes for you to cut, or fold paper and cut half-heart shapes to get symmetrical hearts (older kids might do this themselves). If cutting is too tricky, provide pre-cut hearts and let little ones count them or choose colors.
- Make Stems: Cut long thin rectangles or strips from green paper for stems. Alternatively, use green pipe cleaners, plastic straws, or even sticks from the yard (truly homestead style!). If you want to make a bouquet card on paper, you can simply draw the stems with green crayon or marker – that works too and avoids extra gluing.
- Assemble Flowers: Take 3-5 hearts and arrange them in a circle with the points meeting in the center – now it looks like a flower with heart petals! Glue or tape the pointed ends together where they meet. If using a background paper, glue the cluster of hearts at the top of a drawn stem. If making individual flowers (not on a flat paper), glue the hearts together at their points, then attach the cluster to the top of a paper stem or tape it around a straw/pipe cleaner.
- Add Leaves or Handprint (Optional): Cut out a few small green hearts to glue along the stems as leaves. For a special keepsake, trace your child’s hand on colored paper and cut it out – this can act as a base of the bouquet. For example, on a card, you might glue the hand shape at the bottom so it looks like the paper hand is “holding” the drawn stems. If you made 3D flowers on sticks, you could put them in a real vase or jar, and even place that hand cut-out around the vase as if the hand is holding the bouquet from outside.
- Finish and Present: Have your child add a note like “Love Blooms!” or “Happy Valentine’s Day!” to the card or a gift tag. Now you have a bouquet that won’t wilt! If it’s a flat picture, you can frame it or just have the child give the card to someone special. If it’s a 3D bouquet, tie the stems with a ribbon and present it like real flowers.
This craft combines two things kids are proud of – their hearts and their hands! Little ones love tracing hands or showing off how “big” their hand is now, and incorporating that into a flower craft makes it personal.
The concept of gifting the bouquet makes children excited – they can’t wait to hand over their handmade flowers and say, “I made this for you!” And recipients will surely adore the creativity. From a parent perspective, it’s precious to preserve those tiny handprints in a Valentine craft.
8. Heart-Shaped Love Bugs & Critters
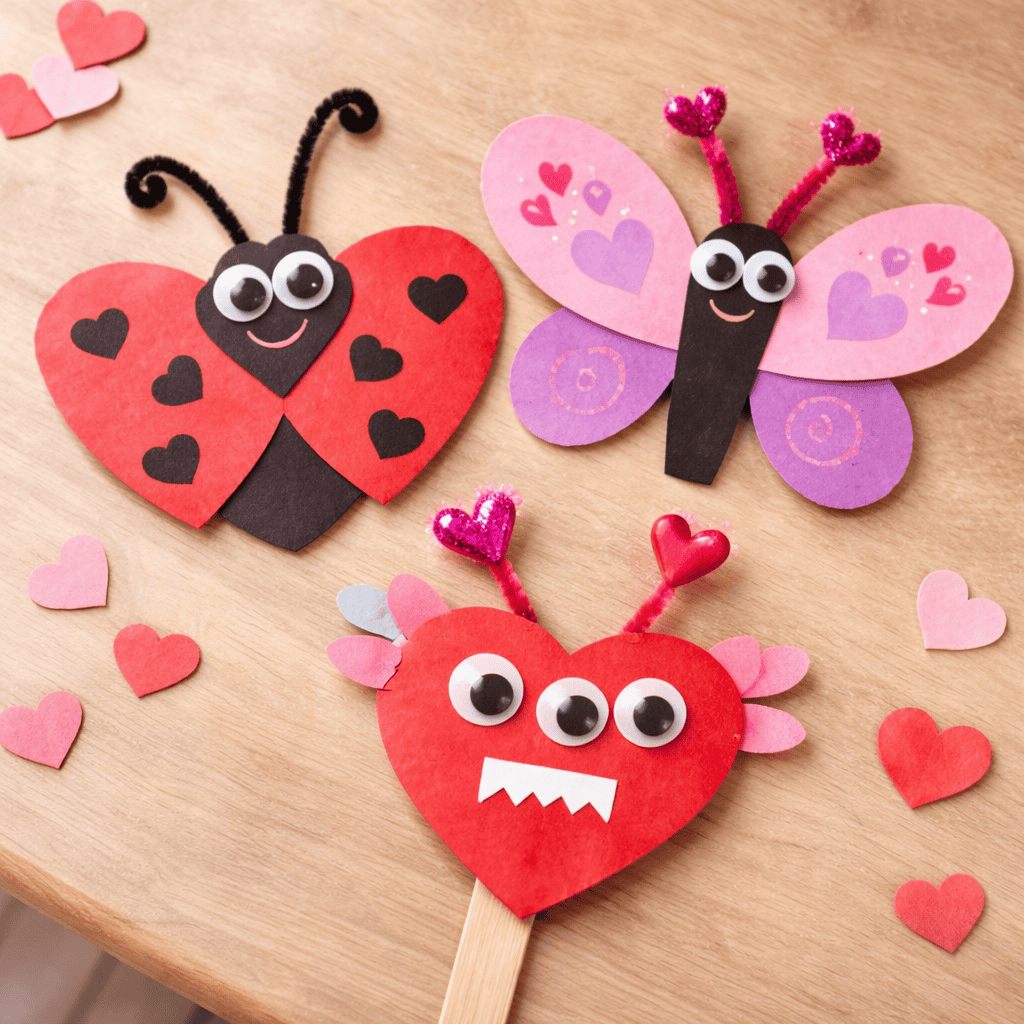
Turn heart cutouts into adorable love bugs, butterflies, or even monsters – a playful craft that lets imagination lead.
Materials: Construction paper (reds, pinks, plus black or other accent colors), scissors, glue, markers, googly eyes (optional), pipe cleaners or straws (for antennae or legs), optional: craft sticks or clothespins if making puppets.
Instructions:
- Pick a Creature: Ask your child what kind of “love bug” they want to make. A ladybug? A butterfly? A silly monster? All will use heart shapes as the main pieces. For a ladybug, you’ll need a large red heart for the wings, a round or heart-shaped black piece for the body, and smaller black dots or hearts for spots. For a butterfly, two large hearts can be wings, with their points meeting in the middle, and a narrower paper rectangle or craft stick as the body. For a monster, maybe a big heart for the face and smaller hearts for eyes or horns. There’s no wrong way – encourage your child’s ideas (half the fun is coming up with creature features!).
- Cut Out the Shapes: Help cut the necessary heart shapes. For example, cut one big heart (~4–5 inches) from red paper, and a circle or smaller heart from black paper for a ladybug’s body. Cut small black hearts or circles to be the ladybug’s spots. If doing a butterfly, cut two hearts of the same size for wings. If doing a monster, cut one big heart plus any other shapes they want (maybe lightning-bolt shaped teeth or extra eyes).
- Assemble the Love Bug: Glue the pieces together to create your creature. For a Ladybug: Glue the point of the red heart onto the black circle so it looks like open wings on a body. Add the black heart “spots” onto the red wings. Glue on googly eyes or draw eyes on the black part, and a smile if you like. For a Butterfly: Glue the two heart tips together onto the stick or paper strip body (hearts make perfect wings!). Draw or add eyes on the top of the stick body, and antennae (use two short pieces of pipe cleaner or just draw curly lines). For a Monster: Go wild – glue googly eyes (as many as they want – monsters can have three eyes!), stick on a few small hearts as “spots” or use them as funny ears. You can even glue heart shapes on the ends of pipe cleaners to make bouncing antennae and attach them to the monster’s head.
- Finishing Details: Draw on any extra details with markers – like a ladybug’s smiling mouth, a butterfly’s patterns on wings, or a monster’s sharp teeth (maybe drawn on a white paper scrap and glued). If the pieces aren’t flat, let everything dry a bit.
- Play or Display: Once the love bug or critter is complete, decide what to do with it. You can tape a string on the back to hang it as an ornament, glue it to a popsicle stick to make a puppet, or simply stick it on the fridge as a Valentine decoration. Older kids might make a whole collection of heart critters and have a little “Valentine bug parade.”
This craft turns hearts into characters – it’s a fantastic blend of craft and play. Children get to invent their own creature, which sparks creativity. Maybe your child’s love bug has six googly eyes and rainbow wings – awesome!
They’ll be proud they designed something themselves. After crafting, kids often continue with imaginative play, using their paper critters as puppets or toys. And if you make a bunch, they can swap or gift them to friends (“Meet my love bug family!”).
For minimal effort (just paper and glue), you get maximum cute factor.
9. Cupcake Liner Love Birds
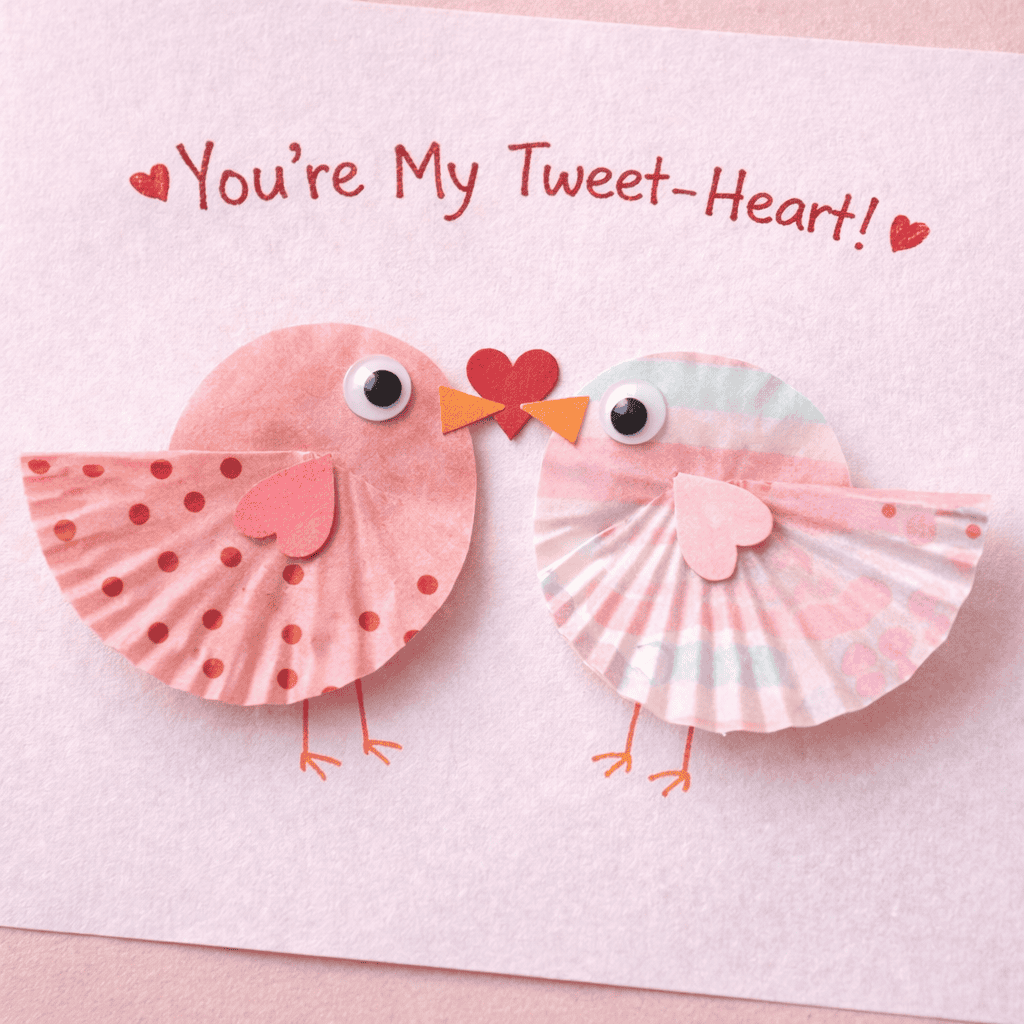
Tweet tweet! Create some “love birds” using cupcake liners – a super simple craft with adorable results.
Materials: Cupcake liners (paper baking cups – any color or pattern, though pink/red fits the theme), construction paper (orange or yellow for beaks, any color for background or extra hearts), googly eyes or markers, glue, and scissors.
Instructions:
- Flatten the Liners: Take two paper cupcake liners and help your child flatten them into circles. Then fold each flattened liner in half (so it becomes a semi-circle). These will be your two birds. The flat fold will be the top of the bird’s body, and the rounded part is the belly.
- Create a Background (Optional): You can make these love birds on a Valentine’s card or a piece of paper to hang up. If so, have that paper ready as the “scene.” If not, you can also make the birds as standalone decorations and later tape them on a window or fridge.
- Position the Birds: Glue each folded liner onto the background paper (or just on the table if making standalones). Place them facing each other like two birds about to kiss, or side by side as friends. Only glue the liners along the folded edge so they stick well (the rounded parts might pop off the page a bit, giving a nice 3D fluffiness). Leave a small gap between the two folded liners if you want to add a heart or “musical note” between them.
- Add Beaks and Eyes: Cut two small triangles from orange/yellow paper for beaks. Glue one triangle onto the pointy end of each folded liner (the point of the semi-circle) so it looks like a little beak sticking out. Glue on googly eyes above the beaks (one per bird), or simply dot an eye with a black marker. Now your birds have faces.
- Finishing Touches: Cut a small heart from paper and glue it between the two birds, as if they’re sharing a heart (very Valentine-y!). Draw little stick legs under the birds if you like, or wings: you can cut a small heart or teardrop shape and glue on each side of a bird as a wing. If this is a card, add a cute saying like “You’re my tweet-heart!” or “Love Birds” above them.
Cupcake liner crafts are great because the liners are fun to flatten and feel crinkly – it’s a new texture to explore. This craft comes together quickly, perfect for short attention spans.
The idea of two “love birds” is super cute and can introduce an idiom in a playful way. If you’re making Valentine cards, your child will be excited to give their tweet creation to someone special.
And if you have lots of liners, kids often ask to make more birds in different colors – soon you might have a whole aviary of paper love birds around the house!
For more colorful, hands-on projects, check out our best fall craft ideas for kids – many of these are just as simple and fun as making cupcake liner love birds.
10. DIY Valentine Mailbox (Card Holder)
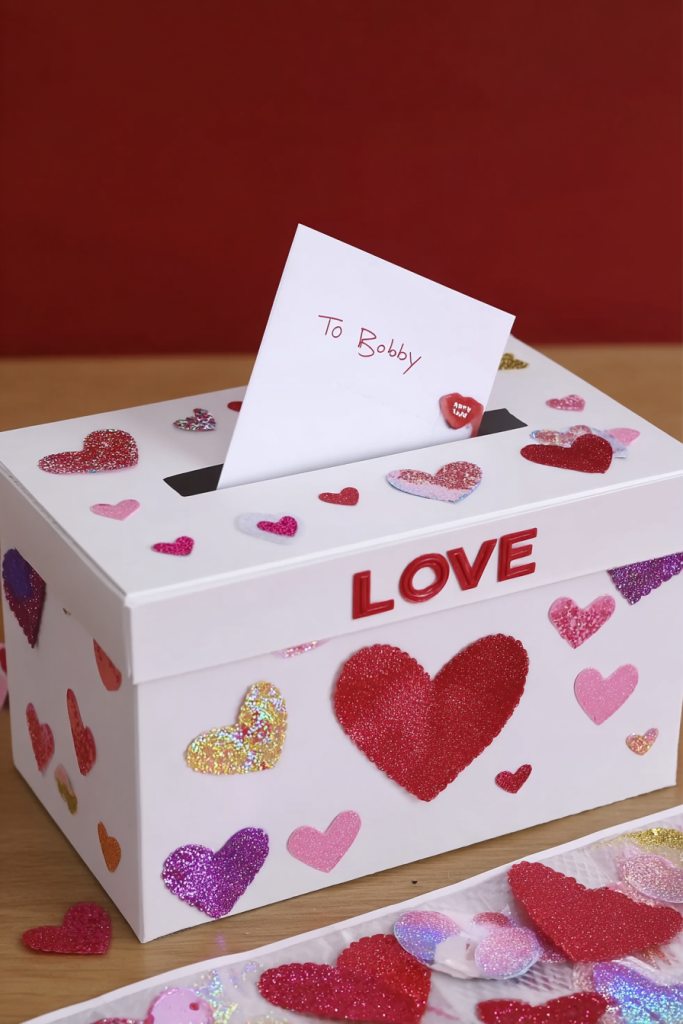
Make a special Valentine mailbox so your child can collect all those sweet notes and cards in style.
Materials: An empty tissue box (with a top opening) or shoebox, construction paper or leftover wrapping paper, child-safe scissors, clear tape or glue, markers, stickers, heart cut-outs for decorating.
Instructions:
- Choose Your Box: A rectangular tissue box with a slot on top works perfectly as a mini mailbox (no cutting needed for the slot!). If using a shoebox, have an adult cut a mail slot in the lid (about 1 inch wide by 5 inches long, big enough for cards). Safety first: Adults should handle cutting the cardboard – no sharp knives for kids.
- Wrap or Paint (Low-Mess Option: Wrap): Cover the outside of the box to have a blank canvas. Easiest method: cut wrapping paper or large construction paper to fit around the box and tape it on like wrapping a gift (leaving the slot open). Plain white or brown paper works too – the kids will be adding decorations on top. If you don’t have paper large enough, you can also have your child paint the box a solid color (but that’s messier and requires drying time). Another fun option: turn a paper grocery bag inside out, decorate that flat, then wrap it around the box.
- Decorate the Mailbox: Now let your child go to town personalizing their Valentine mailbox. They can stick on heart shapes, draw doodles with markers, write their name in big colorful letters, and plaster the box with stickers. Foam heart stickers or alphabet stickers are great if you have them. Encourage them to make it theirs – sparkly, silly, however they like. If the box is for a classroom Valentine exchange, be sure their name is prominent. If it’s just for home, you can label it “Family Valentines” or something fun.
- Add Details: If your child is patient and wants extra detail, they can create a little mail slot label (like “Deliver Valentines Here” written on paper and glued near the slot), or glue on a paper envelope icon. Some kids even like drawing “stamps” or squiggly postage marks on their box to make it look like real mail. This is all optional – the main goal is a festive box ready to catch valentines.
- Use the Mailbox: Once dry and done, put the mailbox out on Valentine’s Day (or at a party) and have family members or classmates drop in their valentines. Kids will light up opening their custom mailbox to retrieve all the cards and treats. You can even make a routine of “mailing” your child little love notes in the days leading up to Valentine’s – they’ll check their mailbox with excitement!
Kids adore having their own mailbox – it feels important and grown-up! Decorating a mailbox also builds anticipation for Valentine’s Day. This craft taps into pretend play too; after the holiday, the mailbox can become a post office prop for playing mail carrier at home.
Parents appreciate that it uses a recycled box and saves you from buying a pre-made card box. And if you have multiple children, each can make their unique mailbox – no mix-ups when it’s time to collect goodies.
How to Make These Crafts Fun and Easy
To get the most out of your Valentine crafting time:
- Keep it simple: Use materials you already have at home. Recycled paper, old magazines, and scrap yarn work perfectly.
- Prepare in advance: Pre-cut tricky shapes for younger kids so they can focus on sticking, coloring, or decorating.
- Set a relaxed pace: Don’t rush. Let kids explore and add their own creative touches.
- Encourage sharing: Talk about who they might give their creations to – it adds purpose and excitement.
- Celebrate the results: Display their crafts or use them as gifts. The pride they feel is part of the fun!
These tips make crafting stress-free for parents and exciting for kids, setting the stage for your 10 Valentine projects.
For projects that are fun and teach important values, check out our meaningful crafts that teach the 10 Commandments – perfect for combining creativity with lessons that last.
Ready to Craft and Share the Love!
Valentine’s Day is so much more than store-bought cards and candy – it’s about sharing love and time with the people who matter. By making these cute crafts with your kids, you’re not only creating adorable keepsakes, but also nurturing their creativity and generosity.
From silly love bugs to heartfelt cards, each project is an opportunity for your child to say “I love you” in their own crafty way. So gather up those recyclables and art supplies, and enjoy some creative family time.
You might be delightfully surprised at how much fun you have (and how proud your little ones will be)! Remember, it’s the simple moments – gluey fingers, giggles over googly eyes, and the “look what I made!” excitement – that make the best memories.
As you craft together, talk about Valentine’s Day as a time to appreciate friends and family. Emphasize kindness, sharing, and the joy of giving homemade treasures.
Happy crafting, and have a love-filled Valentine’s Day!
I’d love to hear how your crafting goes. Did your kids have a favorite craft from this list? Did you put your own twist on any project or come up with a new idea? Share your experiences or tips in the comments below – let’s spread the love and inspiration!
Get the FREE Fruit of the Spirit Playdough Mats + Coloring Pages

Make your Fruit of the Spirit lesson hands-on with this FREE printable set that includes a playdough mat and a bonus coloring page—two activities in one.
Kids can build and color their way through love, joy, peace, patience, kindness, goodness, faithfulness, gentleness, and self-control from Galatians 5:22–23. For easy re-use, laminate the mat (or slide it into a page protector) and pull it out anytime for Bible time, Sunday School, or quiet time at home.
Click below to grab both printables.
FAQs
1. How can I adapt these Valentine crafts for toddlers or younger preschoolers?
Simplify the steps and prep in advance. Pre-cut shapes, let little ones stick large pieces, use stickers, or try finger painting. Focus on fun and exploration, not perfection. Always supervise.
2. What if I don’t have all the craft supplies?
No worries! Substitute with everyday items: draw eyes instead of using googly eyes, use paper strips instead of pipe cleaners, or repurpose old magazines, junk mail, or gift wrap. Creativity counts more than exact supplies.
3. How can I keep the mess to a minimum?
Set up a covered craft area, use washable supplies, prefer glue sticks over liquid glue, offer only needed materials at a time, and dress kids in old shirts or aprons. A little mess is okay—it’s part of the fun.
4. How can I involve children of different ages?
Assign age-appropriate tasks: older kids can cut or assemble, younger kids can glue or color. Set up stations or let older kids help younger ones. Celebrate each child’s creation without comparing.
5. What can we do with the finished Valentine crafts?
Display them, create a “gallery,” gift them to family or friends, use them in Valentine activities, or save a few keepsakes (or photos) for memories.
