If you have been curious about making soap from tallow but felt a little unsure, you are in good company.
Tallow soap has fed and cleaned families for generations, long before fancy oils and complicated formulas ever entered the picture.
It is simple, sturdy, and wonderfully beginner-friendly.
This tallow soap recipe is one I have made dozens of times over the years.
It is the kind of recipe you can come back to again and again, whether you are brand new to soap making or have a few batches under your belt.
It behaves well, cures beautifully, and produces a bar of soap that just works. No drama. No surprises.
If you want a homemade tallow soap that feels traditional, dependable, and comforting in your hands, this is a recipe worth learning!
Why Tallow Makes Such Good Soap
There is a reason tallow has stood the test of time in soap making.
Long before specialty oils and complicated formulas, people relied on what worked consistently.
Tallow earned its place because it creates a bar that is dependable, easy to work with, and genuinely pleasant to use.
What Is Tallow, Really?
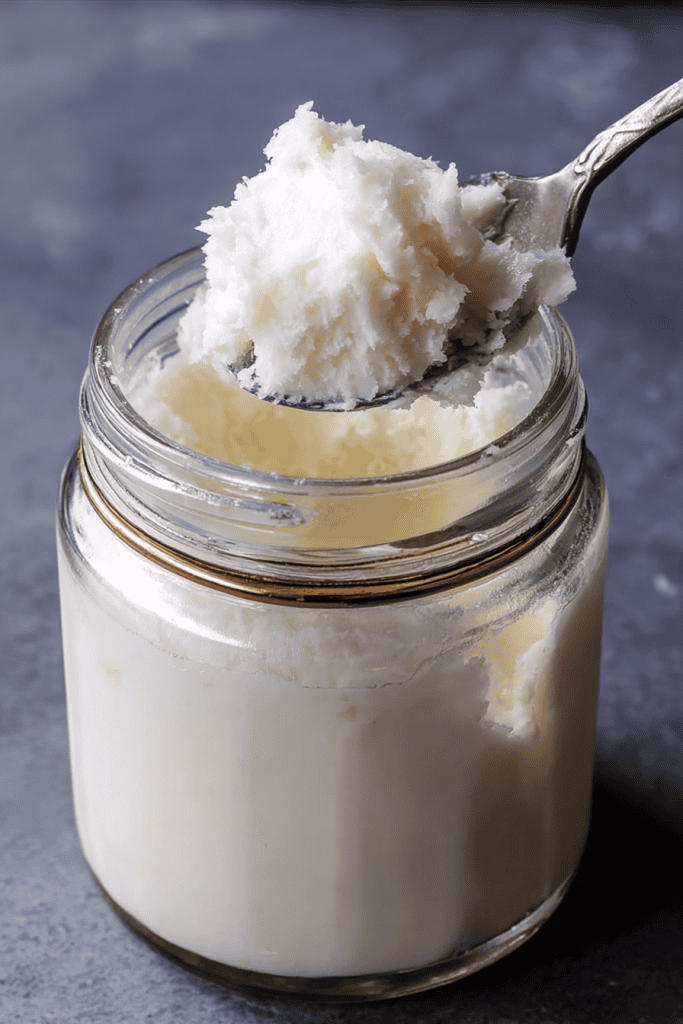
Tallow is rendered beef fat. That is all it is.
When beef fat is slowly melted and purified, the result is a clean, creamy fat that is incredibly stable and useful.
Our great-grandparents relied on tallow for cooking, candles, skincare, and soap because it was readily available and reliable.
In soap making, tallow shines because its fatty acid profile is naturally well suited to creating a balanced bar of soap.
Hardness, Lather, and Longevity
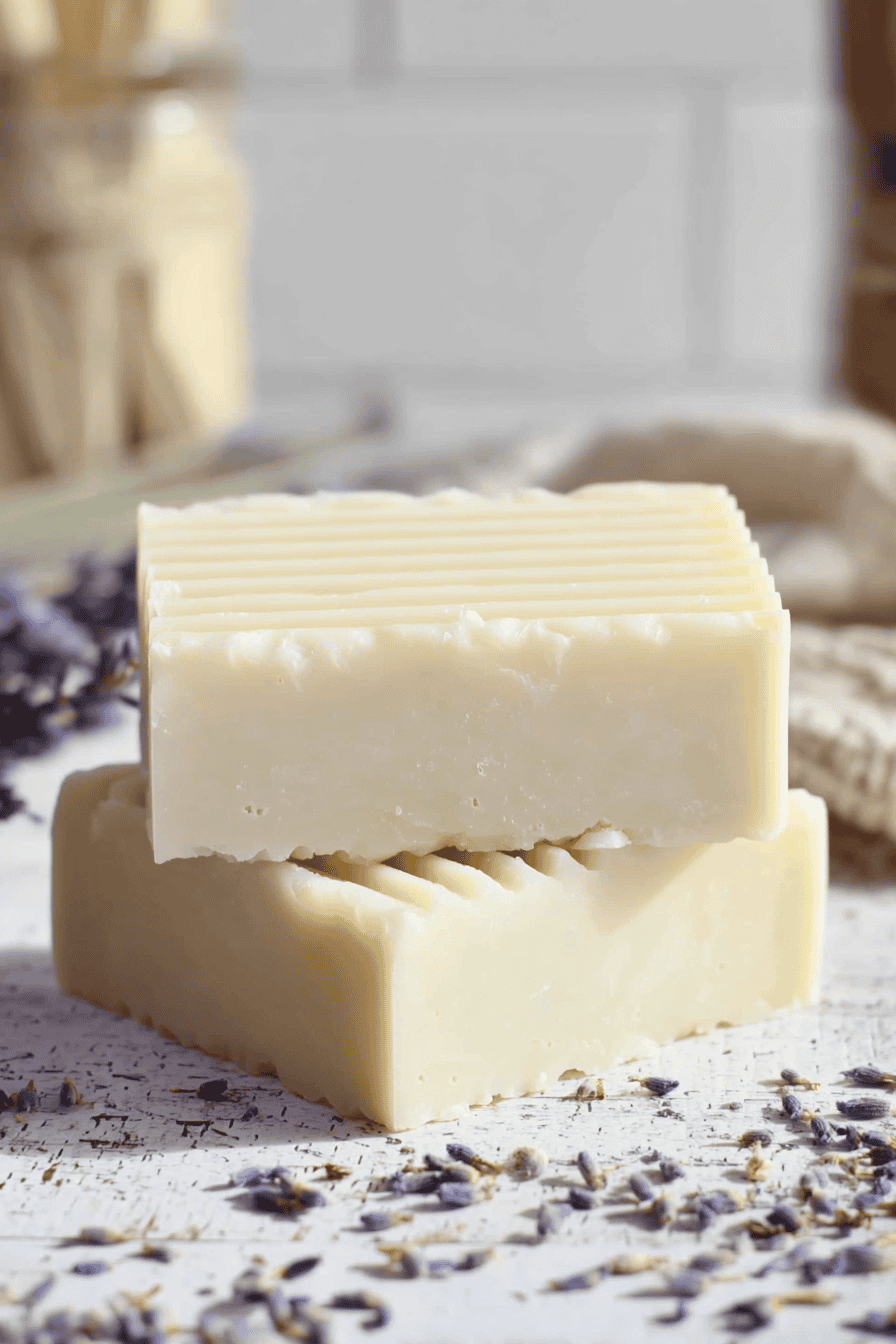
One of the first things you will notice about traditional tallow soap is how hard it becomes.
Tallow produces a firm bar that unmolds easily and lasts a long time in the shower.
That means less mush, less waste, and fewer half-melted bars sitting on the soap dish.
Tallow also creates a creamy, stable lather. It is not big and bubbly like coconut oil soap, but it is rich and satisfying.
The kind of lather that feels substantial without stripping your skin.
Skin-Friendly Without the Fuss
Many people find tallow soap gentle and comfortable to use.
Tallow contains fatty acids that are similar to those found naturally in human skin, which may be one reason it feels so agreeable for daily washing.
This is one of the quiet but meaningful tallow soap benefits that keeps people coming back.
If you love tallow in your soap, you may also enjoy my all-natural beef tallow face cream or ultra-nourishing tallow lip balm, which harness the same skin-friendly qualities.
How It Compares to Plant Oil Soaps
Plant oils can make lovely soap, but they often require careful balancing to achieve hardness, lather, and longevity.
Tallow does much of that work for you. It does not mean plant oils are bad.
It just means tallow is naturally cooperative, especially for beginners who want predictable results.
Ingredients Breakdown

One of the reasons this tallow soap recipe is so reliable is its simplicity. Every ingredient earns its place, and none are included just for show.
When you understand what each component does, the recipe feels less intimidating and much easier to trust.
1. Rendered Beef Tallow
Tallow is the heart of this soap. It provides hardness, creamy lather, and long-lasting bars.
Properly rendered tallow should be clean, white to pale cream in color, and free of strong odors.
Learn how to render it with my guide on how to make tallow from beef fat.
2. Olive Oil (or Optional Supporting Oil)
Olive oil adds mildness and conditioning to the soap.
It helps soften the feel of the lather without compromising hardness.
You may also use another gentle liquid oil if needed, but olive oil is reliable and widely available.
3. Distilled Water
Distilled water ensures there are no minerals or impurities that could interfere with the soap making process.
It keeps things consistent and predictable.
4. Lye (Sodium Hydroxide)
Lye is what turns fats into soap through the process of saponification.
When measured correctly and used properly, no lye remains in the finished soap.
5. Optional Essential Oils
Essential oils are purely optional and used only for scent.
This recipe works beautifully unscented, which many families prefer.
Equipment Needed
A basic, beginner-friendly collection of tools will do the job.
- Digital kitchen scale (accurate to grams or ounces)
- Heat-safe containers for lye and oils
- Stainless steel or heavy plastic spoon
- Stick blender
- Thermometer (optional but helpful)
- Soap mold (silicone or lined wooden mold)
- Parchment paper (if lining a mold)
- Safety goggles
- Gloves
- Long sleeves and closed shoes
Soap making is safe when treated with respect. Take your time and protect your skin and eyes.
A Tried-and-True Tallow Soap Recipe (Exact Measurements)
This recipe is written by weight, which is essential for safe soap making. Do not substitute volume measurements.
Oil Weight Total: 1,000 grams
- Rendered beef tallow: 700 grams
- Olive oil: 300 grams
Lye Solution:
- Distilled water: 330 grams
- Sodium hydroxide (lye): 138 grams
This recipe is calculated with approximately a 5 percent superfat, making it gentle and suitable for daily use.
Step-by-Step Instructions
Set aside a quiet block of time where you will not be interrupted.
Read through all the steps once before starting so nothing catches you off guard.
1. Prepare Your Space and Yourself
Choose a clean, uncluttered workspace where you will not be rushed or interrupted. Soap making should feel calm, not hurried.
Put on your safety gear. This includes gloves, safety goggles, long sleeves, and closed shoes. Lye is safe when handled properly, but it demands respect.
Lay out all your equipment and ingredients. Double-check that everything is measured by weight, not volume.
Once you begin, you will not want to stop to look for tools.
2. Measure the Distilled Water
Place your heat-safe container on the scale and tare it to zero. Slowly pour in the distilled water until you reach the correct weight.
Using distilled water matters. Minerals or additives in tap water can affect the soap and lead to unpredictable results.
Set the container aside for a moment while you measure the lye.
3. Measure the Lye Carefully
Place a separate container on the scale and tare it. Weigh the lye slowly and carefully.
Accuracy here is essential for safety and for a successful bar of soap.
Do not inhale lye dust. Work calmly and deliberately.
4. Mix the Lye Solution
Slowly sprinkle the lye into the water (never pour water onto lye). Stir gently with a heat-safe spoon until the lye is fully dissolved.
The mixture will heat up quickly and release strong fumes. This is normal.
Turn your head away while stirring and avoid breathing in the fumes.
Set the lye solution in a safe, well-ventilated area to cool. Keep it away from children, pets, and distractions.
5. Measure and Melt the Oils
Weigh the rendered tallow and olive oil into a large heat-safe container or stainless steel pot.
Gently heat the oils until the tallow is fully melted and everything is clear. Low and slow is best. You want warm, liquid oils, not hot oils.
Once melted, remove from heat and allow the oils to cool slightly.
6. Bring Oils and Lye to a Similar Temperature
Let both the lye solution and the oils cool until they are roughly within 10 degrees of each other.
Many soap makers work comfortably around 90 to 110 degrees Fahrenheit, but this recipe is forgiving.
If you do not have a thermometer, aim for warm but not hot. You should be able to comfortably hold the container with gloved hands.
7. Combine the Lye Solution and Oils
When both mixtures are ready, carefully pour the lye solution into the oils. Pour slowly and steadily to avoid splashing.
Begin stirring gently with a spoon or spatula to fully combine the liquids before using the stick blender.
8. Blend to Trace
Insert the stick blender fully into the soap batter before turning it on. Use short bursts, alternating with hand stirring.
At first, the mixture will look thin and oily. Over time, it will turn opaque and begin to thicken slightly.
Watch closely for trace. Light trace looks like thin pudding or cake batter.
When you lift the blender and drizzle some soap across the surface, it should leave a faint line that sits briefly before sinking back in.
Stop blending as soon as you reach trace. Over-blending can make the soap too thick to pour smoothly.
9. Add Essential Oils (Optional)
If using essential oils, add them at light trace. Stir gently by hand until evenly mixed.
This recipe works beautifully without fragrance, so do not feel pressured to add scent.
10. Pour the Soap Into the Mold
Slowly pour the soap batter into your prepared mold. Use a spatula to scrape out the container so none is wasted.
Tap the mold gently on the counter to release any trapped air bubbles.
Smooth the top if desired, but perfection is not required. Handmade soap is meant to look handmade.
11. Insulate and Let the Soap Rest
Cover the mold lightly with a piece of cardboard or a towel.
This helps the soap retain heat and complete saponification evenly.
Place the mold in a safe, undisturbed spot and let it rest for 24 to 48 hours.
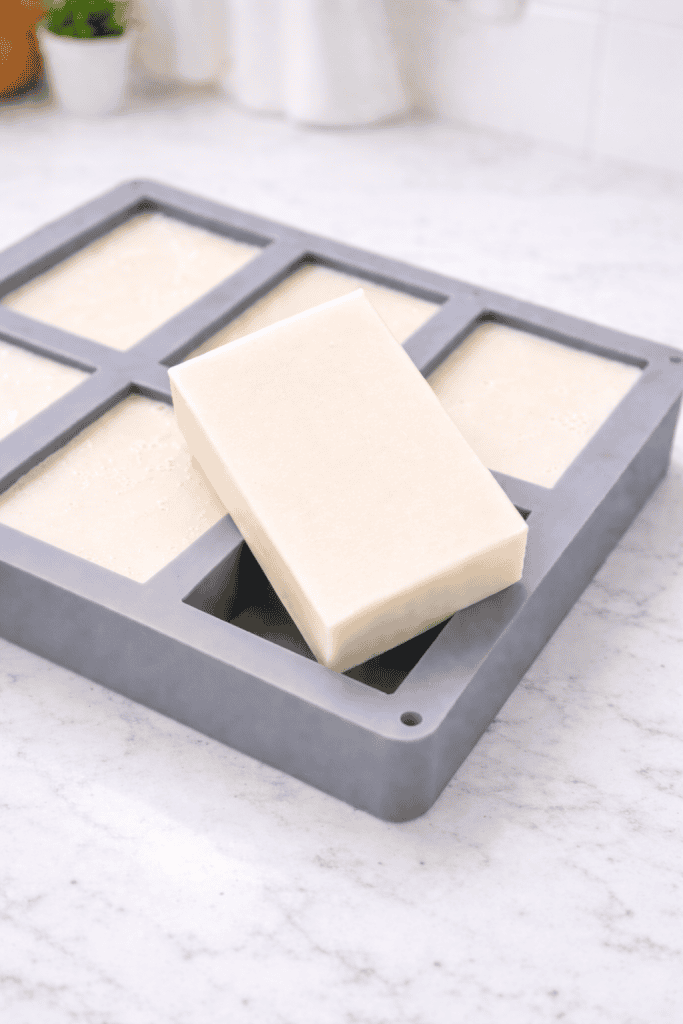
12. Unmold and Cut the Soap
After a day or two, check the soap. It should feel firm and cool to the touch.
If it releases easily from the mold, unmold it and cut it into bars using a sharp knife or soap cutter.
If it still feels soft, give it another 12 to 24 hours before trying again.
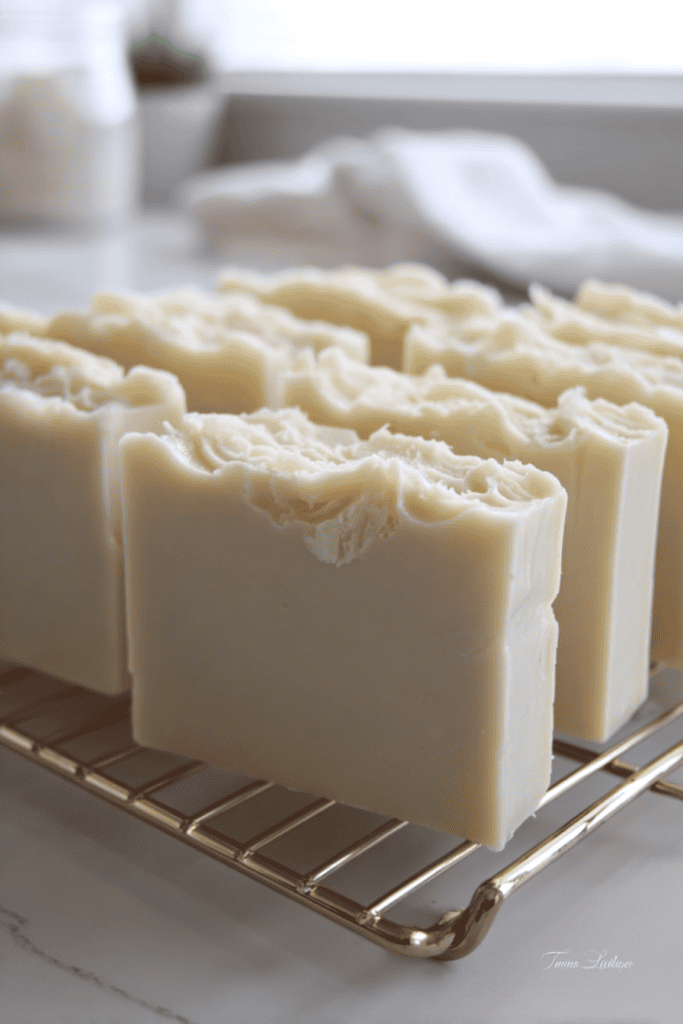
Once cut, place the bars in a single layer with space between them so air can circulate freely.
Curing and When to Use the Soap
Curing is the quiet, often overlooked part of soap making, but it is just as important as the day you mix your oils and lye.
Think of curing as the time when your soap finishes becoming soap.
During this stage, the bars harden, mellow, and improve in every practical way.
Once your soap is cut into bars, the hard work is done. Now the soap simply needs time and airflow.
How Long to Cure
Place the freshly cut bars in a cool, dry area with good air circulation.
A shelf, tray, or cardboard box with holes works well. Lay the bars in a single layer with space between them so air can move freely on all sides.
Allow the soap to cure for at least 4 to 6 weeks. Longer curing is always fine and often beneficial, especially in humid environments.
During this time, avoid stacking the bars or sealing them in containers. Soap needs open air to cure properly.
Why Curing Matters
Even though the soap is technically safe to handle after a few days, it is still holding a lot of excess water. As the bars cure, that water slowly evaporates.
This evaporation does several important things:
- It makes the bars harder and longer-lasting
- It improves the mildness of the soap
- It allows the lather to develop fully
- It gives the soap a smoother, more finished feel
Skipping or shortening the cure time often leads to soft bars that dissolve quickly and feel harsher on the skin.
What the Bars Are Like After Curing
After a full cure, this homemade tallow soap becomes firm and solid with a smooth, even texture.
The bars feel substantial in your hand and hold their shape well when wet.
The lather is creamy and stable rather than bubbly and fluffy. It rinses cleanly and leaves the skin feeling comfortable, not tight or squeaky.
Once cured, the soap is ready for everyday use and will continue to improve slightly over the first few months.
For extra skincare pairing, consider making best homemade tallow lotion recipe or hydrating tallow lotion bars to complement your soap.
Common Beginner Mistakes (and How to Avoid Them)
Every soap maker makes mistakes. They are part of the learning process and nothing to be embarrassed about.
The good news is that this tallow soap recipe is forgiving, and most issues are easy to avoid once you know what to watch for.
Over-Blending the Soap Batter
It is easy to keep blending because you are unsure what trace looks like.
Over-blending causes the soap to thicken too quickly, making it difficult to pour into the mold smoothly.
To avoid this, blend in short bursts and stop frequently to check the texture. Light trace is thinner than many beginners expect.
As soon as the batter looks evenly mixed and leaves a faint line on the surface when drizzled, stop blending.
Remember, you can always blend more, but you cannot undo over-blending.
Rushing the Cure Time
Fresh soap can look beautiful and tempting, but using it too soon leads to disappointment. Soft bars dissolve quickly and do not perform as well.
Mark your calendar or write the cure date on a piece of paper near your soap. Treat curing as part of the process, not an optional step.
Patience during curing is rewarded with a better bar of soap in every way.
Using Unrendered or Impure Tallow
Tallow must be properly rendered and clean before being used in soap.
Unrendered fat, meat bits, or moisture trapped in the tallow can cause unpleasant odors or spoilage over time.
Always use well-rendered, strained, and dry tallow. If your tallow smells strong or looks cloudy once cooled, it likely needs to be re-rendered.
Starting with clean ingredients sets the foundation for a soap you will be proud to use and share.
Make Your First Batch With Confidence (And Keep It Simple!)
If there is one thing I hope you take away from this recipe, it is that good soap does not need to be complicated.
This tallow soap recipe has earned its place as a dependable favorite because it works the same way every time.
It gives beginners a solid foundation and experienced soap makers a reliable bar they can return to whenever they want something simple and honest.
If your first batch is not perfect, that is normal. Handmade soap has a learning curve, and every batch teaches you something useful.
Trust the process, follow the steps carefully, and allow the soap the time it needs to cure properly.
Before long, you will have sturdy, creamy bars of homemade tallow soap that feel just as good to use as they are satisfying to make.
If you give this recipe a try, I would love to hear how it goes for you.
Share your experience, your questions, or any small tweaks you made in the comments below.
Learning from one another is one of the best parts of traditional soap making.
FAQs
Can I make this tallow soap recipe without a stick blender?
Yes, you can. Soap was made by hand long before stick blenders existed.
You will need to stir consistently by hand, which takes more time and patience.
Expect it to take anywhere from 20 to 45 minutes to reach trace, depending on temperature and ingredients.
A stick blender simply makes the process faster and easier.
What should I do if my soap seizes or thickens too fast?
If the soap thickens quickly, stop blending immediately and spoon it into the mold as best you can.
Tap the mold gently to settle the soap. Even if the top looks rustic, the soap is still perfectly usable once cured.
Can I color this tallow soap?
Yes, natural colorants such as clays or herbs can be added at light trace. Start small, as a little goes a long way.
Avoid liquid dyes meant for melt-and-pour soap, as they may not behave well in cold process soap.
How should I store cured tallow soap?
Once cured, store the bars in a cool, dry place with good airflow. Open shelves, baskets, or cardboard boxes work well.
Avoid airtight containers, as soap continues to breathe even after curing.
How long does homemade tallow soap last?
Properly cured and stored tallow soap can last for years. Over time, the scent from essential oils may fade, but the soap itself remains usable and effective.
