If you love deeply conditioning skincare but want something more solid, portable, and long-lasting than a lotion, tallow lotion bars are a beautiful solution.
This recipe creates a firm yet glide-y bar that softens on contact with skin, absorbs well, and leaves a comfortable, non-greasy finish. It’s beginner-friendly, requires no lye or curing chemistry, and uses ingredients that are both time-tested and easy to source.
Below, you’ll find a reliable base formula, clear step-by-step instructions, and simple ways to customize the bar for your climate, skin type, or lifestyle.
Why Make a Tallow Lotion Bar?

As a mom, I’m always looking for skincare that’s simple, natural, and actually works – without all the heavy, chemical-laden creams. That’s where tallow lotion bars come in.
Rendered tallow is naturally packed with skin-friendly fatty acids, and when you mix it with nourishing butters, oils, and just a touch of starch, it becomes a little bar of magic for dry, tired skin.
Here’s why I love them:
- Moisturizing without feeling greasy – it sinks in nicely, so your hands or elbows aren’t left feeling oily.
- Holds its shape – perfect for keeping in your diaper bag, kitchen drawer, or bedside table without worrying it’ll melt.
- Glides on smoothly – no tugging or scraping, just soft, conditioned skin.
- Works everywhere – hands, arms, legs, or those little rough patches kids always seem to get.
- Easy to make – a few simple ingredients and basic tools, and you have a product you can feel good about using on yourself and your family.
I designed this formula to be practical, dependable, and beginner-friendly. It’s the kind of homemade skincare you can enjoy every day, giving your skin a soft, healthy, and cared-for feel – perfect for busy moms who love simple, effective routines.
If you love this, check out my ultra-nourishing tallow lip balm recipe for another easy, all-natural way to pamper your skin.
Base Tallow Lotion Bar Formula (by Percentage)
This base formula uses percentages, so it’s easy to adjust for larger batches or to swap in your favorite ingredients. Below is a balanced starting point to make a firm, moisturizing, and silky-smooth lotion bar.
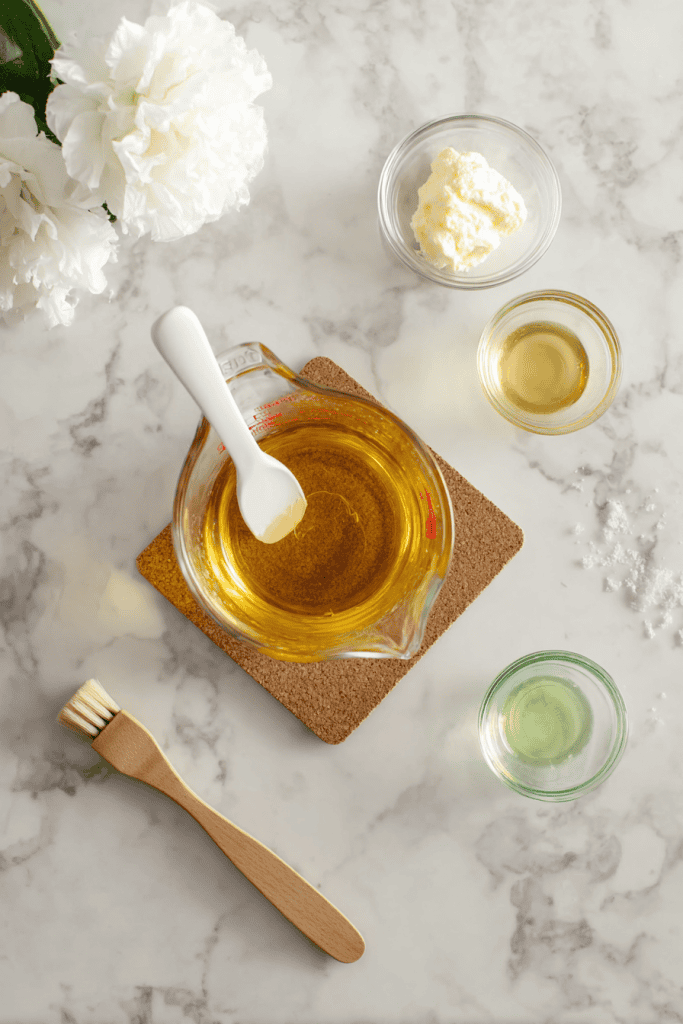
Oils & Butters (90%)
- 60% rendered tallow (Beef tallow, grass-fed if possible, well-deodorized)
- 15% cocoa butter – Adds firmness and smooth glide (Substitute shea or mango butter for a softer bar)
- 15% liquid oil – Jojoba, sweet almond, olive, or avocado all work well
Hardening & Feel (10%)
- 8% beeswax – Adds structure and heat stability
- 2% arrowroot powder or cornstarch – Improves slip and creates a velvety, less-oily finish
Optional Extras (1–2% Total)
Adjust the oil portion slightly to keep the formula at 100%.
- 0.5–1% Vitamin E (tocopherol) – Helps slow oxidation and supports shelf life
- 0.5–1% essential oil (optional) – Lavender, sweet orange, frankincense, or skip entirely for sensitive skin
Tip: For leave-on products, keep total essential oils at or below ~1% unless you are well-versed in dermal limits.
If you’re interested in a similar skin-loving recipe, check out my DIY anti-aging hand cream for targeted care that’s gentle and effective.
Essential Equipment for Making Tallow Lotion Bars at Home
- Small heat-safe glass or stainless bowl
- Small pot (for double boiler)
- Silicone molds, metal tins, or even a lined muffin tray
- Silicone spatula, digital scale, and paper towel/alcohol for cleanup
Step-by-Step Instructions
1. Prep Your Equipment
Before you begin, take a moment to set up your workspace.
Gather all your tools and ingredients and make sure everything is clean, dry, and within reach. Because this recipe doesn’t rely on preservatives or emulsifiers, cleanliness matters.
Wiping down your bowl, molds, and utensils with rubbing alcohol and letting them air-dry helps ensure a smooth, fresh final product. Having your molds ready ahead of time also prevents the mixture from cooling too quickly while you search for them later.
2. Set Up a Double Boiler
To gently melt your ingredients, you’ll use a double boiler method.
Add about 1 to 2 inches of water to a small pot and place it on the stove over medium-low heat. Set your heat-safe bowl on top so it rests above the water without touching it directly.
This indirect heat protects the oils and fats from overheating and helps everything melt evenly. Bring the water to a soft simmer rather than a rolling boil to keep temperatures controlled.
3. Melt the Hard Ingredients
Add the tallow, cocoa butter, and beeswax to the bowl. These ingredients take the longest to melt, so starting with them creates a smooth base.
Stir occasionally as they warm, allowing the mixture to melt gradually and evenly. Keep the heat gentle and steady – there’s no need to rush this step.
Once everything is fully melted, the mixture should look clear and uniform with no solid pieces remaining.
If you don’t have pre-rendered tallow yet, check out how to make tallow from beef fat for a simple, step-by-step guide before starting this recipe.
4. Add the Liquid Oil
Once the hard ingredients are fully melted, briefly remove the bowl from heat. Stir in your chosen liquid oil, mixing until the blend looks glossy and cohesive.
Adding the liquid oil at this stage helps preserve its natural properties and ensures it integrates smoothly with the melted fats.
Return the bowl to the double boiler only if needed to maintain warmth.
5. Cool Slightly, Then Add Powders and Delicate Ingredients
Allow the mixture to cool slightly before adding powders and sensitive ingredients. The oil should still be warm and fluid but not hot enough to feel uncomfortable when touching the bowl – ideally below about 140°F (60°C).
Slowly sprinkle in the arrowroot powder or cornstarch while stirring or whisking continuously. This helps prevent clumping and ensures the powder disperses evenly.
Once the mixture has cooled a bit further, add the vitamin E and essential oils if you’re using them. Stir thoroughly so these ingredients are evenly distributed throughout the mixture. Taking your time here results in a smoother texture and more consistent feel once the bars harden.
6. Pour Into Molds

Carefully pour the warm mixture into your prepared molds or tins. Work slowly and steadily to avoid spills.
After pouring, gently tap the molds on the counter to release any trapped air bubbles and help the surface settle evenly.
If needed, you can lightly skim the surface with a spatula to smooth it out before the bars begin to set.
7. Cool and Unmold
Allow the lotion bars to cool undisturbed at room temperature. Depending on the size of your molds and the temperature of your space, this can take anywhere from one to four hours.
If you prefer faster setting, you can move the molds to the refrigerator after they’ve cooled slightly on the counter. Once the bars are fully firm and opaque, gently remove them from the molds.
8. Optional Cure for Best Texture
Although the bars are technically ready to use once solid, letting them rest for 24 to 48 hours improves the final texture.
This short curing period allows the fats and powders to fully settle and “marry,” resulting in a smoother glide and more refined skin feel. Store the finished bars in a cool, dry place until you’re ready to use them.
If you love tallow for skin, you might also enjoy my whipped tallow body butter recipe for a fluffy, ultra-nourishing alternative that’s perfect for full-body hydration.
How to Use Your Tallow Lotion Bar
Warm the bar between your palms or swipe directly onto clean, dry skin.
A thin layer goes a long way especially on:
- Hands and cuticles
- Elbows and knees
- Feet and heels
- Shins
- Belly and thighs (popular as pregnancy belly bars)
Store in a cool, dry place away from direct sunlight. In warmer climates, a tin or refrigerator storage works well.
Simple Tweaks Based on Climate and Preference
Depending on your environment and personal preference, you can easily adjust your tallow lotion bar formula to get the perfect texture and feel.
If you want to learn more about why tallow is so nourishing for the skin, check out the best benefits of tallow.
For a Softer, More Buttery Bar
If you prefer a bar that melts more easily and feels extra creamy on the skin, reduce the beeswax to 5–6% and increase the liquid oil to 17–18%. Take the extra percentage from the tallow portion to keep the formula balanced. This creates a softer, more luxurious bar that glides effortlessly.
For a Very Firm, Summer-Safe Bar
For a bar that holds up in warmer climates or is ideal for tossing into purses, gym bags, or travel, increase the beeswax to 10–12% and reduce the liquid oil to 10–12%. This produces a firm, stable bar that won’t melt easily, even in hot conditions.
For Ultra-Sensitive or Baby-Safe Bars
If you’re making lotion bars for sensitive skin or little ones, omit essential oils entirely and choose gentle oils like olive or jojoba for the liquid portion. Keep the arrowroot or cornstarch in the formula, as it improves slip and gives a smooth, non-greasy finish suitable for delicate skin.
Make One Batch and Let It Become a Staple!

Tallow lotion bars are one of those rare projects that are easy to make, satisfying to use, and genuinely effective.
Once you make your first batch, you’ll likely start adjusting it instinctively – slightly firmer for summer, softer for winter, scented or unscented depending on the season. That flexibility is part of what makes this recipe so useful.
If you try this formula or make your own variation, comment down below and share what worked well for you. Your tweaks may help someone else create their perfect bar.
FAQs
Can I use store-bought tallow?
Yes. Just make sure it’s fully rendered, well-filtered, and deodorized. Any residual scent will carry through the finished bar.
Why does my bar feel grainy after cooling?
This usually comes from temperature swings while cooling, especially with cocoa butter. Let the bars cool slowly at room temperature for the smoothest texture.
Can I substitute beeswax with a vegan wax?
You can experiment with candelilla or carnauba wax, but they are much harder than beeswax. Start by using about half the amount and adjust as needed.
How long do tallow lotion bars last?
With clean handling and vitamin E added, they typically stay fresh for 6–12 months. Store them away from heat, moisture, and direct sunlight.
Can I use this recipe on my face?
Many people do, especially for dry or mature skin. Apply a very small amount and observe how your skin responds. For facial use, unscented versions are often preferred.
