
Sunday School craft time offers a clear opportunity to help children understand Scripture through hands-on learning.
With a few simple supplies and a thoughtful approach, you can guide them toward meaningful insights that stay with them long after class ends.
These projects are designed for real classrooms and real budgets, using materials many families already keep at home.
You’ll find practical steps that support smooth classroom flow and encourage children to explore faith with creativity and purpose.
Whether you lead a small group or a full classroom, these ideas give you reliable tools for calm, joyful lessons rooted in Scripture.
Before You Begin: How to Create a Smooth, Joyful Craft Time
A calm and well-prepared craft table helps children stay focused and confident.
Simple systems make a meaningful difference.
Begin by placing supplies in small baskets or trays so each group can reach what they need without waiting.
Offer a short demonstration before starting; clear guidance allows children to move through each step with assurance.
Invite teamwork throughout the process. Encourage children to share materials, help one another, and speak with kindness.
Gentle transitions – such as gathering completed pieces or pausing to check in – support steady progress and a positive atmosphere.
Most of all, remember that your presence sets the tone.
A centered, encouraging leader creates a classroom where every child feels welcome, capable, and ready to learn.
If you want more fun project inspiration, check out these irresistible felt craft ideas for kids.
7 Low-Cost Sunday School Craft Ideas
These crafts offer practical ways to help children engage with Bible stories through clear, hands-on activities.
1. Painted Prayer Rock

A Painted Prayer Rock gives children a small, tangible reminder of God’s guidance.
The process is simple, yet it encourages thoughtful reflection as they choose colors and words that matter to them.
You can also explore inspiring God’s promises crafts for kids to discover more hands-on ways to build faith through creativity.
Supplies:
Smooth rocks, acrylic paint, paintbrushes, permanent markers.
How to Make It:
- Invite children to choose a rock that feels comfortable in their hand.
- Paint the surface with bright, positive colors and allow it to dry.
- Add a short prayer word – such as “hope,” “joy,” “peace,” or “trust” – using a marker.
- Encourage them to keep the rock in a place where they can see it during the week.
Teaching Tie-In: This craft opens a natural conversation about daily prayer and how simple reminders can strengthen personal faith in everyday moments.
2. “Wise and Foolish Builders” Sand & Rock House Craft

Children create two houses – one on sand and one on rocks – to see the difference in foundations.
This craft shows how building our lives on Jesus gives strength and stability, while ignoring Him leaves us shaky (Matthew 7:24-27).
Supplies:
Cardboard, sand, gravel/pebbles, glue, markers.
How to Make It:
- Draw two simple house outlines on cardboard.
- Under the first house, glue sand (shaky foundation).
- Under the second house, glue pebbles (solid rock).
- Color the houses and add small rain/cloud drawings above.
Teaching Tie-In: Children instantly understand Matthew 7:24-27 – building faith on Jesus keeps us strong.
For another hands-on Bible activity they’ll enjoy, you can explore exciting walls of Jericho crafts for kids.
3. “Ruth’s Grain Bundle” Blessing Craft
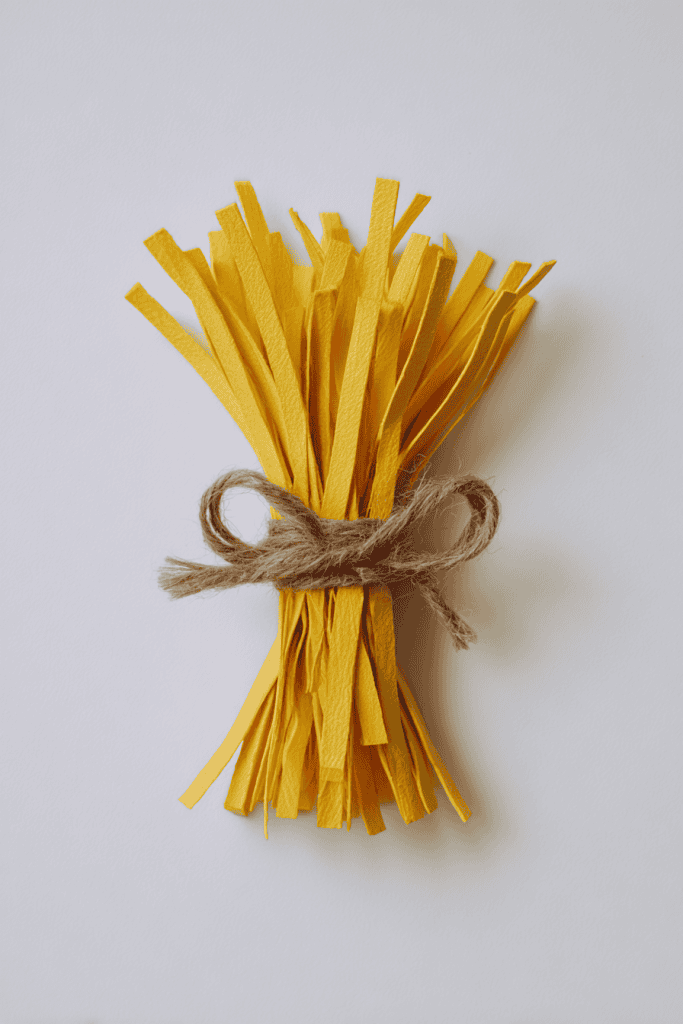
Kids bundle paper “grain stalks” to represent Ruth gleaning in the fields.
This craft teaches about God’s provision and the blessing of loyalty and kindness.
Supplies:
Yellow paper strips, brown yarn, cardboard, markers.
How to Make It:
- Cut yellow paper strips to look like stalks of grain.
- Bundle them together and tie with brown yarn.
- Glue the bundle onto cardboard.
- Add the words “Ruth Chose Kindness” or “God Provides.”
Teaching Tie-In: Connects to Ruth gathering grain in the fields and God providing through kindness and loyalty.
If you want more Bible crafts that build character and understanding, take a look at meaningful crafts that teach the 10 commandments.
4. Daniel and the Lions Den Craft

Children create a small box scene with cutouts of Daniel and the lions inside, arranging them to tell the story.
This craft shows how trusting God keeps us safe even in scary situations (Daniel 6).
Supplies:
- Small cardboard box (shoebox size works well)
- Paper or cardstock
- Markers or crayons
- Scissors
- Glue or tape
How to Make It:
- Turn the box on its side so the opening faces the child.
- Draw or color a simple background inside the box (stone walls, cave, or floor).
- Draw Daniel and the lions on cardstock, then cut them out carefully.
- Use small tabs of cardboard or folded paper to stand the Daniel and lion cutouts inside the box.
- Arrange them to show Daniel in the den with the lions around him.
- Optionally, label the box with “Daniel 6” or a short Bible verse like “God protects those who trust Him.”
Teaching Tie-In: This craft helps children visualize Daniel’s courage and God’s protection. It reinforces the lesson that trusting God gives safety and confidence even in scary or difficult situations.
For another activity that brings important Bible stories to life in a hands-on way, you can explore hands-on crafts to teach children about Jesus’ disciples.
5. Scrap Fabric Joseph’s Coat Craft

This craft brings the story of Joseph to life through color and texture.
Children enjoy choosing fabric pieces, and the process naturally invites conversation about courage, hope, and God’s steady plan.
Supplies: Scrap fabric pieces, glue sticks, printed coat outline, scissors.
How to Make It:
- Provide each child with a simple coat outline on cardstock.
- Cut fabric into small rectangles or shapes.
- Invite children to arrange the scraps across the coat to create a bright, patchwork design.
- Glue the pieces in place and let the coat dry flat.
Teaching Tie-In: This project opens a clear discussion about Joseph’s journey, highlighting themes of wisdom, hope, and God’s faithful guidance.
If you need more simple, age-friendly ideas for little learners, check out engaging Sunday school crafts for toddlers.
6. Lost Sheep Folding Surprise Craft
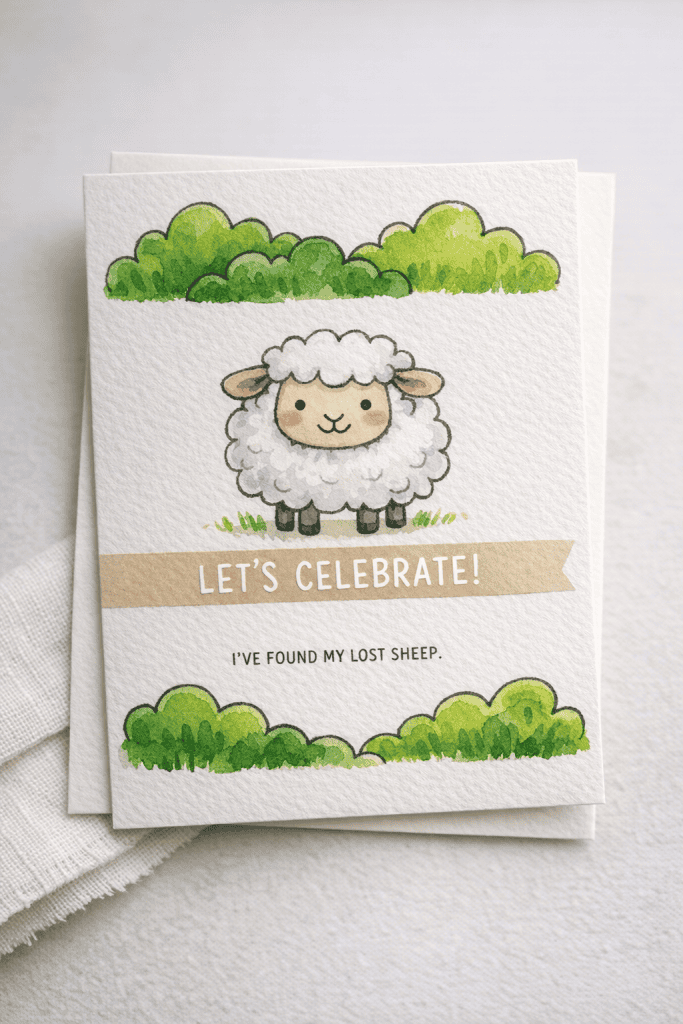
Children fold and open the card to reveal the lost sheep, illustrating Luke 15:4 in a fun, interactive way.
Supplies:
- White cardstock or construction paper
- Markers or crayons
- Scissors
- Glue or tape
How to Make It:
- Fold a sheet of cardstock into thirds like a trifold, or create a single flap that can fold over.
- On the front flap, draw bushes or grass that will “hide” the sheep.
- Draw the lost sheep on the inner section that will be revealed when the flap is lifted.
- Add phrases like “I’ve found my lost sheep!” or “Let’s Celebrate!” around the revealed sheep.
- Children can color and decorate the bushy flap and the sheep for a personal touch.
Teaching Tie-In: This interactive craft shows that Jesus seeks out the lost and celebrates when someone is found. It helps children remember God’s care for every individual and makes the parable of the lost sheep memorable and hands-on.
7. Elijah and the Fire Cotton & Paper Craft

Create a simple 3D craft that helps kids visualize the moment in 1 Kings 18 when God sends fire from heaven.
With layered flames and a soft cotton cloud, children can reenact the scene and remember that God shows His power.
Supplies:
- White cardstock
- Cotton balls
- Red, orange, and yellow tissue paper
- Glue
- Scissors
- Black marker
How to Make It:
- Draw the altar on cardstock.
- Glue tissue paper flames on top.
- Pull cotton apart to make smoke.
- Label “1 Kings 18 – God Shows His Power.”
Teaching Tie-In: Demonstrates God’s authority and that He alone is mighty.
Bring These Crafts Into Your Classroom
Each of these projects gives you a clear, practical way to support meaningful learning in your Sunday School classroom.
Choose one craft for this week or rotate through the full list over the next few Sundays.
Either way, you’ll create a welcoming space where children learn, practice new skills, and grow in understanding.
If you try any of these ideas or have a favorite craft of your own, share it in the comments below – your insight may support another teacher or parent preparing for class.
Get the FREE Fruit of the Spirit Playdough Mats + Coloring Pages

Make your Fruit of the Spirit lesson hands-on with this FREE printable set that includes a playdough mat and a bonus coloring page—two activities in one.
Kids can build and color their way through love, joy, peace, patience, kindness, goodness, faithfulness, gentleness, and self-control from Galatians 5:22–23. For easy re-use, laminate the mat (or slide it into a page protector) and pull it out anytime for Bible time, Sunday School, or quiet time at home.
Click below to grab both printables.
FAQs
How can I prepare these crafts ahead of time for a smoother class?
Cut small pieces, pre-portion supplies into baskets, and test each craft once before teaching. This helps you lead confidently and creates an organized experience for the children.
What are the best budget-friendly materials to keep stocked for Sunday School?
Keep cardstock, markers, glue sticks, yarn, and recycled items such as cardboard pieces or fabric scraps. These basics support a wide range of dependable crafts.
How do I modify these activities for younger children?
Offer larger pieces, fewer steps, and more guided demonstrations. Younger children respond well to simple motions and clear visual cues.
Can these crafts be used for mixed-age groups?
Yes. Provide optional advanced details – such as extra decorations or layered colors – for older children, while younger ones follow the core steps.
How do I store finished crafts so they stay protected until pickup time?
Use shallow trays, labeled folders, or small paper bags. These keep each child’s project secure and easy to hand out at the end of class.
