Shoofly Pie is the kind of recipe that proves simple ingredients can do a lot.
It’s built from pantry staples – flour, molasses, butter, and brown sugar – and comes together with very little fuss.
The result is a pie that’s sturdy, flavorful, and easy to make on a regular baking day.
This version keeps the same straightforward method but swaps in freshly milled whole wheat flour for all-purpose.
That small change makes a real difference.
If you already grind your own wheat or are thinking about starting, this pie is a practical way to see how freshly milled flour can improve even the most traditional recipes.
What Is Shoofly Pie? A Short History
Shoofly Pie is a Pennsylvania Dutch dessert with roots in early American farm life, where ingredients needed to be affordable, shelf-stable, and easy to keep on hand through the winter.
Molasses was a common sweetener at the time, and combining it with flour, fat, and a simple leavening created a hearty baked good that could be served with breakfast or enjoyed alongside coffee throughout the day.
The pie became especially popular in the late 1800s, when molasses-based recipes were common in rural communities. Unlike fruit pies, which relied on seasonal harvests, Shoofly Pie could be made year-round, making it a dependable part of the home kitchen.
As for the name, most historians believe it comes from the sticky sweetness of the molasses, which tended to attract flies while the pie cooled on windowsills.
Others connect the name to Shoofly, a well-known brand of molasses sold during the period. Either way, the name stuck – and the pie eventually became a recognizable symbol of Pennsylvania Dutch baking tradition.
Today, Shoofly Pie remains loved not just for its flavor, but for its story: a practical, resourceful dessert born from everyday ingredients and carried forward by generations of home bakers.
You might also enjoy learning how to make sugar cookies with fresh milled flour for another simple, wholesome treat.
What Makes Shoofly Pie Unique
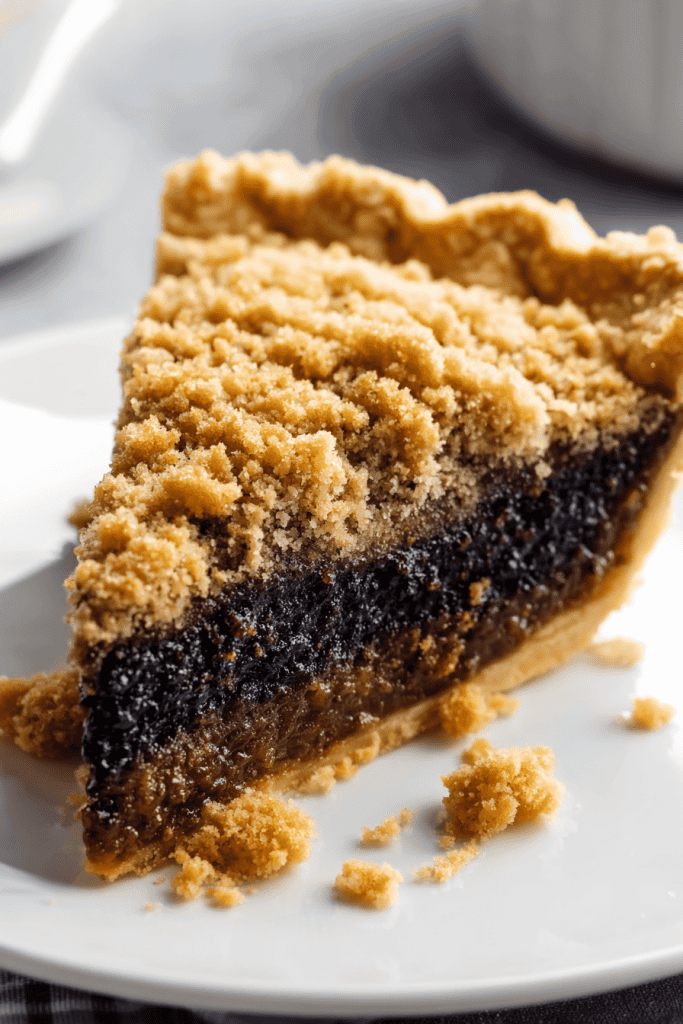
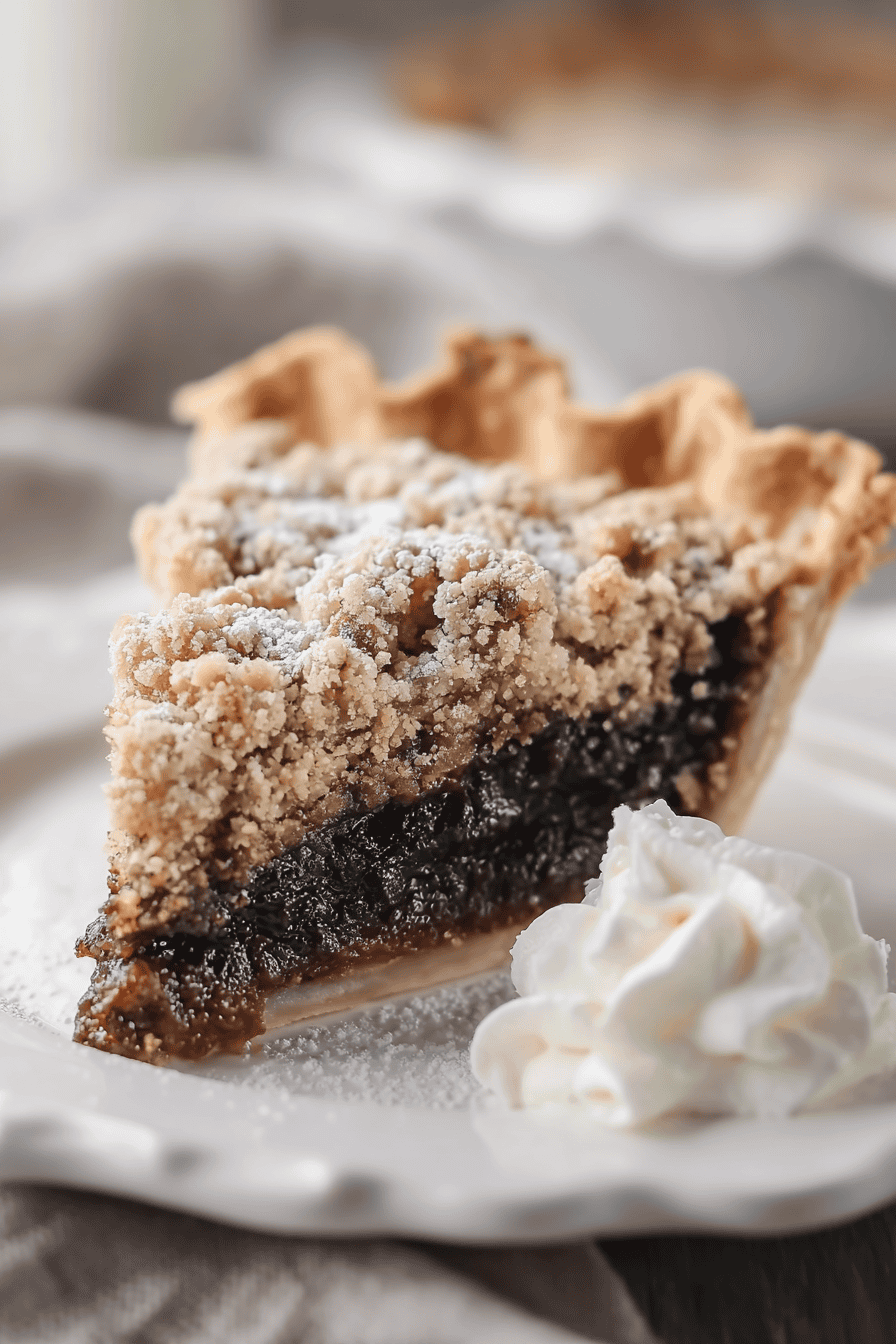
Shoofly Pie stands out because of how it’s built. It’s a pie with two parts: a rich molasses base and a crumb topping that bakes into a firm, cake-like layer.
The texture is somewhere between a pie and a coffee cake – soft in the center with a crisp top that holds up well for slicing.
The recipe comes from Pennsylvania Dutch kitchens, where bakers made use of simple, shelf-stable ingredients.
Molasses replaced refined sugar, and the crumb topping stretched what they had without waste.
It’s the kind of resourceful baking that makes sense in a modern kitchen too – practical, inexpensive, and satisfying.
What keeps Shoofly Pie relevant today is how balanced it tastes. It’s sweet but not overly so, rich but not heavy.
The molasses adds depth, the cinnamon brings warmth, and the crumb layer gives it structure.
It’s easy to make, easy to store, and even better the next day – qualities every home baker can appreciate.
Why Bake With Freshly Milled Whole Wheat Flour
Freshly milled flour behaves differently from store-bought flour, and that’s exactly why it’s worth using.
When you mill grain at home – say, hard white or hard red wheat – you’re working with a flour that still contains all its natural oils and bran.
That freshness gives your pie a deeper flavor and a softer, more satisfying texture.
In this Shoofly Pie, freshly milled flour does three noticeable things:
- It builds a sturdier crust. Whole grain flour contains more structure, so your crust will hold its shape better once baked. It rolls out easily when chilled and gives a gentle crispness along the edges.
- It adds flavor to the crumb topping. The topping won’t taste flat or overly sweet – the flour adds a light nuttiness that balances the molasses.
- It helps the filling set evenly. Whole wheat flour absorbs liquid more efficiently, so the pie develops a clean, even texture without soggy spots.
If you’re used to baking with all-purpose flour, the adjustment is small but important: freshly milled flour soaks up more moisture. When you make this recipe, you can slightly reduce the total flour by 10–15%, or simply add a tablespoon or two of extra hot water to the filling if it looks too thick.
The payoff is real. You’ll get a pie that tastes fuller, cuts cleaner, and keeps its freshness longer in the refrigerator.
It’s the same recipe – just made smarter with better flour.
If you love baking with freshly milled flour, you’ll also want to try our golden glaze donuts made with fresh milled flour.
Tips for Baking With Freshly Milled Flour (Conversion Made Easy)

Switching from store-bought flour to freshly milled flour doesn’t require a full recipe rewrite, but it does call for a few small adjustments.
These changes help you get consistent, reliable results every time.
1. Measure by feel, not just by the cup.
Freshly milled flour is lighter and less compact than commercial flour.
When you scoop it, it tends to trap more air. Start by measuring the usual amount, but hold back a few tablespoons.
Mix your dough or batter first, then decide if it needs a touch more flour or liquid.
2. Expect higher absorption.
Whole grain flour absorbs more liquid because it still has bran and germ.
For pies and quick breads, plan to reduce your total flour by about 10–15%, or add an extra tablespoon or two of liquid to reach the right consistency.
The goal is a dough that holds together but still feels soft and workable.
3. Choose the right wheat for the job.
- Hard white wheat gives a light color and mild flavor – good for desserts like Shoofly Pie or biscuits.
- Hard red wheat adds deeper flavor and a slightly denser texture – great for rustic or hearty pies.
Using a mix of the two often gives the best balance between structure and tenderness.
4. Mill only what you need.
Fresh flour starts losing its natural oils and aroma after a few days.
For best flavor, mill just enough for the recipe and store any extra in an airtight jar in the freezer.
5. Mix and rest.
When using freshly milled flour, give your dough or crumb mixture a five-minute rest before baking.
That short pause lets the bran absorb moisture fully, which keeps your pie from drying out in the oven.
Need more guidance? I have a full walkthrough on how to convert any recipe to freshly milled flour that breaks it down in a simple, beginner-friendly way.
Ingredients for the Best Shoofly Pie
This Shoofly Pie uses simple ingredients that most home bakers already have.
Here’s what you’ll need:
- 1 homemade pie crust
- 2 cups freshly milled whole wheat flour
- ½ cup packed light brown sugar
- 1 teaspoon ground cinnamon
- 10 tablespoons unsalted butter
- ¼ teaspoon fine sea salt
- 1¼ cups light molasses
- 1¼ cups hot water
- 1 teaspoon baking soda
- 1 beaten egg
- Optional toppings: Fresh whipped cream or a small scoop of vanilla ice cream for serving.
Start With a Homemade Pie Crust First
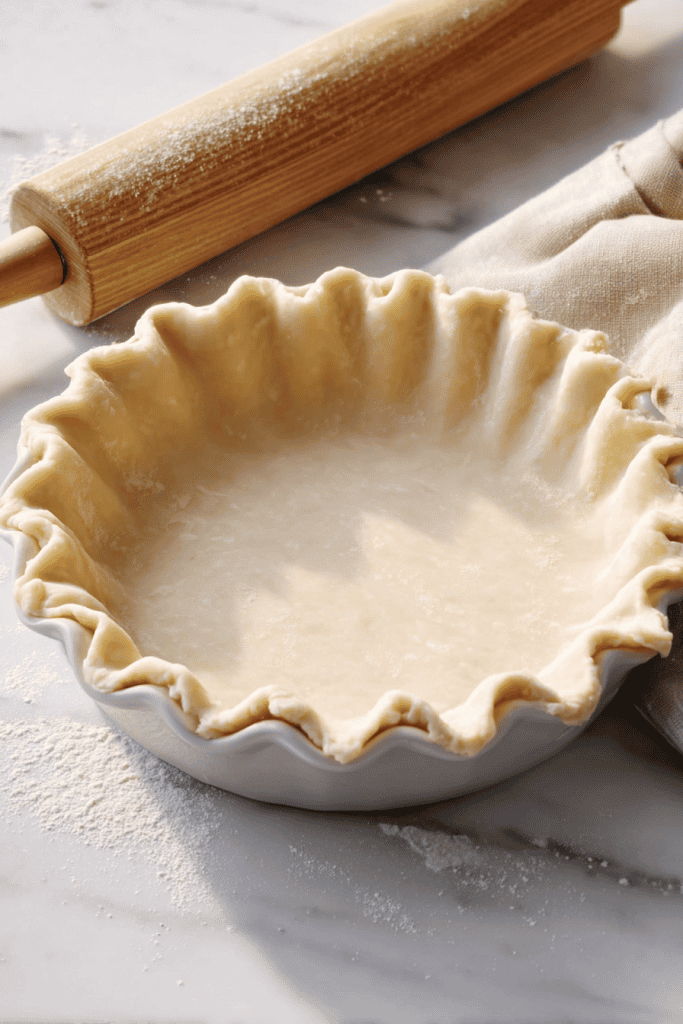
A good Shoofly Pie begins with a solid crust.
You only need one 9-inch single crust for this recipe, but it makes a big difference when it’s made from scratch.
A homemade crust gives you better texture, real flavor, and just the right balance between flaky and sturdy – important since this filling is rich and slightly liquid before baking.
If you’re new to pie crusts, I have a full step-by-step guide on how to make a homemade pie crust with freshly milled flour. It covers how to handle whole-grain crusts so they stay tender instead of tough.
Once your crust is ready and fitted into your pie pan, set it aside while you prepare the molasses filling and crumb topping.
7 Simple Steps to Make Homemade Shoofly Pie
This pie comes together in two parts: the crumb topping and the molasses filling.
Both are simple to mix and you just need a few bowls, a whisk, and a baking dish.
1. Preheat the oven to 425°F
Start with a hot oven.
Shoofly Pie bakes in two stages – a short bake at high heat to set the crust, then a lower temperature to finish the filling.
Preheating ensures the crust doesn’t soften before the filling begins to firm up.
2. Prepare the crumb mixture
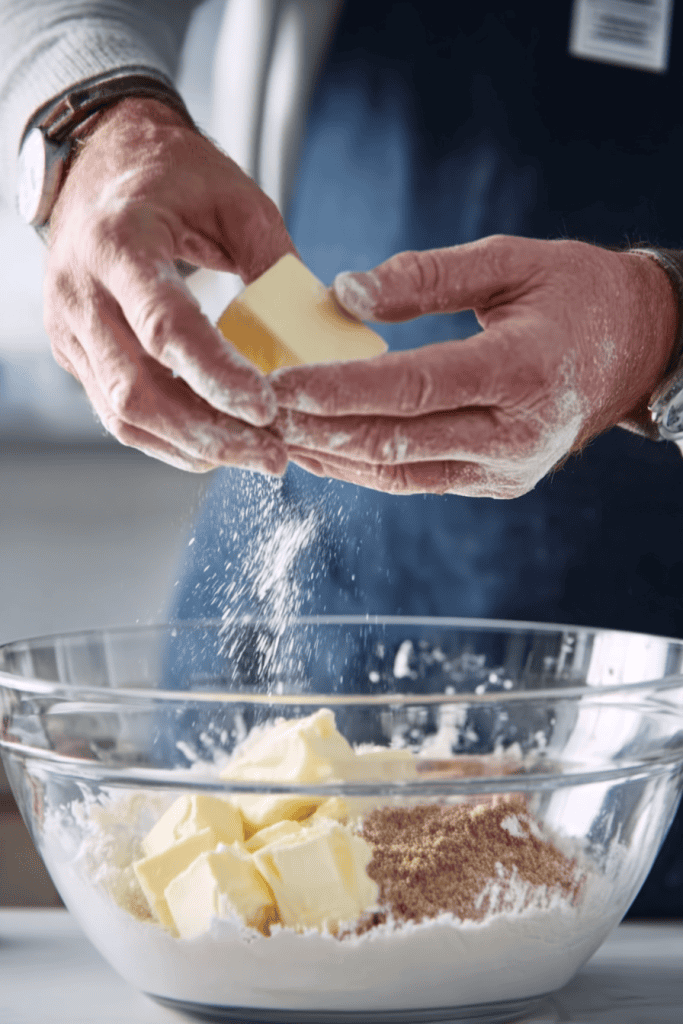
In a large bowl, combine the flour, brown sugar, cinnamon, salt, and butter.
Use a pastry cutter, fork, or your fingertips to work the butter into the dry ingredients until it resembles coarse crumbs – the butter pieces should be about the size of rice.
Those small butter bits melt during baking and create the signature crumbly top.
The mixture should feel slightly sandy but still hold together when pinched.
Set this bowl aside while you make the filling.
3. Mix the molasses filling
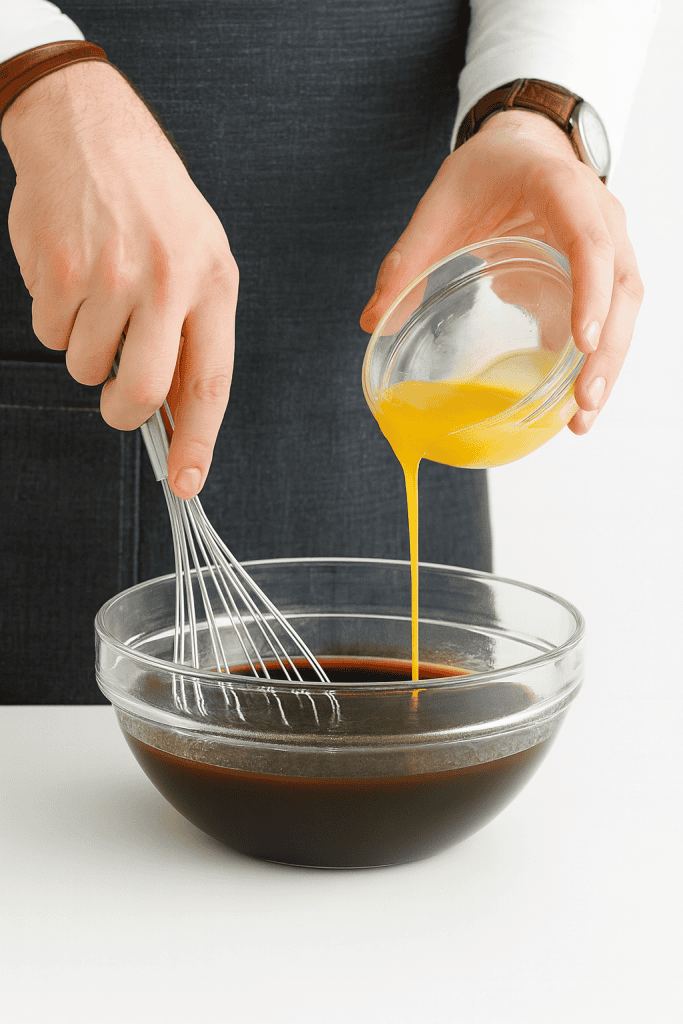
In a separate large, heat-safe bowl, whisk together molasses and hot water until smooth.
The hot water thins the molasses and helps the baking soda dissolve evenly.
Add the baking soda next. You’ll see it foam up a bit – that’s normal and part of what gives Shoofly Pie its light, cake-like texture.
Then whisk in the beaten egg until the mixture looks glossy and uniform.
The filling should be pourable, not thick. If it feels too heavy (especially when using freshly milled flour), add one extra tablespoon of hot water and whisk again.
4. Assemble the pie
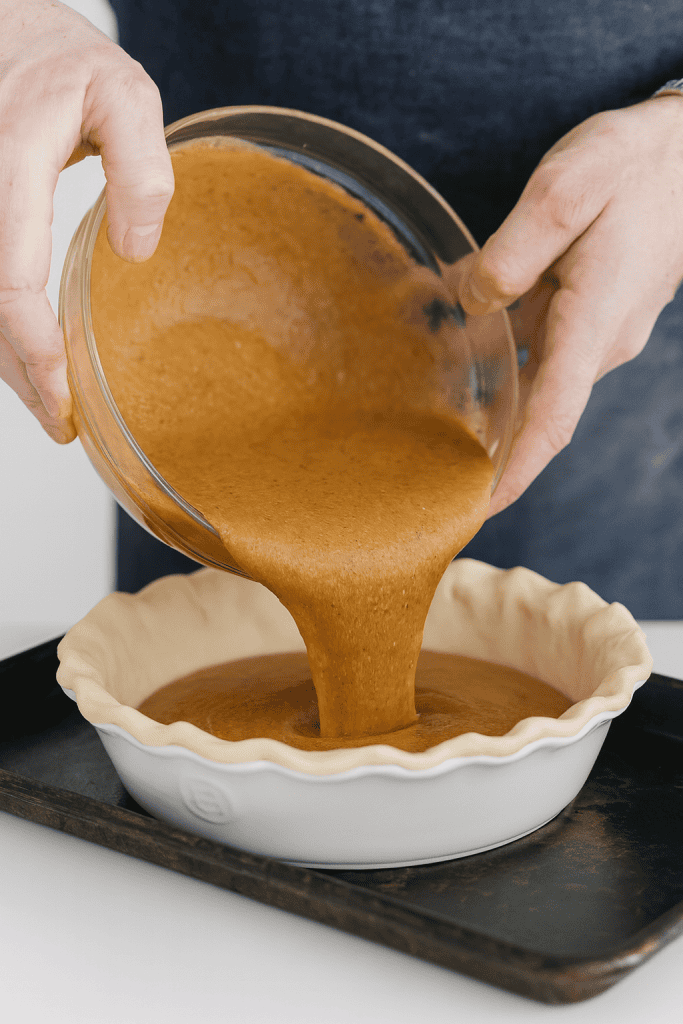
Pour the molasses mixture into your prepared pie crust.
Then take your crumb mixture and sprinkle it evenly over the top.
Make sure the crumbs cover the entire surface – right up to the crust edges.
As it bakes, the crumbs will partly sink and partly stay on top, creating that classic two-layer look: a moist base and a crisp topping.
5. Bake in two stages
Place the pie on the center oven rack and bake at 425°F for 15 minutes.
This initial high heat sets the crust and activates the baking soda fully.
Then, without opening the oven for too long, reduce the heat to 350°F and continue baking for 20–25 minutes, or until the center feels firm when gently tapped and the top is golden brown.
The filling should no longer jiggle in the middle.
If you notice the crust edges browning too quickly, you can loosely cover them with a piece of foil during the final minutes of baking.
6. Cool the pie completely
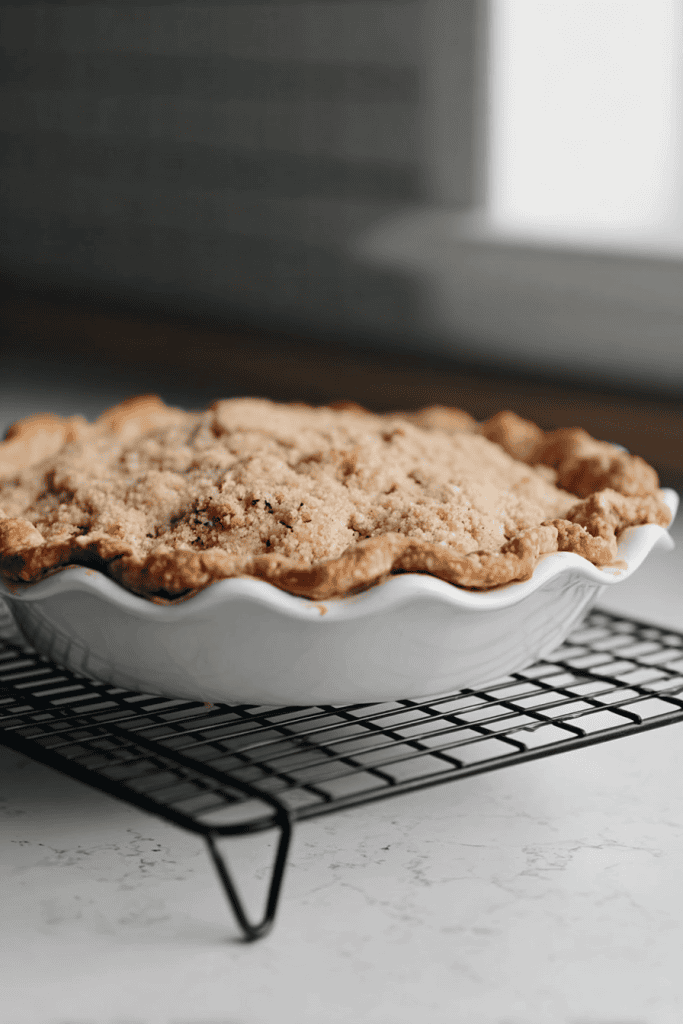
Once baked, remove the pie from the oven and let it cool on a wire rack.
Cooling is not just for temperature – it allows the filling to set fully, so your slices cut cleanly instead of running.
Plan for at least two hours of cooling time at room temperature.
After that, you can refrigerate or serve.
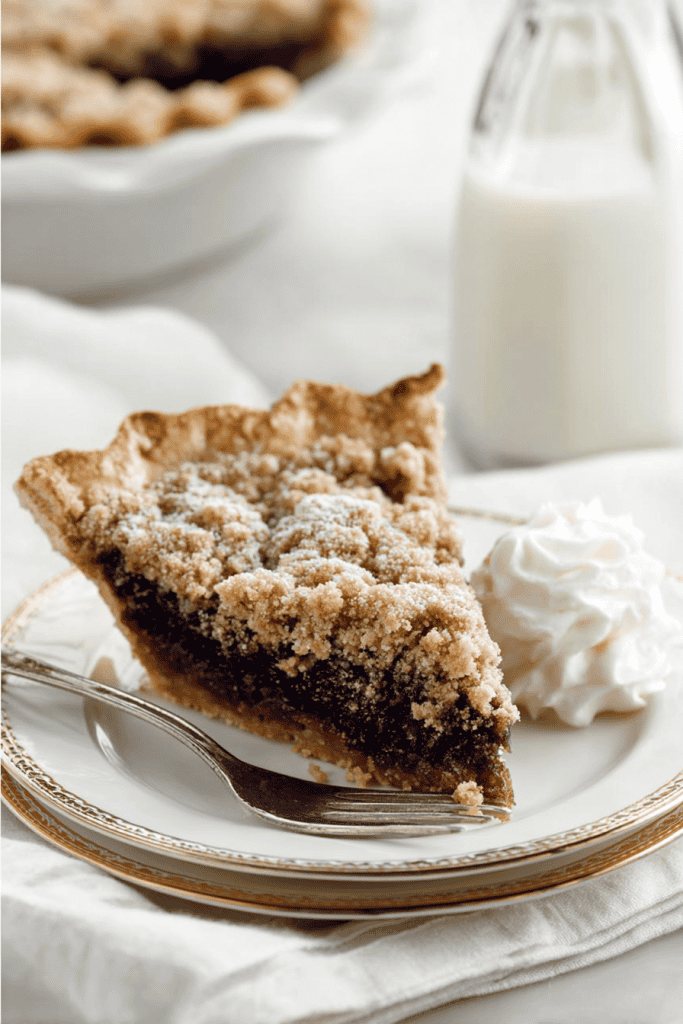
7. Slice and serve
Shoofly Pie tastes best once it’s fully cooled and slightly firm.
Slice with a sharp knife, wiping between cuts for clean edges.
Serve plain, or top with fresh whipped cream or a small scoop of vanilla ice cream if you want a contrast of cool and warm flavors.
The texture should be soft in the middle with a crisp, buttery top – sweet, but balanced.
For another wholesome treat, check out our healthy pumpkin pie recipe with freshly milled flour.
How to Store Homemade Shoofly Pie
Once the pie has cooled completely to room temperature, cover it tightly with plastic wrap or place it in an airtight container.
Store it in the refrigerator for up to 7 days.
If you’d like to keep it longer, wrap it well and freeze for up to 3 months.
When you’re ready to serve, move the pie to the refrigerator and let it thaw for one full day before slicing.
The texture holds up beautifully either way – soft in the center, crisp on top, and just as flavorful as when it was freshly baked.
If you’re in the mood to bake something else delicious, try the ultimate homemade bagel recipe.
Bake a Shoofly Pie That Earns a Spot in Your Regular Baking Rotation
Shoofly Pie is dependable. With freshly milled flour, you get better texture, longer freshness, and a flavor that holds its own next to any modern dessert.
This recipe fits naturally into a busy homestead kitchen: it uses real ingredients, keeps for days, and tastes just as good cold as it does warm.
If you’re looking for a dessert that’s easy to master, affordable to make, and deeply satisfying, this is it.
Give it a try, see how freshly milled flour changes the results, and make it part of your regular baking lineup.
Have you tried making Shoofly Pie before – or are you planning to bake this version next? Share your results or questions in the comments below!
FAQs
1. Can I use store-bought whole wheat flour instead of freshly milled flour?
Yes, but expect a small difference in texture. Store-bought whole wheat flour is drier and has lost some natural oils, so the crumb may be slightly less tender. You can add an extra tablespoon of hot water to balance moisture if needed.
2. What’s the best molasses to use for Shoofly Pie?
Use light molasses for a smoother, milder flavor. Dark molasses creates a stronger taste and denser texture. Avoid blackstrap molasses—it’s too bitter for this pie.
3. Can I make Shoofly Pie without eggs?
Yes. Replace the egg with 3 tablespoons of unsweetened applesauce or 1 tablespoon of ground flaxseed mixed with 3 tablespoons of warm water. The texture will be slightly softer but still cohesive.
4. How do I keep the crust from getting soggy?
Pre-bake (blind bake) the crust for about 8 minutes at 400°F before adding the filling. Let it cool slightly, then proceed with the recipe. The quick pre-bake helps seal the base and prevents moisture from soaking through.
5. What can I serve Shoofly Pie with besides whipped cream?
It pairs well with plain Greek yogurt, fresh fruit, or a drizzle of cream. For a cozy breakfast option, try a small slice with black coffee or hot tea—it holds up perfectly.
