Quilting looks beautiful and detailed, and it all begins with simple, clear steps.
At its core, quilting is the practice of joining layers of fabric, one seam at a time.
Many beginners come to quilting after trying other needle crafts, and if that’s you, starting with something like embroidery for beginners guide can make quilting feel less intimidating because the idea of stitching with intention is already familiar.
For beginners, the first question is not “Can I do this?” but rather “Where do I start?” That’s exactly what this guide is for.
Here, you’ll find the essentials: the tools that make the process smoother, the vocabulary that keeps instructions clear, and the steps that transform fabric into a finished quilt.
What Quilting Really Is
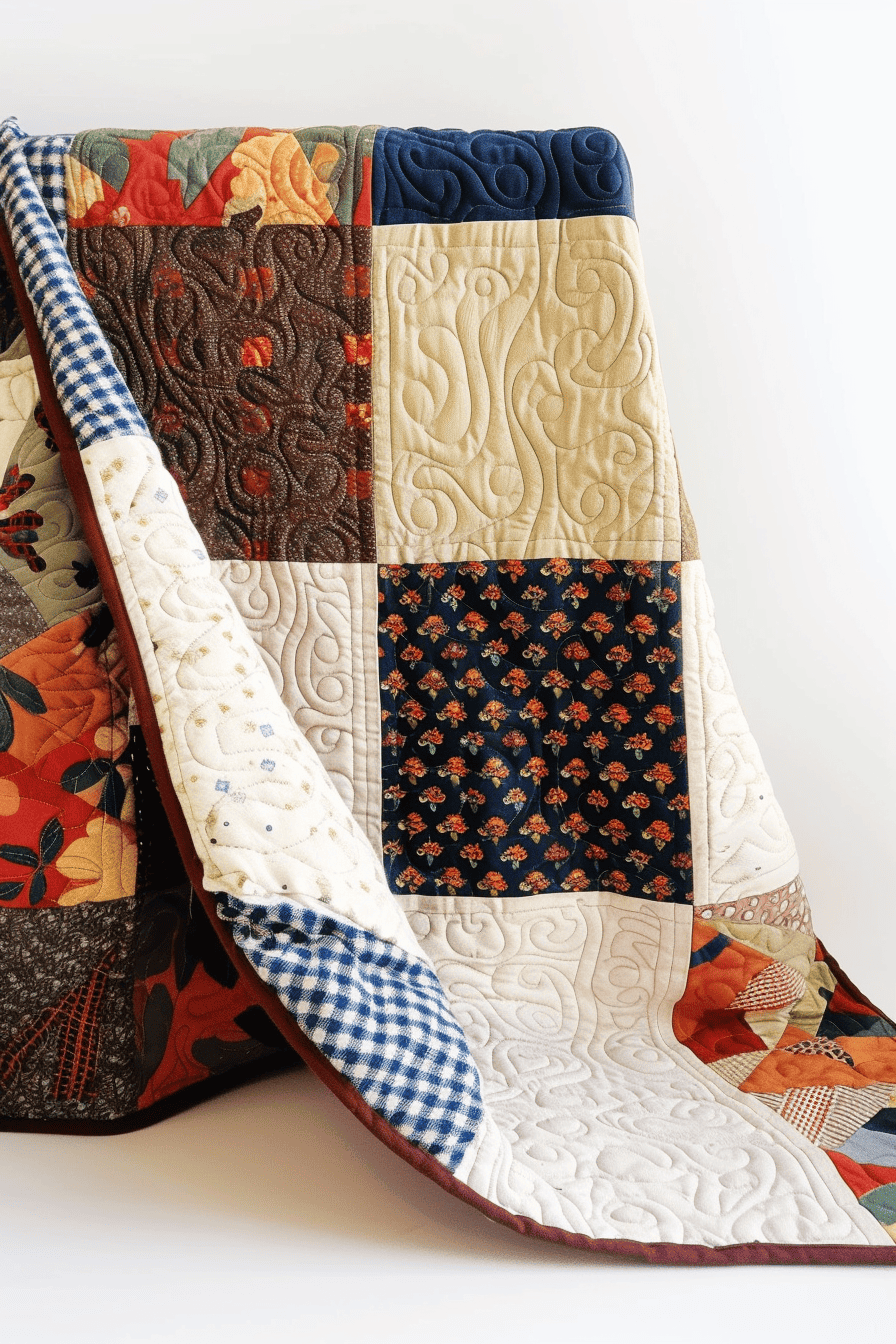
At its simplest, quilting is the practice of stitching three layers together: the quilt top, the batting in the middle, and the backing fabric.
The quilt top often carries the design – blocks of color, repeating patterns, or carefully pieced shapes.
The batting adds warmth and loft. The backing provides stability and a finished surface.
What sets quilting apart from ordinary sewing is this layered construction.
Instead of just joining fabric edges, quilting creates structure, dimension, and texture.
Styles of Quilting You’ll Encounter
- Traditional Quilting: Rooted in heritage patterns and repeated blocks, traditional quilts often follow familiar designs like the Log Cabin, Nine Patch, or Flying Geese. They emphasize balance, symmetry, and the use of classic fabrics.
- Modern Quilting: Modern quilts lean toward bold colors, large areas of negative space, and simplified shapes. They may break away from symmetry, allowing improvisation and clean, graphic lines. This style feels fresh yet approachable for beginners who enjoy experimenting with color and scale.
- Utility Quilting: Made for daily use, utility quilts focus on durability and practicality. They may use leftover fabrics or simple stitches, showing how quilting has long been a resourceful way to make something strong, warm, and lasting.
Seeing these styles side by side reminds beginners that quilting is not a single path – it’s a flexible craft with room for both precision and play.
Whichever direction you choose, the basics remain the same: layers of fabric, stitched together with intention, to create something that lasts.
The Quilter’s Mindset
A helpful way to think about quilting is as a series of small, repeatable actions. Cutting, pressing, stitching – these are simple tasks on their own.
When repeated consistently, they come together to form something much larger and more meaningful.
Optimism also matters.
Instead of focusing on what feels unfamiliar, notice what you are gaining: the rhythm of stitching, the satisfaction of accuracy improving, and the joy of watching fabric transform under your hands.
Every quilter, no matter how skilled today, once began with the same first steps.
And when frustration shows up (because it will), learning how to overcome sewing frustrations can help you stay motivated and enjoy the process.
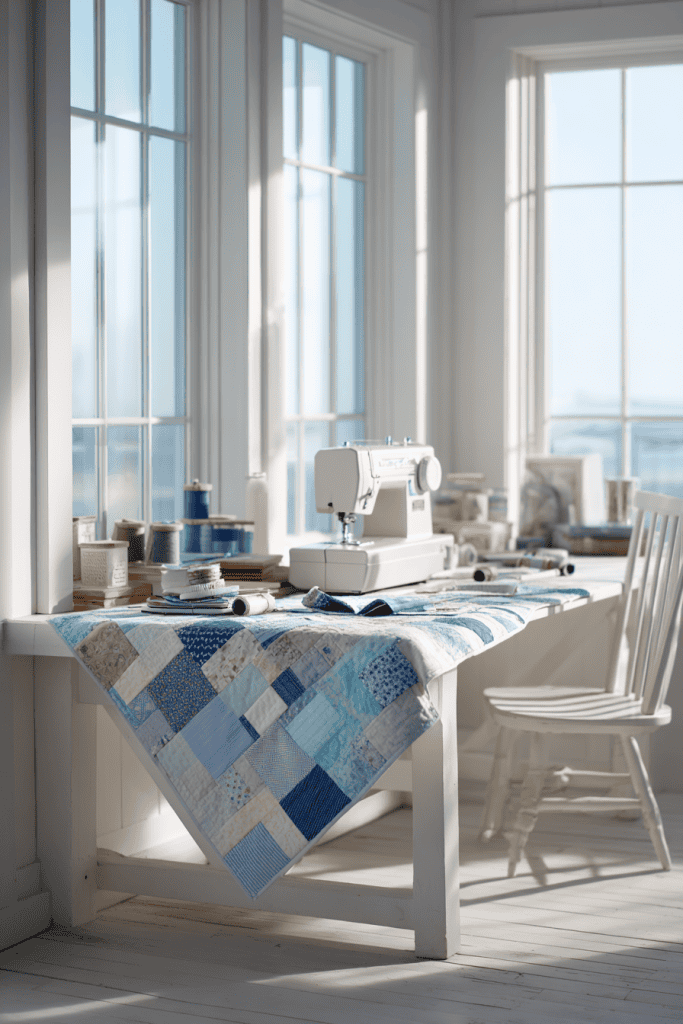
Essential Tools Every Beginner Needs
Starting with the right tools makes quilting simple and enjoyable.
A few well-chosen essentials give you everything you need to feel prepared and set up for success.
- Fabric
- Choose 100% cotton for your first projects. It cuts cleanly and stitches smoothly. When shopping, learning how to read fabric labels helps you avoid blends that behave unpredictably.
- Pre-cut bundles (charm packs, jelly rolls) save time and keep fabrics coordinated.
- Thread
- Use cotton or cotton-polyester blends for strong, smooth seams.
- Medium-weight thread in neutral colors works with most fabrics.
- Needles and Pins
- Machine: universal needles (sizes 80/12 or 90/14).
- Hand sewing: sharps or quilting needles.
- Straight pins or fabric clips for alignment.
- Cutting Tools
- Rotary cutter for clean, accurate cuts.
- Self-healing mat to protect surfaces and extend blade life.
- Sharp fabric scissors reserved for fabric only.
- Measuring Tools
- Clear acrylic quilting ruler for accuracy.
- Seam gauge for checking seam allowances.
- Marking Tools
- Fabric-safe pens, chalk, or pencils.
- Choose ones that wash out or fade easily.
- Pressing Tools
- A reliable iron for pressing (not ironing) seams.
- Pressing as you go keeps quilt tops flat and accurate.
- Sewing Machine (or Hand Sewing)
- A machine that handles straight stitches with consistent tension is enough.
- Hand piecing is a valid starting point – what matters is steady practice.
- Optional but Helpful
- Seam ripper, pin cushion, extra clips.
- Walking foot for easier quilting on larger projects.
With these essentials, you’ll have the foundation you need to begin quilting with confidence.
How to Choose Fabric Materials and Colors
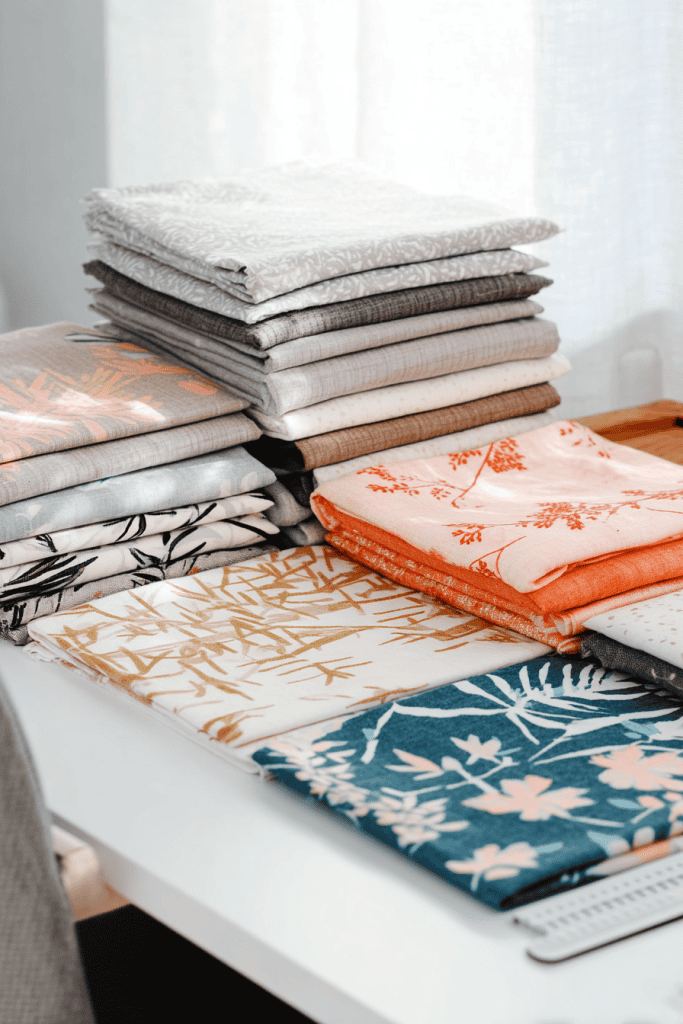
Fabric is at the heart of quilting, and choosing well from the start makes the process smoother.
Fabric Types
- 100% cotton is the most beginner friendly option. Pre-cuts simplify planning, while yardage works well for backing. If you are sourcing natural fibers, see my guide on how to buy affordable linen fabric.
- Pre-cuts: bundles like charm packs (5-inch squares), jelly rolls (2.5-inch strips), and fat quarters (large cuts) simplify fabric selection and keep colors coordinated.
- Yardage: choose when you want larger pieces or need backing fabric.
Patterns and Prints
- Small prints: work well in patchwork and won’t overpower a design.
- Large prints: better for bigger blocks or backing where the design can be seen clearly.
- Solids: balance busy prints and give the eye a place to rest.
Color Basics
- Contrast: mix lights, mediums, and darks so shapes stand out.
- Value: pay attention to how light or dark a fabric feels, not just its color.
- Harmony: use colors that complement each other, or start with a pre-selected bundle if you’re unsure.
Tips for Beginners
- Start with a limited palette – 3 to 5 fabrics is plenty for a first quilt.
- Avoid fabrics that stretch (like knits) or fray easily until you’re more confident.
- When in doubt, hold fabrics side by side – if they make you smile together, they’ll likely work well in your quilt.
Choosing fabric is one of the most enjoyable parts of quilting.
With a few guidelines and some trust in your eye, you’ll develop the confidence to combine colors and prints in ways that feel both personal and balanced.
Quilting Vocabulary Made Simple
Quilting has its own language, and knowing these terms makes patterns much easier to follow.
If you want a deeper reference, this list of must-know quilting terms is helpful as you grow.
- Patchwork: Small pieces of fabric sewn together to create a larger design.
- Piecing: The act of joining fabric pieces (patches) with seams to form blocks or a quilt top.
- Block: A single unit of a quilt design, often square, made from pieced fabric.
- Seam Allowance: The margin of fabric between the stitching line and the fabric edge – commonly ¼ inch in quilting.
- Quilt Top: The upper layer of the quilt, usually pieced with blocks or a repeating design.
- Batting: The middle layer that adds warmth and loft. Comes in cotton, polyester, wool, or blends.
- Backing: The fabric on the underside of the quilt – often one solid piece or large sections of fabric.
- Quilt Sandwich: The three layers (top, batting, backing) stacked and secured together before quilting.
- Quilting: The stitching that holds the three layers together. This can be straight lines, decorative patterns, or even simple hand-ties.
- Binding: The strip of fabric that finishes the edges of a quilt and keeps the layers secure.
Learning these terms is like picking up the basic tools of a new language.
Once they’re familiar, reading patterns and following tutorials becomes far less intimidating.
The Quilting Process Step by Step

Quilting may look complex at first, but it follows a clear sequence. When you break it down, each stage feels manageable.
Here is a detailed path to follow from the very first cut to the final stitch.
Step 1: Plan Your Quilt
Start with a small, approachable project.
A simple patchwork quilt made with 5-inch squares (often sold as “charm packs”) is ideal for beginners.
For example, a baby quilt might use 6 rows of 6 squares, creating a quilt top about 30″ x 30″ before borders.
At this stage, decide whether you’ll use pre-cuts or cut your own fabric.
If cutting from yardage, sketch the layout on graph paper to see how many pieces you need.
Planning your quilt in advance helps you stay organized and prevents fabric waste.
Fabric Yardage Guide for Beginner Quilts
| Quilt Size | Approx. Dimensions | Fabric for Top | Backing Fabric | Batting Size | Binding Fabric |
|---|---|---|---|---|---|
| Baby Quilt | 36″ x 48″ | 1.5–2 yards (or 2 charm packs) | 1.5 yards | 44″ x 56″ | ½ yard |
| Lap Quilt | 50″ x 65″ | 3–4 yards (or 1 layer cake + extra) | 3.5 yards | 58″ x 73″ | ¾ yard |
| Twin Quilt | 70″ x 90″ | 6–7 yards (or 2 layer cakes + extra) | 5.5 yards | 78″ x 98″ | 1 yard |
| Full/Double | 85″ x 108″ | 8–9 yards | 7.5 yards | 93″ x 116″ | 1¼ yards |
| Queen Quilt | 90″ x 108″ | 9–10 yards | 8 yards | 98″ x 116″ | 1¼ yards |
| King Quilt | 108″ x 108″ | 10–12 yards | 9 yards | 116″ x 116″ | 1½ yards |
Estimates assume simple patchwork. Borders or complex patterns may require more fabric.
Understanding Cut Size vs. Finished Size
Cut size is the measurement of your fabric piece before sewing. Finished size is the measurement after you’ve sewn the seams (usually ¼” on each side in quilting).
For example:
- A square cut at 5 inches will measure 4½ inches finished once it’s sewn into the quilt.
When planning quilt layouts, always calculate using finished size (after seams). This ensures your final quilt measures what you expect.
Step 2: Cut with Care
Cutting accurately is one of the most important skills you’ll develop.
Use a rotary cutter with a sharp blade, a self-healing cutting mat (at least 18″ x 24″), and a clear acrylic ruler (6″ x 24″).
Place your fabric on the mat, align the ruler, and cut with firm, even pressure.
For beginners, keep measurements simple – squares or rectangles cut to whole or half-inch increments (e.g., 5″, 6.5″, or 10″) are easier to handle.
Always measure twice before cutting. Consistency in size will make the piecing stage much smoother.
Step 3: Piece the Blocks
Sew your cut pieces together using a ¼-inch seam allowance, the quilting standard.
Many sewing machines offer a ¼-inch presser foot to help maintain this measurement. If not, mark a guide line on your machine’s throat plate with tape.
Set your machine to a shorter stitch length (about 2.0–2.5 mm) for piecing. This keeps seams strong without adding bulk.
Chain piecing – feeding multiple fabric pairs through the machine one after another without cutting the thread – saves time and keeps pieces consistent.
After sewing, press each seam to one side or open, depending on the pattern’s instructions.
- Pressing to the side makes seams stronger and helps them “lock” together when joining rows.
- Pressing open reduces bulk.
Either method is fine – consistency matters more than the method you choose.
A hot iron (cotton setting, with steam if your fabric allows) makes seams lie flat and helps the blocks align neatly.
Step 4: Assemble the Quilt Top
Arrange your blocks into rows according to your layout.
For example, if you’re making a quilt that’s 36″ x 48″, you might create 6 rows of 8 blocks, each block measuring 6″.
Sew blocks together row by row, then join rows to complete the quilt top.
Press seams after each join, alternating seam directions between rows (one row pressed left, the next right).
This makes intersections nest together neatly. Once your quilt top is complete, check the edges.
Trim if needed so the quilt top is square – measuring diagonally corner to corner should give the same number within about ¼ inch.
Step 5: Make the Quilt Sandwich
Layer the three parts of your quilt:
- Backing – Cut at least 4–6 inches larger than the quilt top on all sides. For a 36″ x 48″ quilt top, cut backing to about 44″ x 56″. In practice, this means adding at least 8 inches total to both the width and the length (4 inches extra on each side). This extra fabric gives you room to adjust if the layers shift during quilting.
- Batting – Cut the batting slightly larger than the quilt top as well, extending 2–4 inches beyond the top on all sides. It does not need to match the backing exactly, just be larger than the quilt top so you have room to trim later. Cotton or cotton-poly blends are easiest for beginners.
- Quilt Top – Center on top, right side facing up.
Smooth each layer carefully, working from the center outward to remove wrinkles.
Pin the layers together with curved safety pins every 4–6 inches across the quilt surface.
Step 6: Quilt the Layers Together
This is where you stitch through all three layers to secure them. For beginners, straight-line quilting is the easiest method.
Sew lines ¼ inch away from each seam (called “stitch in the ditch”) or create parallel lines across the quilt at 2–3 inch intervals.
Always start quilting near the center of the quilt and work outward. This keeps the layers from shifting.
Adjust your machine to a slightly longer stitch length (around 3.0 mm) for quilting.
The longer stitch helps the needle pass smoothly through all three layers without puckering.
Step 7: Bind the Quilt
Binding finishes the raw edges and gives your quilt a polished look.
Cut fabric strips 2.5 inches wide across the width of fabric (usually 42–44 inches long).
You’ll need enough strips to go around the quilt’s perimeter plus about 10 extra inches.
To calculate binding more precisely: measure the perimeter of your quilt (all four sides), add 10 inches for overlap, and then divide by 40–42 (the usable width of fabric).
The result is how many strips you’ll need to cut.
Join strips together on the diagonal to create one long piece. Fold binding in half lengthwise and press.
Attach to the front of the quilt with a ¼-inch seam, mitering the corners as you go.
Then fold it over to the back and secure either by hand-stitching with a slip stitch or machine-stitching close to the edge.
Beginner-Friendly Projects
When you’re just starting out, the most important choice is scale.
A small, achievable project gives you the chance to practice cutting, piecing, quilting, and binding – without becoming overwhelming.
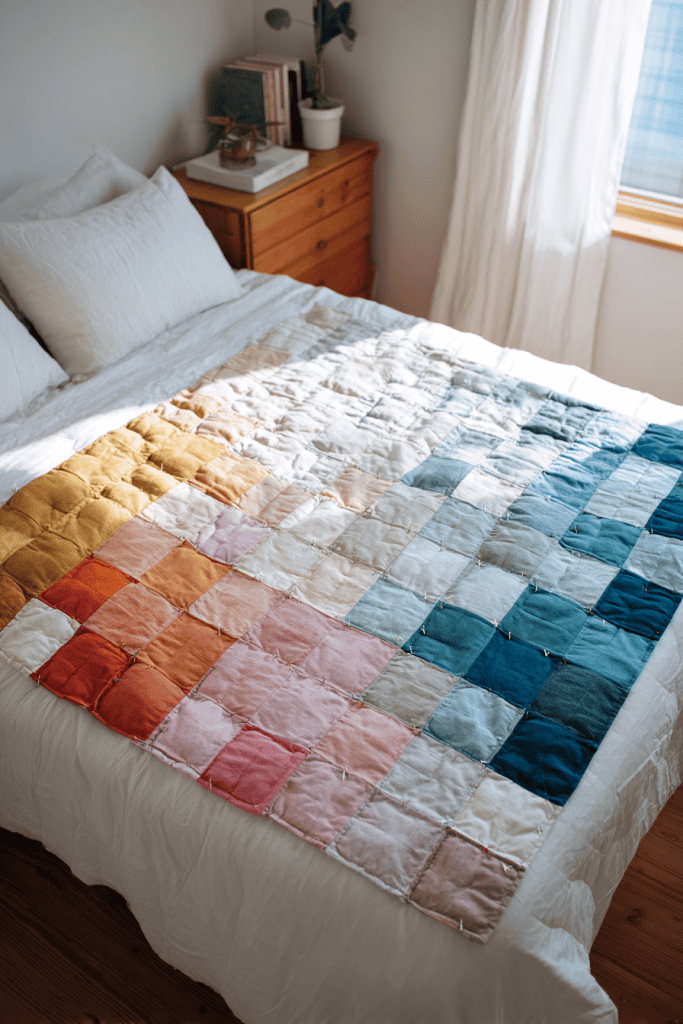
Simple Patchwork Quilt
The classic beginner project is a patchwork quilt made of squares.
Using 5-inch charm squares is the easiest way to begin, since they’re pre-cut and already coordinated.
Arrange them into a grid – such as 6 rows of 6 squares for a quilt about 30″ x 30″ before borders.
This project teaches you consistent seam allowances, pressing, and assembling a quilt top without complicated shapes.
Baby Quilt
A baby quilt is manageable in size and always useful.
A layout of 6-inch squares in 7 rows by 9 rows creates a quilt top about 42″ x 54″, a good crib size.
With fewer blocks than a bed quilt but enough repetition to practice skills, it helps you refine accuracy while finishing a meaningful project.
Quilted Placemats
If you prefer to start smaller, quilted placemats are an excellent option.
Each placemat can be made from simple rectangles or strips, finishing at about 12″ x 18″.
You’ll go through the entire quilting process (piecing, layering, quilting, and binding) on a small scale, which builds confidence for larger quilts.
Table Runner
A table runner offers a slightly larger canvas without the commitment of a full quilt.
A common size is 14″ x 40″, made from pieced squares, strips, or simple blocks.
This project helps you practice straight-line quilting and binding while creating something immediately usable in your home.
Wall Hanging
A small quilt designed to hang on the wall allows you to experiment with color and layout.
Something in the range of 24″ x 24″ can be completed fairly quickly and displayed proudly.
It’s also a forgiving project for testing new techniques, since it won’t face the same wear and washing as a bed quilt.
Troubleshooting Common Issues
Every quilter encounters challenges, especially in the beginning.
The key is to recognize them as normal and to know simple ways to adjust.
With a few practical fixes, you’ll keep moving forward and build confidence as you go.
Crooked Seams
If your seams drift off the standard ¼-inch allowance, blocks may not line up correctly.
The fix is simple: trim blocks back to the correct size using a quilting ruler.
For prevention, use a ¼-inch presser foot or mark a seam guide on your machine. Practicing chain piecing also helps improve straight stitching over time.
Uneven Blocks
Sometimes blocks finish slightly different in size.
To fix this, “square up” your blocks with a rotary cutter and ruler so they’re consistent before assembling into rows.
Aim for accuracy, but remember: even small variations often disappear once the quilt is layered and quilted.
Thread Tension Issues
If stitches look loose on top or bunched underneath, adjust your machine’s tension dial slightly and test on scrap fabric.
A balanced stitch should look even on both sides.
Also check that your machine is threaded correctly – most tension problems come from missed steps in threading.
Puckered Layers
When quilting, fabric layers may bunch or pucker.
Start quilting from the center and move outward to keep fabric smooth.
Use more safety pins or basting stitches (placing them every 4–6 inches) to hold layers in place.
A walking foot attachment can also help feed layers evenly through the machine.
Wavy Edges
If the edges of your quilt ripple, it may be from uneven stitching or stretching fabric as you worked.
The solution is to trim the quilt edges square before binding.
When binding, pin or clip the fabric every few inches to distribute fullness evenly.
Fabric Fraying
Beginners often notice raw edges fraying during handling.
To minimize this, avoid excessive handling before sewing.
If needed, use pinking shears or apply a narrow zigzag stitch along edges that will be heavily used before assembly.
These fixes are part of the learning process. Every quilter has had to re-square blocks, adjust tension, or smooth layers at some point.
What matters most is recognizing the issue, applying the solution, and moving forward.
Next Steps Beyond the Basics
Once you’ve completed a few small quilts and built comfort with the essentials, you may feel ready to expand your skills.
Quilting offers endless directions, and exploring them gradually keeps the learning process engaging without overwhelm.
Explore Different Quilting Styles
You’ve already seen the difference between traditional, modern, and utility quilting.
As you grow, try mixing elements.
A traditional block like the Log Cabin can take on a modern look with bold solids and asymmetrical layouts.
Utility quilts can be elevated with creative quilting lines. Blending styles allows you to find your own voice as a quilter.
Try New Techniques
After piecing simple squares, explore half-square triangles, flying geese, or strip piecing.
These shapes open the door to more complex patterns while building on the same skills you’ve already learned.
From there, you might experiment with appliqué (sewing shapes onto a background) or free-motion quilting, where the stitching becomes more decorative and fluid.
Learn to Read Quilt Patterns
Beginner-friendly patterns often use diagrams, fabric requirements, and step-by-step instructions.
As you gain experience, you’ll find it easier to interpret these patterns and even adapt them to your own fabric choices.
Start with straightforward instructions, then gradually take on more detailed designs.
Scale Up Projects
If your first quilts were baby quilts or table runners, your next step might be a lap quilt (about 50″ x 65″) or a twin-size quilt (70″ x 90″).
Larger quilts bring new considerations, like managing fabric bulk under the sewing machine and planning for more backing and batting.
Take your time – each size increase builds endurance and skill.
Connect with the Quilting Community
Workshops, quilting bees, and online sew-alongs are excellent ways to challenge yourself while gaining support.
Many communities offer block-of-the-month projects, where you complete one block at a time and end the year with a finished quilt.
This steady, structured pace is perfect for expanding skills without pressure.
As your confidence grows, so will your ability to take on projects that reflect both your skill and your creativity.
Quilting evolves with you, one project at a time.
Start Your Quilting Journey Today
Quilting may seem like a detailed craft, but as you’ve seen, it begins with simple tools, clear steps, and steady practice.
With each block you cut and stitch, you’ll gain confidence, skill, and the satisfaction of creating something useful and lasting.
The essentials you’ve learned here are enough to get started – what matters now is beginning.
So gather your fabric, thread your machine, and choose your first project. Your quilting journey starts not with perfection, but with action.
What’s the first quilt you plan to make? Share your ideas or questions in the comments below – I’ll be there to cheer you on.
FAQs
What size should my very first quilt be?
A baby quilt (around 36″ x 48″) or a simple lap quilt (50″ x 65″) is ideal. They’re small enough to handle easily but large enough to practice every step of the quilting process.
How much fabric do I need for a beginner quilt?
For a baby quilt made with 5-inch squares, you’ll need about 1.5–2 yards total of quilting cotton, depending on layout and whether you’re using pre-cuts. Add another 1.5 yards for backing and about ½ yard for binding.
Do I need a special sewing machine for quilting?
No. Any reliable sewing machine that can sew a consistent straight stitch will work. Over time, you may add accessories like a ¼-inch presser foot or walking foot, but they’re not required for starting out.
What kind of batting should I use as a beginner?
Cotton batting or a cotton-poly blend is the easiest to work with. It lays flat, doesn’t shift much during quilting, and gives a soft but sturdy finish. Choose a low to medium loft so your quilt feeds smoothly through the machine.
How do I wash my quilt once it’s finished?
Wash your quilt on a gentle cycle in cold water, then tumble dry on low or air-dry flat. Using a mild detergent helps protect the fabric. Expect a slight crinkle after the first wash – that texture is part of what makes quilts cozy and durable.
