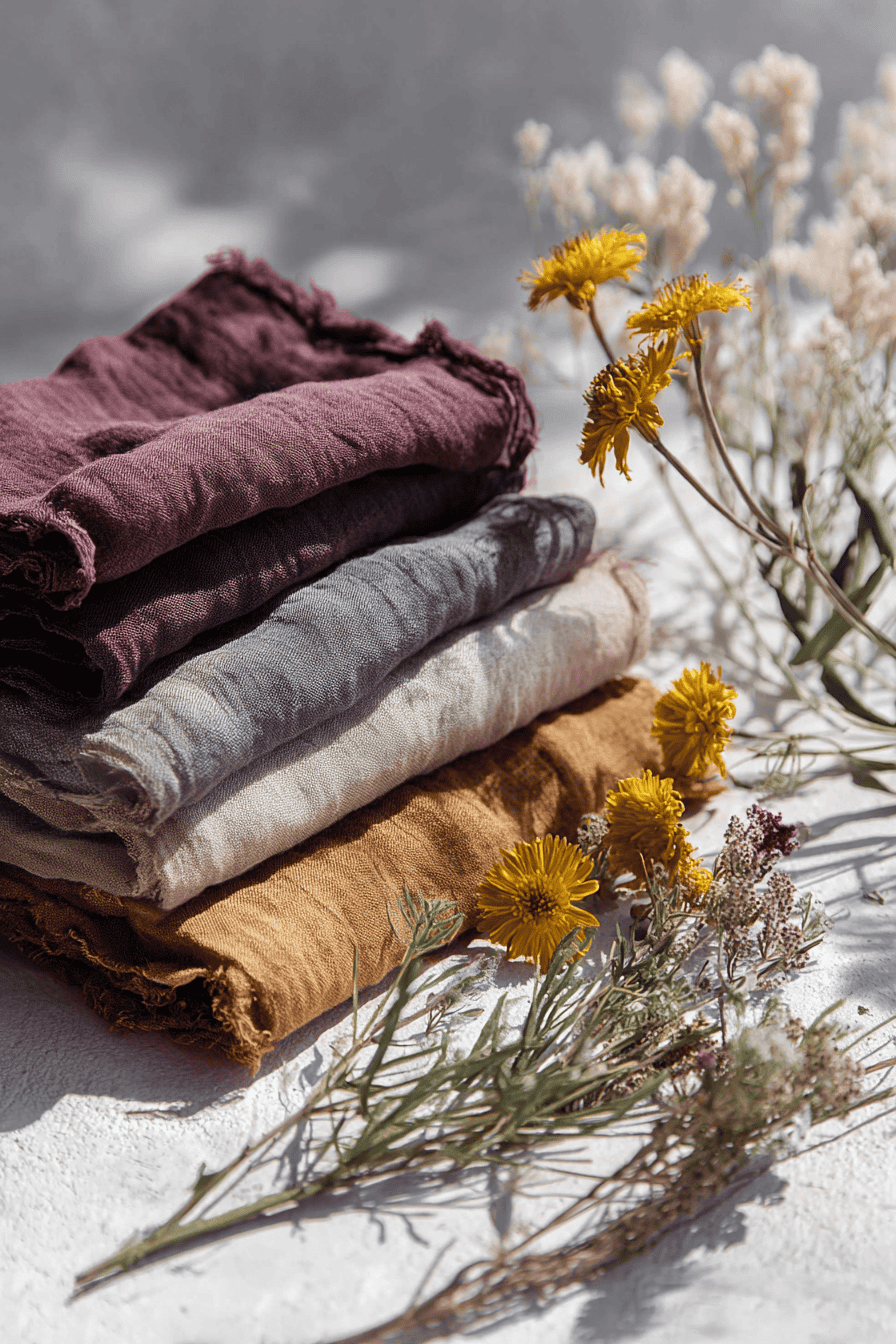
Natural dyes have colored fabrics for centuries, and today’s homesteaders are rediscovering these time-honored methods.
Using plant-based dyes from kitchen scraps or garden plants is a fun, non-toxic way to add color to textiles without synthetic chemicals.
Beginners will find these natural fabric dyes accessible and rewarding – all while enjoying a bit of history in each hue.
From golden onion skins to deep indigo blues, here are eight classic natural dyes for cotton, linen, wool, and other natural fibers that you can try at home.
The Beauty of Natural Dyes
Natural dyes have been coloring fabrics for thousands of years – long before synthetic dyes existed.
Did you know that the deep blue of indigo was once so valuable it was called “blue gold”? Or that madder root was used in ancient Egypt and Europe to create bright reds for textiles and even military uniforms?
Many natural dyes come from things you might already have at home. Onion skins give sunny yellows, avocado pits yield soft pinks, and black tea or coffee can tint fabric in warm browns. Even red cabbage can create purples or blues, depending on whether you add something acidic or alkaline to the dye bath.
If you’re ever unsure about which fabrics will take color best, you might want to brush up on how to read fabric labels so you can pick materials that will show off your natural hues beautifully.
Natural dyes are not only safe and non-toxic, but they’re also surprisingly versatile. They work on cotton, linen, wool, and silk, and the same ingredient can produce different shades depending on how long you leave the fabric in the dye or how you prepare it.
Plus, the results are unique every time – no two batches are exactly alike!
Using these dyes lets you get creative, experiment with kitchen scraps, and connect with traditions that span centuries. It’s a fun way to explore color while making something beautiful and practical for your home.
8 Time-Honored Natural Dyes for Fabric
Below are eight time-honored natural dyes with easy instructions so you can start experimenting today.
1. Onion Skins (Golden Yellow to Brown)
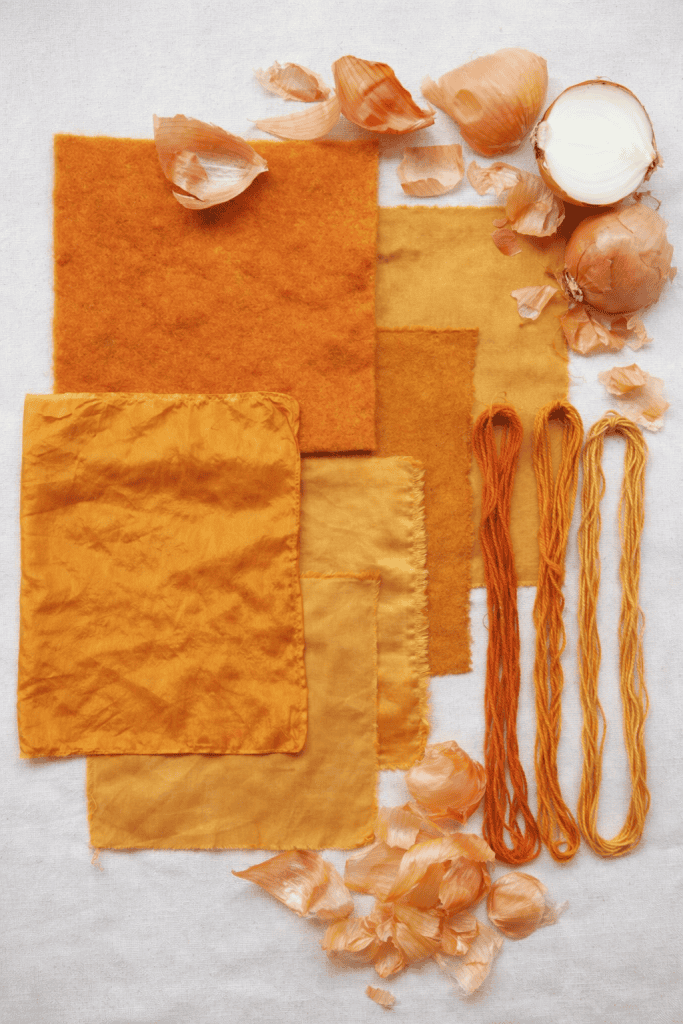
Onion skins are a beginner-friendly dye that yield warm shades from sunny yellow to earthy orange-brown.
Homesteaders have saved papery onion peels for generations to create dye baths instead of tossing them in the compost. To use onion skins, collect the dry outer layers from yellow or red onions (both work, though yellow onion skins are most common).
Simmer a generous handful of skins in a pot of water for about an hour to extract the color. Then strain out the skins and add your pre-wetted fabric to the onion dye bath, keeping it at a low simmer. Natural fibers like cotton or wool will soak up a rich golden hue.
For deeper color, let the fabric sit longer or even overnight (the dye can turn deeper orange-brown with time).
Onion skin dye is quite colorfast compared to some other kitchen dyes, especially if you dry the dyed fabric in the shade to prevent fading. This humble kitchen scrap has been used for centuries and remains one of the easiest ways to achieve beautiful yellows and tans naturally.
For a more structured approach to coloring, you can also explore step-by-step ideas in how to dye fabric – it’s a great companion for trying natural dyes
2. Avocado Pits & Skins (Soft Pink/Rose)
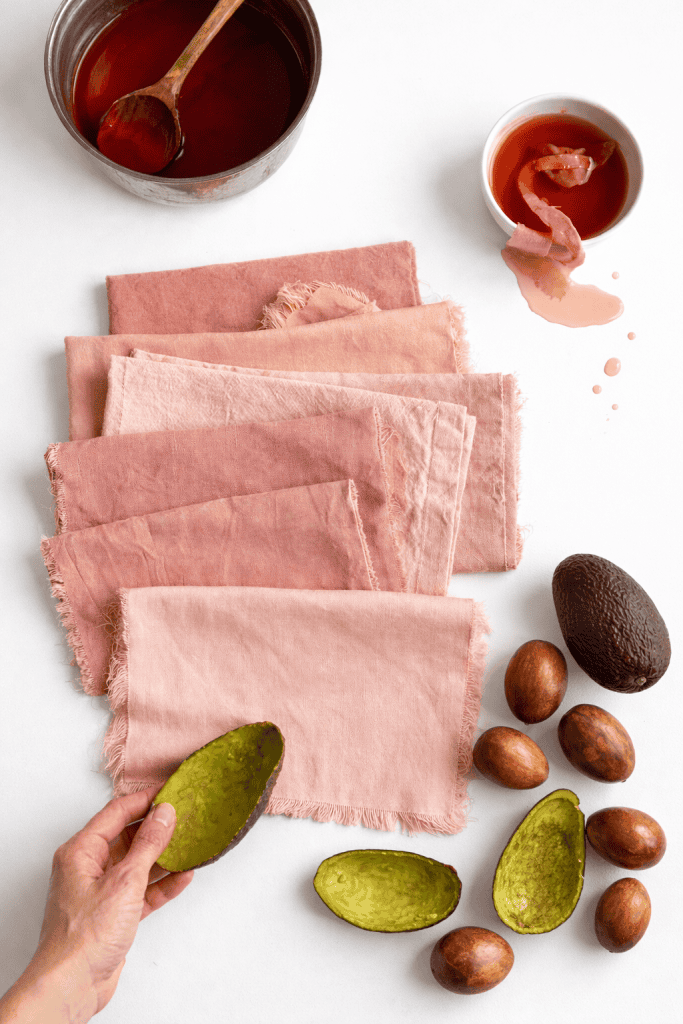
Surprisingly, those leftover avocado pits and skins from your kitchen can create a lovely dusty pink dye for fabrics. Boiling avocado pits (and skins) releases tannins and other polyphenols that turn the water a rosy hue.
The green flesh of an avocado doesn’t give color, but the brown pits contain high levels of tannins which, when simmered, yield pink or peach tones. To make an avocado dye bath, collect 4–6 clean avocado pits (and skins if available), cover with water, and simmer for 1–2 hours.
As the pits break down, you’ll see the water shift to a soft pink or reddish shade. Letting the dye steep overnight can deepen the color. Then strain out the solid bits and submerge your natural fiber fabric in the pink dye bath.
Cotton tea towels, shirts, or yarn will gradually pick up a blush rose color after soaking for several hours (even overnight for a stronger hue). It’s a gentle process but oh-so-simple – a perfect DIY project for a weekend.
Avocado dye has become popular among sustainable crafters, but it also carries a time-honored vibe, connecting us to the resourceful practice of using every part of our food. While not a historically famous dye like indigo or madder, it’s non-toxic, eco-friendly, and yields a charming vintage pink.
(Tip: Make sure to use only natural fibers; avocado dye only works on cotton, linen, wool, silk, etc., and not on synthetics.)
3. Turmeric (Bright Yellow)
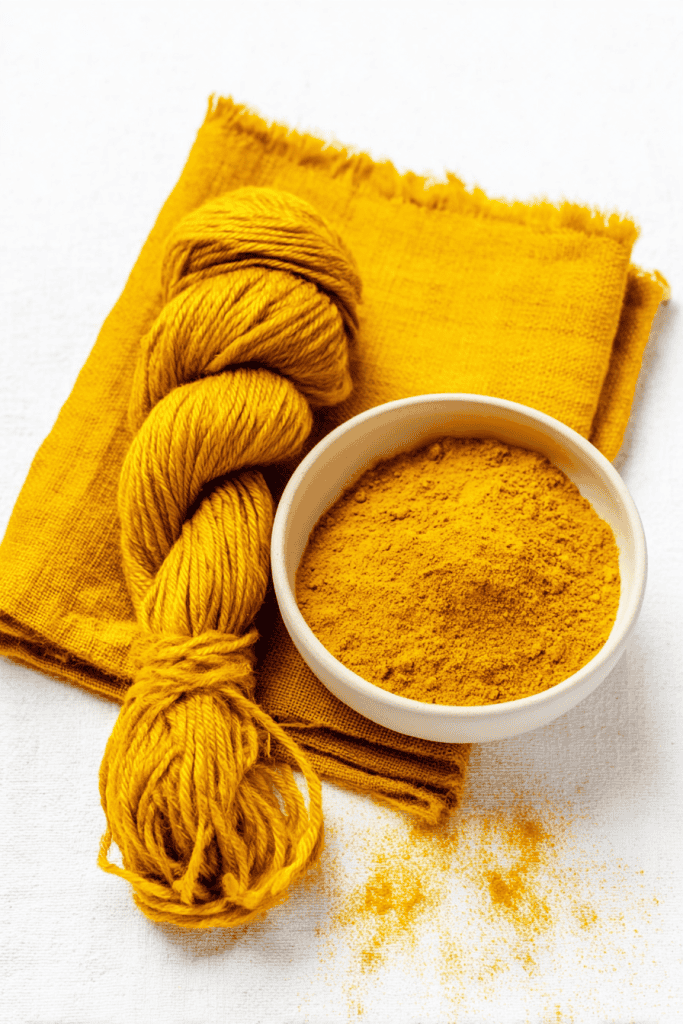
Turmeric, the bright golden spice, doubles as a vibrant fabric dye that has been used in traditional textile coloring (for example, in parts of India) for ages. Turmeric powder (or fresh turmeric root) easily imparts a bold yellow hue to fabrics with just a simple hot water extraction.
To dye with turmeric, mix a few tablespoons of turmeric powder into a pot of water and bring it to a simmer. Add your natural fiber fabric and let it simmer gently for about an hour, stirring occasionally. Very quickly the material will turn a brilliant yellow – turmeric’s color is strong and immediate.
This is one of the fastest natural dyes to try when you want instant results. However, a gentle historical heads-up: turmeric is known as a “fugitive” dye, meaning the color can fade faster than other dyes.
Without a proper mordant or care, a turmeric-dyed item might lose its brightness after a few washes or intense sun exposure.
To help the color last longer, you can add a mordant like alum (a common natural mordant) or even a bit of vinegar to the dye bath, and always wash turmeric-dyed fabrics in mild, cold water.
Even so, the cheerful sunshine-yellow of turmeric is worth the trade-off, especially for items that won’t be in harsh sunlight. It’s an ancient dye in its own right and one of the simplest ways to get a burst of color from your pantry.
If you’re working with linen or other natural fibers, this guide on how to buy affordable linen fabric can help you gather the best base materials before your dyeing projects.
4. Red Cabbage (Purple to Blue)
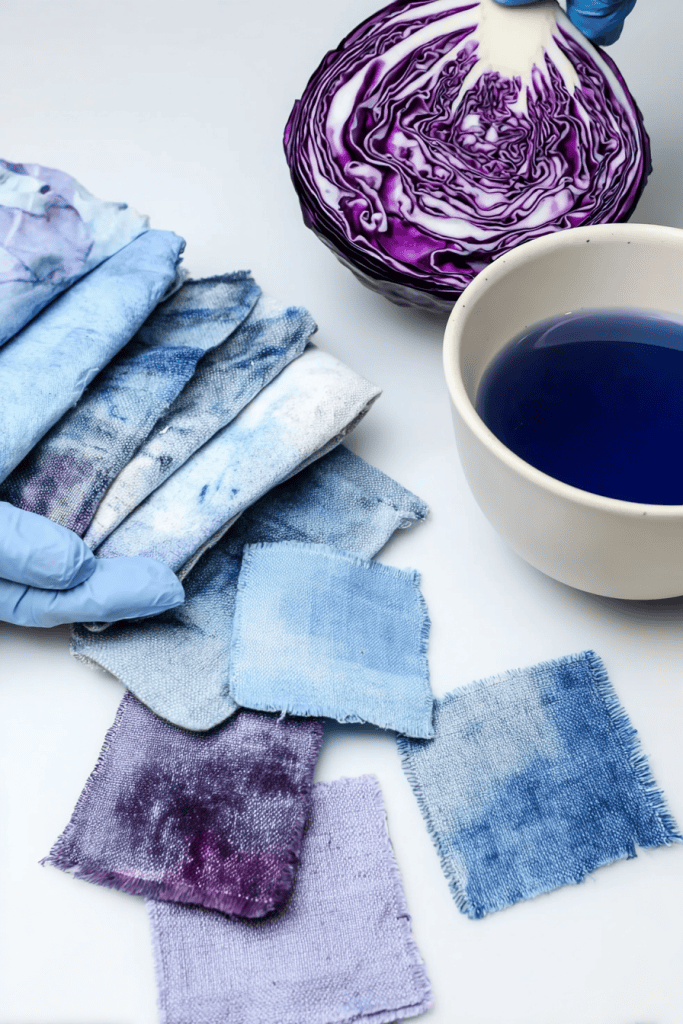
Red cabbage from the garden or grocery is not just for coleslaw – it can dye fabrics in gorgeous shades of purple, lavender, or even blue. Red cabbage dye is famous for being a natural pH indicator: the color you get depends on how acidic or basic the dye bath is.
By default, simmering chopped red cabbage in water will create a purplish dye liquor. Cotton or wool placed in this bath often comes out a soft lilac or gray-purple tone once dried. For a fun twist, you can alter the dye’s pH to shift the color.
Adding a splash of vinegar (acid) will push the color toward pinkish-purple, while stirring in a bit of baking soda (alkaline) can turn the dye blue or teal.
In fact, homesteaders often experiment with baking soda to get a blue shade from red cabbage – the cabbage dye bath becomes alkaline and yields blue hues on the fabric. This sensitivity makes red cabbage a fun, experimental dye.
It’s been used traditionally as a homemade dye (and as a chemistry lesson for kids) because it’s safe and easy to find. Keep in mind that red cabbage works best with a mordant (like alum) if you want the color to stick – the cabbage itself has no natural tannins.
But with some kitchen chemistry, you can achieve a surprising spectrum from one humble veggie. Dye silk or wool for the most vivid results, or try cotton for a lighter pastel effect. It’s a natural dye adventure with color-changing magic along the way.
5. Black Tea (Light Brown/Tan)
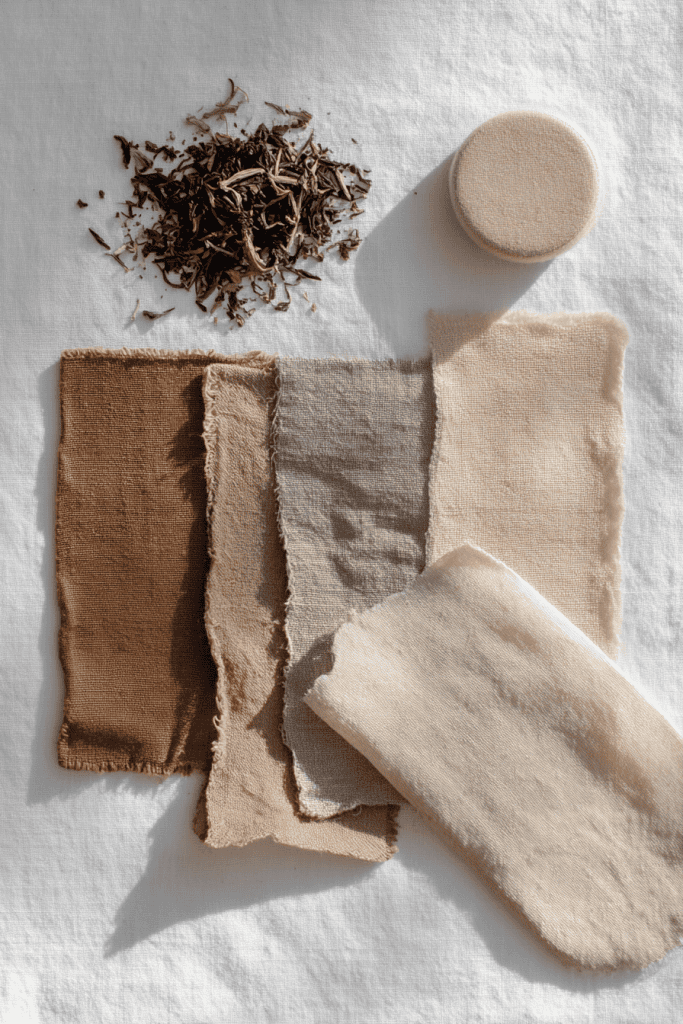
If you’ve ever spilled tea on a white shirt, you know how well it can stain. Black tea has long been used to dye fabric a soft brown or antique beige, perfect for giving textiles an aged, rustic look.
Tea is rich in tannins, which are natural compounds that bond to fibers – meaning that tea can often dye fabric without any added mordant. To tea-dye fabric, brew a strong pot of black tea (using multiple tea bags or a few tablespoons of loose tea in hot water).
Let it steep until the liquid is very dark. Then submerge your clean, pre-wet fabric in the tea and let it soak. The longer it soaks (hours or even overnight), the deeper the tan color will become. Rinse out and you’ll have a warm light brown tone on your material.
This method is commonly used by quilters and crafters to give quilts, laces, or garments a vintage patina. While tea-dye isn’t the most vibrant color, it’s wonderfully accessible – you literally just need old tea bags – and the results are quite colorfast due to those tannins bonding to the fiber.
For a darker brown, you can increase the tea concentration or even boil the fabric in the tea.
Just remember that, like all natural dyes, very bright sunlight can fade the color over time, so dry your tea-dyed items in the shade. Tea dyeing is easy, inexpensive, and connects you to a centuries-old practice of using what’s on hand to color cloth.
6. Coffee (Rich Brown)
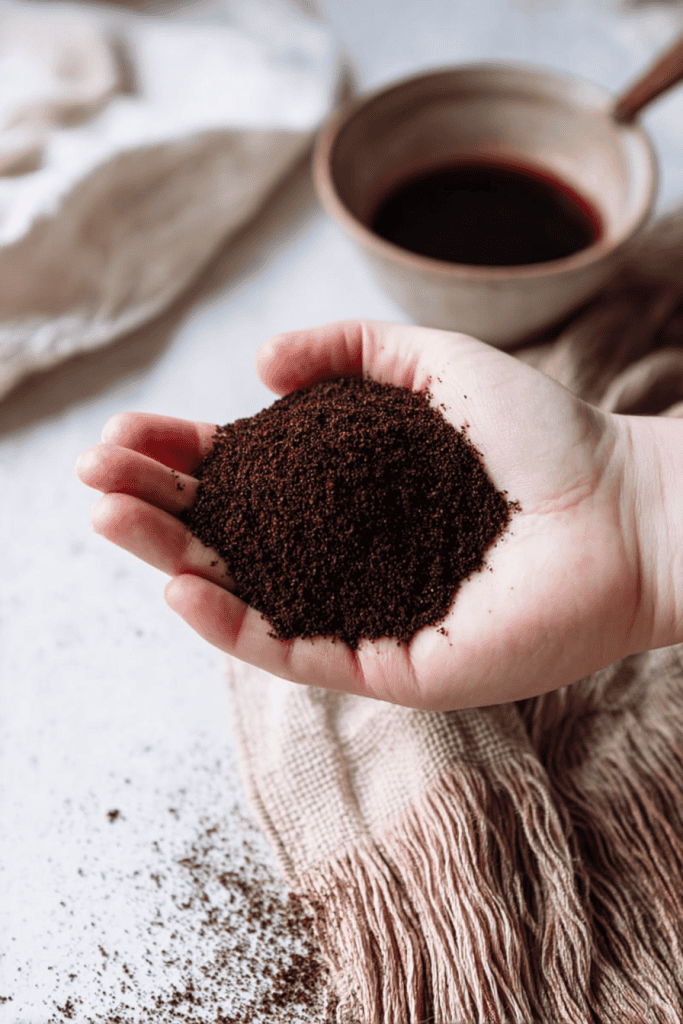
Like tea, coffee can also be used as a natural dye to produce earthy browns. This is another kitchen staple that homesteaders love for upcycling fabrics. Leftover brewed coffee or spent coffee grounds create a light to medium brown dye bath, depending on strength.
The process is similar to tea dyeing: make a very strong batch of coffee (or reboil used grounds with water to extract more color), and then soak your fabric in this dark brew. Cotton and linen will take on a warm beige or light brown tint after a few hours of soaking.
For a richer brown, simmer the fabric in the coffee or let it sit overnight. Coffee-dye works great for achieving a cream, tan, or “old parchment” look on white fabrics. Crafters often use it to give clothes or paper an aged appearance. Keep in mind, coffee (like tea) is essentially staining the fibers.
It has some natural tannins as well, though typically a mordant can help if you want a somewhat stronger result.
Still, many find it isn’t necessary for a mild sepia tone. One advantage of coffee and tea dyes is that they’re food-safe and non-toxic, so you don’t have to worry about handling or disposal – it’s just coffee after all!
The color might not be extremely intense or long-lasting compared to professional dyes, but it’s easy to re-dye or deepen the shade with another round.
Overall, coffee is a practical natural dye for homesteaders who want to recycle waste and enjoy the comforting scent of coffee while they work. (And don’t worry – once rinsed and dried, your fabric won’t retain a strong coffee smell!)
For homesteaders experimenting with safety and testing fibers, my burn test for natural fabrics article can help you identify fabrics and avoid surprises.
7. Madder Root (Red/Rust Orange)
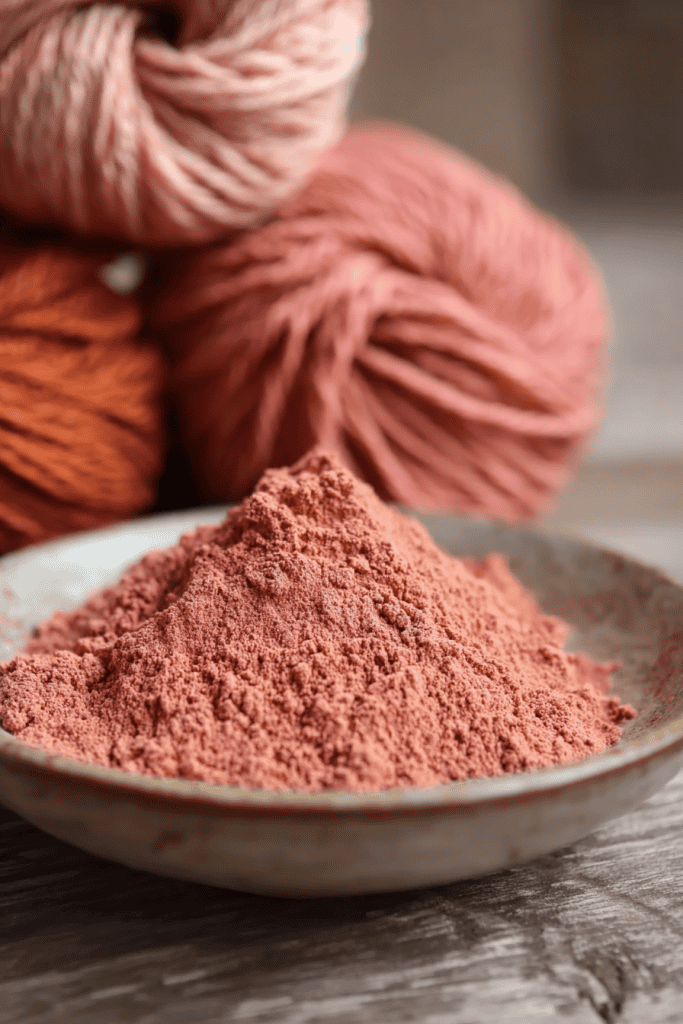
For true reds and oranges, madder root is a classic dye that has truly stood the test of time. Madder (from the Rubia tinctorum plant) has been cultivated as a dye plant since ancient times – used by the Egyptians, Greeks, Romans and throughout Asia for its reliable red hues.
It was historically among the most important red dyes because madder can produce saturated shades of red, terracotta, and rusty orange that are quite lightfast (resistant to fading). The dye comes from the plant’s roots, which contain a pigment called alizarin.
To dye with madder, you’ll typically use chopped dried madder root (available from natural dye suppliers, or grown in your own dye garden if you’re adventurous). The roots are simmered in water – often after soaking overnight – to extract their red-orange color.
Wool, silk, or cotton fibers pre-mordanted with alum will grab the strongest reds from madder. You can achieve anything from a soft salmon pink (with a quick dip or lower concentration) to a deep brick red with longer cooking and more madder.
Traditionally, madder was used to dye oriental rugs, military uniforms, and quilts a distinctive “Turkey red.” It’s truly a time-honored dye in every sense.
For the homesteader, madder root might be one of the only dyes on this list you’d have to purchase (unless you grow it), but it’s worth it if you’re after those rich red tones.
It’s still natural and non-toxic, and for authenticity, nothing beats knowing your red came from the same plant that colored textiles in pharaohs’ tombs and colonial quilts.
If you do use madder, be patient – the dye bath often benefits from gentle heat over a longer time to let the color molecules fully attach. The results are wonderfully historic and vibrant, connecting your modern crafting to ancient dye traditions.
8. Indigo (Deep Blue)
Perhaps the most famous natural dye of all, indigo gives fabric a deep blue that’s been prized across cultures for millennia. Indigo dye comes from the leaves of certain plants (like Indigofera tinctoria and Indigofera suffruticosa, or even woad in Europe) which contain the indigo pigment.
Historically, India, Japan, Africa, and the Americas all had rich indigo dyeing traditions, from Japanese aizome cloth to the classic blue of denim jeans. Using indigo is a bit different from the other dyes here: indigo requires a special vat process to become soluble and bind to fabric.
Traditional indigo dyeing involves fermenting the leaves or using reducing agents to create a dye vat where the liquid looks yellow-green. Fabric is dipped in the vat, then exposed to air; the magic happens as the indigo oxidizes and the textile turns from green to blue before your eyes.
Home dyers today can buy natural indigo powder and use a pre-reduced indigo kit or a simple fructose (or even urine, traditionally!) fermentation vat. While the chemistry is more involved, beginners can still try indigo with a kit or shibori tie-dye kit that uses indigo – it’s a fantastic introduction to natural blue dye.
Indigo yields shades from a light dusty blue to the deepest navy, depending on how many dips you do. The color is quite washfast and lightfast, which is why indigo-dyed fabrics can last generations (think of antique indigo textiles or your favorite pair of jeans).
This dye has been called “blue gold” in history, as it was once a highly valuable commodity. For a homesteader, working with indigo connects you to a global tradition of dye artisans.
Even if you don’t grow indigo plants, using this natural dye (in purchased form) can still be a totally natural process. Just be aware it’s a bit advanced compared to boiling onion skins – indigo dyeing is usually done in a separate session with its vat, but the breathtaking blue is well worth the effort.
Natural Dyeing Tips for Beginners
- Use Natural Fibers: Ensure you’re dyeing cotton, linen, wool, silk or other natural fibers. Natural dyes only bond well with natural fibers – no polyester or nylon if you want good results. Plant dyes simply won’t take on synthetics.
- Prep Your Fabric: Start with clean, pre-washed (scoured) fabric. Washing removes oils or finishes that could block dye absorption. Even new fabric should be washed; for extra prepping, simmer the fabric in water with a little soda ash or detergent (this deep cleaning is called scouring). This helps the color take more evenly.
- Consider Mordants or Fixatives: A mordant is a substance that helps the dye bind to the fiber, making colors more intense and long-lasting. Common mordants for home use are alum (aluminum sulfate), which is fairly safe and works for most dyes, or iron (which can “sadden” colors to deeper tones). Some people also use vinegar or salt as simple fixatives – for example, vinegar for berry dyes or salt for plant dyes – although these are less effective than true mordants, they can still help. Not all dyes require mordant (tea and oak gall have natural tannins, for instance). But if you want the best colorfastness, mordanting your fabric before dyeing (or using a tannin-rich dye) is recommended.
- Time and Heat are Your Friends: Natural dyeing is typically a slow art. Simmer dyes gently (not a hard boil) and give the fiber time to soak. Many dye baths yield a deeper color if you turn off the heat and let the fabric sit in the dye for several hours or overnight. Patience often means richer hues. Keep an eye on the temperature for delicate fibers (wool can felt if agitated in hot water).
- Dye in Batches and Test: If it’s your first time, try dyeing a small fabric scrap or yarn sample to preview the color. Natural dyes can be unpredictable in shade. Also, remember that wet fabric looks darker – the color will dry lighter. You can always repeat a dye (or do multiple dips, as with indigo) to build up color.
- Use Dedicated Equipment: It’s best to have a separate pot or utensils for dyeing, especially if you’re using items from nature that might not be food-safe (like a copper mordant or just to avoid onion smell in your soup pot). A stainless steel or enamel pot is ideal, as it won’t react with the dyes. (Iron or aluminum pots can actually shift your dye colors – which can be a technique in itself, but that’s advanced!) Also, wear gloves to avoid staining your hands, particularly with strong dyes like turmeric or indigo.
- Rinse and Care: After dyeing, rinse your fabric in cool water until it runs mostly clear. Wash naturally dyed items separately the first few times, with a gentle detergent. To preserve color, wash in cold water and avoid harsh sunlight when drying (since UV rays can fade natural dyes faster). With proper care, your naturally dyed creations will stay beautiful longer.
By following these tips, you’ll set yourself up for success and more vibrant results in your natural dye experiments!
If you’re curious about experimenting with other fabric coloring methods, check out our guide on how to use RIT dye on natural fabrics for a beginner-friendly alternative.
Ready to Bring Nature’s Color into Your Life?
The eight natural dyes we’ve explored are just the start. Now it’s your turn to gather some kitchen scraps or garden plants and give it a try.
Start with something simple (perhaps that onion skin dye or a pot of tea) and see the wonder of color unfolding. Natural dyeing rewards patience and curiosity – and you’ll create one-of-a-kind fabrics imbued with a story and heritage.
Give it a go and let your homestead become a more colorful place! If you have experience with any of these dyes, or if you’re excited to try, drop a comment below.
I’d love to hear about your natural dye adventures, any questions you have, or tips you’ve learned. Happy dyeing, and welcome to the beautiful world of natural colors – don’t forget to share what you create! Comment below to join the conversation and let us know how it goes!
FAQs
Do I need to mordant the fabric before using natural dyes?
Using a mordant (like alum, iron, or copper) helps colors stick to fibers and last longer. Cotton and linen usually need a mordant for vibrant results, while protein fibers (wool, silk) often take dyes better without one. Some tannin-rich plants, like black tea or walnut hulls, can bond without mordants. Mordanting is optional for experimenting, but it ensures more intense, long-lasting color.
Can I dye synthetic fabrics (like polyester) with natural dyes?
Natural dyes generally do not work on synthetic fibers (polyester, acrylic, nylon). You might get a faint stain, but it won’t last. Stick to 100% natural fibers like cotton, linen, wool, silk, or hemp for reliable results. Blends may dye unevenly, with natural fibers taking color and synthetics staying pale.
How can I make naturally dyed colors last longer?
- Use a mordant to help dyes bind.
- Wash sparingly in cold water with mild soap.
- Avoid direct sunlight when drying.
- Some dyes benefit from a post-dye vinegar or tannin rinse.
- Over time, colors may fade, but you can always re-dye the fabric to refresh the hue.
Can I mix or layer different natural dyes to create new colors?
Yes! Overdyeing (layering colors) lets you create new shades. For example:
- Yellow onion skins + indigo → green
- Red cabbage + baking soda → blue
- Turmeric + indigo tie-dye → green/blue patterns
Stronger dyes like indigo may dominate weaker ones, so test small pieces first. Layering is how historical dyers achieved complex colors.
Do I need special equipment to start natural dyeing at home?
No fancy setup is needed. A few basics make it easier:
- Separate old or enamel/stainless steel pot for dyeing
- Wooden spoons or tongs for stirring
- Strainer or cheesecloth for solids
- Gloves and apron (turmeric stains!)
Work in a ventilated area or outside if simmering strong-smelling ingredients. That’s all you need to start experimenting.
