
If you’ve ever wished you could make clothes your kids actually love to wear – soft, simple, and made to last – you’re in the right place!
Sewing kids’ clothes gives you the freedom to make pieces that feel good, fit well, and reflect your family’s simple style.
You can begin right where you are. No special setup, no big investment – just curiosity and a steady mindset.
Every small project helps your hands grow more confident and your creativity more natural.
Soon, sewing becomes part of your rhythm, like cooking or tending a garden – something that connects skill with care.
In this article, you’ll learn how to start sewing clothes for kids step by step: how to choose your first simple project, gather the right tools, pick comfortable fabrics, and stitch your first handmade piece.
Choose a Simple First Project

The best way to start sewing kids’ clothes is with one small, achievable project.
A simple piece gives you a clear path to follow, builds confidence, and lets you see quick results.
Start with projects that have straight seams and easy shapes. A few great first choices include:
- Elastic-waist pants or shorts – perfect for everyday wear and quick to sew.
- A gathered skirt – simple construction, yet full of charm and movement.
- A basic T-shirt or pullover top – a great introduction to sewing with knit fabric.
- A pajama set – forgiving fit and plenty of practice for hems and elastic.
Choose a pattern that looks clear and friendly, with step-by-step photos or diagrams.
Many beginner patterns are available as printable PDFs, ready to cut and tape at home.
If you are new to working with digital files, learning how to use PDF sewing patterns can make the process much less intimidating and help everything line up correctly before you start cutting fabric.
(You can also find plenty of free sewing patterns online if you want to start without spending anything).
Pick something your child will enjoy wearing – a soft pair of play pants, a twirly skirt, or a cozy pajama top.
When they love the fabric and feel of what you’re making, the process feels even more rewarding.
Gather the Sewing Supplies You’ll Need
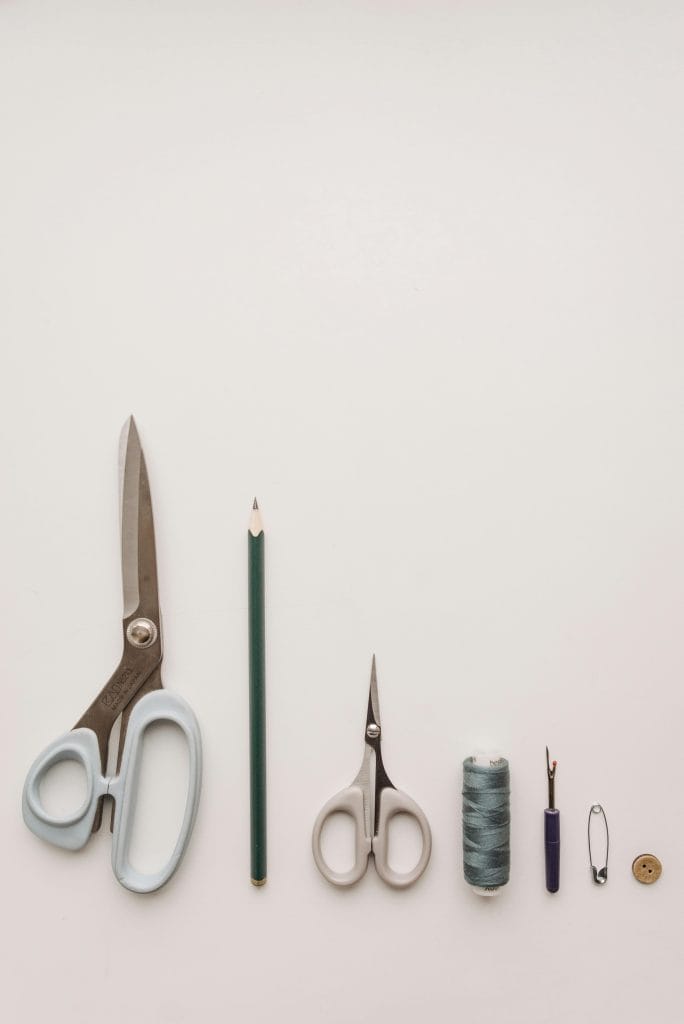
Before you start your first project, gather a few reliable tools.
Here’s what to keep on hand:
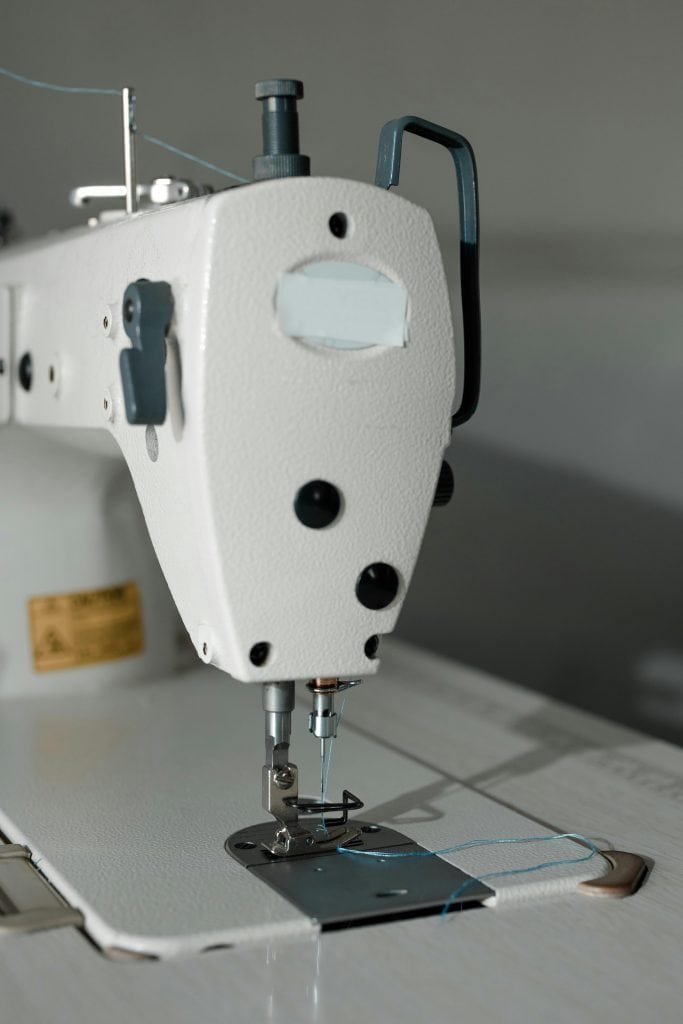
- Sewing machine – A basic, well-functioning machine is perfect. Look for one with straight and zigzag stitches. Learn how to thread it, wind a bobbin, and adjust tension.
- Fabric scissors – Use sharp shears made for fabric only. Clean cuts make sewing easier and seams neater.
- Pins or clips – These hold pieces together before you sew. Pins work well for woven fabric, while clips are gentle on knits.
- Measuring tape – Flexible and accurate, perfect for taking body measurements or marking fabric.
- Seam ripper – A small, handy tool for removing stitches with care. It helps you adjust and refine as you learn.
- Iron and ironing board – Pressing fabric before and during sewing keeps seams crisp and professional-looking.
- Thread – Choose all-purpose thread that matches your fabric. Natural fibers pair beautifully with cotton or linen.
- Fabric marking tool – A washable pencil or tailor’s chalk helps you mark seam lines, fold lines, and pattern details clearly.
These are the essential sewing tools that cover most beginner projects without feeling overwhelming.
Keep your tools in one small basket or box so they’re easy to find when inspiration strikes.
As you keep sewing, you might add extras like pinking shears, a rotary cutter, or a small sewing gauge – but start simple.
Pick the Right Fabric for Kids’ Clothes
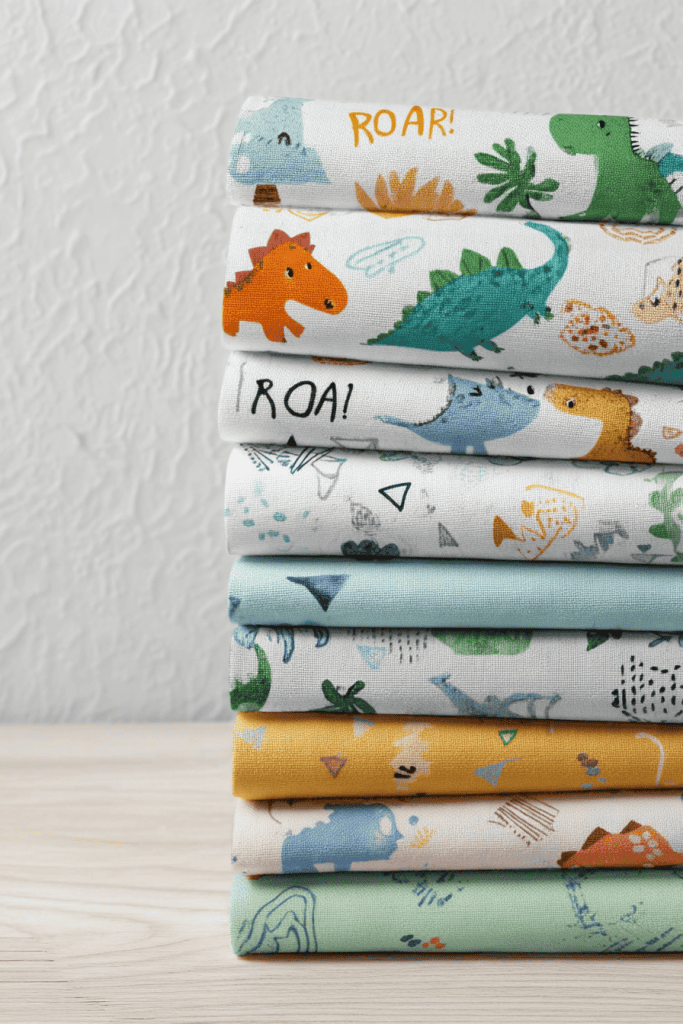
When you’re sewing for kids, the fabric really makes or breaks it.
You want something that feels soft on their skin, moves with them when they play, and can survive a hundred trips through the washer.
Start with natural fibers – they’re comfortable, breathable, and simple to sew.
Here are a few favorites for beginners:
- Cotton woven fabric – Easy to cut, easy to sew, and great for shirts, skirts, or dresses. It holds its shape well and presses beautifully.
- Cotton knit (jersey) – Soft and stretchy, ideal for T-shirts and pajamas. Look for medium-weight knits -they’re forgiving and comfortable to wear.
- Linen – Light, airy, and naturally strong. It softens with every wash, making it lovely for warm-weather outfits.
- Flannel – Cozy and gentle, perfect for cool-weather pajamas or casual pants.
- Double gauze – Lightweight, slightly crinkled cotton that feels cloud-soft and dreamy for summer wear.
When possible, choose organic or OEKO-TEX certified fabrics to keep things gentle and safe for sensitive skin.
Learning how to read fabric labels can help you quickly spot fiber content, finishes, and care instructions before buying.
These fabrics avoid harsh treatments and are kinder to both your child and the planet.
Before cutting, always prewash and press your fabric.
This step removes any residue and ensures your finished garment keeps its shape after the first wash.
If you’d like to start sustainably, try using what you already have.
A soft cotton sheet, an unused pillowcase, or a thrifted linen shirt can become wonderful practice fabric.
Repurposing textiles is an easy way to learn while saving money and reducing waste.
Choose colors and prints that bring joy like tiny florals, stripes, or cheerful solids.
If you want extra reassurance about fiber content, learning how to do burn test for natural fabrics is a simple way to identify synthetic blends at home before you cut or sew.
Learn Basic Sewing Techniques
Once you’ve chosen your first project and gathered your tools, it’s time to get comfortable with a few simple techniques.
These are the building blocks that make every garment come together neatly and smoothly – and with just a bit of practice, they’ll start to feel second nature.
Start with Straight Seams
Practice sewing straight lines on a scrap of fabric before beginning your project.
Focus on guiding the fabric gently rather than pushing or pulling it.
A steady pace keeps the stitches even and clean.
Once you can sew a straight seam confidently, you can sew just about anything.
Learn to Read a Pattern
Patterns might look technical at first, but they’re really just maps for your fabric.
Before you cut, take a few minutes to familiarize yourself with it.
Knowing how to read a sewing pattern makes it easier to follow instructions, match pieces, and avoid mistakes.
Pay attention to symbols for grainlines, fold lines, and notches – these small details help everything fit together perfectly later.
Press as You Sew
If there’s one “secret” to making your sewing look polished, it’s pressing.
After you sew a seam, press it flat before moving on to the next step. It might feel like extra work, but it makes a huge difference.
The fabric lays nicer, and your finished piece looks crisp and professional.
Finish Your Seams
Finished seams prevent fraying and make clothes last longer.
You can use a zigzag stitch, pinking shears, or a simple French seam.
Start with whichever method feels easiest – each one adds strength and neatness to your work.
Try an Elastic Waistband
Elastic is forgiving and perfect for kids’ clothes. It allows easy movement and flexible sizing.
Practice making a casing – a folded channel that holds the elastic in place.
Once you’ve done it once, you’ll use this technique again and again for pants, skirts, and pajamas.
Add Simple Hems
A clean hem gives your project a finished look. Fold the fabric edge twice toward the wrong side, press it, and stitch along the fold.
The goal is an even edge that feels smooth and durable.
Each of these skills builds naturally on the next.
By the time you finish your first little project, you’ll already have practiced most of these – and that’s really how you learn.
One seam, one step, one happy success at a time.
How To Get a Good Fit for Kids’ Clothes

One of the best parts about sewing for kids is that you can make clothes that actually fit.
Store sizes can be all over the place, but when you sew your own, you get to shape the fit to your child’s body and how they move through the day.
The goal is: clothes that feel soft, move easily, and last through plenty of playtime (and maybe even a growth spurt or two).
Take Simple, Accurate Measurements
Before you cut fabric, take a few key measurements. Keep it easy and quick:
- Chest – Around the fullest part of the chest.
- Waist – Where the body naturally bends.
- Hip – Around the widest part.
- Height and inseam – For pants, shorts, or dresses.
If you’re new to this, learning how to take body measurements correctly makes it much easier to match your notes to the pattern’s size chart.
Then, compare your notes to the pattern’s size chart – not the child’s age.
Every brand and pattern runs a little different, so this step saves a lot of frustration later.
Use Patterns With Adjustable Ease
Kids grow fast (sometimes overnight, it seems), so it helps to choose patterns that can flex with them.
Look for elastic waists, gathered necklines, or button straps.
Those little details give clothes a longer life and make them easier to move in, too.
Add Room To Grow
When you’re cutting out your pieces, you can add a little extra seam allowance or a deeper hem.
It gives you some wiggle room to let the garment out later.
Rolled cuffs, adjustable straps, or even elastic casings are easy ways to stretch a piece’s lifespan – literally.
Prioritize Comfort
At the end of the day, kids just want to feel comfy. Stick with soft fabrics, smooth seams, and non-restrictive shapes.
Skip anything that feels stiff or scratchy.
If they love how it feels, they’ll reach for it again and again.
Try On as You Go
If your little one is nearby, have them try it on mid-project.
A quick fit check helps you tweak the length or waistband before things are fully sewn.
Plus, kids love being part of the process – it makes them proud of what you’re making together.
Step-by-Step: Sewing Your First Kids’ Garment

Alright, you’ve got your pattern picked out, your fabric washed, and your tools ready – now comes the fun part: actually sewing!
This step-by-step walkthrough will guide you from start to finish, so you can move forward with confidence (and maybe a cup of coffee by your side).
Step 1: Prepare Your Fabric and Pattern
Start by giving your fabric a good wash and press. This softens it up, gets rid of any factory finish, and keeps it from shrinking later.
Once it’s dry, lay it flat on a big surface – no wrinkles if you can help it.
Cut out your paper pattern pieces carefully, using the size that matches your child’s measurements.
Smooth the pattern onto the fabric and pin it in place, keeping those grainline arrows lined up with the edge of the fabric.
That’s what makes your garment hang nicely once it’s sewn.
Take your time cutting. Clean, steady cuts make a world of difference.
I like to label my pieces (front, back, sleeve, etc.) with little sticky notes or chalk marks – it saves a lot of confusion later.
Step 2: Pin and Sew the Main Seams
Place your fabric pieces right sides together and pin along the edges where you’ll be sewing.
If you want to make sure your seams come out perfectly every time, check out our full guide on how to pin your fabric correctly – it’s packed with tips for beginners and pros alike.
Stick the pins in perpendicular to the edge, about an inch apart – it makes them easier to pull out as you go.
Set your machine to a straight stitch, and sew slowly, keeping your seam allowance consistent (⅜” or ½”, depending on the pattern).
Don’t rush; just find your rhythm and let the machine do the work.
When you’re done, press your seams open or to one side.
It might seem like a small thing, but pressing as you go makes your project look clean and crisp – even if it’s just a simple pair of elastic pants.
Step 3: Finish the Seams
Finishing your seams is what makes your clothes hold up through all that running, jumping, and laundry.
You can use a zigzag stitch along the raw edges or trim them with pinking shears to stop fraying.
If you want to go a step further, try French seams – you sew the seam twice so the raw edges are tucked neatly inside.
It takes a bit longer but looks lovely and feels soft against the skin.
Step 4: Create the Waistband or Neckline
If your pattern has an elastic waistband, fold the top edge toward the inside to make a little tunnel (called a casing).
Press it down, sew around it, and leave a small opening.
Attach a safety pin to one end of your elastic and thread it through.
Once it comes full circle, overlap the ends and sew them together before closing the gap.
Give it one last press, and voila! You’ve got a stretchy waistband.
For necklines, finish them with bias tape or a facing (your pattern will tell you which).
Both help the neckline hold its shape and feel smooth around the neck.
Step 5: Hem the Edges
Almost done! Fold the bottom edge of your garment twice toward the inside – about half an inch each time.
Press it down, then sew close to the fold. This gives your piece a nice, clean finish and keeps it from fraying.
It’s worth taking your time here. A neat, even hem really makes the whole thing look “put together.”
Step 6: Add Closures or Decorative Details
If your pattern calls for buttons, snaps, or ties, this is when you add them.
Practice on a fabric scrap first if you’re new to the technique – it’ll save you stress later.
You can also get creative here. Add a pocket on the front, a little lace trim, or even a cute fabric tag inside the waistband.
If you want to make your lace look perfect every time, check out our guide on how to sew lace on fabric – it’s full of tips for beginners and clever tricks for neat, professional-looking results.
Those tiny touches make handmade clothes feel extra special.
Step 7: Give It a Final Press and Try It On
Give your finished piece a gentle press to smooth everything out and help it take shape. Then comes the best part – have your little one try it on!
Watching them twirl around or run off wearing something you made with your own hands? That’s the real reward.
And remember, every step you just did taught you something new – how to handle fabric, follow a pattern, or keep your stitching steady.
That’s how you grow as a maker: one project, one seam, one happy kid at a time.
Add Simple Personal Touches
Once your garment is sewn and pressed, you can make it uniquely yours with a few thoughtful details.
These finishing touches bring warmth and personality to your handmade clothes – small additions that turn a basic project into something special for your child.
Add a Pocket (or Two)
Pockets are one of my favorite things to add. They’re cute, practical, and kids love them.
You can pop one on the front of a dress, the side of some shorts, or wherever it feels right.
Just cut a pocket shape from your leftover fabric, finish the edges, and stitch it on.
Before long, it’ll be filled with pebbles, acorns, or some mystery “treasure” from the backyard.
Use Contrast Fabric for Character
Got some leftover scraps in a fun print? Use them!
A little bit of contrast (like striped cuffs on a plain shirt or a floral waistband on simple linen shorts) adds so much personality.
It’s a small touch that makes handmade clothes feel cheerful, unique, and perfectly yours.
Add a Fabric Tag or Label
This one’s simple but so sweet.
Cut a little piece of cotton twill tape, write your child’s name or the size with a fabric pen, and stitch it into a seam.
You could also sew on a decorative label inside.
It’s a tiny detail, but it makes your garment feel finished – and it’s a big help when you’re sorting laundry later!
Topstitch for a Professional Finish
Topstitching sounds fancy, but it’s just a neat row of stitches along a seam or edge.
It keeps things strong and gives that clean, “store-bought” look. Try it around pockets, hems, or necklines.
It’s such a simple thing, but it really pulls the whole piece together.
Embellish with Care
If you’re feeling creative, add a small embroidered detail or a fabric appliqué.
A stitched star on a pocket or a tiny heart near the hem says “made with love” without saying a word.
Just keep it simple and sturdy enough to handle lots of wear and washing.
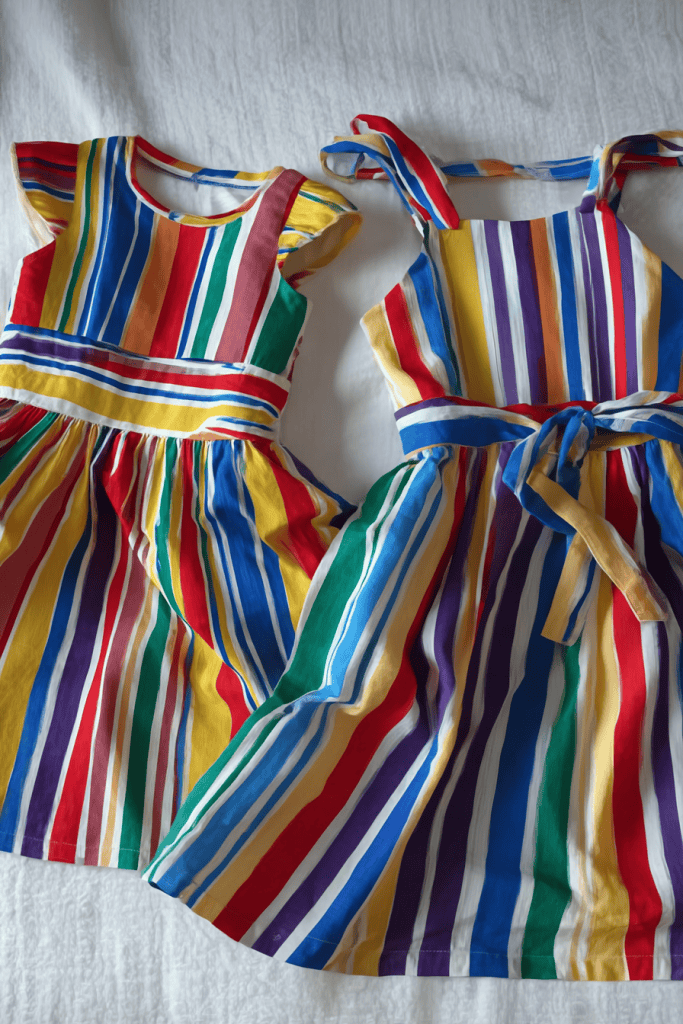
At the end of the day, handmade clothes just need to reflect you. Every color, stitch, and little choice tells a story about your home and the care that went into it. These personal touches turn everyday clothes into keepsakes your child will wear, play in, and maybe one day remember fondly.
How To Care for Handmade Kids Clothes
Taking care of handmade clothes is simple.
A few small habits can help each piece last through play, washing, and even a second round of wear.
Thoughtful care keeps the fabric soft, the colors fresh, and your sewing work strong.
Wash Gently and Thoughtfully
Use a gentle detergent and stick with cool or warm water – nothing too hot.
Natural fabrics like cotton, linen, and flannel really appreciate a softer wash.
If your machine has a delicate or low-spin setting, use it! It’s easier on seams and elastic.
Before washing, go ahead and close up buttons or snaps and turn clothes inside out.
It helps protect your stitches and keeps the outside of the fabric looking smooth and fresh.
Line Dry When Possible
There’s just something about clothes dried in fresh air, isn’t there? Sunlight and a bit of breeze work wonders.
Hang your handmade pieces on the line or lay them flat on a drying rack.
It saves energy, helps the fabric keep its shape, and makes everything smell like sunshine.
If you do use a dryer, go for a low-heat setting to be gentle on fibers.
Press as Needed
A quick press can make a big difference after washing.
Use steam for cotton or linen, and low heat for knits.
It smooths wrinkles, yes – but it also helps the fibers relax back into shape so your clothes keep looking new.
Repair Small Wears Right Away
Kids are tough on clothes, but little fixes go a long way.
Keep a small mending kit handy for loose buttons, tiny tears, or frayed hems.
If you catch it early, it’s an easy fix – and you’ll get plenty more wear out of your handmade pieces.
Store with Care
When it’s time to tuck things away, fold clothes neatly and keep them in a cool, dry place.
Avoid plastic bins for long-term storage; fabric likes to breathe.
Cotton bags or drawers work best.
You can even toss in a little lavender sachet or cedar block to keep things smelling fresh and naturally pest-free.
Pass Them On
Maybe the sweetest part of making clothes by hand is watching them live a second life.
When your child outgrows something, pass it along to a younger sibling, cousin, or a friend’s little one.
Handmade clothes carry love in every stitch, and sharing them keeps that love going.
Start Sewing Today!
Start with one pattern, one fabric, and one free afternoon. Enjoy the process, stay patient with yourself, and celebrate what you make.
Each piece carries your care, your effort, and your creativity – something store-bought clothes can never match.
If you’re ready to begin, gather your supplies and choose a project that excites you.
What will you sew first? Share in the comments below – I’d love to hear what project you’re starting and how it’s going!
FAQs
1. What’s the easiest first sewing project for kids’ clothes?
Elastic-waist pants or a gathered skirt are great starting points. They use straight seams, require minimal pattern pieces, and help you learn essential sewing skills without feeling complicated.
2. How much fabric do I need for a child’s garment?
For most beginner projects, one yard (around one meter) of fabric is plenty for a toddler-sized piece. Larger sizes or longer garments may need 1.5–2 yards. Always check your pattern for exact measurements before buying fabric.
3. Can I sew kids’ clothes without a serger?
Yes, absolutely. A basic sewing machine with a straight and zigzag stitch is all you need. You can finish seams neatly using a zigzag stitch or pinking shears to prevent fraying.
4. What’s the best fabric for everyday kids’ wear?
Soft cotton, linen, flannel, and cotton jersey are all excellent choices. They’re breathable, durable, and comfortable for active play. Prewash your fabric before cutting to help it keep its shape.
5. How do I make sewing time fit into a busy routine?
Sew in small sessions – 15 to 30 minutes at a time. Cut one day, sew seams the next, and finish later in the week. Steady progress builds confidence, and even short bursts of creative time feel rewarding.
