
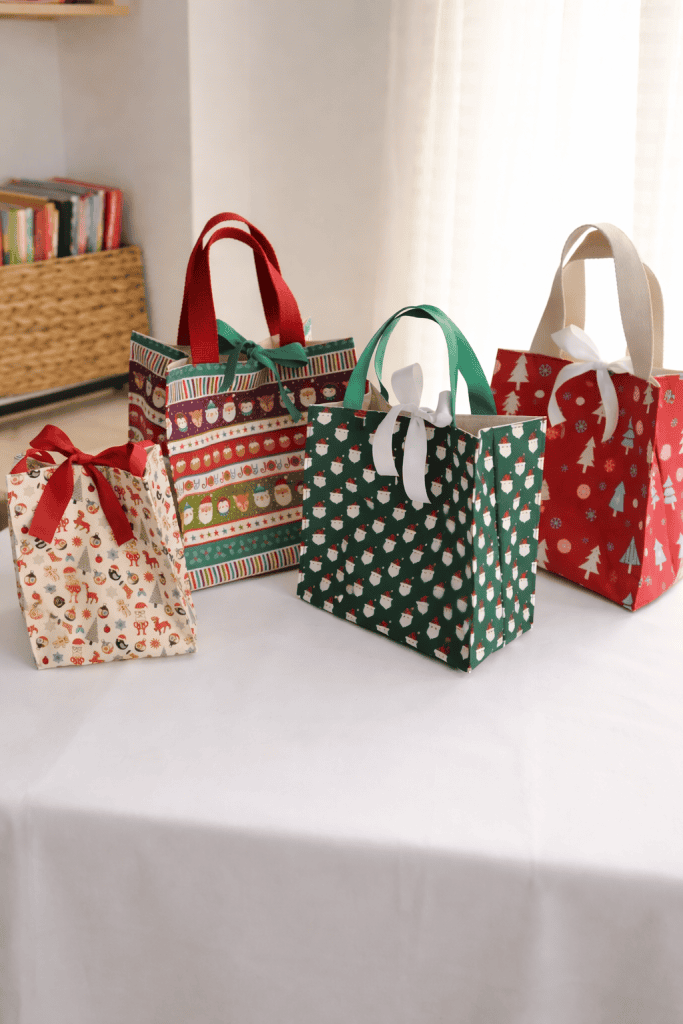
Reusable fabric gift bags are a beautiful, eco-friendly alternative to wrapping paper – especially during Christmas.
They’re festive, practical, and perfect for beginners who want a satisfying sewing project without complicated techniques.
In this tutorial, you’ll learn how to sew a Christmas fabric gift bag with handles and a decorative bow.
This project is beginner-friendly, requires basic sewing skills, and can be completed in under an hour once you get the hang of it.
By the end of this guide, you’ll have a sturdy, lined fabric gift bag – perfect for gifts, treats, or holiday décor!
Why Make a Fabric Gift Bag for Christmas?
Before we start sewing, let’s talk about why fabric gift bags are worth making.
- Reusable & eco-friendly – no waste after Christmas
- Professional-looking gift presentation
- Beginner-friendly sewing project
- Customizable for any holiday or occasion
- Great use of fabric scraps
Once you make one, you’ll probably want to make several more – for gifts, storage, or even selling at craft fairs.
If you’re looking for more inspiration, check out our easy sewing gift ideas for Christmas to keep the holiday creativity flowing.
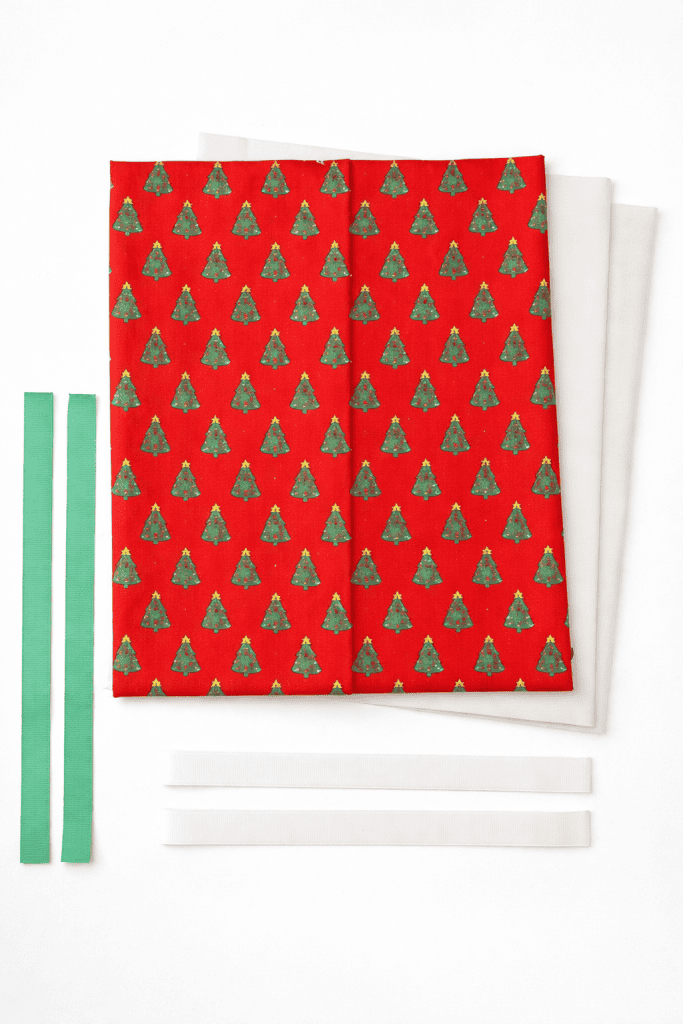
Materials Needed for Sewing a Christmas Fabric Gift Bag
- Outer fabric (cotton), 2 pieces, 40 × 33 cm (15 ¾” × 13″)
- Lining fabric (cotton muslin or lightweight cotton), 2 pieces, 40 × 33 cm (15 ¾” × 13″)
- Fusible interfacing, 2 pieces, 40 × 33 cm (15 ¾” × 13″)
- Handle ribbon (cotton), 2.5 cm (1″) wide, 28 cm (11″) long
- Decorative bow ribbon (cotton), 2.5 cm (1″) wide, 30 cm (11 ⅞”) long
Must-Have Tools for Making a Christmas Fabric Gift Bag
- Sewing machine
- Fabric scissors or rotary cutter
- Iron and ironing board
- Ruler or measuring tape
- Fabric marker or chalk
- Pins or clips
Sew Your Own Christmas Fabric Gift Bag in Just 12 Easy Steps
Now that you have everything ready, follow these simple steps to sew your Christmas fabric gift bag.
STEP 1: Cut All Materials
Cut the following:
- Outer fabric: 2 pieces, 40 × 33 cm
- Lining fabric: 2 pieces, 40 × 33 cm
- Fusible interfacing: 2 pieces, 40 × 33 cm
- Handle ribbon: 2.5 cm wide × 28 cm long
- Decorative ribbon: 2.5 cm wide × 30 cm long
Keep pieces stacked neatly to avoid mixing layers.
STEP 2: Fuse the Interfacing
Place the fusible interfacing on the wrong side of each outer fabric piece (adhesive side down).
Press with a hot iron using a lift-and-press motion, holding for a few seconds at a time.
Allow the pieces to cool completely before handling.
STEP 3: Mark the Boxed Bottom Corners
With the outer fabric pieces lying flat on your work surface, begin marking the bottom corner cutouts that will form the bag’s boxed base.
On the bottom left corner, measure 7 cm in from the side edge and 7 cm up from the bottom edge, then draw a square connecting those points.
Repeat this process on the bottom right corner. Use a ruler and fabric marker or chalk to ensure the lines are straight and easy to see.
These markings are very important because they determine the depth of the bag, so double-check your measurements before moving on.
STEP 4: Cut the Corner Squares
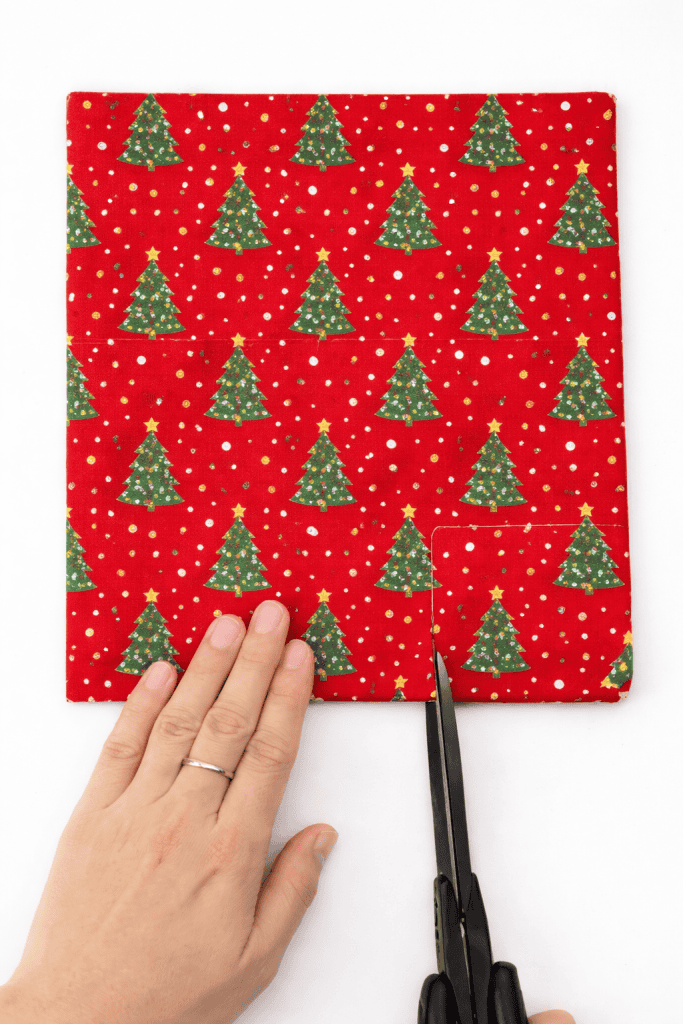
Carefully cut out the marked 7 × 7 cm squares from both bottom corners of the outer fabric pieces.
Use sharp scissors to make clean cuts and follow the lines closely.
Repeat the same cutting process on the interfacing so that it matches the fabric exactly.
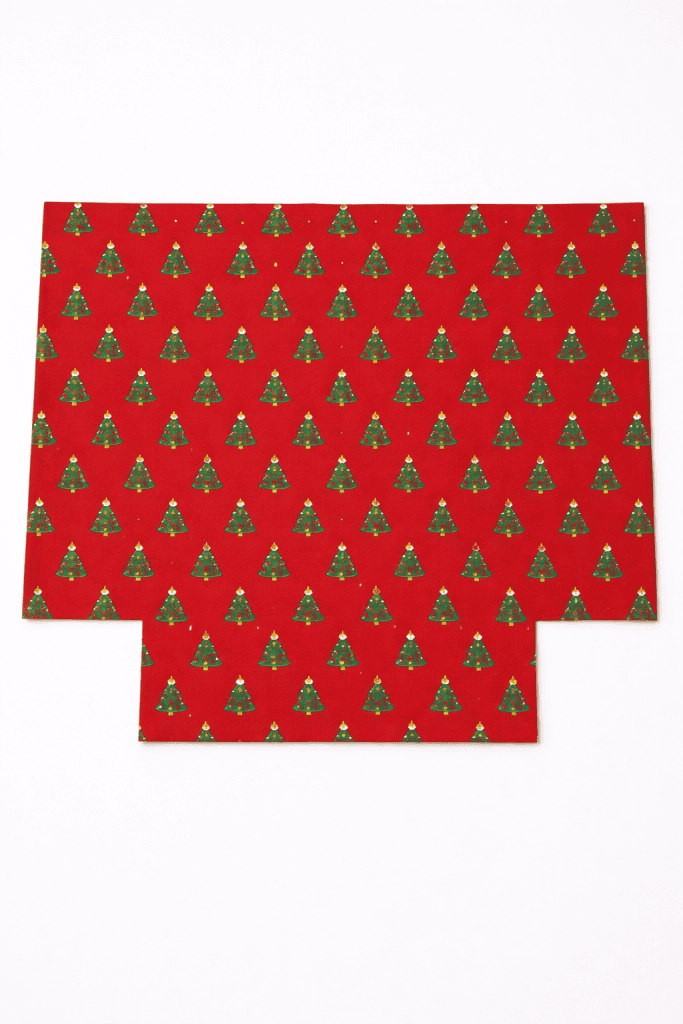
Once these squares are removed, the fabric will appear T-shaped, which is normal and necessary for creating the boxed bottom later.
STEP 5: Attach Handles and Decorative Ribbon (Outer Fabric Only)

Lay one outer fabric piece flat with the right side facing up.
Take the handle ribbon and place it along the top edge of the fabric, positioning the ends evenly so the handle forms a smooth U shape.
Make sure the ribbon is not twisted and that both ends are aligned straight with the top edge.
Next, take the decorative ribbon and place it vertically down the center of the fabric front.
This ribbon will later be tied into a bow, so ensure it is straight and centered for a balanced appearance.
(If you want to add a delicate touch, you can also learn how to sew lace on fabric to create extra decorative detail.)
Once both ribbons are positioned correctly, stitch across the top edge of the fabric to secure all ribbon ends firmly in place.
STEP 6: Place Outer Fabric (Wrong Side) on Lining and Sew Edges

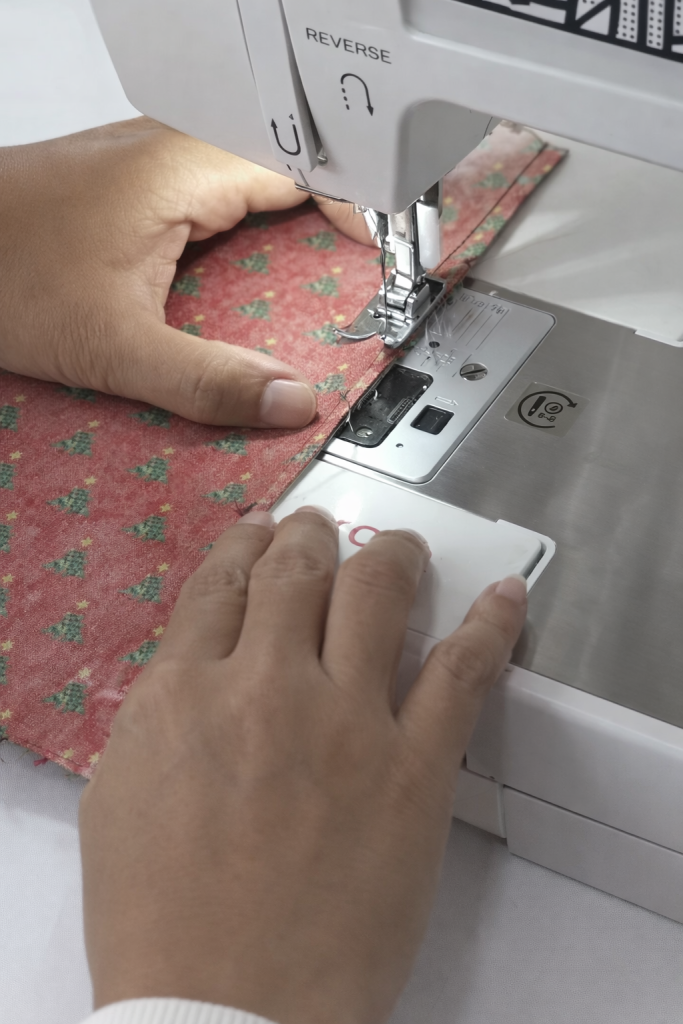
Place the lining fabric down first, then lay the outer fabric on top with its wrong side facing up, matching all edges.
Using a 1 cm (3/8″) seam allowance, stitch straight down the pinned side edge.
Begin sewing at the top edge and sew downward toward the bottom, stopping before the cutout section.
Backstitch at both the beginning and end of the seam to secure it firmly. This seam joins the outer fabric and lining together along one side while leaving the bottom and cutout areas open for the next construction steps.
At the end of this step, the outer fabric and lining are attached along one side seam only, with the remaining edges still open and ready for further sewing.
STEP 7: Stack Wrong Sides Together and Stitch Side Edges

With both pieces stacked wrong sides together, align the edges carefully.
Make sure all edges are aligned evenly, including the top edge and the T-shaped cutouts at the bottom.
Take a moment to smooth the layers so there are no wrinkles or shifting between the fabrics.
Once aligned, secure the layers together with pins or clips along both side edges.
Using a 1 cm (3/8″) seam allowance, stitch straight down one side edge, starting from the top and sewing down toward the bottom, stopping before the cutout opening.
Backstitch at the beginning and end of the seam to secure it.
Repeat the same stitching on the opposite side edge, again using a 1 cm seam allowance and stopping before the cutout area.
Do not stitch across the bottom edge or across the cutout sections at this stage.
After completing this step, both side edges of the outer fabric and lining are joined together, while the bottom and cutout openings remain unsewn and ready for forming the boxed base in the next steps.
STEP 8: Sew the Boxed Bottom Corners

Open one bottom corner at a time and pinch it flat so the side seam and bottom seam line up, forming a straight line across the corner.
The fabric will naturally create a boxed shape. Clip in place to keep the layers aligned.
Stitch straight across the corner to secure the boxed bottom.
Repeat on the remaining corners for both the outer fabric and the lining.
STEP 9: Turn Right Side Out and Stitch the Lining Bottom
Turn the lining right side out, pulling the fabric through so the seams are inside and the shape is fully formed.
Smooth the fabric and shape the corners so the bottom edge lies flat.
Align the bottom edges neatly, making sure both layers are even.
Using a 1 cm (3/8″) seam allowance, stitch straight across the bottom edge.
Once stitched, the lining bottom is closed and the lining is ready to be inserted into the outer bag in the next step.
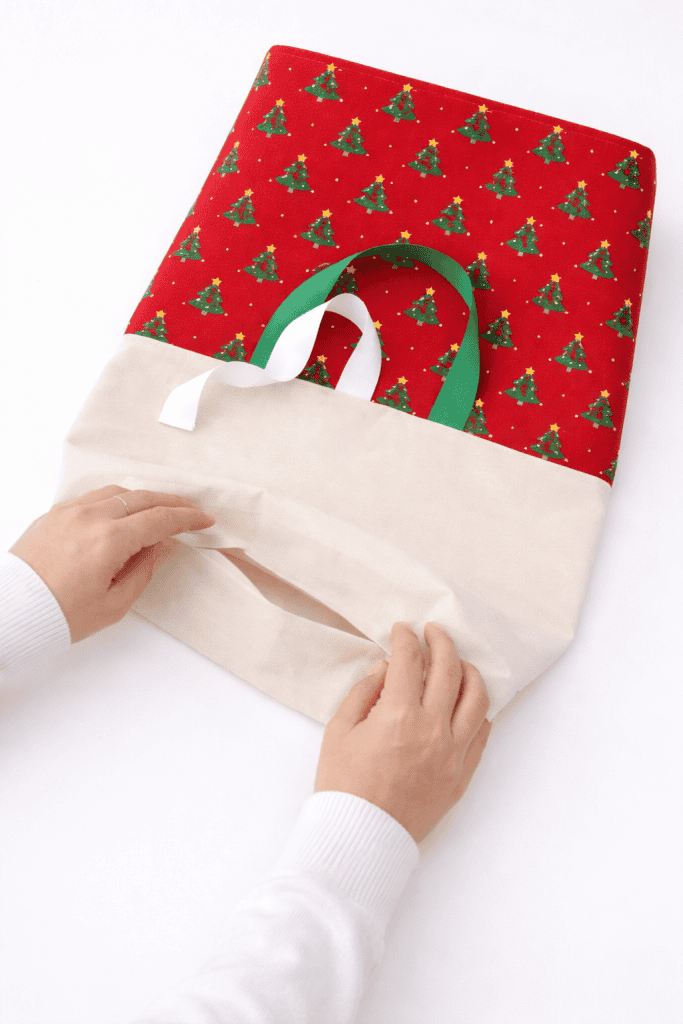
STEP 10: Insert the Lining and Stitch the Top Edge
Place the lining inside the bag, pushing it all the way down so the lining sits neatly inside.
Reach inside and adjust the lining so it spreads evenly against the outer bag.
Align the top raw edges of the outer bag and lining, matching the side seams and corner areas.
Fold and smooth the top edge so both layers sit flat and even all the way around.
Secure the top edge with clips or pins. Stitch once around the entire top opening.
Sew close to the edge, keeping the stitching line even as it passes over the handle and ribbon areas.
This seam joins the lining and outer bag at the opening and prepares the bag for final top-stitching and finishing.
STEP 11: Press the Bag to Set the Shape

With the bag fully assembled and right side out, smooth the fabric so the sides and bottom sit evenly.
Use your hands to adjust the lining inside the bag, making sure it lies flat and does not bunch.
Place the iron on the outside of the bag, pressing along the side panels and edges.
Press carefully around the corners and seams to define the boxed bottom and straighten the sides.
Keep the iron moving and apply light pressure to avoid flattening the shape.
This pressing step sets the structure of the bag and prepares it for the final top stitching and finishing steps.
STEP 12: Top Stitch the Sides and Finish the Bag
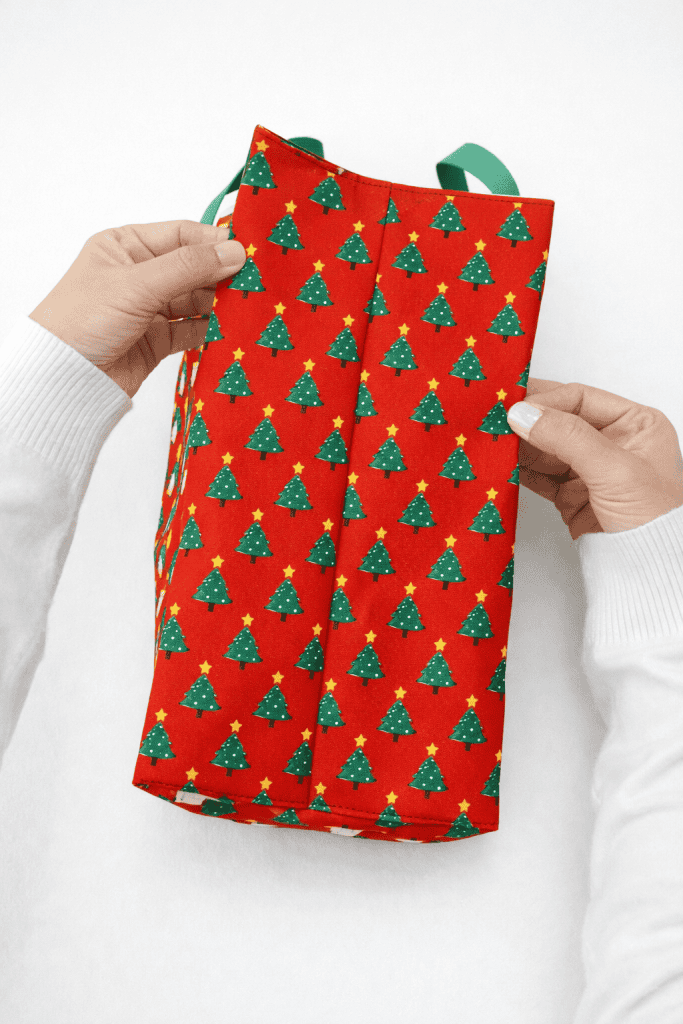


With the bag fully assembled and pressed, stitch straight down both side panels.
Sew close to the side seams, keeping the stitching parallel and even from the top edge down to the bottom of the bag.
This side top-stitching reinforces the structure, sharpens the edges, and helps the bag hold its boxed shape.
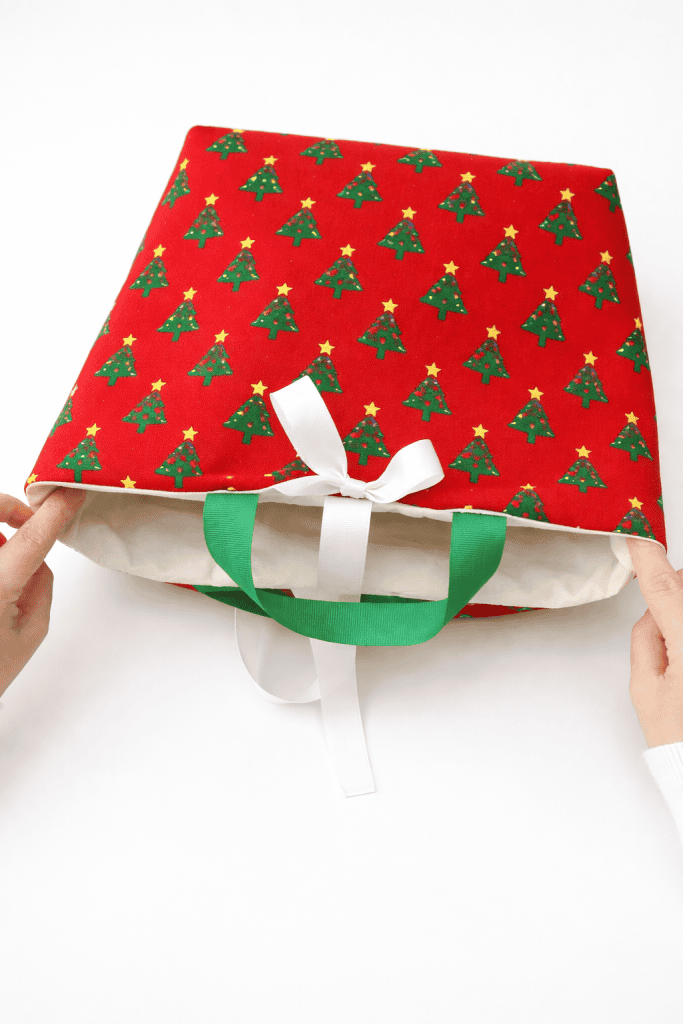
Once stitching is complete, adjust the handles and tie the decorative ribbon into a bow at the front. Smooth the bag one final time.
The fabric gift bag is now finished and ready to use! Projects like this are just the start – check out our list of thoughtful sewing gifts you can make at home for more creative ideas.
Common Mistakes to Avoid (and How to Fix Them)
Even when following step-by-step instructions, small sewing mistakes can happen especially if you’re new to working with fabric and interfacing.
Understanding what can go wrong and how to fix it will help you feel more confident and prevent frustration as you sew your Christmas fabric gift bag.
Uneven Bag Shape or Twisted Seams
An uneven or twisted bag shape is usually caused by inaccurate cutting or misaligned fabric pieces before sewing.
When cutting your fabric, always measure carefully and keep your cuts straight.
Before stitching, take time to align the edges and corner cutouts properly, and use pins or clips to hold everything in place.
If your bag looks slightly uneven after turning it right side out, gently reshape it with your hands and use steam pressing to help the fabric relax and straighten.
Handles That Feel Weak or Shift Out of Place
Handles need to be securely attached because they support the weight of the gift inside the bag.
If the handle feels loose or looks uneven, it may not have been stitched firmly enough at the top edge.
Make sure the ribbon ends are caught securely in the top seam and that you backstitch at the beginning and end of the seam.
For extra strength, you can sew an additional line of stitching just below the top edge to reinforce the handle without affecting the appearance.
Bulky or Stiff Boxed Corners
Bulky boxed corners often occur when seam allowances are not pressed flat before sewing the corner seams.
Pressing your seams after every step helps reduce thickness and makes the fabric easier to handle.
If the corners still feel stiff, you can carefully trim a small amount of excess fabric from the seam allowance, being cautious not to cut into the stitching.
This small adjustment can greatly improve how the base of the bag sits.
Lining Peeking Out at the Top Edge
If the lining shows at the top of the bag, it usually means the lining and outer fabric were not aligned evenly when sewn together.
Matching the side seams and pinning around the entire opening before stitching helps prevent this issue.
Top stitching around the top edge also encourages the lining to stay inside the bag and creates a crisp, professional finish.
Skipping the Final Pressing Step
One of the most common beginner mistakes is skipping the final pressing step.
Pressing the finished bag smooths wrinkles, sharpens edges, and enhances the overall appearance.
Even if your stitching is neat, an unpressed bag can look unfinished.
Taking a few extra minutes to press the bag makes a noticeable difference and gives your handmade gift bag a polished look.
Sew, Gift, and Reuse: Make Your Christmas Gifts Extra Meaningful

Creating your own Christmas fabric gift bag is a thoughtful way to combine creativity, sustainability, and heartfelt gifting.
By sewing a reusable fabric bag, you’re not only reducing waste but also adding a personal, handmade touch that makes any gift feel more special.
You can also try other small sewing projects using fabric scraps to turn leftover pieces into cute, useful creations.
Whether you’re making just one bag or a whole set for family and friends, this project is a wonderful way to build confidence at the sewing machine while creating something truly useful.
Now that you’ve completed your fabric gift bag, consider experimenting with different fabrics, ribbons, or sizes to suit various occasions throughout the year.
Handmade projects improve with practice, and each bag you sew will be quicker and more polished than the last.
Have you tried sewing a fabric gift bag before, or is this your first one? Comment down below and share your experience, questions, or fabric choices – I’d love to hear from you!
FAQs
What type of needle should I use for this project?
A universal sewing machine needle in size 80/12 is ideal for this project. It works well with cotton fabric and interfacing, providing clean stitches without damaging the fabric. If your fabric feels thicker, you can move up to a size 90/14 for smoother sewing.
Can I use fabric scraps to make this gift bag?
Yes, fabric scraps can be used as long as they are large enough for the required pattern pieces. If your scraps are smaller, you can piece them together creatively, but be sure to press seams flat and reinforce them to maintain the bag’s strength and shape.
How can I prevent the bag from collapsing when filled?
Using fusible interfacing helps the bag hold its shape, but choosing a slightly heavier cotton or adding an extra layer of interfacing can provide additional structure. Pressing the boxed corners well also helps the bag stand upright when filled.
Can this fabric gift bag be used for non-Christmas occasions?
Absolutely. By changing the fabric print and ribbon colors, this same bag pattern can be used for birthdays, weddings, baby showers, or everyday storage. It’s a versatile design that works year-round.
How long does it take to sew one fabric gift bag?
For beginners, this project typically takes about 60 to 90 minutes from cutting to final pressing. As you gain confidence and familiarity with the steps, you may be able to complete each bag in under an hour.
