
If you’ve just brought home a new sewing machine or inherited one from a relative, the first big step is getting it set up properly.
This part can feel a little intimidating at first (all those knobs and levers!), but once you understand the basics, it becomes second nature.
In this article, I’ll walk you through the essentials (threading, winding, and connecting) so you can prepare your machine with confidence.
By the end, you’ll understand the function behind each step and feel ready to begin sewing simple, clean stitches on your own.
If you’re still deciding which machine to get or want a refresher, check out our guide on how to pick a sewing machine to make sure you start with the right one for your needs.
What You’ll Need
Before setting up your sewing machine, take a moment to organize what you’ll use.
You’ll need:
- Power cord and foot pedal – securely connected to your machine.
- Spool of thread – choose a good-quality thread that matches your project.
- Empty bobbin – to wind the lower thread.
- Fabric scrap – for testing your first stitches.
- User manual – to confirm the specific thread paths and parts for your model.
A clear workspace and a few steady minutes are all it takes to begin.
Once everything is in place, you’re ready to set up your sewing machine step by step.
6 Simple Steps to Set Up Your Sewing Machine
Before you begin, make sure your machine is plugged in, the presser foot is raised, and the needle is in its highest position.
From here, each step builds on the next. Once you’ve followed the full sequence, your machine will be ready for clean, even stitching.
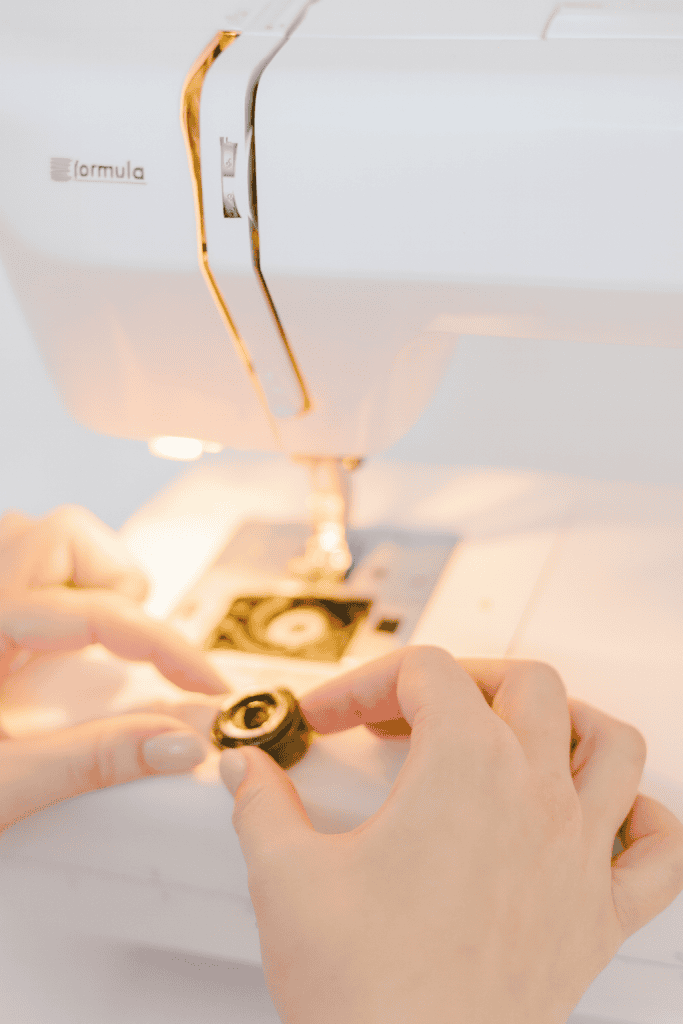
Step 1: Wind the Bobbin
Start by making sure you have a bobbin loaded with the thread you want to use. If your bobbin has a small hole, slip the thread from the inside out.
Some machines have self-winding bobbins with no hole – if that’s the case, simply wrap the thread around the bobbin a couple of times and the machine will take over once it starts spinning.
Place the bobbin on the bobbin winder and lock it into position, usually by pushing it to the right.
Then, take your thread from the spool and guide it around the bobbin-winder tension disc – this keeps the thread tight and even as it winds.
When the bobbin and thread are correctly aligned, press the foot pedal gently. The bobbin should begin to spin, winding the thread evenly across its surface.
You’ll only need to hold the pedal down until the bobbin looks full enough for your project.
Once it’s loaded, release the pedal, unlock the bobbin, and trim the thread. It’s now ready to go into the machine.
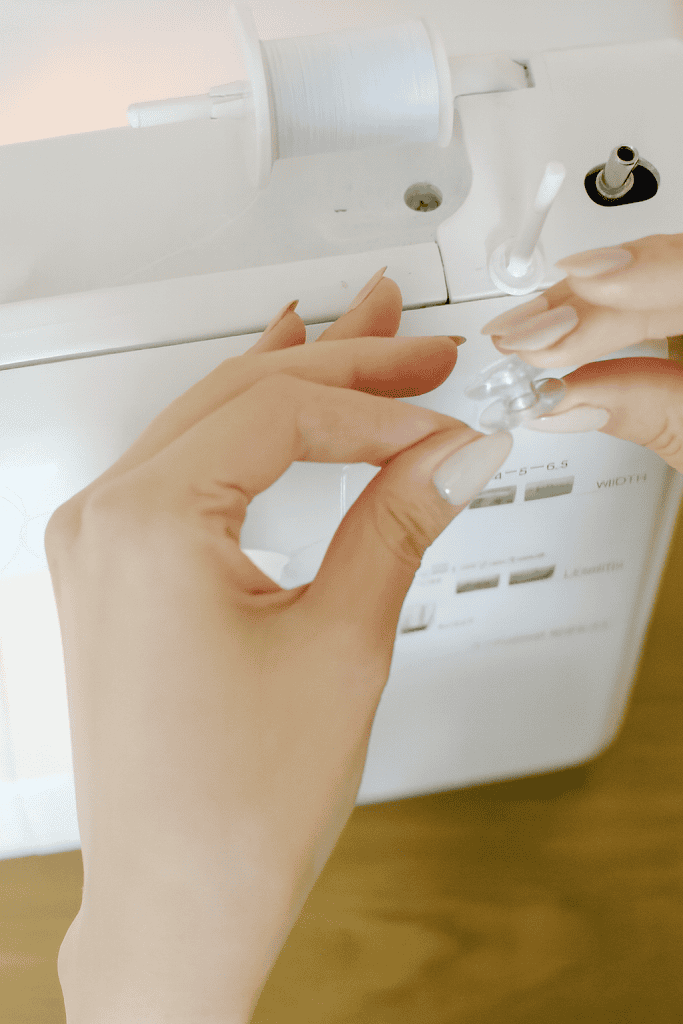
Step 2: Insert the Bobbin
Most machines have a small plate at the bottom that covers the bobbin compartment. Pop open this plate to access where the bobbin will sit.
Hold the bobbin so that the thread forms a “P” shape – the round part of the letter represents the bobbin itself, and the thread should flow down the left side.
Place the bobbin into its holder while maintaining that P-shaped orientation.
Follow the diagram near the bobbin case to guide the thread into the correct slot – usually pulling it slightly to the left.
Leave a few inches of thread extending outward.
With the bobbin now positioned correctly, it’s time to focus on threading the upper portion of your machine.
Step 3: Thread the Top of the Machine
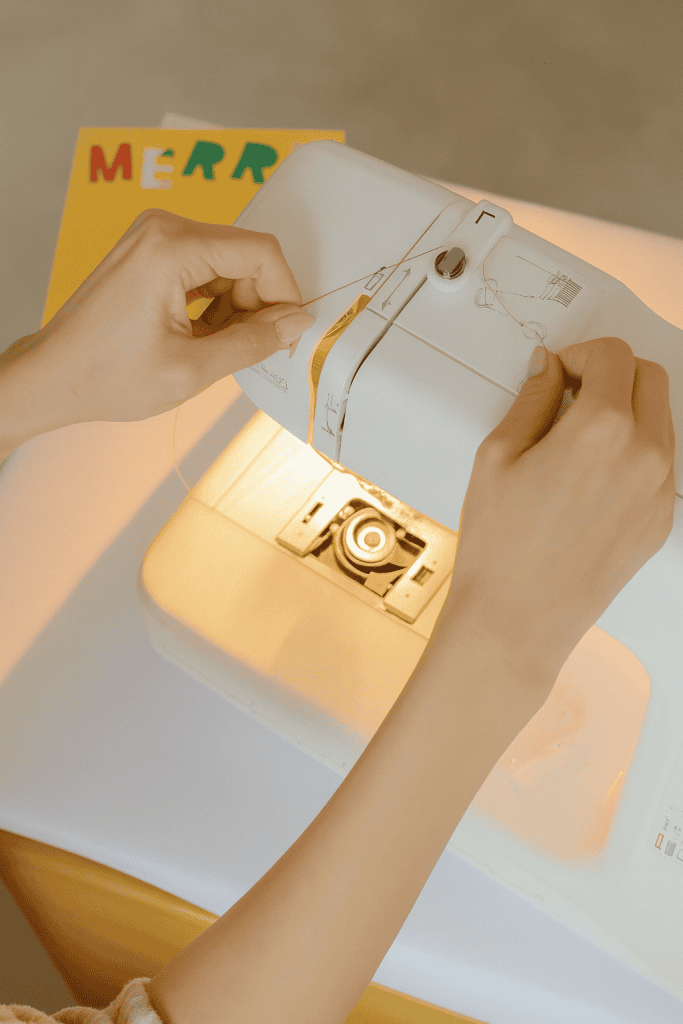
Threading the upper part connects the main spool of thread to the needle and creates the top half of your stitch.
Begin by placing your spool of thread on the spool pin.
Guide the thread through the machine’s upper threading path, following the arrows or diagram printed on most modern machines.
As the thread moves through the machine, you’ll come across a metal arm shaped like a swan’s neck – this is the take-up lever.
It moves up and down as the needle does and helps control thread tension. Before threading through this part, make sure it’s in its fully raised position.
You can lift it by turning the manual handwheel on the right side of your machine until the needle reaches its highest point.
Once the thread passes through the take-up lever, bring it downward again toward the needle area.
There’s usually a small metal hook just above the needle – loop the thread through this hook to keep it aligned before threading the needle itself.
Step 4: Thread the Needle
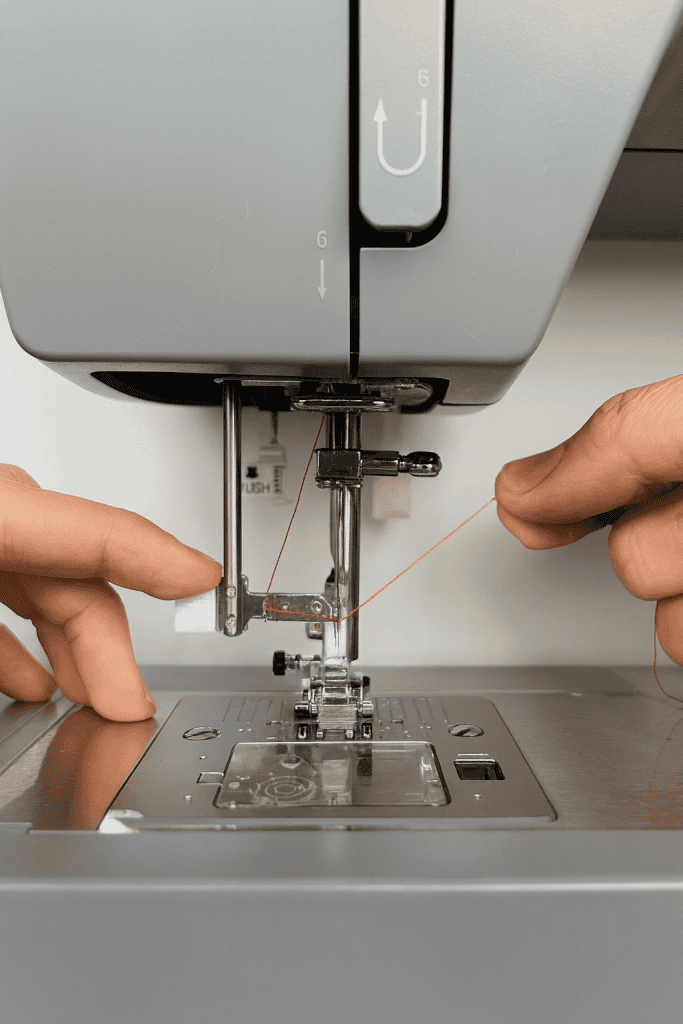
Insert the thread through the eye of the needle from front to back.
Pull out a good four to five inches of thread and swing it gently under the presser foot (check out the most common presser feet and what each one is used for), letting it rest toward the back of the machine.
This tail gives you enough slack for the first few stitches.
Threading the needle carefully ensures that the upper thread flows smoothly during sewing, keeping your stitches balanced and even.
Step 5: Connect the Bobbin and Top Thread
Now that both threads are in place, you’ll bring them together.
Hold the top thread gently in one hand and turn the handwheel toward you for one complete rotation.
As the needle lowers and comes back up, it will catch the bobbin thread and pull it up through the metal plate.
You’ll see a small loop of bobbin thread appear – pull it gently to bring the full length up.
Then, lay both threads flat under the presser foot, guiding them toward the back of the machine.
This connects your two threads and prepares the machine for stitching.
At this point, your sewing machine is fully threaded and ready to sew. You can place a piece of scrap fabric under the presser foot, lower it, and take a few test stitches to confirm that everything is running smoothly.
If you’re unsure what to try first, here are a few easy things to sew as a beginner.
Sewing Machine Giving You Trouble? Try These Quick Fix Tips

Even with a careful setup, your machine might occasionally need a small adjustment before it runs perfectly.
These moments are part of learning how your machine responds.
Once you know what to look for, these fixes become second nature.
1. Uneven or loose stitches
If your stitches look uneven, start by checking your threading.
Remove the top thread and rethread it carefully, making sure it passes through every guide and tension disc.
Then, check that your bobbin is seated correctly in its compartment and turning in the right direction.
Balanced tension between both threads is what creates smooth, even stitching.
For more guidance, see our step-by-step guide on how to adjust the tension on your sewing machine to keep every stitch looking perfect.
2. Thread breaking or snagging
Thread breaks usually happen when the thread catches on a guide or isn’t seated properly in the tension discs.
Rethread the top of the machine slowly, making sure each path is secure.
Also, double-check that the needle isn’t bent or dull – needles wear down over time and should be replaced regularly for best results.
3. Needle not picking up the bobbin thread
If the top thread doesn’t catch the bobbin thread, lift the presser foot and raise the needle to its highest point.
Then, turn the handwheel toward you one full rotation while gently holding the top thread.
This motion helps the needle loop correctly around the bobbin thread.
If it still doesn’t connect, remove the bobbin and check that it’s inserted in the proper “P” orientation.
4. Fabric not feeding smoothly
If your fabric isn’t moving forward as you sew, make sure the presser foot is down.
Then, check the feed dogs – the small metal teeth under the presser foot that help guide your fabric.
If they’re lowered, raise them back up using the feed dog lever or switch (usually located near the bobbin area).
5. Machine not stitching
If the needle moves but no stitches form, check that both threads are correctly threaded, the presser foot is down, and the tension isn’t too tight.
Take a moment to rethread both the top and bobbin threads; a clean start often solves the issue immediately.
A few simple checks can save you time and frustration. Most issues come down to threading or tension, and with practice, you’ll be able to identify them in seconds. Once your machine feels smooth and steady, you’re ready to move on to real projects with confidence.
You’re Ready to Sew!
Once your machine is threaded and the bobbin is in place, you’ve completed the most important foundation of sewing.
This simple routine sets the tone for every project that follows – neat stitches, even seams, and a calm sense of control at your machine.
The more often you thread and rethread, the easier it feels.
With practice, your hands will know the motion, and you’ll move from setup to sewing in just a few minutes.
Start with a small project – a fabric napkin, a pillow cover, or a simple hem. Each time, your confidence will grow.
If this guide helped you get started, I’d love to hear how your first project went. Leave a comment below and share what you’re making!
FAQs
1. How often should I change my sewing machine needle?
It’s best to change your needle after every 8 to 10 hours of sewing or at the start of each new project. A fresh needle ensures clean, even stitches and prevents skipped threads. Dull needles can cause puckering or tiny snags in fabric, even if everything else is threaded correctly.
2. Can I use any thread in my sewing machine?
Most machines work best with all-purpose polyester or cotton thread. Specialty threads, such as metallic or heavy topstitching thread, can be used too, but they may require adjustments to your tension or a specific needle type. Always check your manual if you’re trying a new thread type.
3. Why does my sewing machine make a clunking or clicking noise?
A rhythmic clicking sound usually means the machine needs a quick rethread or that the needle might be bent. Stop sewing, rethread both the top and bobbin threads, and check that the needle is fully inserted and straight. A clean rethread often solves the noise immediately.
4. How do I clean the area around the bobbin?
After several projects, lint and dust can collect under the needle plate and around the bobbin case. Unplug your machine, remove the plate, and use a small lint brush or soft cloth to clear debris. Avoid compressed air – it can push lint deeper into the machine. Regular cleaning helps your stitches stay smooth.
5. What tension setting should I use for general sewing?
For most medium-weight fabrics, a tension setting between 3 and 5 works well. This range gives balanced stitches where the top and bottom threads meet neatly in the middle of the fabric. If you notice loops or puckers, adjust slightly and test again on a scrap piece before returning to your main project.
