Some clothes simply fit just right. They move well, rest comfortably on the body, and make getting dressed easy.
Learning to draft a pattern from those well-loved pieces allows you to recreate that same fit and feeling – on your own terms.
This process is about understanding how a garment comes together and translating that knowledge into something you can make again and again.
Drafting from clothes you already love also encourages a more intentional approach to making.
It helps you create pieces that last, reduce waste, and align with the practical rhythm of home sewing.
With just a few tools and careful attention, you can turn your favorite everyday clothes into reusable, custom patterns that fit beautifully every time.
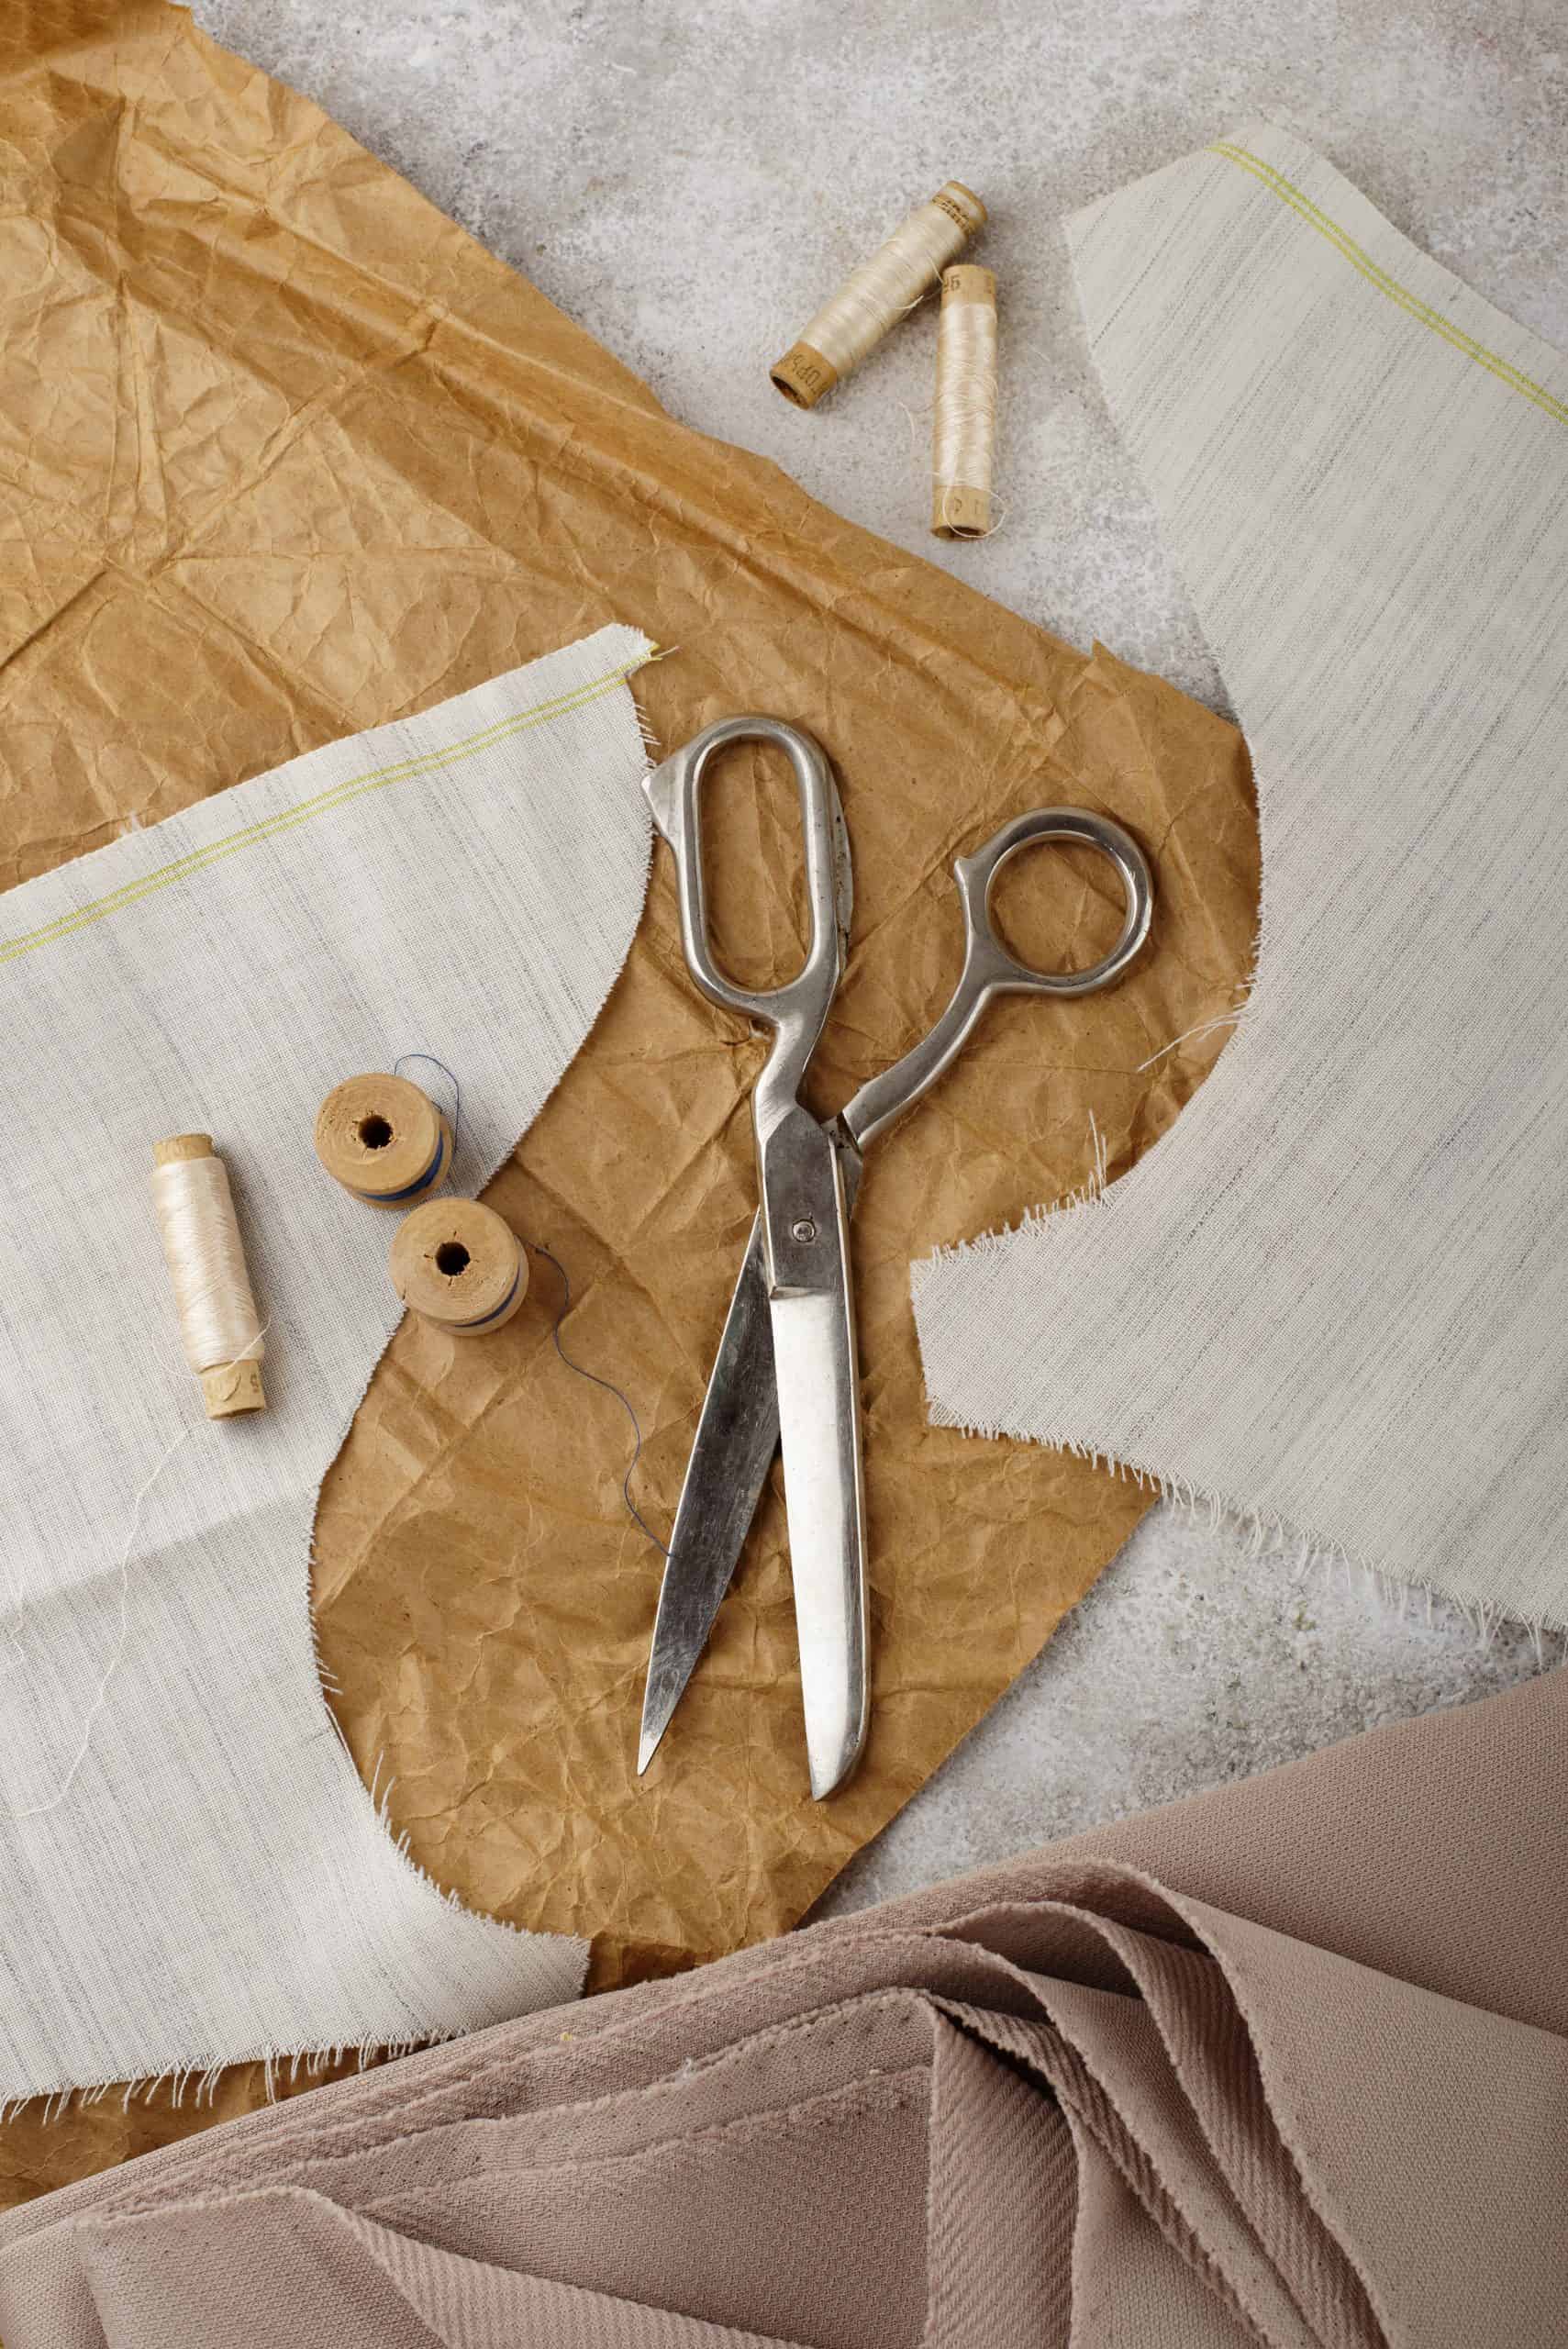
What You’ll Need for Pattern Drafting
Gather your tools before you start so you can focus on tracing and measuring instead of hunting for supplies.
- Tracing paper, tissue paper, or kraft paper
- Fabric scissors and paper scissors (separate pairs)
- Pencil
- Tape measure and clear ruler
- Pins or pattern weights
- The garment you’re replicating
- Sewing machine (for testing and final sewing)
- Optional: muslin or similar inexpensive fabric for a test run
If you’re new to working with sewing patterns, check out my post on how to read sewing patterns for beginners before you start.
It’ll help you understand markings, grainlines, and cutting layouts more confidently.
How to Draft a Pattern from Your Favorite Clothes
Before jumping in, it helps to get a feel for the process.
Drafting a pattern from clothes you already love is mostly about slowing down, noticing the details, and taking it one step at a time.
By the end, you’ll have a custom pattern that fits just the way you like.
Step 1: Choose Your Garment

Begin with a piece you truly enjoy wearing – one that feels natural, fits comfortably, and reflects your everyday style.
The simpler the silhouette, the smoother the process will be. A basic blouse, skirt, or casual dress works well for a first draft.
Inspect your garment closely.
Notice where the seams fall, how the fabric moves, and what details give it shape – like darts, gathers, or a gently curved neckline.
You’re not just copying a garment; you’re studying how it was built.
Choose something you’d happily make again in another color or fabric.
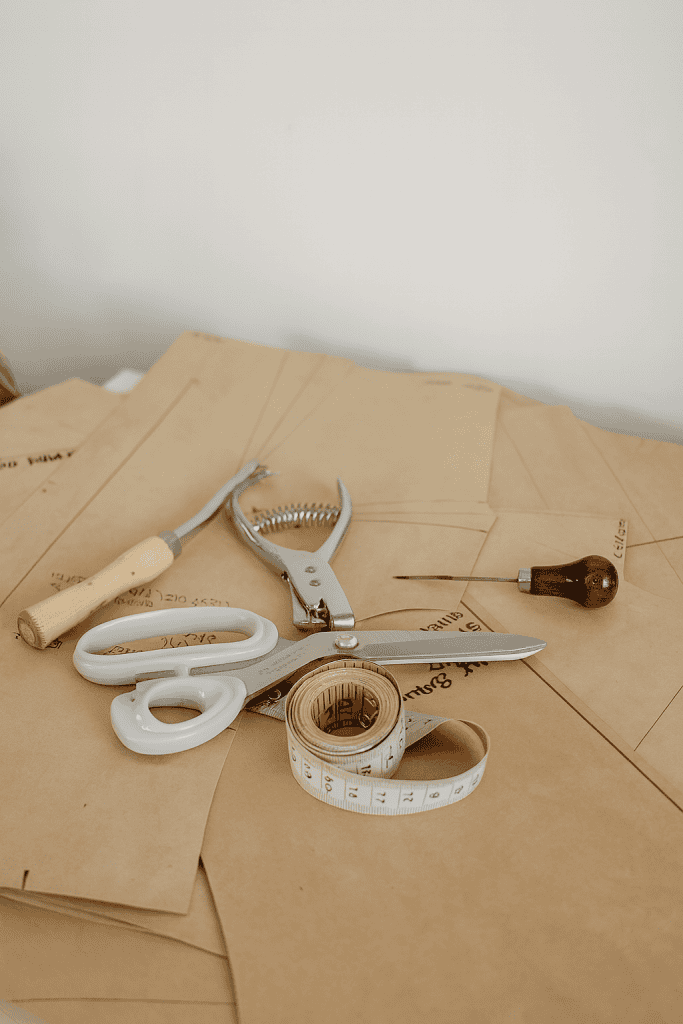
Step 2: Prepare Your Workspace
You already have your tools and materials gathered – now it’s about setting them up well.
A calm, organized space allows you to focus without distraction.
Lay your tools within easy reach on a clean, flat surface. A large table or countertop works best.
Make sure the lighting is even so you can see seam lines clearly.
Keep fabric scissors and paper scissors separate, and set your garment nearby, pressed and ready.
When everything is in order, the work ahead feels steady and efficient.
For a complete guide, check out essential sewing tools every beginner should have.
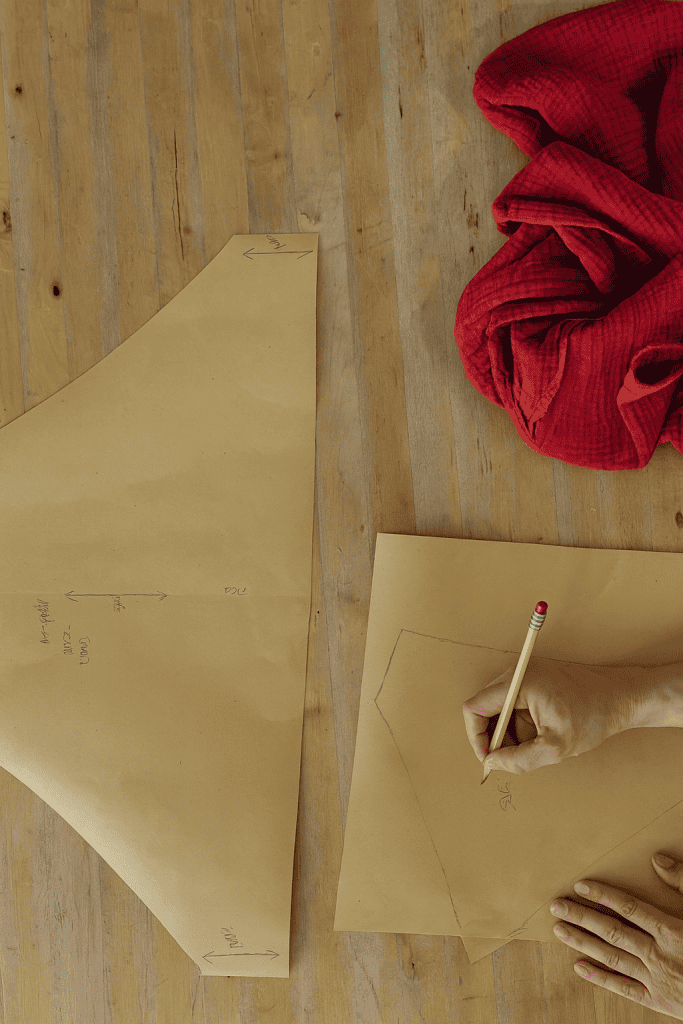
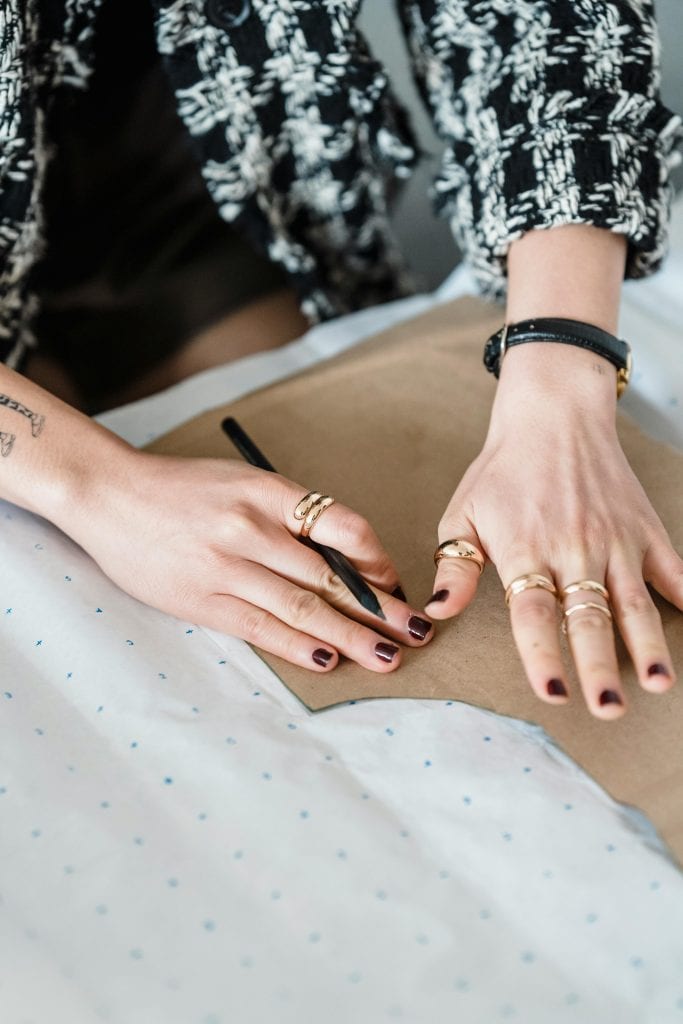
Step 3: Trace the Garment

Lay your garment flat on the table, smoothing away any folds or wrinkles. Turn it inside out so the seams and stitching lines are visible.
This gives you a clear view of its construction and helps ensure accuracy as you trace.
Work one section at a time: the front, the back, the sleeves, or any small detail like a waistband or pocket.
Place your tracing paper beneath each section and, using a pencil, follow the garment’s outline carefully.
If needed, use pins or pattern weights to prevent shifting.
When tracing pieces with elastic or gathering, measure them both relaxed and fully stretched – this gives you an accurate range.
Mark darts, pleats, and other shaping details directly onto your tracing.
The goal is to record what exists faithfully, not to perfect every line just yet.
Step 4: Add Seam Allowance and Adjust Your Pattern
Once the garment’s shape is captured, use your ruler to add seam allowance – typically ½ inch around each edge.
A steady hand and consistent measurement will make sewing easier later.
If you’re uncertain about certain areas, give yourself a bit more room.
Extra fabric can always be refined; it’s a margin that supports learning and fit adjustments.
At this stage, you can also make subtle improvements – smoothing uneven lines, refining darts, or noting areas you may want to modify in the final garment.
This balance of precision and flexibility is what transforms a traced shape into a true pattern.
Step 5: Label and Cut Your Pattern Pieces Clearly
Labeling keeps your pattern functional and organized.
On each piece, write:
- The section name (Front, Back, Sleeve, etc.)
- Grainline direction
- Fold indicators (if applicable)
- Number of pieces to cut
- Notes for mirrored cuts or special placement
Then, cut along your traced lines with smooth, controlled motions. Clean edges help ensure an accurate fit later.
Keep each piece flat and store them neatly – organization here saves time during sewing and future reuse.
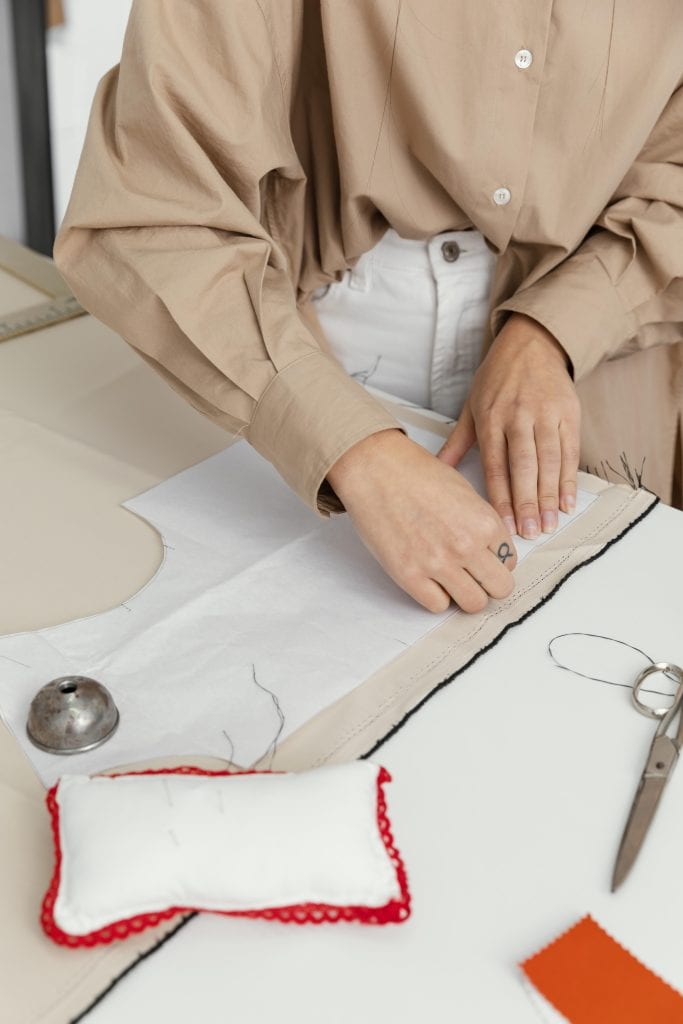
Step 6: Test Your Pattern with a Muslin Mock-Up
Before committing to your final fabric, test your pattern by sewing a muslin or mock-up.
Use a lightweight, inexpensive fabric with a similar drape to your intended material.
Baste the pieces together and try it on.
Move naturally – raise your arms, sit, walk. Observe how it fits and feels.
This step turns your draft into something real, giving you the opportunity to refine it.
Adjust seams, darts, or hems as needed. Mark these updates clearly on your paper pattern.
Once it fits as you’d like, your pattern is complete – ready to be used again and again, customized for different fabrics, colors, and seasons.
If you’re looking for more inspiration to practice, there are plenty of free sewing patterns online that work perfectly with muslin mock-ups.
How to Prepare Fabric Before Using Your New Pattern
Once your pattern is ready, preparing your fabric is the next important step.
Wash and Press Before You Cut
- Prewash fabric to remove treatments and prevent shrinkage.
- Use the same wash/dry settings you’ll use for the finished garment.
- Press thoroughly for a smooth surface and accurate cutting.
- Use light steam to relax fibers and “reset” the fabric’s shape.
Check the Grainline and Layout
- Lay fabric flat and check that the grain runs straight.
- Fold and align selvage edges if your pattern calls for it.
- Place pattern pieces according to grainline markings.
- Use a clear ruler to keep arrows parallel to the selvage.
Secure and Cut with Care
- Pin or weight pattern pieces without stretching the fabric.
- Cut smoothly with fabric scissors, keeping blades flat.
- Work slowly and accurately – cutting is irreversible.
- Label each piece before sewing to stay organized.
How to Store and Reuse Your Handmade Patterns
Once your pattern fits the way you like, keep it safe. It’s your go-to guide for future projects, already shaped to your body and style.
Store it well so you can reuse it anytime without having to start over.
Label Everything Clearly
After final adjustments, record every important detail directly on the pattern.
Include the garment type, size, date, and any notes about fabric type or fit. For example: “Linen blouse – relaxed fit – size medium – ½” seam allowance.”
These notes may seem small, but they save time when you revisit the pattern months later.
If you’ve made variations – such as a longer hem or a different neckline – label those versions separately.
Good recordkeeping turns a single draft into a growing personal library. For tips on staying organized, check out how to use a sewing journal.
Store Flat for Longevity
Paper patterns keep their shape best when stored flat. Large envelopes, manila folders, or clear plastic sleeves all work well.
Label the outside of each one with the garment name and date. Avoid folding your patterns tightly; creases can distort measurements over time.
If you sew regularly, consider keeping a flat file or dedicated drawer for your patterns.
Organizing them this way helps maintain order and keeps your workspace clear for new projects.
Reuse and Refine as You Go
Each time you use your pattern, you have an opportunity to refine it.
Small updates – a slightly shorter sleeve, a narrower neckline, or a new fabric type – can be recorded directly onto the paper.
Over time, these refinements turn your pattern into a highly personalized fit guide.
You can also trace copies of your original pattern onto fresh paper to experiment with style variations.
This keeps the base version intact while allowing creativity to grow. Thoughtful reuse extends the life of both your work and your materials.
Build a Collection That Fits You
The goal of pattern drafting isn’t just one project – it’s progress.
As you collect patterns that fit your body well, you’ll find sewing becomes faster, easier, and more intuitive.
Each pattern becomes a foundation for new fabrics, styles, and seasons.
When stored carefully and labeled clearly, your handmade patterns evolve into a personal wardrobe system – one built with intention, precision, and joy in the making.
And if you also work with digital files, learning how to use PDF sewing patterns can help expand and complement your collection.
Pro Tips for Better DIY Pattern Drafting
Once you’ve learned the basics, small refinements make a big difference.
These are the quiet habits that help your handmade patterns last longer, fit better, and look more polished with every project.
Work on a Firm, Even Surface
A sturdy, level surface – such as a large table or cutting board – gives your tracing and cutting clean precision.
Avoid working on soft or uneven areas where paper or fabric can shift.
Stability ensures accuracy at every step.
Use Notches as Reference Points
Add small notches to your pattern edges where seams meet – at the shoulders, side seams, and sleeve caps.
These markings help align fabric pieces perfectly during sewing.
It’s a simple habit that improves accuracy and makes construction smoother.
Keep Grainlines Consistent
Always mark grainline arrows on every piece, and check them carefully before cutting your fabric.
Following the grain ensures your finished garment hangs naturally and holds its intended shape through wear and washing.
Make Notes Right on Your Patter
Patterns are living documents – they evolve as your skills and preferences grow.
Write notes directly on your paper pieces as you test and sew: fabric type, fit adjustments, or small changes that improved the result.
These notes become valuable references for your next project.
Store and Label with Intention
Treat your handmade patterns as tools, not temporary projects.
Store them flat, label clearly, and group them by garment type or season.
This organization saves time and allows you to revisit favorite designs whenever inspiration strikes.
Build Confidence Through Repetition
Each pattern you make strengthens your understanding of fit, form, and construction.
Start simple, practice steadily, and trust that precision grows with repetition.
Every line you trace and every seam you sew builds skill that stays with you.
Start Drafting and Build a Wardrobe That Truly Fits You
Learning to draft a pattern from the clothes you already love is a skill that deepens your understanding of how garments work.
Each time you trace, test, and refine, you gain more confidence and precision.
The more you practice, the easier it becomes to adjust fit, explore new fabrics, and recreate favorite pieces that feel like you.
If you’ve been thinking about trying pattern drafting, start with one piece this week.
Lay it out, trace it carefully, and enjoy the process.
You might be surprised by how capable you feel once you see that first pattern come to life.
Have you tried drafting a pattern from your favorite clothes?
Share your experience, questions, or beginner tips in the comments below – I’d love to hear what you’re working on.
FAQs
1. Can I draft a pattern from stretchy or knit fabrics?
Yes, you can – but with care. Knit or stretch fabrics behave differently from woven ones, so take note of how much the original garment stretches. When tracing, measure both the relaxed and fully stretched widths of key areas like the bust or waist. You’ll also need to choose a fabric with a similar stretch percentage when you sew your new version.
2. What kind of paper is best for pattern drafting?
Use tracing paper, medical exam paper, or kraft paper – all of which are sturdy enough to hold shape but thin enough to see through for tracing. For long-term storage, you can transfer final patterns to heavier pattern paper or poster board.
3. How do I handle darts, pleats, or gathers when tracing a garment?
For darts and pleats, mark their placement and shape directly on your tracing paper. You can use dotted lines for dart legs and arrows for pleat direction. For gathers or elastic sections, measure both the stretched and unstretched lengths so your finished garment has the correct shape and ease.
4. Should I iron my garment before tracing it?
Yes – pressing the garment helps you get more accurate outlines. Wrinkles or folds can distort shapes and seam lines. Use a light steam to smooth the fabric, especially around curved areas like the neckline or armholes.
5. How do I know if my pattern fits correctly before sewing my final fabric?
Always test your pattern with a muslin or a similar inexpensive fabric first. Sew the pieces together with loose basting stitches and try it on. This lets you check proportions, comfort, and movement. Once you’re satisfied with the fit, transfer any corrections back to your paper pattern – that’s your finalized version.
