
If you’ve ever looked at your closet and wished your clothes fit better, felt better, or simply looked more like you – this is where to start.
Designing and making your own clothes is a skill you can build with a bit of patience and curiosity.
You’ll learn to see fabric, shape, and fit in a new way, and discover how much satisfaction comes from wearing something you created yourself.
In this article, I’ll walk through each step clearly – from finding inspiration to sketching, drafting patterns, testing fit, and sewing the final piece.
You’ll see that the process doesn’t have to feel overwhelming; it can be steady, creative, and surprisingly practical.
By the end, you’ll not only have something handmade – you’ll have the confidence to design and make clothes that genuinely work for you.
How to Start Designing Your Own Clothes
The design process starts with gathering ideas, understanding your preferences, and translating them into simple sketches that help you visualize your future wardrobe.
Find Inspiration for DIY Clothing Design

Every design starts with inspiration, and your goal is to collect what sparks your interest.
Keep a small notebook or folder where you can store visual ideas – colors, shapes, or textures that stand out to you.
- Create a physical scrapbook. Cut images from magazines or newspapers and paste them into a notebook. Circle hemlines, highlight fabric combinations, or jot down what you like about a particular shape. When an issue is full of great looks, keep the whole magazine and mark your favorite pages with notes or sticky tabs.
- Use Instagram and Pinterest intentionally. On Instagram, save posts using the “Save” button and organize them into folders (collections) – one for tops, one for dresses, one for details like sleeves or collars. Pinterest is even more dynamic: pin one image, and it automatically shows you similar ideas. Over time, you’ll start seeing patterns in what you love most.
Your goal is to understand your own taste. The more you gather, the clearer your style becomes.
Sketch and Plan Your Handmade Wardrobe
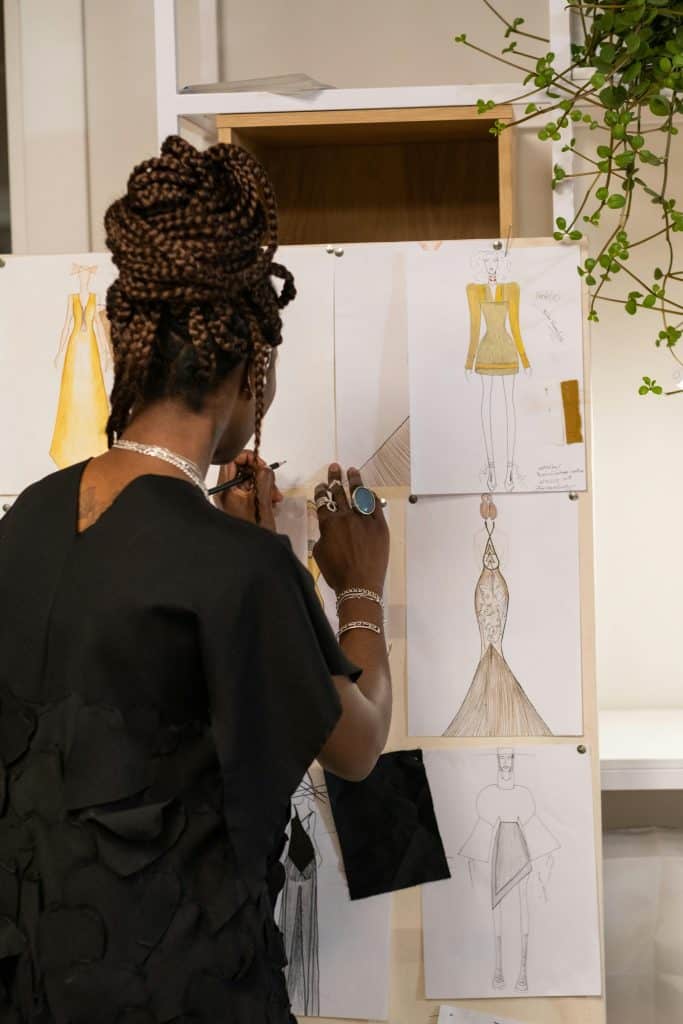
Once you’ve collected ideas, it’s time to sketch them out.
Putting an idea on paper helps you think through shape, proportion, and how a garment comes together.
- Sketch by hand. Try a Fashionary sketchbook – its faint figure outlines help you draw quickly without worrying about proportions.
- Draw digitally. If you prefer tech, use a tablet, stylus, and app like Procreate to test color combinations and edit easily.
- Trace to simplify. You can even trace over a photo of yourself or use a template to see how designs might suit your shape.
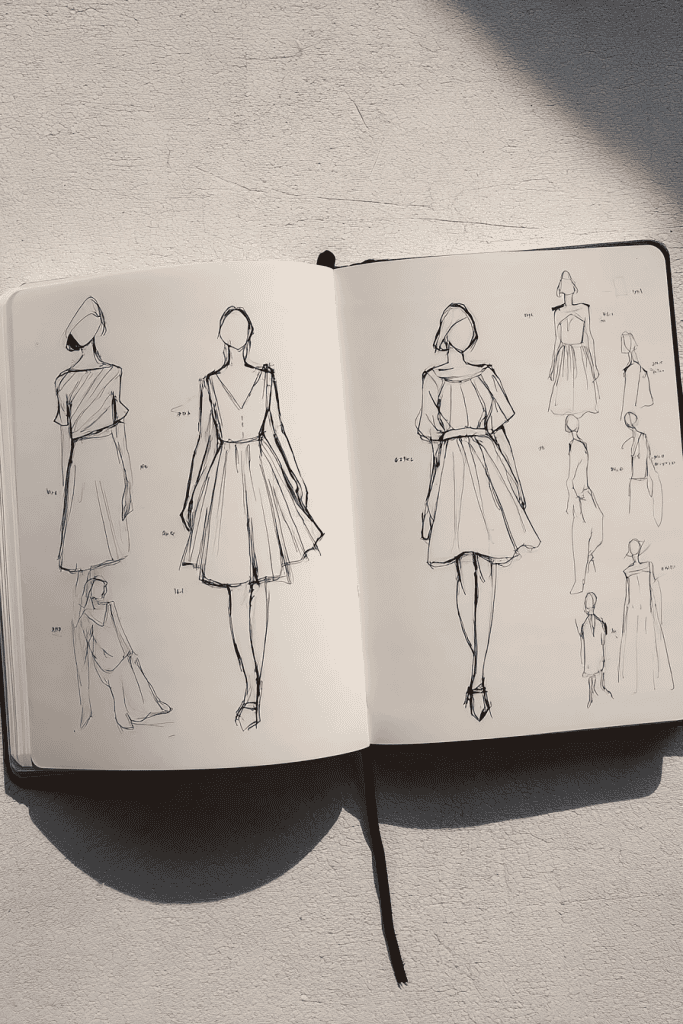
Sketching helps you notice how seams, fabrics, and fit work together.
As you practice, you’ll begin to design with intention – and that’s where the fun begins.
If you want to keep track of sketches, notes, and what worked (or didn’t), this is a perfect moment to learn how to use a sewing journal as part of your design process.
How to Create Sewing Patterns for Your Own Clothes

Once your design ideas start to take shape, it’s time to turn them into sewing patterns.
Think of pattern cutting as writing the “recipe” for your garment – it’s where creative ideas meet structure.
A good pattern gives you freedom; it lets you make the same piece again and again, each time with more precision and ease.
1. Choose What to Pattern Cut
Start simple. Choose one to three designs from your sketches – the ones you’re most excited about and feel ready to make.
Then gather your pattern blocks (the basic stencils for garments like bodices, sleeves, or skirts).
These blocks form the foundation of almost every piece of clothing you’ll create.
Before cutting anything, annotate your pattern blocks.
Write notes about what needs to change – maybe you want the sleeves wider, the waist higher, or the hem longer.
It’s also the time to think about your fabric: thicker materials may need deeper pleats, while soft fabrics like silk or rayon will drape naturally.
Ask yourself a few simple questions:
- How should the garment fit — loose or fitted?
- How will it open and close — buttons, zips, or none at all?
- What design details matter most — ruffles, tucks, gathers, or pockets?
Answering these early keeps your project clear and manageable.
If you’re looking for inspiration or starting points you can print and modify, check out this free sewing patterns online to see a range of styles you can tailor to your own ideas.
2. Draft and Adjust Clothing Pattern
Now comes the creative drafting.
Start by checking dart placement – if a dart interferes with your design lines, shift it into a new seam or feature.
Then, adjust the overall fit of the pattern before adding style details.
Once the main body pieces are finalized, move on to drafting or modifying sleeves, ensuring any armhole changes are reflected accurately.
This stage is methodical but empowering.
It’s where your design becomes something you can physically create.
3. Add Hem and Seam Allowances
Always add hem and seam allowances last.
Doing this at the end keeps your pattern pieces clean and avoids confusion during drafting.
The type of fabric you’re using will guide how much to add – heavier fabrics need more space in seams, while lighter fabrics may need less.
Think of allowances as the hidden framework of your garment – they don’t show, but they make the difference between a rough finish and a polished one.
For a deeper dive into measurements, techniques, and practical tips, see our essential guide to hem and seam allowances to make every project look professional.
4. Annotate Thoroughly
Before storing your finished pattern, take time to label everything clearly – grainlines, notches, fold lines, and seam allowances.
Note any design variations or fabric ideas right on the pattern piece itself.
This small step saves time later and helps you build a personal library of reusable patterns – the foundation of a slow, thoughtful wardrobe you can expand and refine season after season.
If you want to dig a little deeper, you might like how to draft a pattern from your favorite clothes.
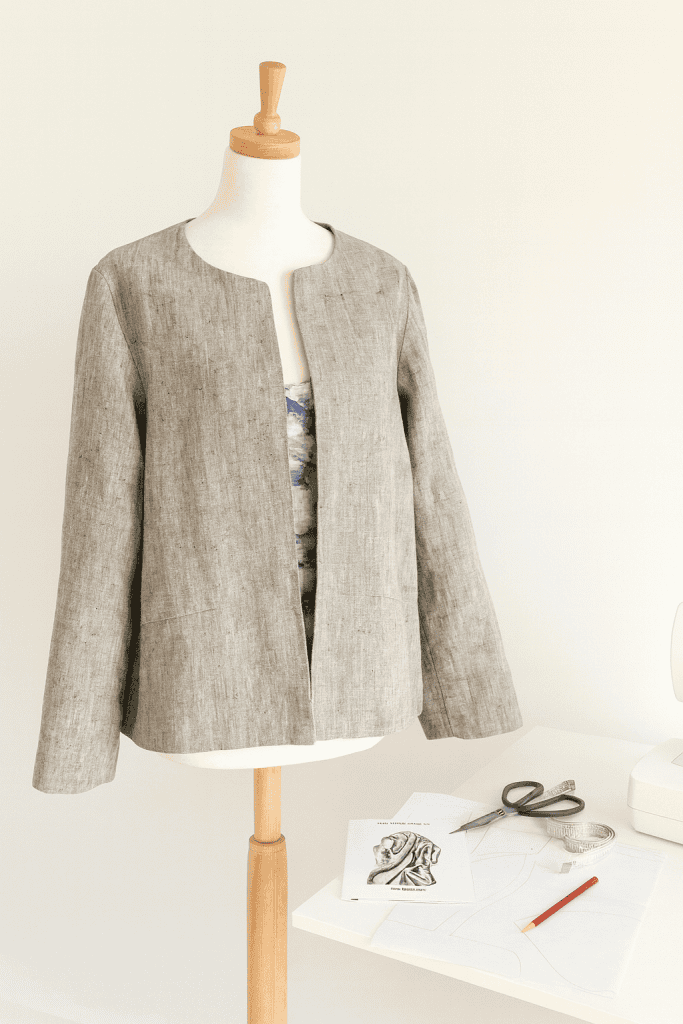
How to Make a Toile (Test Garment) Before Sewing Your Clothes
A toile is a simple test version of your garment – a way to check the fit and design before cutting into your final fabric.
It’s a smart step that helps you understand how your pattern behaves in real life.
Even if you’re using a commercial pattern, a toile gives you the freedom to test and tweak before sewing the real thing.
It saves fabric, time, and frustration later on.
A well-made toile tells you three things:
- Fit: Does the garment sit comfortably where it should?
- Design: Does it look the way you imagined?
- Construction: Do the pattern and instructions make sense in practice?
Treat it as a low-stakes trial run that brings clarity and confidence.
Smart Toile Tips for Home Sewers
- Skip the finishing touches. Don’t worry about hems or decorative stitching – you can fold hems under for testing.
- Reuse materials. Old bedsheets, tablecloths, or damaged fabric are perfect. If you buy fabric, choose organic calico or something similar in weight and drape to your final fabric.
- Match the fabric type. If your final garment will use stretch fabric, your toile should too. The closer the fabric behaves to your final choice, the more reliable your results.
- Sew with care. Keep seam allowances accurate, but don’t worry about thread color or perfect topstitching. This stage is about testing movement and proportion.
The toile is your space to experiment and learn.
How to Fit, Test, and Adjust a Toile for Perfect Results
Once your toile is assembled, try it on – and always on your own body, not a mannequin.
Wear it inside out so you can easily pin or mark changes.
Move naturally: sit, reach, and bend. Notice how the garment responds.
Look for signs that adjustments are needed:
- Fabric pulling or rippling across areas of movement.
- Extra fullness or gaping around the bust, waist, or armholes.
- Darts that miss the natural points of the body.
- Garment feeling unbalanced or restrictive.
Mark your changes directly on the toile with pins or a fabric marker. Write notes or draw lines where fabric needs to be added or removed.
This version becomes your guide – a physical notebook for refining your pattern.
If the changes are significant, make another toile. It may feel repetitive, but it’s time well spent.
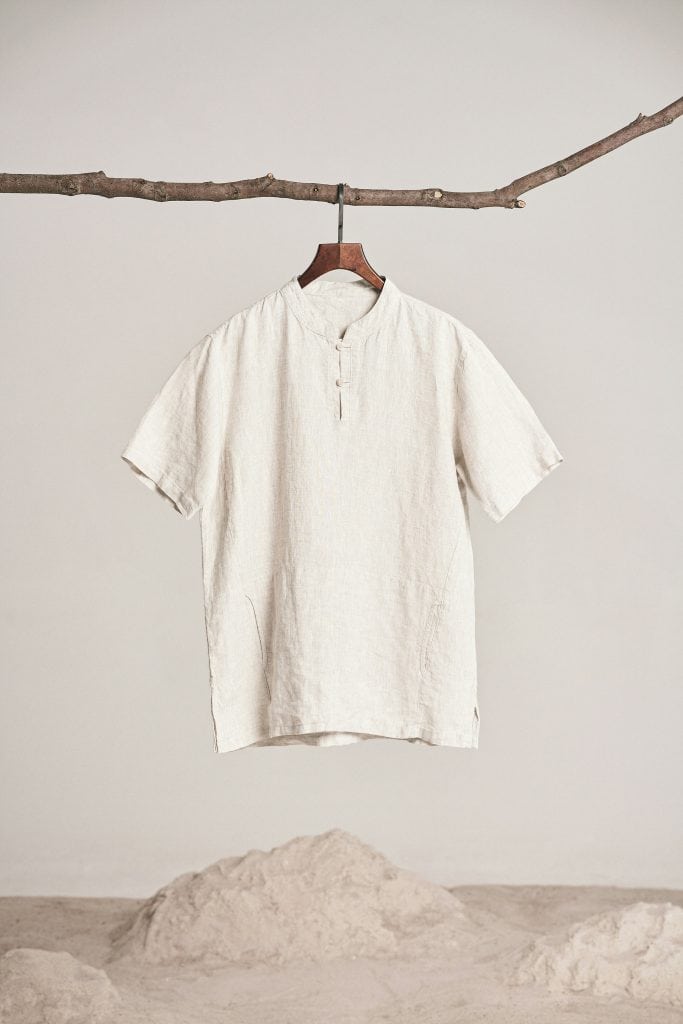
How to Sew Your Own Clothes from Start to Finish
This is the part most people look forward to – bringing your design to life. Sewing your own clothes is equal parts focus and patience.
It’s where planning pays off, where fabric meets form, and where you begin to see the reward of all your careful steps.
Prepare Your Fabric Before Sewing
Before you start cutting or sewing, take a few minutes to prepare your fabric properly.
Wash it first using the same method you’ll use for the finished garment – cotton and linen can handle a normal wash, while wool or silk may need a gentle cycle or hand wash. This step prevents shrinking or warping later.
After washing, give the fabric a good press to remove wrinkles and relax the fibers. Fold it so the selvage edges meet evenly, keeping the fabric on grain.
Lay it flat on your table, then position your pattern pieces according to the grainlines marked on each one.
Pin or weigh them down, double-checking that any prints or stripes line up correctly.
When everything looks right, cut slowly with sharp scissors or a rotary cutter, following the edges of your pattern carefully.
As you go, mark darts, pleats, or pocket placements with tailor’s chalk or a washable pen.
Taking this time up front makes the sewing process smoother and ensures your finished garment hangs and fits just as you planned.
Cutting and Sewing Tips

Cutting is the most decisive step in sewing. The golden rule still stands: think twice, cut once. Take your time.
Work when you’re alert, not distracted. Precision here saves effort later.
As you sew, keep a few habits that make everything easier:
- Trim threads as you go. It keeps your work neat and organized.
- Iron often. Press seams before sewing hems – a simple habit that results in cleaner, more professional edges.
- Ask for help when needed. Every sewer, beginner or experienced, learns through questions and shared knowledge.
For a complete checklist to set yourself up for success, see must-do steps before cutting fabric to ensure every project starts off on the right foot.
Turn Mistakes into Creative Wins
Even experienced makers unpick seams or recut pieces – it’s simply part of sewing.
If you realize a mistake mid-project:
- Pause and recheck your markings or pattern.
- Unpick slowly with a seam ripper; press the fabric flat again before resewing.
- If you’re short on fabric, combine materials or add a contrast facing, lining, or patch. Often, these “fixes” add unique character.
Example: if you run out of lining fabric, replace it with a pop of color that complements the garment.
These adjustments often create the most memorable details.
For more tips on staying patient and confident, see how to overcome sewing beginner frustrations.
The Final Press and Try-On
When all seams are complete, give your garment a thorough press.
Steam helps fibers settle, giving structure and polish.
Then try it on slowly – move, stretch, sit. Notice how it feels.
Adjust any areas that pull or twist, and make notes on your pattern for next time.
Start Designing and Sewing Clothes You’ll Actually Love to Wear

Designing and making your own clothes is about learning how fabric, fit, and creativity come together to create something that truly works for you.
Every sketch, cut, and stitch teaches you something new. The more you make, the more you understand your own style and how to shape it with intention.
So start small. Choose one piece, follow each step with patience, and enjoy watching your confidence grow.
Before long, you’ll have a wardrobe filled with clothes that fit beautifully and feel like your own work of art – practical, personal, and made with care.
Have you tried designing or sewing something recently?
Share your experience or ask your questions in the comments below – I’d love to hear what you’re working on and help you take your next step.
FAQs
1. What’s the easiest first project for beginners?
Start with something simple but useful, like a gathered skirt, pajama pants, or a loose top. These garments use basic pattern shapes and straight seams, helping you focus on accuracy without frustration.
2. How do I choose the right fabric for my first garment?
Look for stable, medium-weight woven fabrics like cotton poplin, chambray, or linen blends. They’re easy to cut, don’t slip while sewing, and press well – ideal for learning. Avoid stretchy or slippery materials until you’ve built confidence.
3. What basic sewing tools do I need to get started?
Keep your toolkit simple: a sewing machine, fabric scissors, measuring tape, pins or clips, an iron, and tailor’s chalk. Add tools like a seam ripper and pressing ham as you advance – they’ll make your work cleaner and faster.
4. How can I make sure my clothes fit better next time?
Keep notes after each project. Record what fit adjustments you made on your pattern, where seams felt tight or loose, and how the fabric behaved. Over time, you’ll develop a personal fit guide that makes every new project easier.
5. Can I reuse my sewing patterns for different designs?
Absolutely. Once you have a well-fitting base pattern, you can modify it endlessly – adjust sleeve shapes, necklines, or hems to create new looks. Label and store each version clearly so you can revisit and build on your designs later.
