If you’ve ever looked at a hand-stitched design and thought, “I wish I could do that,” embroidery is a great place to start.
It’s simple, relaxing, and lets you turn everyday fabric into something personal and beautiful.
Embroidery is one of those crafts that fits easily into everyday life.
You can work on a small piece during quiet evenings, bring your hoop along on trips, or use your stitches to add a thoughtful touch to gifts and home items.
It’s creative, hands-on, and endlessly flexible, which is what makes it so rewarding.
In this article, I’ll walk through everything you need to get started – from choosing materials to learning simple stitches and setting up your first project.
What Is Embroidery?
Embroidery is a method of decorating fabric with thread, needle, and hand-guided stitches.
It’s part of the larger family of textile arts, but unlike sewing – which joins fabric pieces together – embroidery is about surface design.
You’re creating patterns, textures, or lettering directly on the fabric itself.
At its simplest, embroidery involves five core elements:
- Fabric: the surface you stitch on, often cotton, linen, or canvas.
- Needle: a sharp tool with a larger eye to fit embroidery thread.
- Thread (Floss): usually made of cotton and divided into six strands, allowing you to adjust thickness and texture.
- Hoop: a two-part ring that holds the fabric taut for smooth, even stitches.
- Design: the outline or pattern you stitch, which can be drawn, traced, or transferred onto the fabric.
Embroidery can be purely decorative (like floral motifs on napkins) or functional, such as reinforcing worn fabric or labeling linens.
Modern beginners often start with simple patterns: outlines, initials, or small motifs that use just a few types of stitches.
There are also different styles of embroidery, each with its own tradition:
- Surface embroidery: the most common form, where stitches sit on top of the fabric (this includes most beginner projects).
- Counted-thread embroidery: such as cross-stitch, which follows the fabric’s weave to create precise patterns.
- Freehand embroidery: where designs are drawn freely, allowing more artistic expression.
In short, embroidery is both a craft and a language of thread – one that turns a plain piece of cloth into something personal, tactile, and lasting.
It’s simple to learn, endlessly adaptable, and deeply satisfying to practice.
If you’re curious about the basics of sewing before diving into embroidery, you might enjoy this guide on how to start sewing as a beginner.
Essential Embroidery Supplies for Beginners
Embroidery begins with only a few reliable tools. Here’s what every beginner should have on hand:
1. Embroidery Hoop
A hoop holds your fabric tight while you stitch, keeping tension even.
It comes in two rings: the inner ring supports the fabric, and the outer ring tightens around it with a screw.
- Best size to start: 6–8 inches in diameter.
- Material options: Wood gives a natural grip and feel; plastic is lighter and often easier to clean.
2. Embroidery Needles
Embroidery needles (also called crewel needles) have a sharp tip and a slightly larger eye to fit thicker thread.
- Sizes: Numbers 5–10 are most versatile for beginners.
- Tip: Start with an assortment pack so you can match needle size to thread thickness.
3. Embroidery Floss
This is the thread you’ll be working with – usually made of cotton and sold in skeins.
Each strand of floss contains six finer threads twisted together.
You can use all six for bold stitches or separate them for finer details.
- Best brand types: DMC and Anchor are reliable and colorfast.
- Tip: Choose a small color palette (3–5 colors) for your first project to stay organized.
4. Fabric
A smooth, tightly woven fabric makes learning easier.
Avoid anything stretchy or too textured at the start.
- Best beginner options: 100% cotton, cotton-linen blend, or lightweight linen.
- Tip: Pre-wash and iron your fabric to prevent shrinking later.
5. Scissors
Small, sharp embroidery scissors are worth investing in.
They give clean thread cuts and prevent fraying.
- Size: 3–4 inches with fine, pointed tips.
- Tip: Keep them separate from fabric shears to maintain sharpness.
6. Marking Tools
To transfer or draw your design, use a water-soluble pen, heat-erasable pen, or chalk pencil.
- Tip: Always test your marking tool on a fabric scrap first to ensure it erases cleanly.
7. Optional (But Helpful) Tools
A needle threader saves time, a thimble protects your fingers, and a storage box keeps floss organized.
These aren’t necessary, but they make your stitching setup more efficient and pleasant.
How to Choose the Right Fabric and Thread for Your First Project
Your fabric and thread are the foundation of every embroidery piece.
The right combination helps your stitches look clean, stay secure, and move smoothly through the fabric.
Starting with beginner-friendly materials will make your first few projects easier and more enjoyable.
1. Choosing Fabric
Select a fabric that’s tightly woven and smooth to the touch.
This makes it easier to guide the needle and keeps your stitches even.
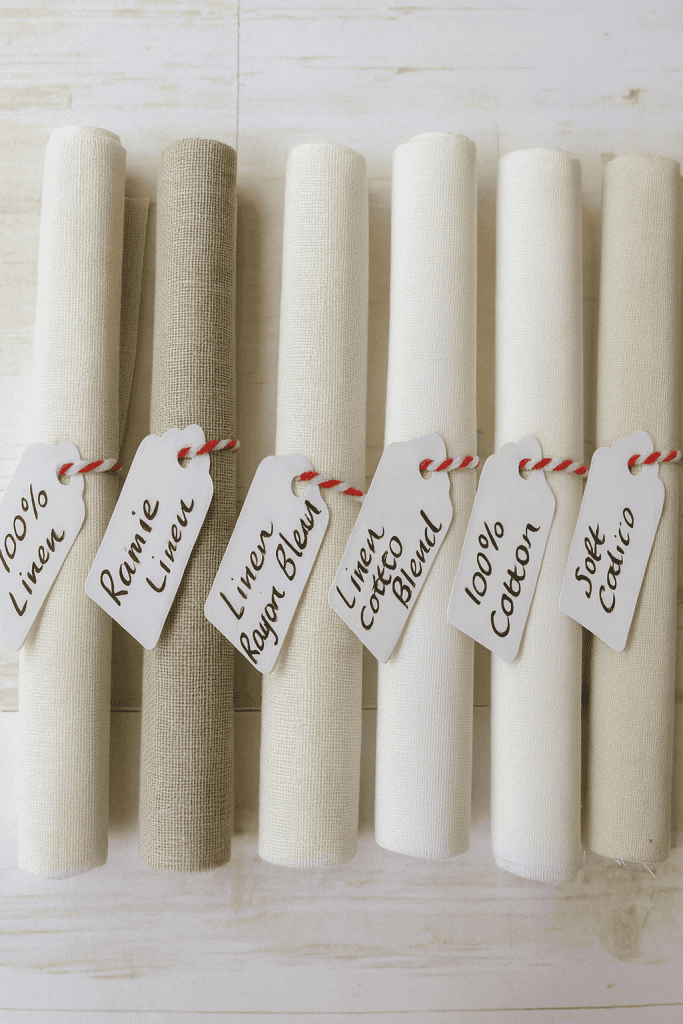
- Best beginner fabrics: 100% cotton, cotton-linen blend, or lightweight linen.
- Weave type: Look for a plain weave – it’s firm, balanced, and forgiving if your stitches wander slightly.
- Color: Choose a light or neutral fabric for your first project so you can clearly see your stitches and markings.
- Tip: Pre-wash and iron your fabric before starting. This removes any finish that might resist your needle and prevents shrinking later.
If you want to choose the right fabric with confidence, check out our guide on how to read fabric labels – it helps you spot fiber content, care instructions, and finishes before you buy.
2. Choosing Thread
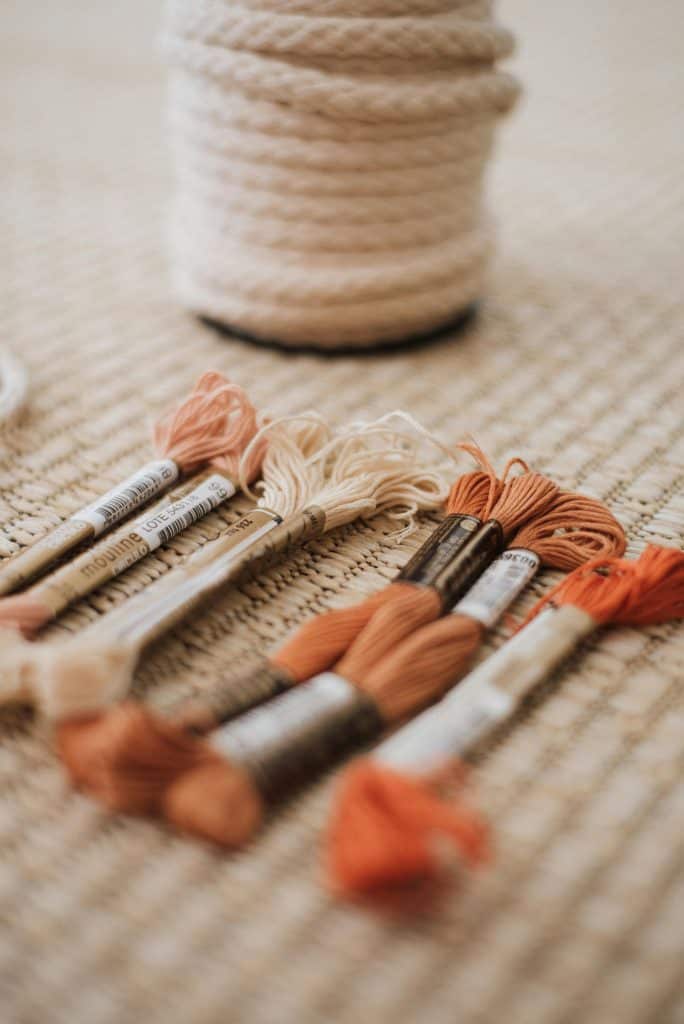
Embroidery thread, or floss, is usually made of six fine strands twisted together.
You can separate these strands to control how thick or thin your stitches appear.
- Best choice for beginners: Cotton embroidery floss – it’s strong, smooth, and widely available.
- Common brands: DMC, Anchor, or Cosmo (each offers consistent color and texture).
- Thread thickness: Use two or three strands for most designs; thicker threads can make stitching harder to control.
- Color selection: Pick colors you naturally enjoy seeing together. A simple palette (one light, one dark, and one accent) helps you focus on stitch technique rather than design complexity.
3. Matching Fabric and Thread
A good rule: the denser the fabric, the fewer thread strands you’ll need.
Lightweight cotton pairs well with two strands; heavier linen may need three or four for visibility.
Try a small test square before starting your main design – stitch a few lines to see how the thread moves through the fabric and how the color looks once stitched.
7 Basic Embroidery Stitches Every Beginner Should Learn
Learning a few basic stitches is the best way to build a strong start in embroidery.
These stitches are simple but versatile, and once you get the rhythm, they open up endless creative possibilities.
With them, you can outline shapes, fill in patterns, or add delicate details that make each piece your own.
1. Running Stitch
The most straightforward stitch.
Bring the needle up through the fabric, then down again in a steady rhythm, creating a dashed line.
It’s used for outlines, borders, and simple textures.
Tip: Keep your stitches and spaces even for a clean, balanced look.
(If you’re new to sewing, check out our guide on essential stitches for beginners – it covers the must-know stitches to get started confidently.)
2. Backstitch
A strong, continuous line created by overlapping stitches slightly backward each time.
Perfect for outlines, lettering, or any area that needs definition.
Tip: Pull your thread gently after each stitch to maintain smoothness without tightening the fabric.
3. Split Stitch
Formed by stitching through the middle of the previous stitch, creating a solid, rope-like texture.
Great for curved lines or delicate outlines.
Tip: Use two strands of floss for best control and visibility.
4. Satin Stitch
A filling stitch made by working long, parallel lines side by side.
It gives a smooth, satin-like finish and is often used for petals, leaves, and solid shapes.
Tip: Outline the shape with small backstitches first; it helps define edges and guides your filling lines.
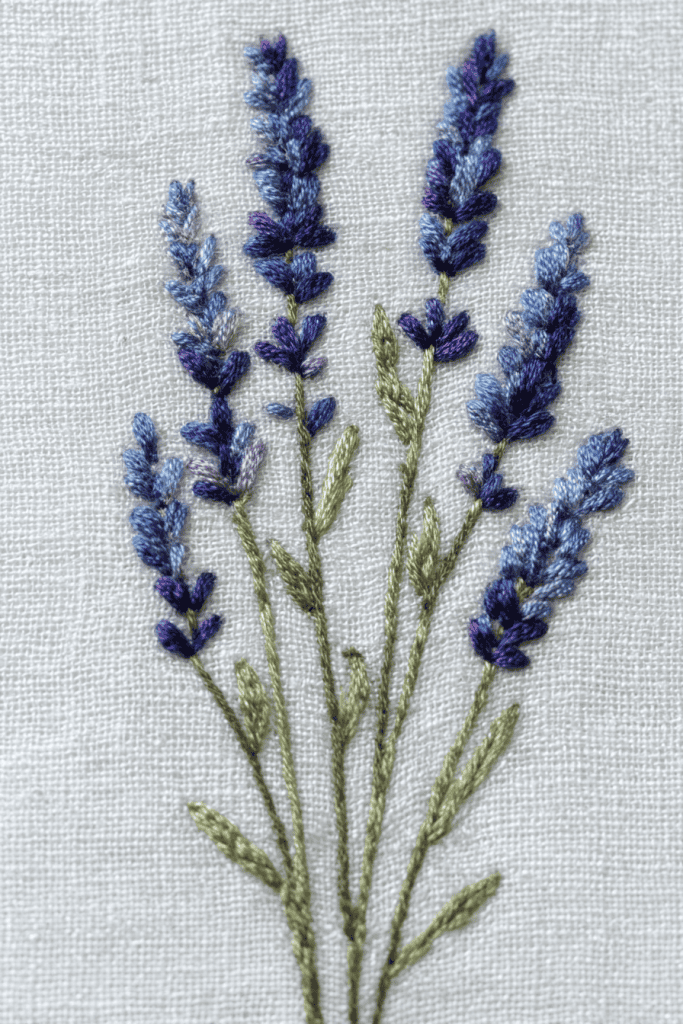
5. French Knot
A small, raised knot made by wrapping the thread around the needle before inserting it back into the fabric.
It adds texture and dimension – perfect for flower centers or dotted accents.
Tip: Keep your wraps tight and your tension consistent to form neat knots.
6. Lazy Daisy Stitch
A looped stitch that forms a petal or teardrop shape. Often used in floral motifs.
Tip: Anchor each loop with a tiny straight stitch to keep it secure and uniform.
7. Blanket Stitch
Traditionally used to edge fabrics, it creates a decorative border that also prevents fraying.
It’s ideal for napkins, patches, or applique edges.
Tip: Use it around even curves for a polished, structured finish.
With these seven stitches, you can complete almost any beginner pattern – from florals and monograms to simple decorative borders.
8 Easy Steps to Start Embroidering
In this step-by-step guide, I’ll walk you through how to set up your fabric, thread your needle, and make your first stitches with ease.
1. Prepare Your Fabric
Start with a clean, pressed piece of fabric. Cotton or linen works beautifully because it’s sturdy yet smooth.
If the fabric is new, give it a quick wash and iron to remove any factory coating – it helps your needle glide more easily.
Cut the fabric at least two inches wider than your hoop on all sides. This extra space gives your hands room to move freely while you stitch.
Hold the fabric in your hands for a moment – feel how it handles.
You’ll start to recognize the difference between a weave that’s too loose or too stiff.
With time, you’ll know exactly what feels “right” for your projects.
2. Transfer Your Design
Pick a simple pattern to begin – maybe a single flower, a leaf sprig, or a monogram.
You can trace a design directly onto your fabric using a water-soluble pen or a heat-erasable marker.
Lay your fabric over a window or use a lightbox if you have one; it makes tracing smooth and precise.
Follow the lines gently – the marks are only guides, not something you need to fill in perfectly.
Keep the design small, about the size of your palm.
This keeps your first project easy to manage while still giving you space to practice different stitches.
3. Set Up Your Hoop
Unscrew the outer ring of your embroidery hoop and place your fabric over the inner ring.
Then press the outer ring on top, sandwiching the fabric between them. Tighten the screw just enough to hold the fabric firmly.
Now, pull gently around the edges to even out any wrinkles.
The surface should feel taut – like the top of a drum – but not stretched to the point of distortion.
This tension helps your stitches sit neatly on the surface without pulling the fabric inward.
4. Thread Your Needle
Cut a piece of embroidery floss about 18 inches long. Any longer, and it’s likely to twist or knot while you work.
Separate your floss into the number of strands your pattern calls for – two or three strands are perfect for most beginner projects.
Thread your needle slowly and tie a small knot at one end.
If you’d rather avoid knots, leave a short tail on the back and anchor it under your first few stitches.
Either method works – what matters is that it feels easy and secure in your hands.
5. Begin Stitching
Bring your needle up through the back of the fabric where your design begins.
Pull the thread through gently until the knot (or tail) stops it. Then, insert the needle back down through the next point of the line.
That’s your first stitch.
Take your time. There’s no rush in embroidery. Focus on the rhythm – up, down, up, down – until it feels natural.
Choose a simple stitch, like the backstitch for lines or lazy daisy for petals.
As you go, you’ll start to recognize how thread tension and stitch spacing shape your design.
6. Manage Thread Tension
This part is about feel. The thread should rest flat on the fabric, not sagging or tight enough to pucker the weave.
If it twists, simply let your needle hang for a moment – the thread will unwind on its own.
Smooth, even tension makes all the difference. It keeps your stitches consistent and your fabric relaxed.
You’ll get better at this naturally with every project.
7. Secure and Finish
When you finish an area, pass your needle under two or three stitches on the back, then trim the thread close.
If you’ve used a knot, make sure it’s small and tidy so it doesn’t create bulk.
To complete your project, remove it from the hoop, give it a light press with a warm iron (face down on a towel to protect the threads), and admire your work.
Even the simplest design holds real value – you made something lasting with your own two hands.
8. Step Back and Observe
Hold your piece up to the light. You’ll see tiny variations in stitch length or angle, and that’s completely fine – it’s evidence of learning.
What matters is that your stitches hold, your fabric is smooth, and you understand how each movement shapes the thread.
Every time you practice, you’ll notice steadier hands and clearer control.
Embroidery rewards this kind of quiet persistence – progress you can actually see.
5 Simple Embroidery Projects for Beginners

Once you’ve practiced a few stitches, the best way to grow your skill is through small, useful projects.
These are approachable pieces that can be completed in a few evenings – practical enough to use, simple enough to build confidence, and satisfying to finish.
1. Embroidered Tea Towel or Napkin
Why it’s a great first project: It’s flat, easy to hoop, and instantly useful in your home.
- What you’ll need: A plain cotton or linen towel, embroidery floss in 2–3 colors, and a simple design (like herbs, flowers, or a border).
- Suggested stitches: Backstitch for outlines, satin stitch for filled shapes, and French knots for small details.
- Tip: Start near one corner and keep your design about palm-sized. It’s small enough to finish yet large enough to practice control.
2. Monogrammed Handkerchief or Cloth Label
Why it’s a great skill builder: Monograms teach precision and spacing – perfect for practicing neat, even stitches.
- What you’ll need: A square of lightweight cotton or linen, embroidery floss in a single color, and your initial printed or traced onto the corner.
- Suggested stitches: Backstitch or split stitch for lettering; satin stitch for bold initials.
- Tip: Outline your letter first, then fill the inside – it helps keep edges crisp.
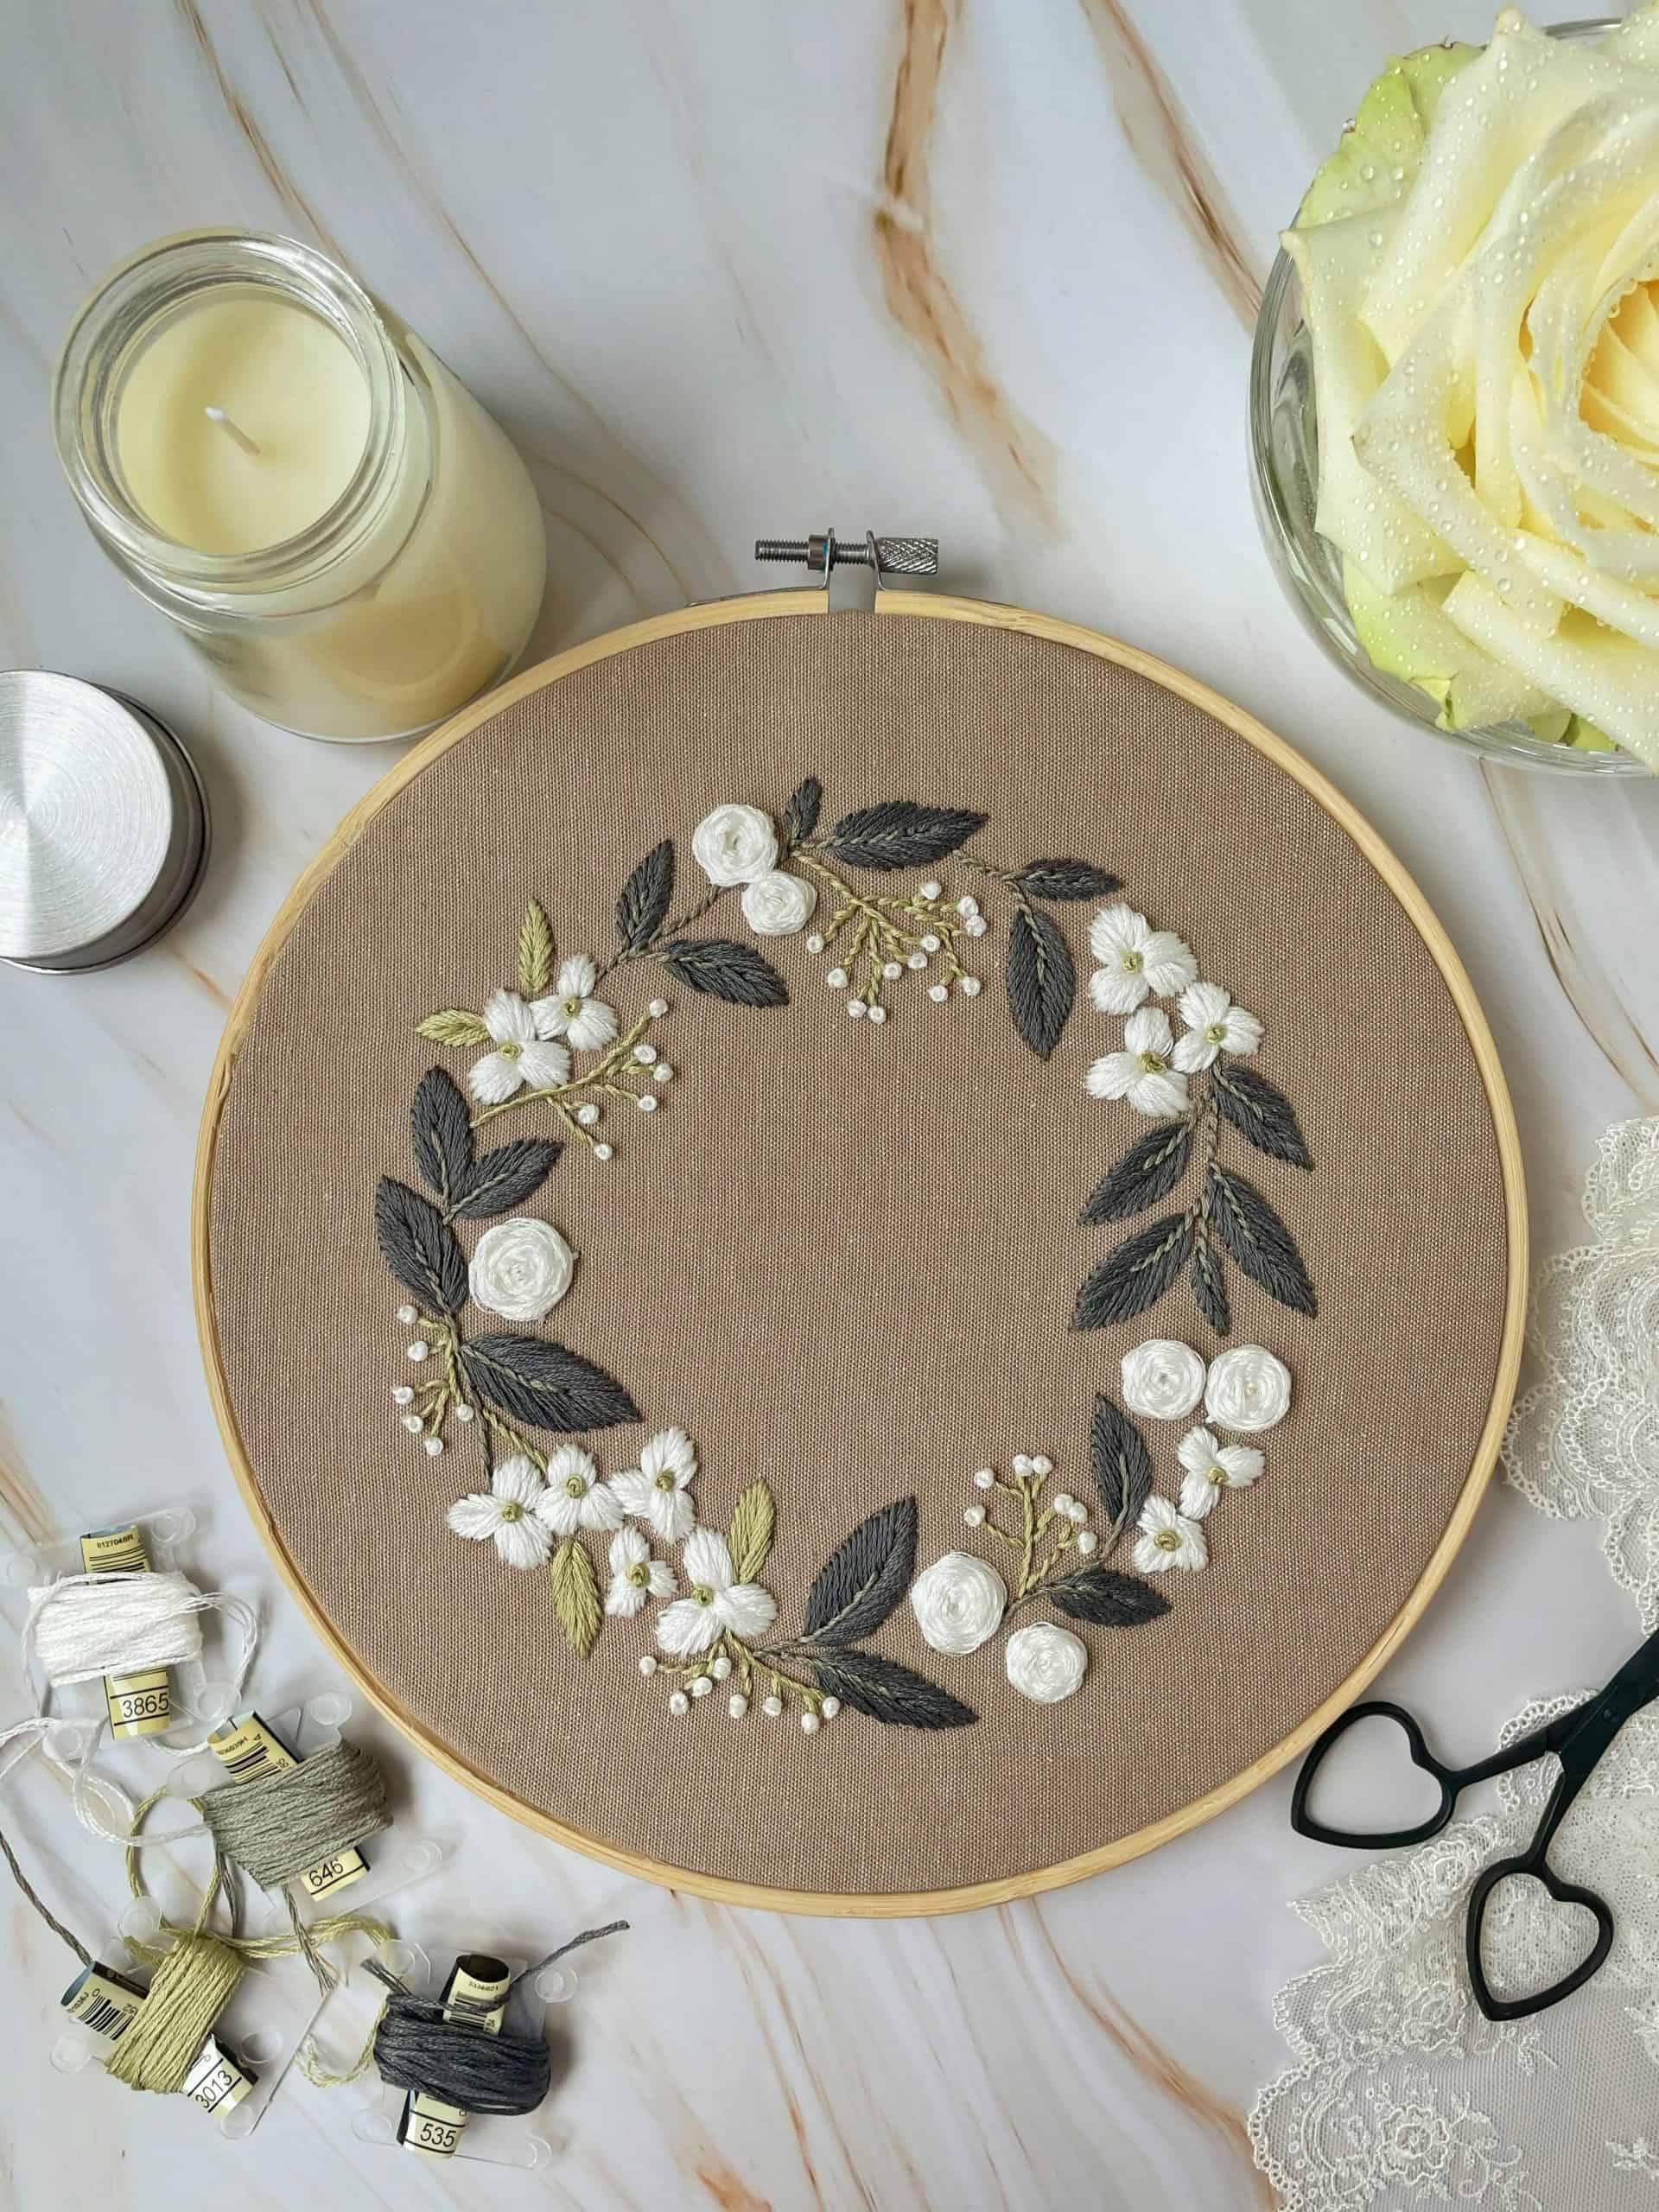
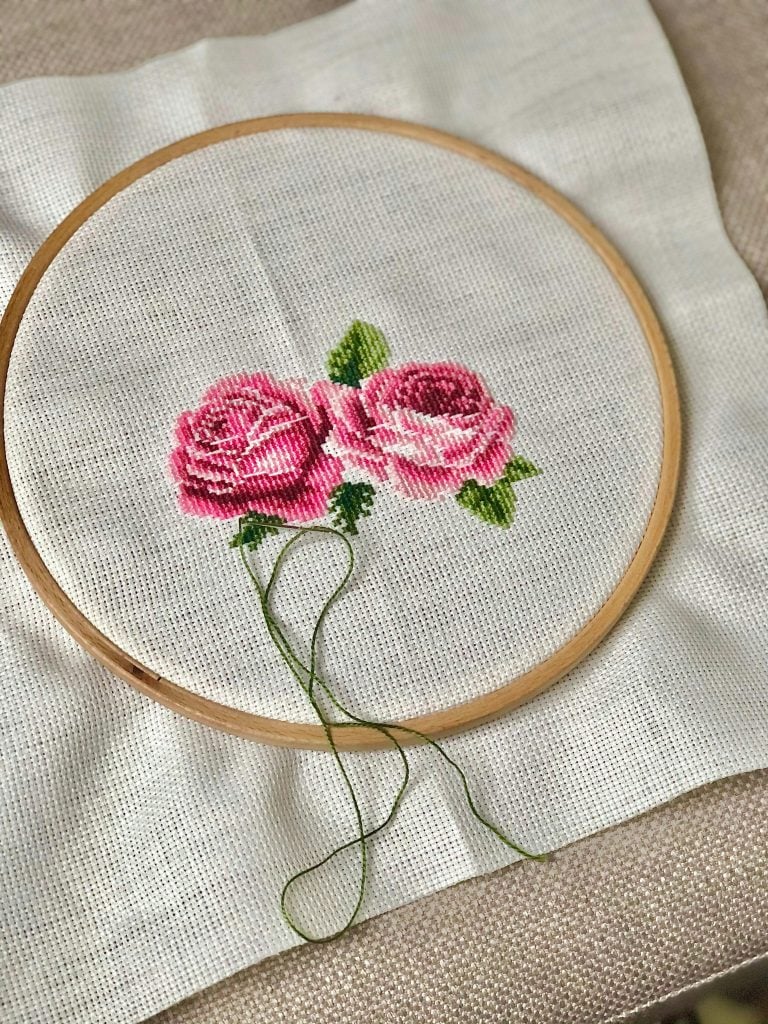
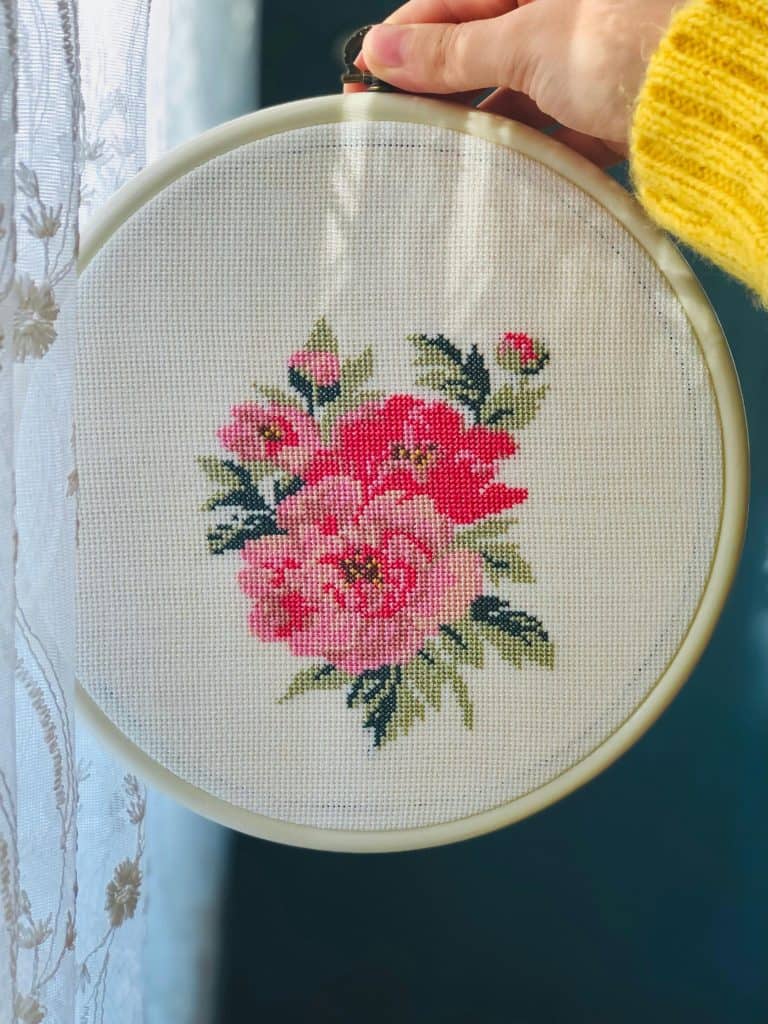
3. Botanical Hoop Art
Why it’s rewarding: It lets you explore composition and color while staying simple.
- What you’ll need: A 6-inch hoop, light linen or cotton fabric, and embroidery floss in green and a few accent colors.
- Suggested stitches: Stem stitch or split stitch for stems, lazy daisy for petals, and French knots for centers.
- Tip: Keep your design organic – a single branch or small cluster of leaves looks beautiful without much planning.
4. Decorative Border on a Pillowcase
Why it’s practical: You can refresh something you already own while practicing long, steady lines.
- What you’ll need: A plain cotton pillowcase and embroidery floss in two shades that complement your bedding.
- Suggested stitches: Running stitch or blanket stitch along the edge; add small lazy daisies or leaf shapes as accents.
- Tip: Mark a straight guide line with a ruler before stitching to keep the border even.
5. Stitched Kitchen Labels
Why it’s fun and useful: Quick to complete, perfect for handmade organization.
- What you’ll need: Small scraps of cotton fabric, embroidery floss, and a pattern for words like Tea, Sugar, or Herbs.
- Suggested stitches: Backstitch for lettering, satin stitch or French knots for embellishment.
- Tip: Sew or glue the finished labels onto fabric jars, baskets, or containers for a personal touch.
Small projects like these build steady hands and clear understanding of how fabric and thread work together.
7 Expert Tips to Avoid Beginner Mistakes
Every beginner learns through practice.
The best way to improve your embroidery is to notice what helps your stitches look cleaner and your fabric stay smooth.
These tips will help you avoid the most common frustrations and build strong, consistent habits from the start.
1. Keep Thread Length Manageable
A common beginner habit is cutting thread too long, thinking it will save time.
In reality, longer threads twist, fray, and knot easily. Cut a piece of embroidery floss about 18 inches long – roughly the length from your fingertips to your elbow.
This length moves smoothly through the fabric and helps you maintain even stitches without tangling.
Shorter threads also make it easier to control your tension and keep your fabric neat.
2. Maintain Even Tension
Good tension is what gives embroidery its clean, balanced look.
When the thread is too tight, the fabric puckers; when it’s too loose, the stitches can sag.
The sweet spot is when your thread rests flat on the surface without pulling.
Check your work every few stitches – the fabric should stay smooth and relaxed.
With practice, your hands will find that balance naturally, and your stitching rhythm will become steady and reliable.
3. Practice Consistent Stitch Length
Even stitches are the hallmark of skillful embroidery.
Large variations can distract from your design, while consistent spacing creates harmony across your pattern.
Try to think in rhythm as you stitch – the movement of the needle up and down should feel measured and calm.
If you struggle with spacing, lightly mark your fabric with dots or lines as a guide.
Over time, your eyes and hands will begin to measure distance instinctively.
4. Secure Your Thread Neatly
The back of your embroidery should feel as cared-for as the front.
Loose ends can unravel over time, and bulky knots may show through lighter fabrics.
Instead of tying large knots, pass your needle under two or three stitches on the back before trimming the thread close.
This creates a flat, secure finish that helps your work last longer.
A tidy back is a sign of attention, not perfection – and it makes washing and pressing much easier later.
5. Use the Right Needle and Fabric Pairing
A good match between needle and fabric makes stitching effortless.
If your needle struggles to pass through, it’s too large; if it slides through with no resistance, it may be too small.
You’ll know it’s right when the needle moves cleanly through the fabric without forcing or stretching it.
The right pairing helps your thread glide smoothly and prevents the weave from distorting – a small adjustment that makes a big difference in comfort and results.
6. Take Breaks and Rest Your Hands
Embroidery uses fine hand movements that can easily tighten muscles over time.
Every 20 to 30 minutes, set your hoop down, stretch your fingers, and rest your eyes.
A short break keeps your grip relaxed and your stitches consistent.
Embroidery is best approached as a steady practice, not a rush to completion – each pause gives you clarity and focus when you return to your work.
7. Embrace the Process
Learning embroidery is not about flawless stitches; it’s about building awareness, patience, and precision.
Every piece (even the uneven ones) holds value because it marks progress.
Keep your early projects as a reminder of how your skill has grown.
You’ll begin to notice straighter lines, cleaner finishes, and smoother rhythm with every session.
That quiet improvement is the real success of handwork.
Embroidery becomes more enjoyable when you allow it to unfold at a natural pace. With attention to these small details – thread length, tension, and care – you’ll find that your projects begin to feel effortless, and your results more refined.
If you’re ready to expand your handwork skills, check out our guide on quilting basics for beginners – it’s a perfect next step once you feel comfortable with stitching techniques.
How to Finish and Care for Embroidered Fabric

Finishing your embroidery is more than the final stitch – it’s what gives your work a lasting, polished look.
Proper finishing helps your design stay bright, your fabric smooth, and your stitches secure for years to come.
Taking a few extra moments to clean, press, and store your piece well is part of respecting the time you’ve invested in creating it.
1. Secure the Thread Ends
Before anything else, turn your embroidery over and check that all loose threads are neatly fastened.
Slip the needle under two or three nearby stitches on the back of the work, then trim the thread close.
Avoid leaving long tails or bulky knots; they can show through lighter fabric or create bumps once pressed.
A clean, smooth back supports a professional finish and helps your stitches hold over time.
2. Wash Gently (If Needed)
If you’ve used a water-soluble or heat-erasable marker to transfer your design, remove it carefully before pressing.
For washable pieces, fill a small bowl with cool water and a mild soap – something gentle, like baby detergent or a few drops of castile soap.
Submerge the fabric and move it softly with your hands; there’s no need to scrub or twist.
Let it soak for about ten minutes, then rinse thoroughly with clean water.
After washing, press the fabric between two clean towels to remove excess moisture.
Avoid wringing or twisting – gentle handling protects your stitches and prevents distortion.
3. Press for a Smooth Finish
Ironing gives your embroidery a crisp, finished look, but it requires care.
Always press from the back of the fabric, not directly on the stitches.
Lay a clean towel or pressing cloth over your work, then iron on a low to medium heat setting.
The towel cushions the thread and prevents flattening the texture.
If your fabric still has slight wrinkles, let it cool completely before re-pressing – heat sets the thread fibers, so it’s better to build up gradually than use high heat all at once.
4. Frame or Store Your Work
Once your embroidery is dry and pressed, you can display it or store it safely.
For framing, stretch the fabric gently over a piece of cardboard or backing material and secure it with acid-free tape or thread.
Avoid glue, which can stain or stiffen fabric over time.
If you plan to store your piece, keep it flat in a fabric-lined box or wrapped in acid-free tissue paper.
Store in a cool, dry space away from direct sunlight to prevent fading.
For embroidered linens or clothing, fold them gently along natural seams to reduce strain on the stitched areas.
5. Handle With Care Over Time
Handmade pieces last longest when treated gently.
If your embroidery decorates an everyday item like a towel or pillowcase, wash it by hand when possible or use a delicate cycle in a mesh bag.
Avoid bleach and harsh detergents, which can dull thread color.
Air-dry flat or on a clean towel rather than hanging – this keeps fabric edges from stretching.
Caring for your embroidery is as much part of the craft as stitching itself.
These final steps preserve the texture, color, and shape of your work, allowing it to age gracefully.
What to Learn Next (and How to Keep Growing Your Skills)
Once you’ve completed your first few embroidery projects, you’ve already built the foundation.
From here, growth comes naturally through steady exploration.
Embroidery offers endless ways to expand your skill, and each step you take deepens both your precision and creativity.
1. Practice With a Stitch Sampler
A stitch sampler is one of the best tools for learning.
Take a piece of cotton or linen fabric and divide it into small sections with a pencil or washable marker.
In each square, practice a different stitch – backstitch, satin stitch, French knot, or anything new you want to try.
Label each one directly on the fabric.
This single piece becomes both a reference and a visual record of your progress.
You’ll quickly see how your tension, spacing, and neatness improve with time.
It’s a simple, structured way to practice without pressure – perfect for quiet evenings or small bursts of creative time.
For an extra layer of organization, consider using a sewing journal to track your projects, note what works, and plan your next steps. It’s a great way to see your growth over time.
2. Try New Patterns and Techniques
Once you’re comfortable with the basics, introduce small challenges.
Try combining stitches, filling larger shapes, or experimenting with different textures of thread like pearl cotton or wool.
Explore small, themed projects such as wildflowers, simple animals, or geometric borders.
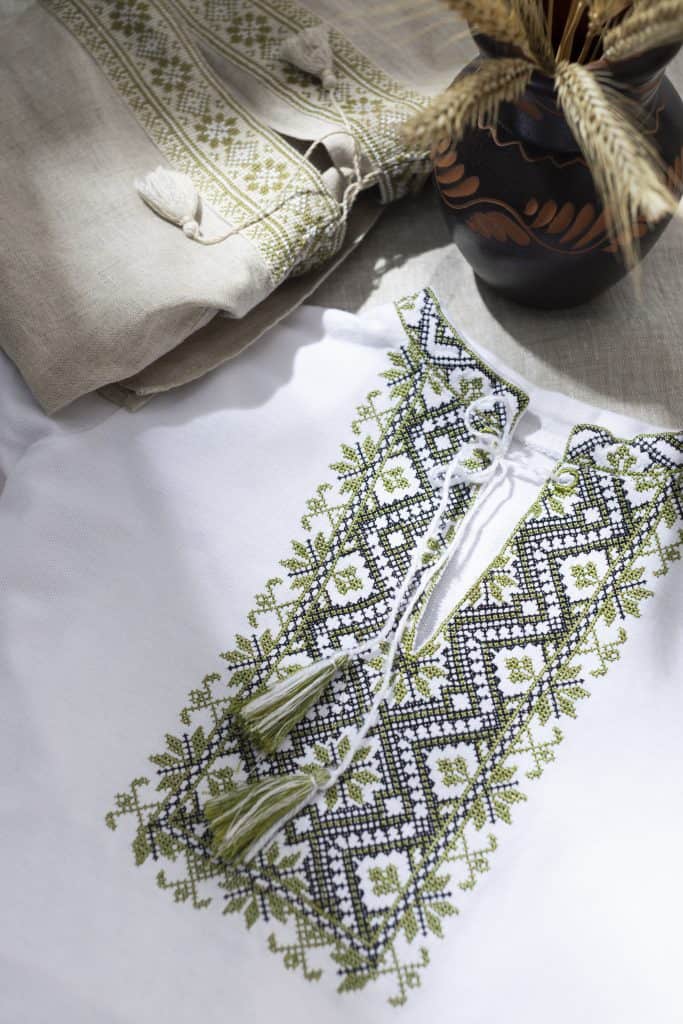
If you’re curious about tradition, look into regional embroidery styles like sashiko (Japanese functional stitching), crewel work (using wool on linen), or redwork (a classic single-color style).
Each tradition teaches new techniques and ways to approach texture and design – all while reinforcing the fundamentals you already know.
3. Learn to Design Your Own Patterns
Start by sketching small motifs (leaves, letters, borders) then trace them onto fabric.
Working from your own drawings gives you freedom and helps you understand how line and space interact in thread form.
Over time, you’ll notice what you enjoy most and you can begin designing projects that reflect your personal style.
4. Join a Community or Workshop
Embroidery is best learned with quiet focus, but there’s real value in connecting with others who enjoy it too.
Look for online workshops, local craft groups, or embroidery circles that offer skill-sharing and encouragement.
Observing others’ work broadens your understanding of technique and keeps you inspired to refine your own.
Even following a few embroidery artists or small makers online can help you see new methods, color combinations, or finishing ideas you might want to try.
5. Build a Routine That Encourages Practice
Consistent progress in embroidery doesn’t require hours each day – just a few intentional minutes.
Keep your supplies in a small box or basket that’s easy to reach.
A routine of fifteen minutes in the evening or while listening to music can do more for your skills than a single long session once in a while.
The more often you handle your needle and fabric, the more natural your movements become.
With time, stitching will feel as familiar as handwriting – calm, confident, and precise.
Start Your Embroidery Journey Today
As you grow, you’ll start to see fabric differently – not just as material, but as potential.
A napkin becomes a canvas for detail.
A shirt becomes an opportunity for repair and renewal.
Embroidery connects creativity with purpose, and that’s what makes it such a lasting skill.
If you’re feeling stuck or frustrated as a beginner, check out our guide on how to overcome sewing beginner frustrations – it’s full of tips to keep you motivated and confident as you practice
So gather your hoop, fabric, and thread – and begin. The first stitch is always the most important one.
What’s your first project going to be? Comment below and share what you’re planning to embroider – let’s start stitching together.
FAQs
1. How do I keep my embroidery fabric from fraying at the edges?
Before you begin stitching, trim your fabric with pinking shears or run a quick zigzag stitch along the edges with a sewing machine. If you don’t sew, apply a thin line of clear fabric glue or Fray Check to the raw edges. This simple step keeps your fabric neat while you work and protects it from unraveling during handling.
2. Can I embroider on clothing?
Yes – embroidery on clothing is both practical and personal. Start with natural fabrics like cotton or denim, as they’re easier to stitch through. Always use an embroidery hoop to keep the fabric tight and prevent puckering. If the material is stretchy, place a piece of stabilizer behind it before stitching to keep the design in place.
3. What’s the best way to transfer a design onto dark fabric?
For dark fabrics, use a white or light-colored transfer pencil, chalk pencil, or iron-on transfer paper made for dark textiles. You can also trace your design onto thin tracing paper, pin it in place, and stitch directly through the paper – then gently tear it away afterward.
4. How do I store embroidery floss to prevent tangles?
Keep your floss wrapped around small bobbins or cards, label each color, and store them in a divided box or pouch. This keeps threads smooth, easy to find, and prevents knots. If you prefer a simple solution, wind each skein loosely and store them in separate resealable bags by color family.
5. How do I fix a mistake in my stitching?
If a stitch lands in the wrong place, use the tip of your needle to gently lift and pull the thread back out. Go slowly to avoid snagging the fabric. For more serious errors, cut the thread at the back, remove the section, and restitch the area. Small corrections like this are normal – they’re part of learning precise handwork.

Thank you so much for helping me get started! I can’t wait to complete my first pieces. You have given me the courage to think I can!!!
Thank you again, Tammy
You’re welcome 🙂