As a mom who leans into simple, practical living, I love projects that are quick, useful, and reusable.
This easy DIY Easter basket checks all of those boxes.
It’s sturdy, beginner-friendly, and customizable enough to make each child feel special.
And the best part is, you can sew one in under an hour.
If you’ve been looking for a simple step-by-step Easter sewing project, this is it.
Why Make Your Own Easter Basket?

Before we jump into the tutorial, let me tell you why this project is worth your time.
- It’s reusable year after year
- It’s sturdier than store-bought baskets
- You control the fabrics (whether you prefer natural cotton and linen)
- It’s customizable for each child
- It doubles as storage after Easter
I love projects that stretch beyond one holiday. After Easter, these baskets become book holders, toy bins, or little gathering baskets for garden harvests.
If you enjoy reusable gift options, you might also love how to sew a Christmas fabric gift bag – another zero-waste project you can bring out year after year.
Supplies You’ll Need
This Easter basket sewing tutorial is intentionally simple. No complicated pattern pieces.
Fabric & Stabilizer
- Outside fabric: 23 inches x 6 inches
- Lining fabric: 23 inches x 6 inches
- Iron-on stabilizer: 23 inches x 6 inches
- Bottom circle: 8-inch diameter (cut one each from outside fabric, lining, and stabilizer)
- Handle: 15 inches x 3 inches (outside fabric + stabilizer)
Tools
- Sewing machine
- Thread
- Iron
- Pins or clips
- Scissors
- Something round to trace an 8-inch circle
Step-by-Step: How to Sew an Easy Easter Basket
Let’s walk through this slowly and clearly. You can absolutely do this – even if you’re newer to sewing.
Step 1: Fuse the Stabilizer
Press the iron-on stabilizer to:
- The outer side panel
- The bottom circle
- The handle piece
Use medium heat and follow your stabilizer’s instructions.
This is what gives the basket structure. Don’t skip it.
Step 2: Sew the Side Seam
Take your outer side panel (23 x 6 inches).
- Fold it in half so the short ends meet.
- Place right sides together.
- Sew the short edge using a ¼ inch seam allowance.
- Press the seam.
Repeat this same step with your lining piece.
Now you have two fabric tubes.
Step 3: Attach the Bottom
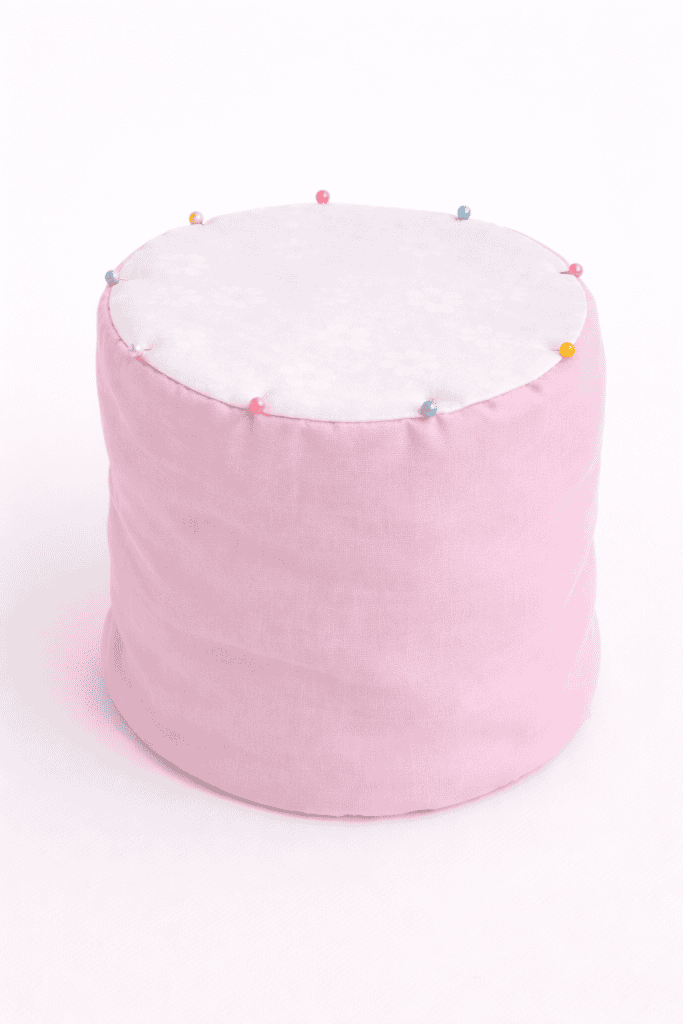
Pin the 8-inch bottom circle to the bottom of the outer tube.
- Right sides together
- Ease it evenly around
Sew all the way around the circle.
Repeat with the lining piece.
Take your time here. Sewing circles can feel tricky at first. Go slow and pivot gently as you sew.
Now you have:
- One finished outer basket shell
- One finished lining shell
And it already looks like something.
Step 4: Make the Handle
Take the 15 x 3 inch handle piece.
- Fold lengthwise, right sides together.
- Sew along the long edge.
- Turn right side out.
- Press flat.
You can topstitch along the long edges if you want a polished look.
Step 5: Attach the Handle
Place each end of the handle on opposite sides of the outer basket.
Pin them near the top edge. Make sure they are centered.
Tack (baste) them in place so they don’t shift.
Step 6: Join Outer and Lining

Place the outer basket inside the lining basket.
Right sides should be together.
Match the side seams and pin around the top edge.
Sew around the top edge – but leave a 3 to 4 inch opening.
This opening is important. It’s how we’ll turn it right side out.
Step 7: Turn It Right Side Out
Pull the basket through the opening.
It feels a little magical every time.
Push the lining inside. Shape the bottom with your fingers.
You’re almost done.
Step 8: Press and Topstitch

Press around the top edge so it’s crisp.
Then topstitch all the way around the top.
This closes the opening and gives it that clean, finished look.
And just like that…
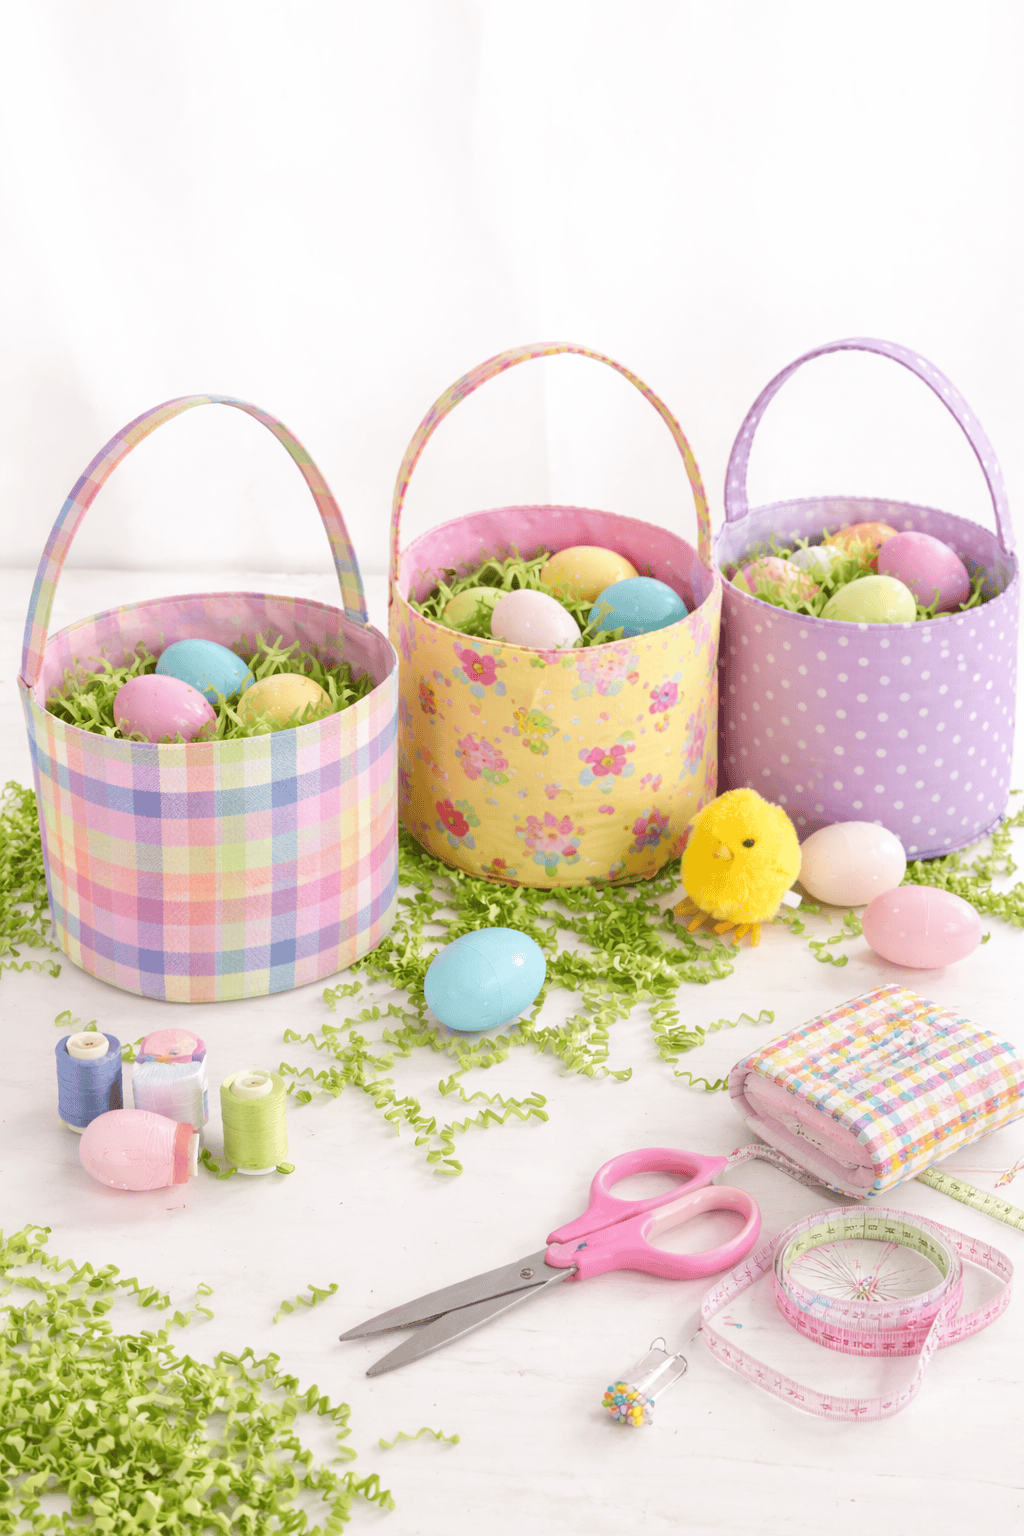
Your easy DIY Easter basket is finished.
Customizing Your Handmade Easter Basket
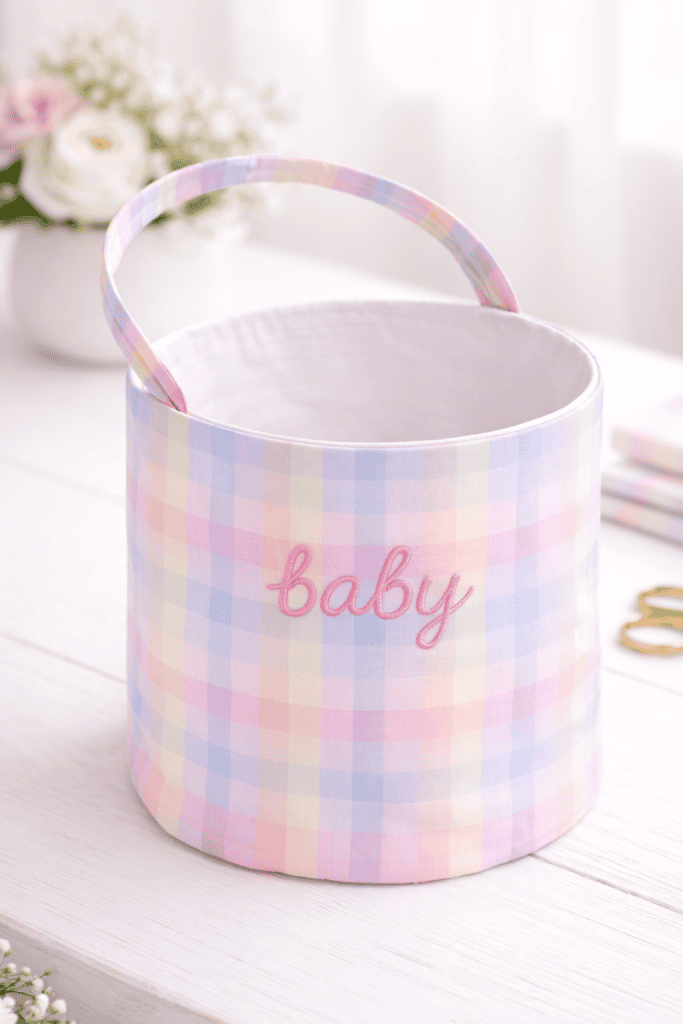
You can personalize this simple Easter sewing project in so many ways:
- Add a name tag
- Embroider initials
- Sew on a patch
- Add lace trim
- Use neutral linen for a farmhouse look
- Use pastel cotton prints for a classic Easter vibe
If you’d like to add a delicate touch, my guide on how to sew lace onto fabric can help you elevate your basket beautifully (without making the project feel complicated).
If you’re like me and prefer natural fabrics, this is a great excuse to use leftover cotton or linen scraps.
It’s simple. But it feels special.
Is This a Good Project for Beginners?
Yes. If you can sew a straight line, you can make this basket.
The only slightly tricky part is sewing the circular bottom. Just go slow. Use plenty of pins. Adjust as you go.
This project builds confidence without overwhelming you.
If you’re brand new to sewing, you may also enjoy these beginner friendly sewing projects to build confidence before or after making this basket.
Can You Make These to Sell?
Absolutely. Because they’re reusable and customizable, handmade Easter baskets are something families come back for every year.
If you:
- Choose quality fabrics
- Keep seams neat
- Offer personalization
You could easily turn this into a small seasonal side income.
And I love projects that serve both home and income potential.
If you’re curious about expanding beyond holidays, explore other profitable sewing projects you can sell for additional inspiration.
Make One This Week (And Start a Tradition)
Set aside one quiet evening this week.
Pull out your sewing machine. Cut the fabric. Press the stabilizer. Let it be simple.
Just start with one basket. One small, thoughtful project that can become part of your family’s Easter rhythm year after year.
And if you do make one, I would truly love to hear about it.
Tell me in the comments:
- What fabric did you choose?
- Did you add a name or special detail?
- Are you sewing one for each child or sharing one for the whole family?
Your ideas might inspire someone else who’s thinking about starting, too.
Grab Your FREE Sewing Pattern Labels Today

As the seasons pass and projects add up, those little paper patterns have a way of piling into drawers and baskets. And when you go to remake something, you end up searching instead of sewing.
That’s exactly why I created these Free Sewing Pattern Labels.
They make it simple to keep every pattern neat, easy to find, and ready whenever inspiration strikes. Just print the labels, fill them out, and attach them to your pattern envelopes.
In a few minutes, your patterns go from scattered to beautifully organized.
A small change that makes your sewing space feel calmer, clearer, and ready for your next project.
FAQS
Can I make this Easter basket without stabilizer?
You can, but it won’t be as sturdy.
If you want it to stand upright, stabilizer is highly recommended. You could substitute fusible fleece or a heavier interfacing if needed.
What type of fabric works best?
Medium-weight cotton works beautifully. Linen also gives a lovely natural look. Avoid very thin fabrics unless paired with strong stabilizer.
Can I wash the basket?
Yes. If using cotton and fusible stabilizer, wash on gentle and air dry. It may need a light press afterward.
How can I make a larger Easter basket?
Increase the side panel length for more circumference and increase the bottom circle diameter proportionally.
For example:
- 28-inch side panel
- 10-inch bottom circle
Keep the height measurement consistent if you like the current proportions.
Can kids help with this project?
Yes – especially older children. They can:
- Help pick fabrics
- Pin pieces
- Turn the basket right side out
- Press seams (with supervision)
It’s a beautiful way to include them in preparing for Easter.
