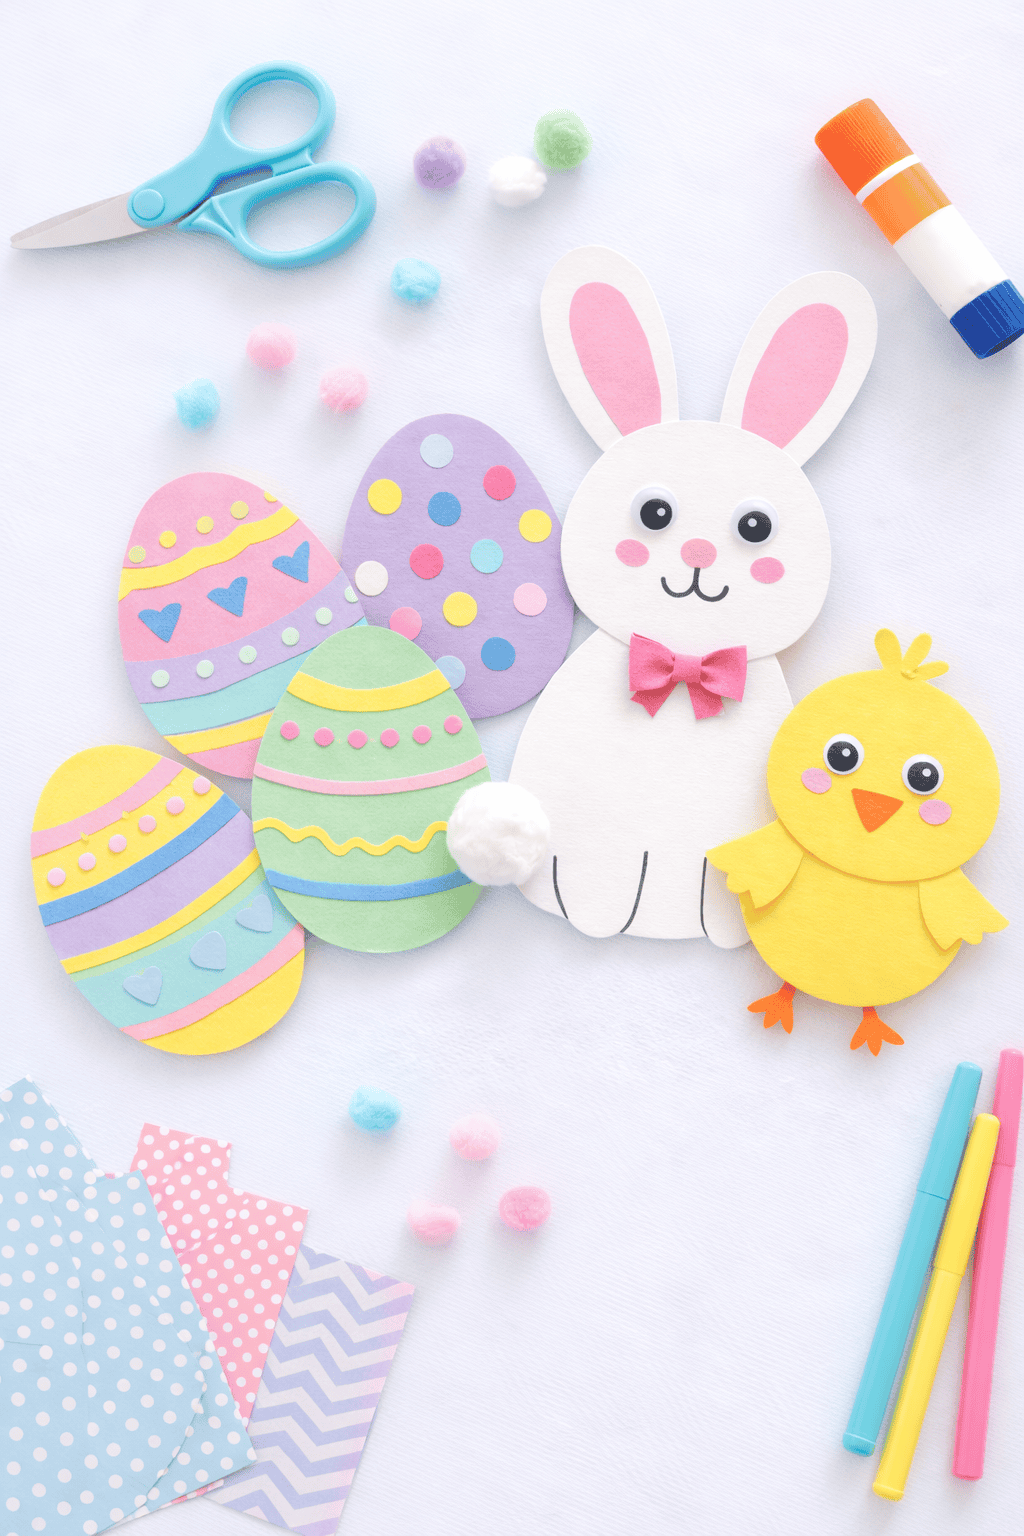
Easter is a wonderful time to get crafty with your little ones.
Whether you’re a parent, grandparent, or teacher, making Easter crafts for kids is a fun way to celebrate the season together.
These projects are easy Easter crafts for kids ages 5–10, using simple household materials and lots of imagination.
The best part is you’ll enjoy screen-free family time while creating happy memories and colorful keepsakes.
From bunnies and chicks to spring blooms, there’s something here for everyone to make.
So gather those egg cartons, paper scraps, and glue sticks – let’s hop into some creative Easter activities for kids!
Why Easter Crafts Are Great for Kids
Crafting is a chance for kids to learn, bond, and have fun.
Easter crafts for kids offer many benefits:
- Creativity & Imagination: Children get to design, paint, and decorate, turning ordinary materials into Easter treasures. Crafting encourages them to invent their own ideas and stories as they create.
- Fine Motor Skills: Cutting, gluing, coloring, and assembling small pieces help strengthen those little hands. All that bunny-ear cutting and egg painting builds coordination and confidence in their skills.
- Quality Family Time: Crafting together is quality screen-free time. Parents and kids can chat, laugh, and connect one-on-one. It’s a wonderful way to slow down and bond over a shared project, whether you’re making one craft or an afternoon’s worth.
- Seasonal Joy & Learning: Easter crafts help kids engage with the holiday and the spring season. As they make bunnies, chicks, and eggs, you can talk about Easter traditions or the signs of spring (flowers blooming, baby animals, etc.), making learning fun and hands-on.
- Pride & Confidence: There’s nothing like the “Look what I made!” feeling. Displaying their handmade Easter decorations or gifting a craft to Grandma gives kids a sense of accomplishment and pride in their work.
With just basic supplies and a little guidance, Easter crafts for kids turn an ordinary day into a meaningful, creative adventure.
(If you love holiday crafting, you can also check out our creative Christmas crafts for kids for more inspiration.)
10 Easy Easter Crafts for Kids Using Everyday Materials
Let’s get started with 10 wholesome and easy Easter crafts for kids that use everyday materials you likely have at home.
These ideas are simple to set up and filled with springtime fun.
Each craft brings a touch of Easter magic – from fuzzy animals to colorful eggs – and plenty of opportunities for your kids to get creative.
Coloring Easter eggs is a classic activity, but it’s just one of many creative Easter crafts your kids can enjoy this season. The list below features a variety of projects to keep little hands busy and happy.
1. Egg Carton Chicks
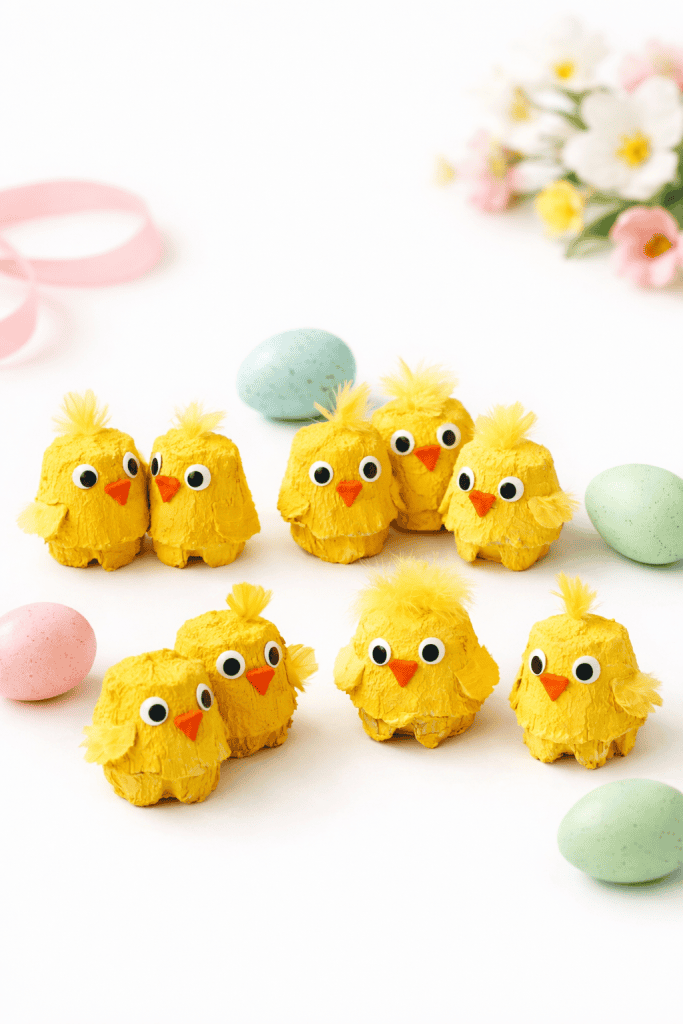
Transform an old egg carton into a brood of adorable baby chicks! This easy Easter craft is perfect for recycling materials and makes a cute decoration or toy.
Materials: Cardboard egg carton, yellow paint (or markers), paintbrush, glue, googly eyes (or bits of paper), orange paper or felt for beaks, scissors.
Instructions:
- Cut the Carton: Help your child cut out individual cups from the egg carton – these will become the chick bodies. You’ll need one cup per chick.
- Add Color: Paint each egg carton cup yellow (inside and out) and let them dry. If you don’t have paint, yellow markers or crayons work too. This is a great step for kids to do – it’s okay if it’s a bit spotty, that just adds character!
- Create the Face: Glue on two googly eyes to the front of each yellow cup. For the beak, cut a small triangle of orange paper or felt and glue it just below the eyes. Now your chick has a cute little face.
- Finishing Touches: If you like, you can glue a bit of yellow craft fluff or a few yellow feathers to the top to look like fuzzy hair (optional). Older kids might also draw little wings on the sides of the cup.
Let the glue dry, and your egg carton chicks are ready to “hatch”! These tiny chicks stand up on their own and make a delightful Easter display on a countertop or windowsill.
Kids will love that they turned something as ordinary as an egg carton into a cheeping Easter friend.
2. Paper Plate Bunny Mask

Kids will have a blast pretending to be the Easter Bunny with this simple paper plate mask.
It’s a craft and an imaginative play prop all in one. Watch as your child hops around wearing their handmade bunny disguise!
Materials: Paper plate, white and pink construction paper (for ears and nose), black marker or pipe cleaners (for whiskers), scissors, glue or tape, a popsicle stick or elastic string.
Instructions:
- Prepare the Plate: Take a paper plate and cut out two eye holes so your child can see. An adult can start the cut with scissors or a craft knife (grown-ups only) and then help trim the holes to the right size. This plate is the bunny’s face.
- Make Bunny Ears: Cut out two big bunny ear shapes from white paper, and two smaller inner-ear pieces from pink paper. Glue or tape the pink inner ear onto the white ear. Then attach both ears to the top of the plate (on the back side) so they stick up. Now your bunny has its ears perked up!
- Add Nose and Whiskers: Cut a small oval or triangle from pink paper for the nose and glue it in the center of the plate (where a nose would be). For whiskers, either draw three whiskers on each side with a black marker, or glue on pieces of black pipe cleaner or paper strips. Suddenly, your bunny mask has an adorable face.
- Attach a Handle or String: For a mask they can hold, tape or glue a popsicle stick to the bottom of the plate as a handle (like a masquerade mask). Alternatively, punch a hole on each side of the plate and tie a piece of elastic string to make it a wearable mask around the head.
Once everything is dry, it’s time to play! Hop around and let your little bunnies pretend to deliver Easter eggs.
This craft is great for inspiring imaginative play – expect lots of giggles and maybe a few “boing, boing” bunny impressions!
For faith-based classrooms or homeschool lessons, check out our easy Sunday school crafts on a budget that keep prep simple while reinforcing meaningful lessons.
3. No-Sew Sock Bunny
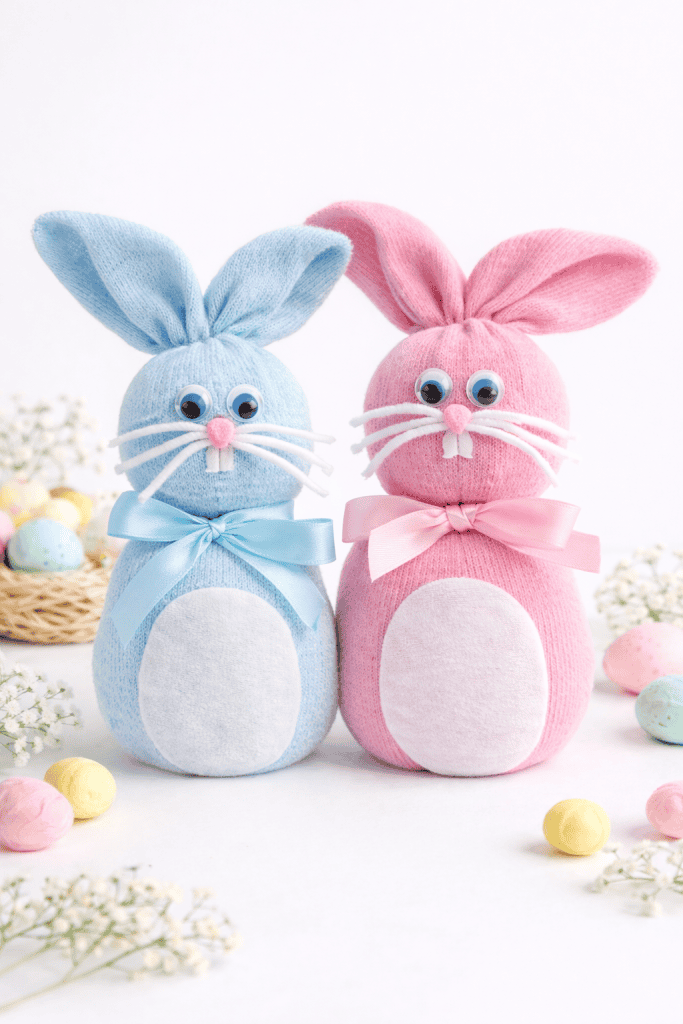
Give new life to those lonely old socks by turning them into cuddly Easter bunnies.
This no-sew craft is like making a DIY stuffed animal – perfect as a spring craft for kids and a sweet homemade toy.
Materials: A clean sock (an adult sock makes a bigger bunny, a child’s sock a smaller bunny), rice or dried beans (for filling), ribbon or string, markers or felt scraps for the face, scissors. (Optional: a rubber band)
Instructions:
- Fill the Sock: Pour rice or dried beans into the sock until it’s about 2/3 full. The sock will start to form a body shape. Kids can help scoop with a funnel or spoon – it’s a good sensory activity feeling the rice fill it up.
- Form the Bunny Body: Tie a ribbon or wrap a rubber band tightly around the sock about two-thirds of the way up, creating a head on top and a body below. Adjust the size: the top portion is the bunny’s head (smaller) and the bottom is the belly (larger). You can also tie another ribbon around the very top of the sock to close it, but we will trim it in the next step.
- Make the Ears: The excess sock at the top above the “head” will become the ears. Use scissors to cut this top part in half (from the tip down to the head tie) forming two floppy ears. Trim the corners to make them more ear-shaped (rounded or pointed – however you like). Now you have a bunny shape!
- Add a Face and Tail: Draw eyes, a nose, and whiskers on the bunny’s face with markers (or glue on tiny felt or paper pieces for the facial features). For a tail, you can glue a small pom-pom or cotton ball to the back of the bunny’s bottom. If you don’t have one, a little wad of cotton or even a balled-up scrap of the sock can be the tail.
- Finishing Touch: Tie a pretty ribbon around the bunny’s neck (over the rubber band that separates head from body) to look like a bow or bow tie. This also secures the head shape nicely.
Now give your new sock bunny a gentle squish – it’s satisfyingly soft and weighted. Kids love carrying their homemade bunny around.
Each bunny will have its own personality depending on the sock color and the face your child creates.
This is a wholesome Easter craft that doubles as a heartfelt toy or Easter basket gift made by your child.
4. Paper Plate Easter Chick
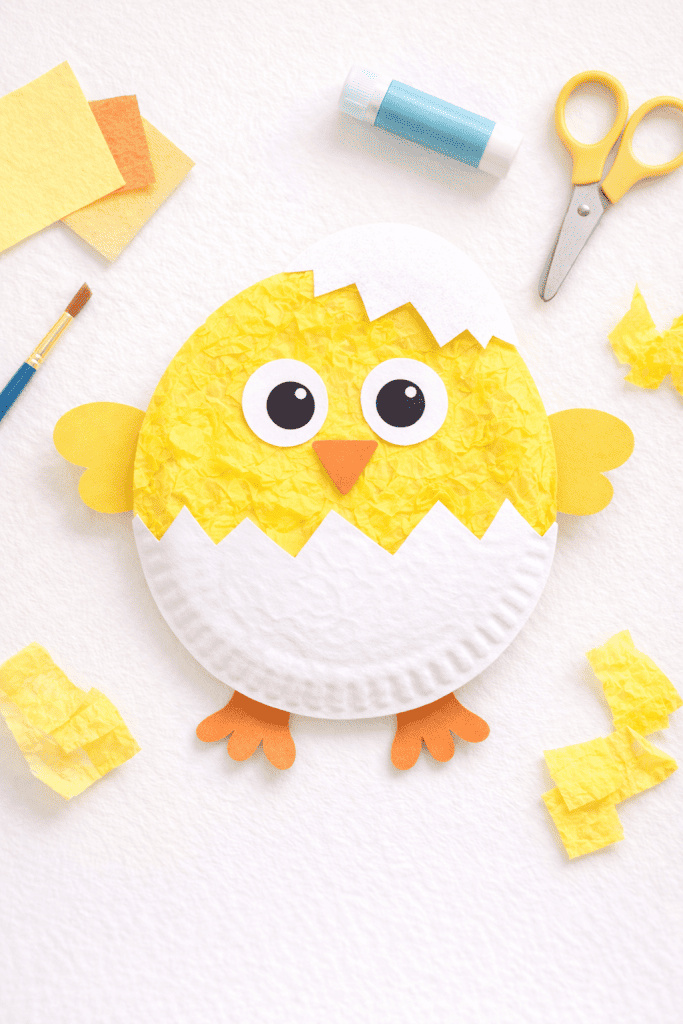
Cheep cheep! This paper plate craft turns a plain plate into a fluffy baby chick just in time for Easter.
It’s bright, fun, and easy enough for young kids, but older kids can add details to make it their own.
Materials: Paper plate (yellow if available, or you can paint a white one), yellow paint or tissue paper, construction paper (orange and white), googly eyes (optional), child-safe scissors, glue.
Instructions:
- Color the Chick: If you have a yellow paper plate, you’re already set for the chick’s body. If not, have your child paint a white paper plate all over with yellow paint and let it dry. Alternatively, you can have them glue torn-up pieces of yellow tissue paper all over the plate for a fluffy textured look – a great option for little hands.
- Add the Chick’s Face: Cut two round circles from white paper for eyes (or use googly eyes) and glue them towards the top center of the plate. Cut a triangle from orange construction paper for the beak. Glue the beak just below the eyes, pointing outward. Now the chick has a cute face.
- Wings and Feet: Cut two small wing shapes from yellow paper (basically ovals or half-circles) and glue one on each side of the plate as the chick’s wings. For feet, cut two little strips or duck-foot shapes from orange paper and glue/tape them to the bottom of the plate on the back side, so they stick out from under the chick.
- Optional – Hatchling Egg Shell: For a fun twist, you can make it look like the chick is hatching. Cut a zig-zag “cracked egg shell” from white paper or another paper plate, and glue it on the bottom of the chick (so the chick looks like it’s popping out of an egg). You could do a smaller cracked shell piece on its head too, as if it’s wearing part of the egg!
Let all the glue dry, then have your child hold up their paper plate chick and make it “cheep!”
This craft makes a delightful homemade decoration – hang it on the fridge or wall to add some Easter cheer. It’s amazing what a little paint and paper can do!
Families celebrating biblical holidays may enjoy these simple Passover crafts for kids, which offer hands-on ways to teach history and tradition.
5. Tissue Paper Egg Sun-Catchers
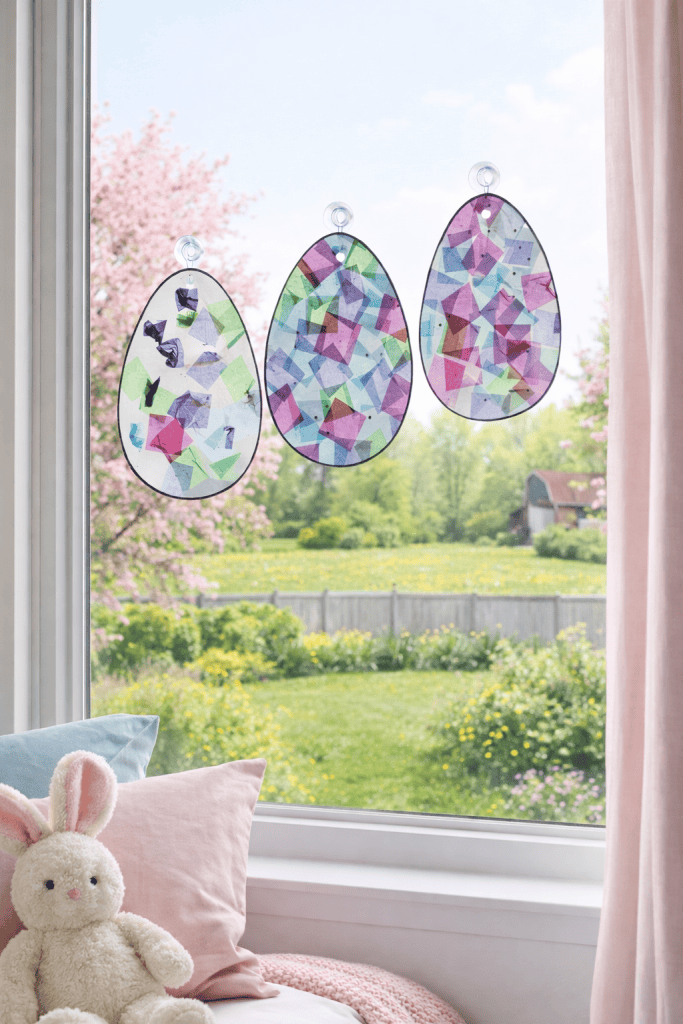
Bring some color to your windows with “stained glass” Easter eggs.
This craft uses tissue paper to create a beautiful sun-catcher that looks like a stained glass Easter egg when hung in the light.
It’s a lovely craft that also teaches about colors and light.
Materials: Colored tissue paper (an assortment of colors, cut or torn into small pieces), clear contact paper or wax paper, scissors, construction paper (for the egg frame), hole punch and string (for hanging, optional).
Instructions:
- Create an Egg Frame: First, cut an egg shape out of construction paper – this will be the frame. To do this, fold a piece of construction paper in half, draw a large half-egg shape against the fold, and cut it out. Then cut out the inside of the egg, leaving about a 1-inch thick outline. When you unfold, you’ll have an egg-shaped ring or frame. (Grown-ups may need to help with cutting the center out.)
- Prepare the Sticky Surface: If using clear contact paper, cut a piece slightly larger than your egg frame, peel off the backing, and lay it sticky side up on the table. If using wax paper, cut a piece and tape it down flat on the table, then have an adult brush a thin layer of clear school glue all over it to make it sticky.
- Make the “Stained Glass”: Now the fun part – let the kids place the small tissue paper pieces onto the sticky contact paper or wax paper. They can overlap colors, arrange a pattern, or just do a random mosaic. The tissue pieces will create a translucent, colorful collage. Fill an area at least as big as the egg frame (make sure there are no gaps where there’s no tissue).
- Seal it Up: If using contact paper, you can place a second sheet of clear contact paper on top to seal in the tissue paper pieces (sticky side down, like a sandwich). If using wax paper and glue, once they finish placing tissue, you can add another thin layer of glue on top to secure the pieces (or a second sheet of wax paper with glue between).
- Attach the Frame: Gently place the construction paper egg frame on top of the tissue design so that it sticks to the contact paper (or glue). Now your tissue collage shows through the egg-shaped window. Let everything dry if glue was used. Trim any tissue bits sticking out beyond the frame so you have a neat egg shape.
- Display: Punch a hole at the top of the egg and tie a ribbon or string, then hang your sun-catcher egg in a sunny window. When sunlight shines through, you’ll get a beautiful display of colors!
These tissue paper sun-catcher eggs look amazing hung up for Easter – perhaps in the kids’ bedroom window or in the living room.
Each one is unique, and you can make a whole batch of different sizes and colors. It’s a wonderful craft for teaching about how light passes through colors.
When Easter is over, you might even keep these up as cheerful spring crafts that brighten your home.
6. Shaving Cream Marbled Eggs
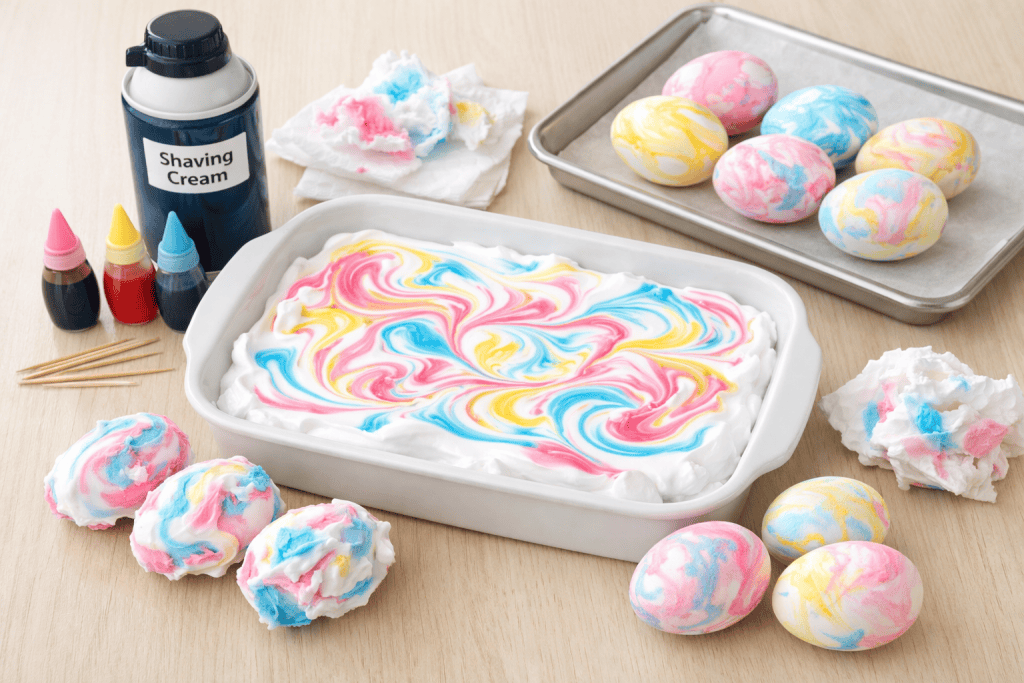
Ready to get a little messy and make some dazzling Easter eggs? This project uses shaving cream to marbleize eggs with swirls of color.
It’s a sensory Easter activity for kids that produces beautifully decorated eggs for your basket.
Materials: Hard-boiled eggs (white shells work best) or craft faux eggs, a baking dish or tray, shaving cream (foam, not gel), liquid food coloring or liquid watercolors, toothpicks or a skewer, rubber gloves or tongs (optional, to keep hands clean), paper towels.
Instructions:
- Set Up the Swirl Tray: Spray a layer of shaving cream into your tray or baking dish, spreading it out evenly like frosting (about 1 inch deep).
- Add Colors: Drip several drops of food coloring in different spots on the surface of the shaving cream. Use a few colors (for example, drops of pink, yellow, and blue food coloring). Don’t go too overboard; 2–3 colors at a time usually works well and avoids muddiness.
- Marble the Colors: Take a toothpick or skewer and gently drag it through the shaving cream, swirling the food coloring drops around. Make curvy, loopy patterns – this will create a marbled effect. Kids love this part because the colors make pretty swirls. Stop before the colors blend completely; you want distinct swirls.
- Roll the Eggs: Wearing rubber gloves (or using tongs or just careful hands), place a hard-boiled egg on the colorful shaving cream and roll it so that the entire egg shell gets coated in the shaving cream and food coloring mixture. You can also gently press the egg into the foam and turn it. Do this for each egg, setting the coated eggs aside on a protected surface (like a parchment-lined tray). The eggs will look messy now, but the magic is coming!
- Wait, Then Wipe: Let the shaving cream sit on the eggs for about 5–10 minutes. This allows the color to absorb into the shells. Then, wipe off the shaving cream from each egg with paper towels or a rag. As you buff it off, you’ll reveal gorgeous marbled patterns on the eggs! (Tip: It’s best to wear old clothes or aprons for this, and cover your table with butcher paper or a plastic tablecloth for easy cleanup.)
Voila – each egg is a tiny work of art! Kids will be amazed at the swirling pastel designs they created.
Display your marbled Easter eggs as a centerpiece, or hide them for an Easter egg hunt (just remember where you put them if they’re real eggs!).
This craft is a bit messy, but the wow factor is worth it, and cleanup is part of the fun when you see the final results.
If you’re looking for projects with deeper meaning, explore our meaningful crafts that teach the 10 commandments to combine creativity with foundational values.
7. Easter Bunny Garland with Cotton Tails
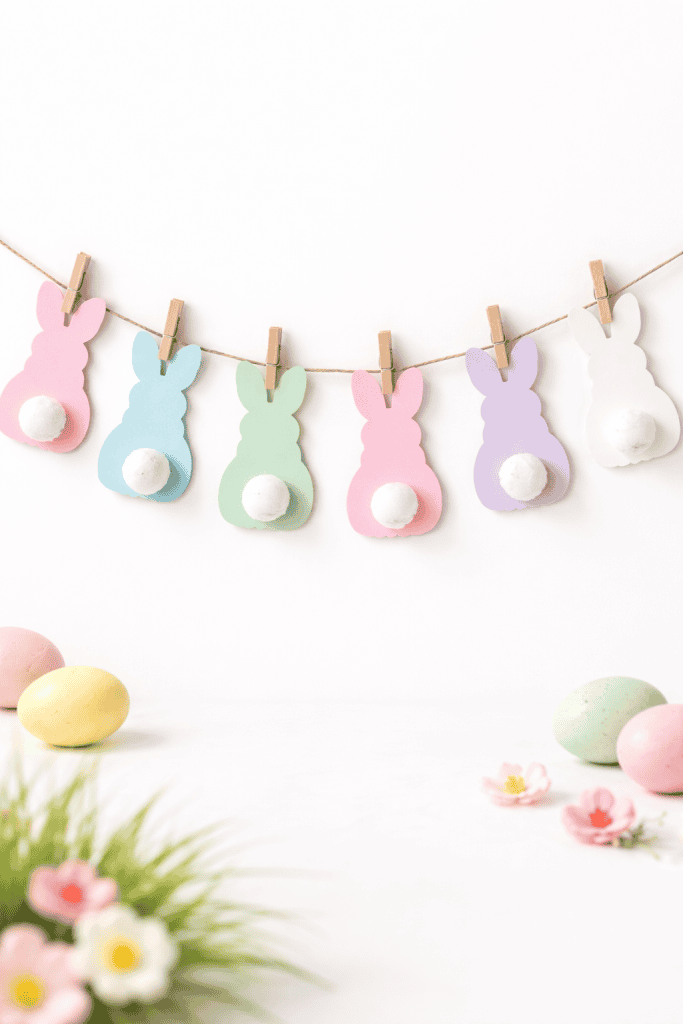
Decorate your home for Easter with a charming bunny garland that kids can help craft. This project involves making a string of paper bunnies, each with a fluffy cotton ball tail.
It’s simple and makes a lovely decoration across a mantel or doorway.
Materials: Colored construction paper or cardstock (pastel colors are great, or plain white), pencil, bunny silhouette template (optional, or draw your own), scissors, cotton balls, glue, a hole punch, yarn or ribbon (for stringing the garland), tape (for hanging).
Instructions:
- Cut Out Bunnies: Draw a simple bunny shape on paper (one that shows the bunny’s profile or back view with ears). If drawing isn’t your forte, you can find a bunny silhouette online to trace. Cut out the bunny shape and use it as a template. Trace it onto your construction paper multiple times. Make about 6-10 bunnies (depending on how long you want your garland). Kids can help trace if you hold the template, or they can cut along drawn lines if they are comfortable with scissors.
- Add Fluffy Tails: For each paper bunny cut-out, glue a cotton ball onto the backside, right where the tail would be. The cotton ball is the bunny’s puffy tail, which gives the garland a fun 3D touch. Let the glue dry for a few minutes so those tails stick on well.
- String the Garland: Use a hole punch to make a small hole at the top of each bunny’s ear or two holes at the top of each bunny (one in each ear, for stability). Then thread a long piece of yarn or ribbon through the holes of each bunny, stringing them together. You can arrange the colors in a pattern or randomly. If you don’t have a hole punch, another option is to simply tape the backs of the bunnies to a piece of string.
- Space and Secure: Slide the bunnies along the string so they are spaced out evenly. You might tie a little knot around the hole behind each bunny or add a piece of tape to keep them from sliding if you want them fixed in place.
- Hang It Up: Find the perfect spot to display your garland – across a fireplace mantel, along a stair rail, or above a window. Use tape or thumbtacks to secure the ends of the garland in place.
Stand back and admire your bunny banner! The kids will be proud seeing their paper bunnies hopping across the room.
This garland brings a wholesome Easter touch to your decor and can be saved and reused next year.
For added fun, intersperse paper egg shapes or little chick cut-outs between the bunnies if you want a full Easter theme garland.
8. Cotton Ball Lamb Craft
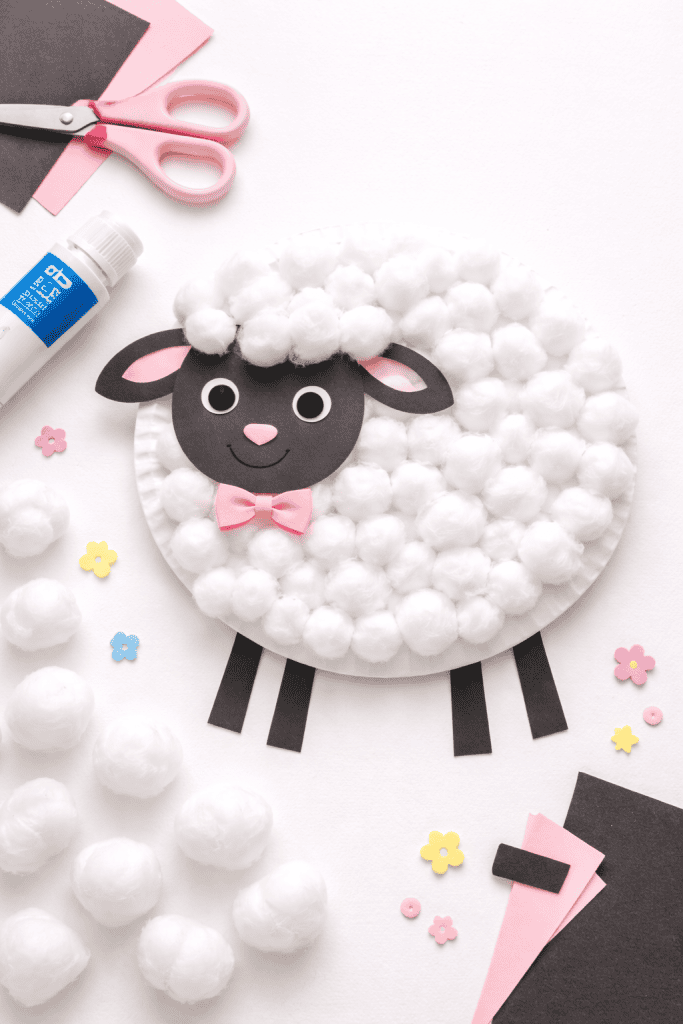
What’s Easter without a cute little lamb? This craft is as wholesome and simple as it gets: kids will create a fluffy lamb using cotton balls.
It’s great for younger children, and older ones can add details to make their lamb unique. Plus, it’s a nice way to talk about spring farm animals.
Materials: Paper plate or thick white paper cut into a circle (for the lamb’s body), black construction paper (for face and legs), lots of cotton balls, glue, scissors, googly eyes (optional), pink crayon or paper (for inner ears or cheeks).
Instructions:
- Prepare the Base: If using a paper plate, that’s your lamb’s body. If you don’t have a plate, cut a circle out of cardboard or cardstock roughly the size of a plate. This base will hold all the “wool.”
- Make a Fluffy Body: Spread glue all over one side of the plate. Stick cotton balls onto the glue until the entire circle is covered in soft, white cotton fluff. Kids can really pile them on; the fluffier, the better! This is a fun, tactile part for little ones. Set it aside to dry a bit while you make the face.
- Create the Lamb’s Face: From black construction paper, cut out a circle or oval for the lamb’s head (about the size of the palm of your hand). Also cut four thin rectangles for legs while you have the black paper out. On the head shape, you can glue on googly eyes or simply draw eyes with a white crayon/colored pencil. Add a little oval snout or nose (you can draw it or cut a tiny oval of pink paper). Cut two small black ear shapes. If you want, add a touch of pink to the inner ears with crayon or a small paper piece.
- Assemble the Lamb: Tuck the black paper ears slightly under the top of the head shape and glue them in place so they peek out. Then glue the completed head onto the cotton ball-covered body – choose a spot on the edge of the plate so it looks like the lamb is peeking out from its fluffy wool. Glue the four legs to the bottom of the plate (on the backside of the plate, so the black legs dangle below the cotton ball body).
- Finishing Details: Draw a smile on your lamb’s face, if you like, or any other detail (maybe a little bow on its head or a bell on its neck drawn in).
Let everything dry, then your cotton-ball lamb is ready to display. It’s so soft and cute! You can prop it up on a shelf or even glue a craft stick on the back to make it a puppet.
This craft is a nice opportunity to talk about gentle qualities like taking care of animals, and it adds a farm-charming touch to your Easter decorations.
When the calendar turns, our DIY new year’s crafts are a fun way to reflect, set intentions, and celebrate fresh beginnings together.
9. Handprint Easter Lily Bouquet
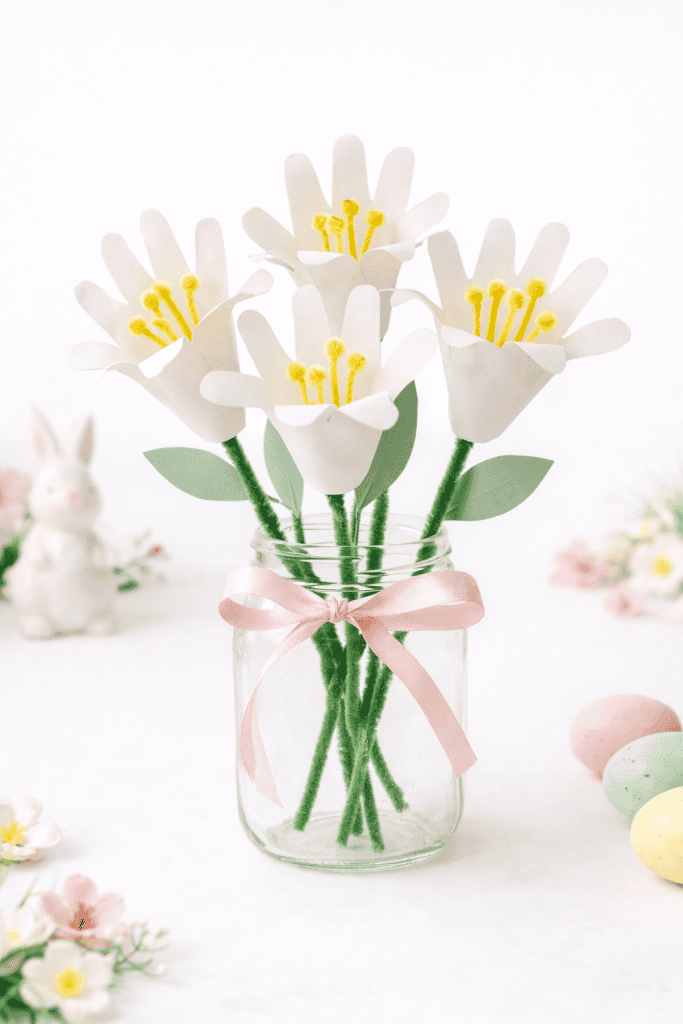
Easter lilies are a symbol of spring and new life. In this craft, your child’s handprints become beautiful paper lilies.
It’s a meaningful project (think keepsake for grandparents) and also a lovely spring decoration made by your kids.
Materials: White paper (printer paper or construction paper), green pipe cleaners or green straws (one for each lily stem), yellow pipe cleaner or yarn (for flower centers), pencil, scissors, tape. (Optional: light green paint or green paper for leaves, or a ribbon to tie the bouquet)
Instructions:
- Trace Hands: Have your child spread out their hand on a sheet of white paper. Trace around their hand with a pencil. Do this for each lily you want to make (a small bouquet of 3–5 lilies is nice). If doing with multiple kids, you can mix handprints of siblings for a family bouquet.
- Cut Out Hand Shapes: Cut out the hand shapes from the white paper. These hand cut-outs will each become a lily. If kids are able to use scissors, let them help cut the larger curves while an adult does the tricky parts between fingers.
- Form the Lily: Take one handprint cut-out and gently curl the fingers inward – you’ll roll the handprint into a cone shape (fingers will be the petals of the lily, and the wrist part becomes the base of the flower). Overlap the edges slightly and use tape or a dab of glue to secure the cone shape. Now the paper hand looks like a blooming lily with the finger “petals” slightly flared out. You can use a pencil to curl the fingertips back a little for a natural petal look.
- Stamen (Flower Center): Cut a 2-3 inch piece of yellow pipe cleaner (or a small bundle of yellow yarn strands). Bend it in half and twist it a little – this is the pollen part of the lily (the stamens). Make a tiny hook or knot at the bent end. Then, poke the straight end down through the center of the paper lily (from the wide open end out through the point). The little hook will catch and keep the yellow piece from pulling all the way through. You should see the fuzzy yellow ends sticking out inside the lily as the flower’s center.
- Stem: Insert a green pipe cleaner or straw into the lily as the stem. If using a pipe cleaner, you can hook the top end and tape it inside the lily to secure it. If using a straw, a bit of tape will hold the lily on the end of the straw.
- Leaf (Optional): Cut a long leaf shape out of green paper or use a green pipe cleaner bent to look like a leaf, and attach it to the middle of the stem. You can also lightly color the stem with green paint or marker if it’s a straw.
- Repeat: Make as many lilies as you want by repeating the above steps for each handprint.
- Arrange the Bouquet: Gather the stems together and tie with a ribbon to present as a bouquet, or stick the stems in a small jar or cup to display upright.
The result is a bouquet of handprint lilies – a beautiful symbol of Easter and spring, made even more special because the “petals” are your child’s handprints.
This craft is wonderful for grandparents or teachers as a gift (“These flowers were picked just for you!”).
It’s also a nice way to discuss the meaning of Easter symbols (like lilies representing new life). Plus, parents might treasure the little handprint keepsakes for years to come.
10. Jelly Bean Bracelets
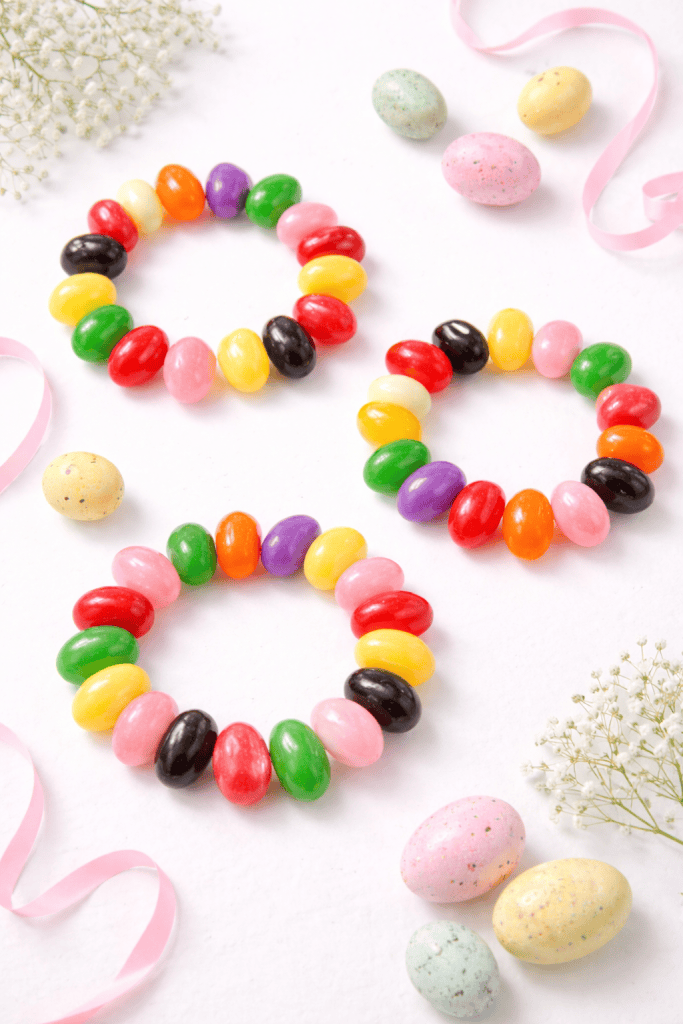
Here’s a sweet and crafty treat! Kids can make edible jewelry by stringing colorful jelly beans into bracelets (or necklaces).
This activity is great for fine motor practice and makes a fun Easter activity during a party or family afternoon. And yes, they can nibble a few candies along the way!
Materials: Jelly beans (assorted colors), elastic string or thin ribbon (about a foot long per bracelet), a plastic needle or tape (to stiffen one end of the string for easier threading), scissors. (Alternative: use licorice laces and poke candies through them, no needle needed.)
Instructions:
- Prepare the “Thread”: Cut a piece of elastic string long enough to go around your child’s wrist with a little extra (for tying off). If you have a plastic lacing needle for kids, thread the elastic through it – this makes it easier to push through the jelly beans. If not, you can wrap a small piece of tape tightly around one end of the elastic to make it stiff like a shoelace tip.
- Plan Your Pattern (Optional): Pour out a pile of jelly beans and let your child pick their favorite colors. They can sort them or decide on a pattern (like alternating colors) or just do a random mix. This is a fun chance to sneak in a little counting or pattern-making practice.
- Thread the Jelly Beans: Carefully poke the needle or taped end of the string through the center of each jelly bean. Jelly beans are usually soft enough to push through, but you might need to wiggle it gently. Slide each jelly bean down the elastic. Little kids will need some help and supervision here to avoid poking themselves – or you can pre-poke holes in the jelly beans with a skewer to make threading easier.
- Fill the Bracelet: Keep adding jelly beans until the string is mostly filled. Leave a couple of inches of elastic empty on each end so you can tie it.
- Tie it Off: Loop the strand around your child’s wrist (or neck, if making a necklace – but be cautious with necklaces and young children) and tie the ends of the elastic together in a secure knot. Make sure it’s not too tight on the wrist. Trim any excess elastic.
Now you have a sweet jelly bean bracelet! Your child can wear their yummy creation proudly.
It makes a great party favor or a craft to do at an Easter gathering – kids can make one for themselves or to give to a sibling.
Just note to the kids: if they nibble a jelly bean from their bracelet, the rest might scatter, so maybe make a spare or eat it after showing it off!
This edible craft is a delightful way to celebrate Easter with something both creative and tasty.
If your family enjoys seasonal crafting throughout the year, you may also love our cute Valentine crafts for kids, which are perfect for spreading love and creativity in February.
Simple Tips for Fun Easter Crafting with Kids
To get the most out of your Easter crafting time, keep these tips in mind:
- Use What You Have: Keep it simple and frugal by using materials around the house. Recycled supplies like toilet paper rolls, egg cartons, scrap paper, and old socks work perfectly for many spring crafts. You don’t need fancy kits – creativity thrives on everyday items.
- Prep in Advance: For younger kids, do a little prep work before craft time. Pre-cut shapes (like bunny ears or flower petals), pour paint into easy-to-use cups, or lay down a plastic tablecloth/newspaper. This way the kids can dive right into the fun parts (painting, gluing, decorating) without too much waiting.
- Embrace the Mess (with Protection): Crafts can get messy, and that’s part of the joy! Dress kids in old play clothes or aprons and cover your table. Use washable paints and glues. Keep a roll of paper towels or wipes handy for sticky fingers. If you set up for easy cleanup, you can relax and let them enjoy the process without worry.
- Encourage Creativity: There’s no “right” way to do a craft. Let your child add their own twist. Maybe your child wants to make a blue chick or a polka-dot bunny – great! Encourage their ideas and praise their unique creations. This keeps crafting stress-free and fun.
- Celebrate & Display: When a craft is done, show it off! Hang the suncatcher in the window, string up the garland, or set the painted eggs in a basket on the table. Seeing their crafts used as Easter decor or given as gifts makes children proud. It shows them their hard work has value and adds to the celebration.
These tips will help make your Easter crafting time fun, not frantic, setting the stage for happy family memories.
And as the seasons change, don’t miss our faith-filled fall crafts perfect for Sunday school, ideal for autumn lessons, harvest themes, and cozy crafting days.
Ready to Hop into Easter Crafting Fun!
Put on some cheerful spring music, gather those craft supplies, and enjoy some creative family time.
You might be delightfully surprised by how much fun it is to craft together (and how proud your little ones will be of their creations).
Remember, it’s the simple moments – gluey fingers, bursts of giggles, and the proud shout of “Look what I made!” – that make the best memories.
As you craft, chat about Easter plans, favorite spring animals, or what kindness and renewal mean to your family this time of year.
Emphasize imagination, togetherness, and the joy of making something with love.
Happy crafting, and have a very Happy Easter filled with creativity and connection!
I’d love to hear about your crafting adventures. Did your kids have a favorite craft from this list? Did you add your own creative twist or come up with a brand-new idea?
Share your experiences and tips in the comments below – let’s hop into the conversation and spread the Easter joy!
Looking for an easy, meaningful way to talk about Jesus’ love with toddlers and young children?

This FREE Jesus Loves Me Printable uses a “What does the Bible say?” approach with familiar verses, simple language, and hands-on fun.
Kids can see, color, and come back to Scripture—helping the truth of Jesus’ love stick.
Click below to grab the printables and use them at home or in Sunday School.
FAQs
How can I adapt these Easter crafts for toddlers or younger preschoolers?
For younger kids (ages 3–4), keep things simple and safe. Do any cutting or prep work ahead of time, and let toddlers focus on painting, sticking, and decorating. Use safer options like glue sticks and larger craft pieces. Simple scribbles and sticker-covered projects are perfect at this age. The goal is fun and exploration, not perfection, with close supervision.
What if I don’t have all the craft supplies on hand?
That’s completely fine. These Easter crafts are easy to adapt using what you already have. Plain paper can replace colored paper, drawn-on eyes can stand in for googly eyes, and cardboard or cereal boxes work well for sturdy shapes. Markers and crayons can replace paint, and beans or rice can substitute for pom-poms. Creativity matters more than exact supplies.
How can I keep the mess to a minimum during these crafts?
Set up a protected craft area using an old tablecloth, sheet, or trash bag. Dress kids in old shirts and use washable paints, markers, and glue. Offer only small amounts of materials at a time and keep wipes nearby for quick cleanups. For messier projects, crafting outside or in the bathtub (without water) can make cleanup much easier.
How can I involve children of different ages in these crafts together?
Give each child tasks that match their age and skill level. Older kids can cut shapes, assemble pieces, or help younger siblings, while younger kids focus on painting and decorating. Pre-cut pieces help everyone participate. Encouraging teamwork and praising each child’s effort helps everyone feel included.
What can we do with the finished Easter crafts once they’re made?
Use them to decorate your home, share them as gifts, or display them during Easter celebrations. Some crafts can be saved in a memory box for next year, while others can be photographed and recycled. Most importantly, celebrate your child’s creativity and let them see their work enjoyed.
