If you’ve ever noticed how neat and stretchy the seams on store-bought clothes look, it’s all thanks to one machine: the serger (also called an overlock machine).
A serger trims, sews, and finishes fabric edges all at once, giving your projects that polished, professional look.
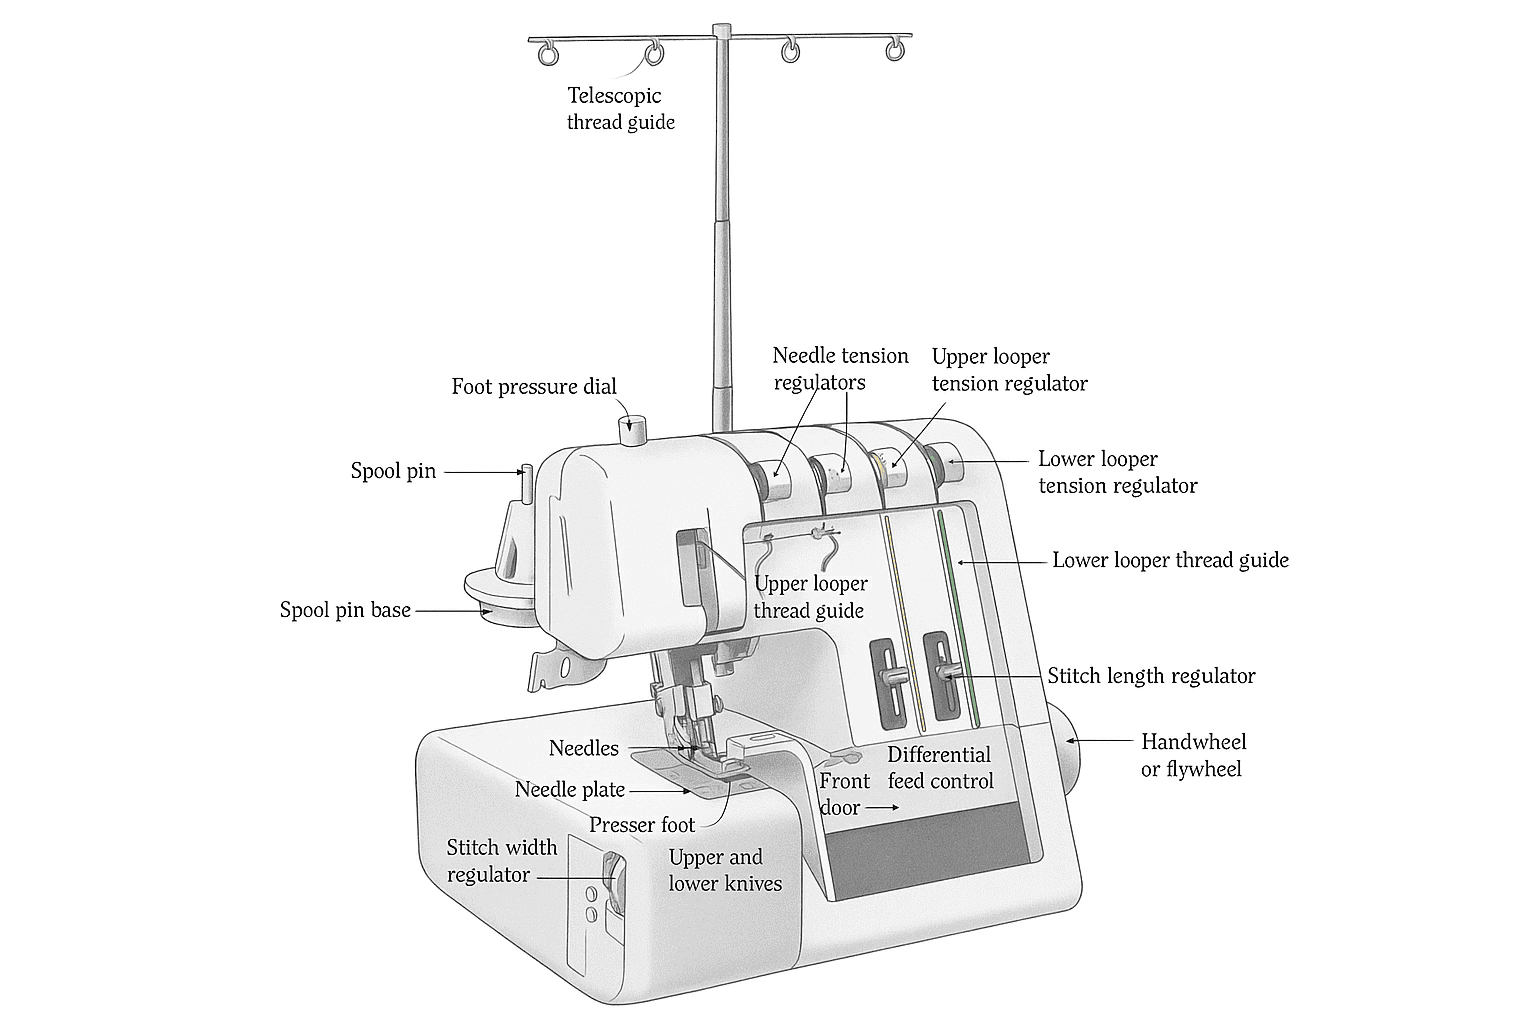
Most modern sergers share a similar design, so once you learn the basic anatomy – from the telescopic thread guide to the differential feed – you’ll be able to confidently set up, troubleshoot, and fine-tune your stitches no matter the brand.
In this article, I’ll break down each major part of a serger, what it does, and how to use it to your advantage, plus a few maintenance tips to keep your machine running like new.
8 Major Parts of a Serger
Let’s take a closer look at the main parts that make your serger run smoothly.
1. Differential Feed Control
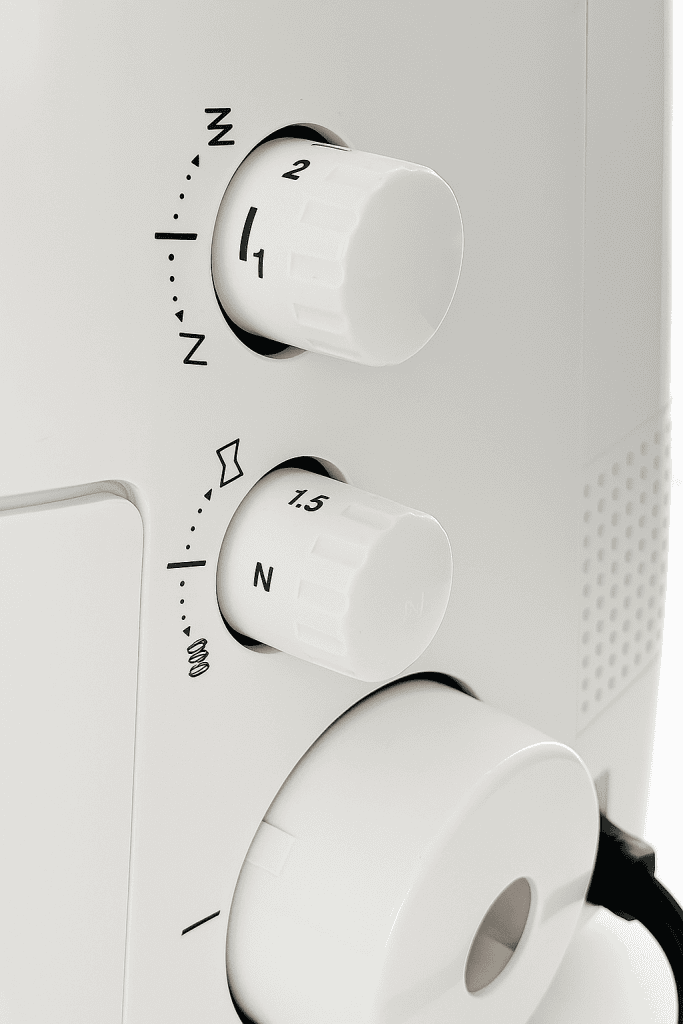
This knob adjusts how fast your fabric moves under the presser foot.
Your serger has two sets of feed dogs (the little teeth that pull the fabric), and this control decides how they work together.
When it’s set to “N” or “1,” both feed dogs move evenly, which is perfect for most fabrics.
If you’re working with stretchy knits or want to create gathers, you can turn the dial higher.
That makes the front feed dogs pull the fabric faster, preventing stretched-out seams.
If you’re sewing something light or slippery and notice puckering, turn the dial lower.
This slows the front feed dogs so the fabric feeds more gently.
2. Foot Pressure Dial

This dial controls how tightly the presser foot presses down on your fabric.
Thick fabrics like denim or canvas usually need more pressure so they feed evenly.
Stretchy or lightweight fabrics need less pressure so they don’t wave or stretch as you sew.
If your fabric isn’t moving smoothly or looks wavy along the seam, it’s worth checking this setting.
You can experiment on a small fabric scrap before starting your project.
Adjust it a little at a time until the fabric feeds evenly and the stitches look flat and balanced.
3. Needle

The needles are what actually form the stitches, working closely with the loopers underneath.
Your serger uses two needles instead of one like a regular sewing machine, which is how it creates those strong, stretchy seams and neat edges.
Always make sure you’re using the correct type and size of needles that your serger manual recommends.
Regular sewing machine needles sometimes don’t fit or can cause skipped stitches.
When threading them, it helps to use tweezers or a needle threader since the space is small.
If you ever have skipped stitches or broken thread, rethreading the needles carefully often solves it.
4. Presser Foot
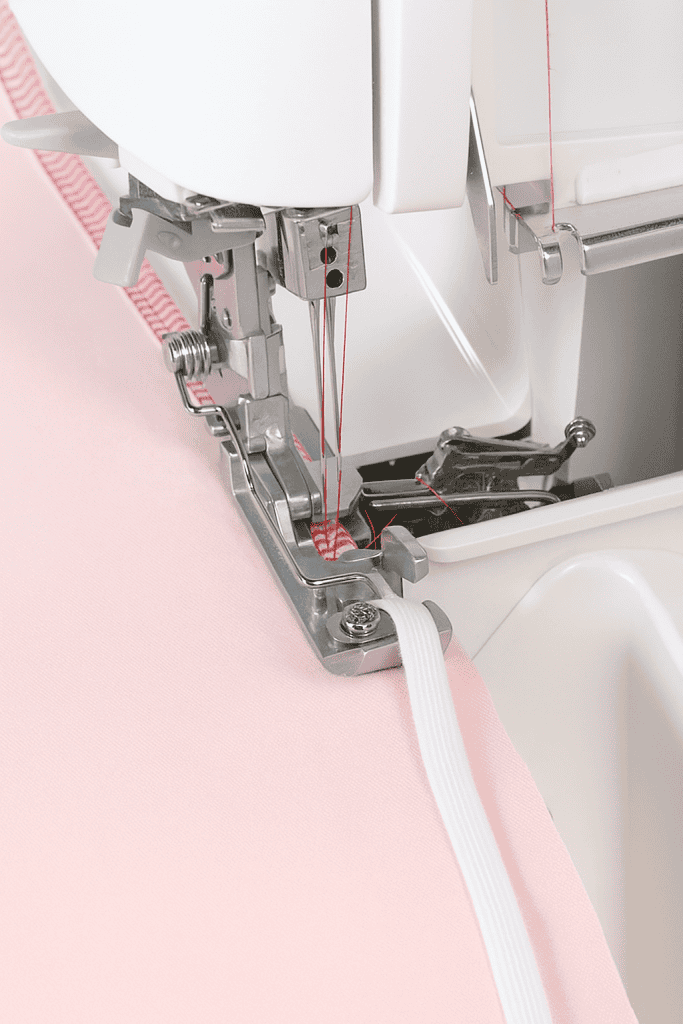
The presser foot holds your fabric steady while it’s being sewn, trimmed, and finished.
Sergers usually have a long, narrow presser foot that presses right before the knife trims the fabric.
That design helps keep your edge clean and your stitches even.
Before you start sewing, always leave a short tail of thread (about 3 to 4 inches) hanging off the back or side.
That keeps your first stitches from unraveling.
If you ever need to change feet, most sergers have a small lever or button at the back that lets you pop the foot off quickly.
Different presser feet can make certain techniques a lot easier, like gathering, piping, or blind hemming.
You can learn more about the most common presser feet and what each one does here.
5. Spool Pin
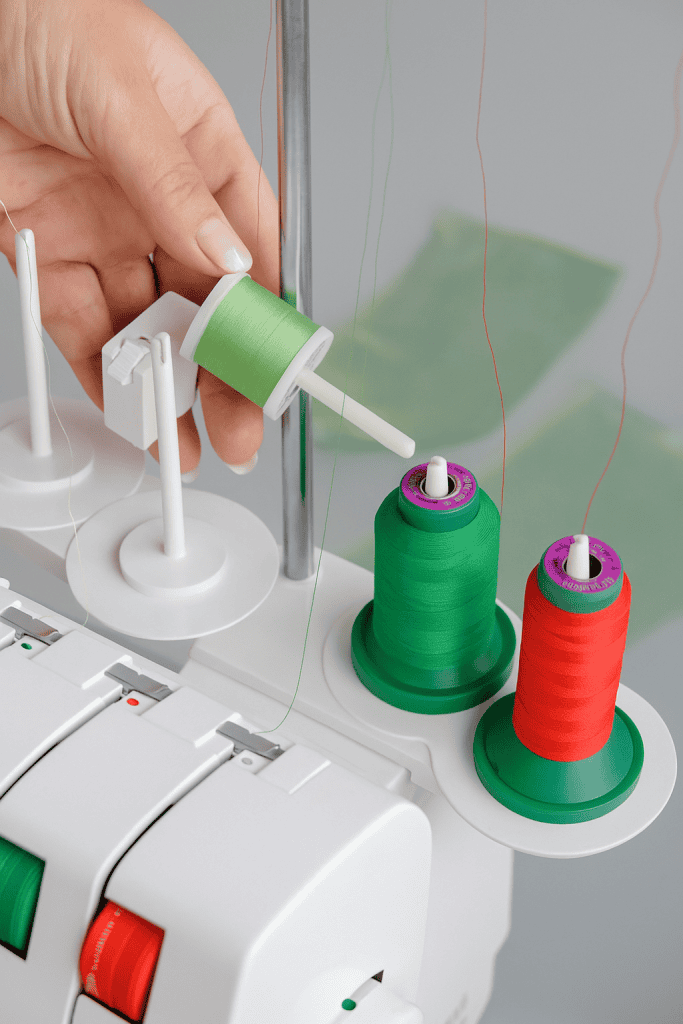
These hold your thread cones in place at the top of the machine.
Sergers usually use larger cones instead of small spools, so the pins are spaced to keep each cone feeding evenly.
Make sure the thread unwinds smoothly without catching or wobbling.
If your thread keeps breaking or tangling, check that the cone is sitting straight and that the cap or net (if your serger uses one) is fitted properly.
The smoother the thread feeds, the cleaner your stitching will be.
6. Telescopic Thread Guide
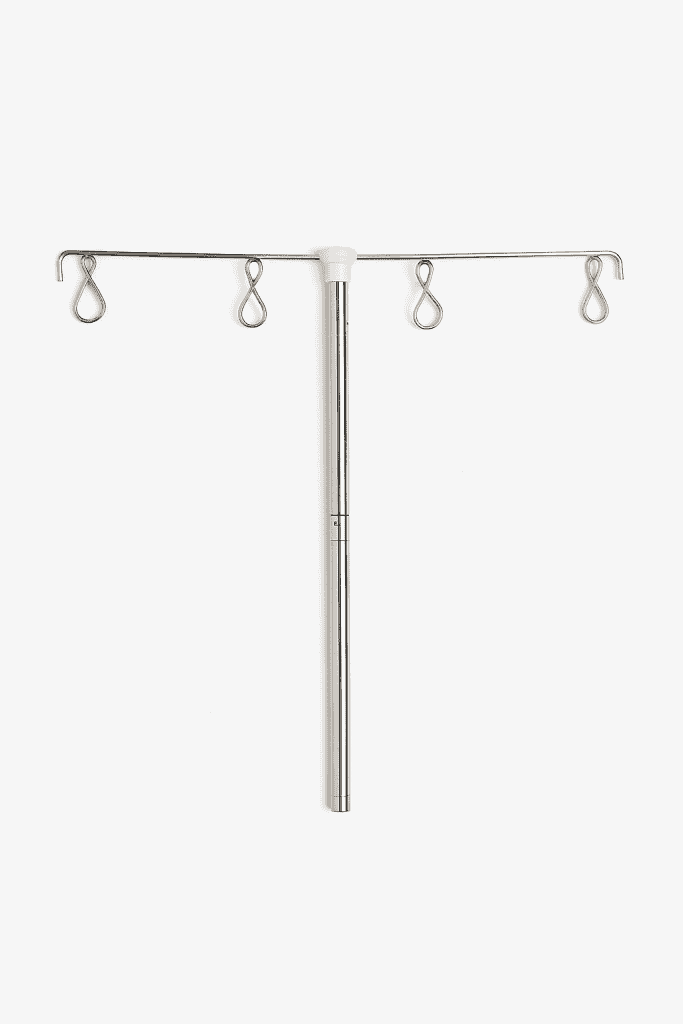
These hold your thread cones in place at the top of the machine.
Sergers usually use larger cones instead of small spools, so the pins are spaced to keep each cone feeding evenly.
Make sure the thread unwinds smoothly without catching or wobbling.
If your thread keeps breaking or tangling, check that the cone is sitting straight and that the cap or net (if your serger uses one) is fitted properly.
The smoother the thread feeds, the cleaner your stitching will be.
7. Tension Regulators

These are the small dials, usually color-coded, that control how tight or loose each thread is pulled.
Each thread (two loopers and up to two needles) has its own tension dial.
Balanced tension means the threads meet neatly along the fabric edge without loops hanging off or pulling too tight.
If your stitches look uneven, loose, or tight, turn the dial a little at a time and test on a scrap piece.
A small adjustment usually fixes it. Also remember that thicker thread or heavier fabric may need slightly lower tension.
Once you get comfortable reading your stitches, adjusting tension will feel second nature.
You can also check out how to adjust the tension on sewing machine for more detailed guidance.
8. Upper and Lower Loopers
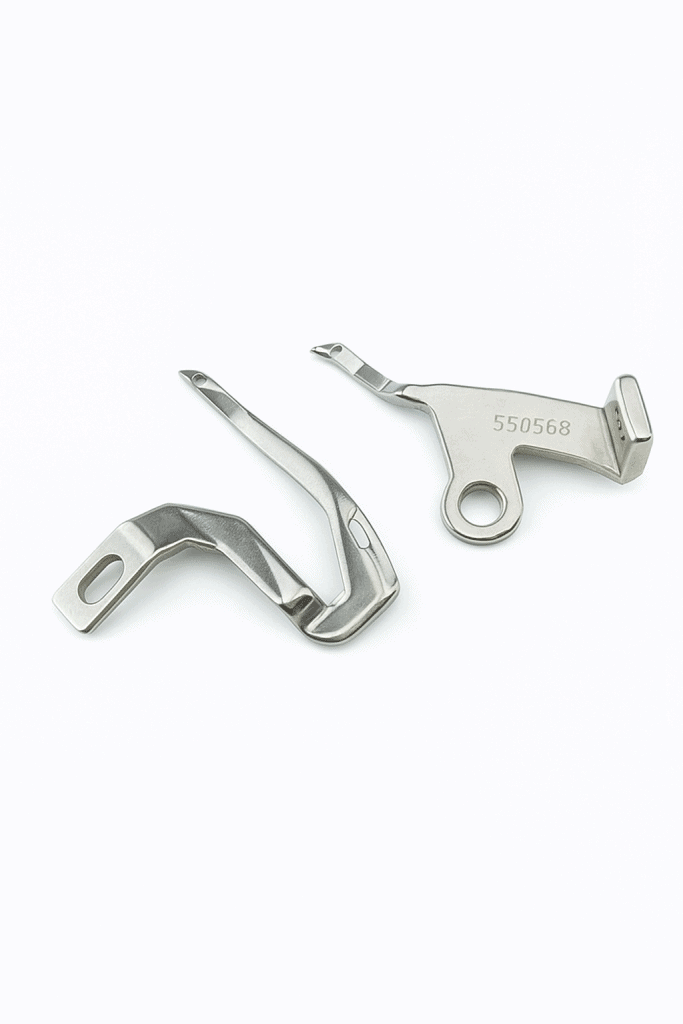
These metal parts are inside the machine, right under the needles.
They swing back and forth, wrapping the thread around the fabric edge to make that classic serged stitch.
The upper looper usually overlaps the lower one, which is why you should always thread the upper looper first.
If your serger is skipping stitches or breaking thread, double-check the looper threading.
Even a small mistake can throw off the stitch formation.
Cleaning lint around the loopers every now and then also helps keep them moving freely and prevents tension issues.
Once you understand how the loopers and needles work together, it’s easier to troubleshoot problems and get clean, even seams every time.
Using the Differential Feed on a Serger (and When to Adjust It)
The differential feed is one of those features that can completely change how your stitches look.
It controls how the front and back feed dogs move the fabric under the presser foot, which affects how smoothly everything feeds through.
Once you get a feel for it, you’ll see how easy it is to stop rippling seams, gather fabric evenly, or keep delicate materials from puckering.
To Fix Wavy or Stretched Seams
If your seams turn out rippled – especially on stretchy or soft fabrics – turn the differential feed a bit higher than normal.
This keeps the feed dogs moving at the right pace so the fabric doesn’t stretch as it’s stitched.
You’ll notice your seams start to look flatter and neater right away.
To Keep Curves Smooth
Curved or bias seams tend to stretch out of shape while sewing.
Raising the differential feed slightly helps the layers feed together more evenly.
It keeps your curves lying flat instead of waving or twisting.
To Make Gathers or Ruffles
Want to create gentle gathers for sleeves, skirts, or trims?
Increase your differential feed setting and lengthen your stitch.
This makes the front feed dogs move faster than the back ones, pulling in the fabric and forming natural, even gathers – no pulling by hand needed.
To Stop Lightweight Fabrics from Puckering
Sheer or lightweight fabrics can be frustrating because they pucker so easily.
Lower the differential feed below normal so the fabric glides through more slowly and smoothly.
You’ll get crisp, flat seams instead of wrinkled ones.
To Sew a Lettuce Edge
For knit fabrics, you can use the differential feed creatively.
Try lowering the setting while sewing a rolled hem – this stretches the edge a bit as it stitches and gives it that soft, rippled “lettuce” finish.
To Add More Stretch to Seams
When sewing activewear, swimwear, or anything that needs flexibility, turn the differential feed slightly lower.
This gives your seam more give, helping it move naturally with the fabric instead of feeling tight or pulling apart when stretched.
To Smooth Out Flared or Curved Hems
Curved or flared hems can bunch or ripple if you’re not careful.
Turning the differential feed up just a touch above normal helps pull in the extra fullness evenly.
It keeps the hemline smooth and shaped the way you want it.
Start Getting to Know Your Serger – One Part at a Time
Once you understand how each part of your serger works, the machine becomes far less intimidating.
Take it slow at first – thread, stitch, and test your settings on scrap fabric.
Notice how a small turn of a dial or a change in feed can transform your seam.
Over time, you’ll develop a natural feel for what your serger needs, and it will become one of your most trusted tools in the sewing room.
If you’re still learning, you’re not alone! Every serger user started right where you are – curious, a little cautious, and ready to create.
What about you? Do you have a favorite serger tip or a question about your machine? Comment down below – I’d love to hear from you!
FAQs
1. Do I need to use all four threads on my serger every time?
Not always! Most sergers can be used with two, three, or four threads depending on the stitch you want. A four-thread stitch is great for seams that need strength, while a three-thread stitch is perfect for finishing raw edges. Two-thread stitches are used for delicate hems or lightweight fabrics.
2. How often should I clean my serger?
Clean your serger after every few projects – or sooner if you’re working with linty fabrics like fleece or terry cloth. Use a small brush or compressed air to remove lint from around the knives, loopers, and feed dogs. Regular cleaning helps prevent skipped stitches and keeps your machine running smoothly.
3. Why does my serger keep breaking thread?
Thread breakage usually means something is off with threading or tension. Double-check that each thread is seated correctly in the tension disks and that the telescopic thread guide is fully extended. Burrs on the loopers or needles can also cause breakage – smooth them gently with fine crocus cloth if needed.
4. Can I use regular sewing machine thread in my serger?
Yes – but serger thread is lighter and wound differently, so it feeds more smoothly through multiple thread paths. Regular thread is fine for short projects or special decorative seams, but if you serge often, investing in serger cones will save time and reduce tension problems.
5. How do I know when my serger knives need replacing?
If your serger starts leaving frayed or uneven edges, or it struggles to trim cleanly through fabric, the blades may be dull. Most upper knives can be replaced or sharpened easily – check your machine’s manual for the correct part number and installation instructions.
