Looking for fun and meaningful Adam and Eve crafts to do with your preschoolers? You’re in the right place.
This list of Bible crafts for kids will help bring the story of Adam and Eve to life in a hands-on way that preschoolers will love.
The tale of the Garden of Eden is often one of the first Bible stories young children learn, so engaging them with creative activities is a great idea.
These projects are simple Bible story crafts that feel more like play than a lesson, making faith-filled learning light and accessible.
One key to success is keeping things interactive.
Experts note that when children actively create something related to a Bible story, they’re more likely to remember and retell it “in their own words.”
In other words, crafts help kids connect with the story on their level.
So as you do these activities, encourage your little ones to chat about the Garden of Eden – what they think it looked like, what animals Adam might have named, or how Eve might have felt. Keep it warm and conversational, like a story time with a fun creative twist.
Tip: The Adam and Eve story comes right after the Creation story in Genesis.
You might introduce these crafts by quickly recapping the 7 days of creation – perhaps even using a quick craft like a how to make a creation wheel or a days of creation craft for kids to set the stage (a great way to link one Bible lesson to the next!).
This gives kids context before diving into the Garden of Eden activities.
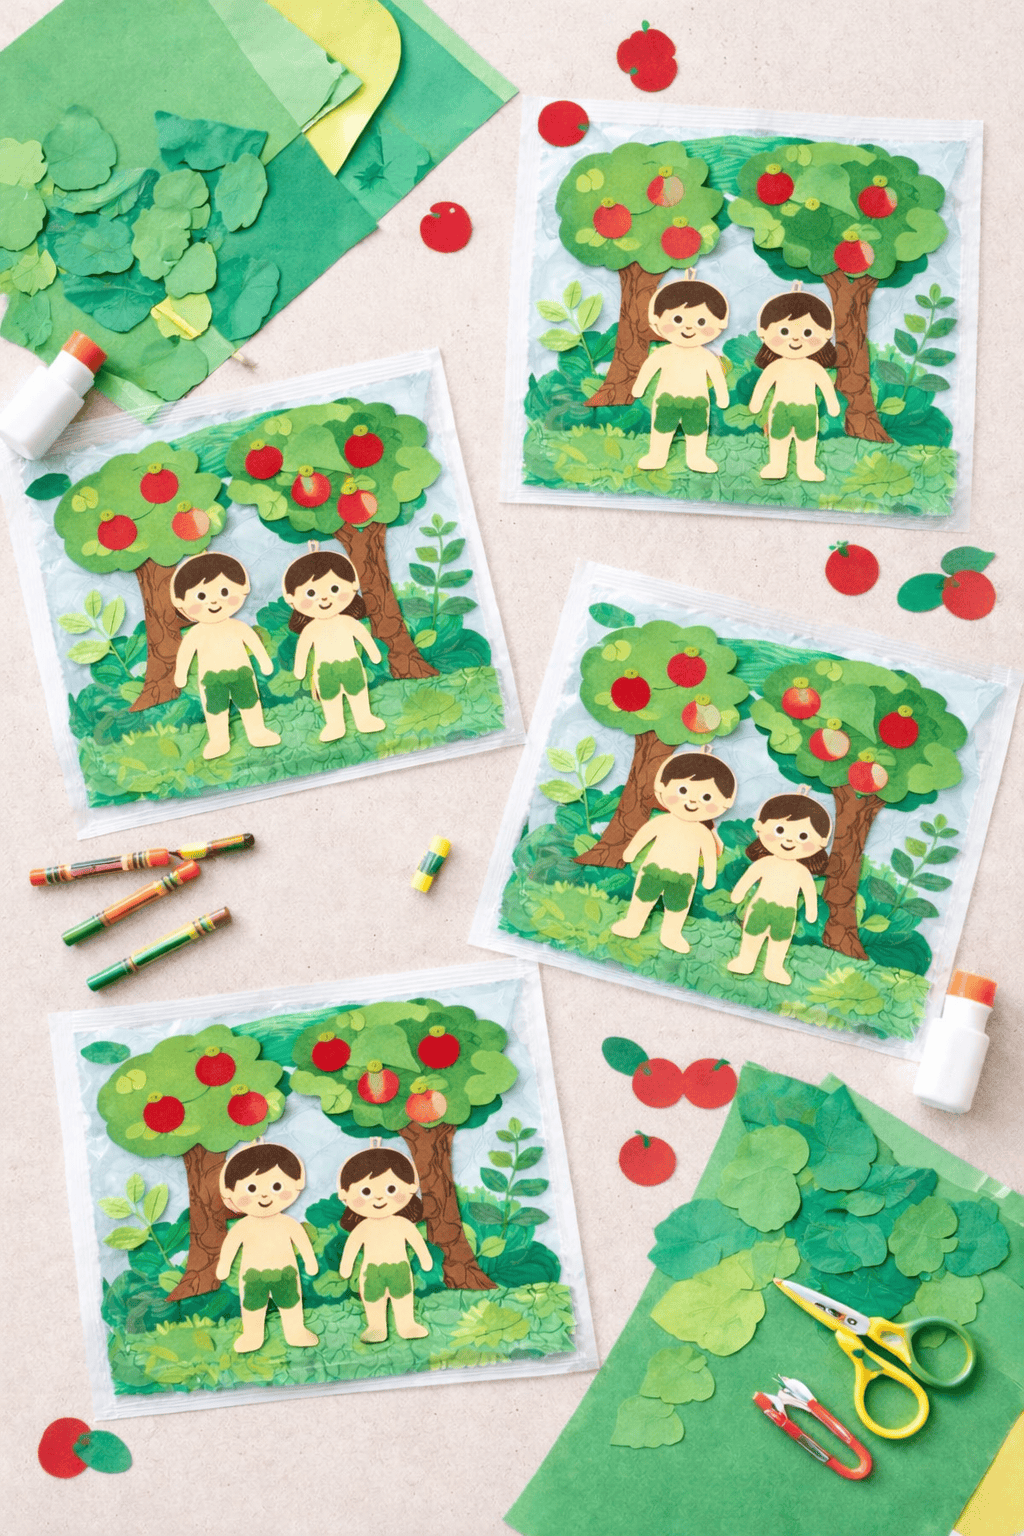
10 Simple Adam and Eve Crafts for Preschoolers
Now, let’s jump into 10 Adam and Eve craft ideas preschoolers can’t get enough of.
I’ve got a mix of paper crafts, sensory play, and even a fun snack craft.
Most are easy enough for ages 3-5 with a bit of adult help, making them perfect Christian preschool activities at home or in Sunday School.
Let’s get crafting!
1. Handprint Garden Tree Craft
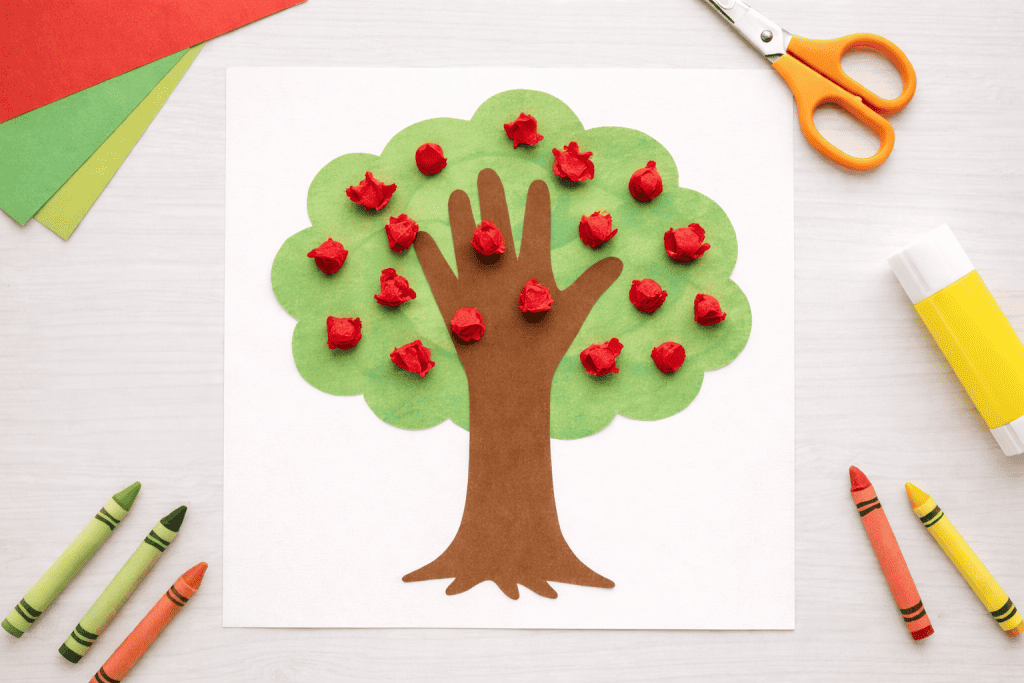
There’s no better way to start than with a tree craft, since a very important tree is at the center of the Adam and Eve story.
For this craft, your child’s handprint becomes the tree trunk and branches! Trace your preschooler’s hand and forearm on brown paper and cut it out – this will be the tree. Next, cut a fluffy tree top from green paper (or have your child paint or color a treetop).
Glue the handprint “trunk” onto the treetop. Now the fun part: add “fruit” by gluing on red pom-poms, stickers, or scrunched bits of red tissue paper to represent apples. (While we don’t actually know what fruit was on the tree, using an apple is a simple way for kids to visualize it.)
As your little one decorates the tree, you can talk about how God told Adam and Eve not to eat fruit from one special tree. It’s a gentle way to introduce the idea of listening to God, without getting too heavy. This handprint tree craft lets kids literally get their hands on the story!
2. Adam and Eve Stick Puppets
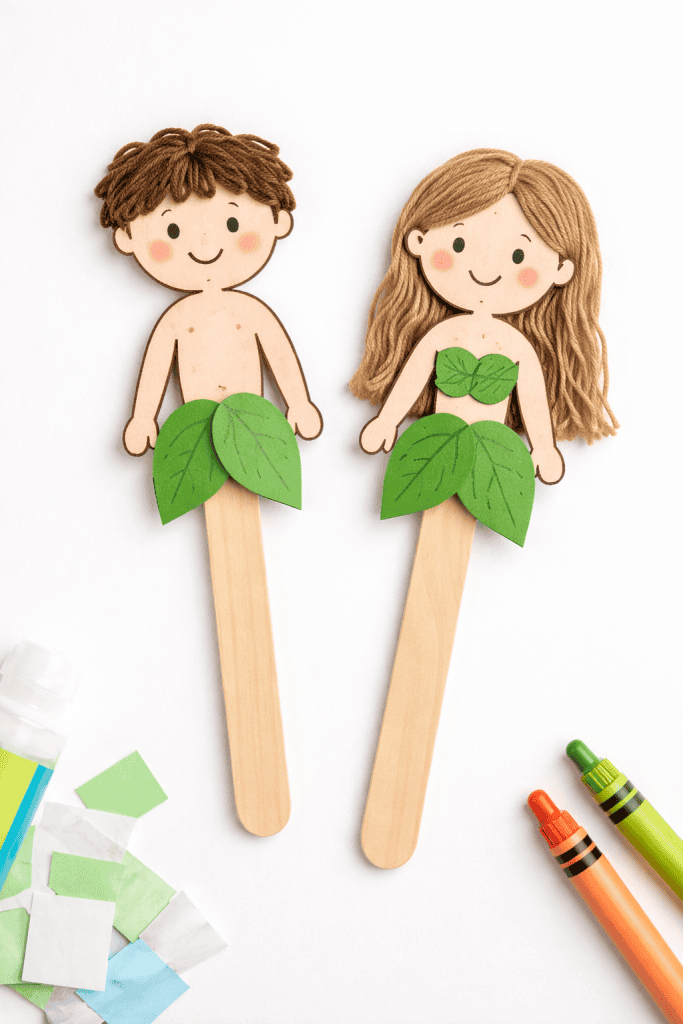
Bring the Bible characters to life with some simple homemade puppets!
For Adam and Eve stick puppets, you’ll need craft sticks (popsicle sticks) and some paper or cardstock. You or your child can draw two simple people figures about 4–5 inches tall (one for Adam, one for Eve), or print out coloring page figures to color in.
Cut them out and tape or glue each figure onto a craft stick. Now let your preschooler add personal touches: yarn or drawn-on hair, maybe a leaf outfit made from cut-out green paper (a fun nod to the fig leaves Adam and Eve wore).
Keep it light-hearted – the goal is not historical accuracy but a playful representation of the first man and woman. Using puppets, kids can act out the story in their own words. You might be amazed at the insights they share while “playing” Adam and Eve.
As one children’s ministry expert advises, crafting the story props and then letting kids help tell the story is a fantastic way to boost their understanding. These puppets also double as a great Sunday school craft – after making them, the class can put on a little puppet show to recap the lesson.
3. Tissue Paper Apple Mosaic

It’s time for a bright and colorful apple craft!
Preschoolers love mosaics because tearing and gluing pieces of paper is both simple and surprisingly calming for them. Start by drawing a big apple shape on a sheet of paper or use a large apple coloring page.
Provide red, green, and yellow tissue paper (or construction paper) cut into small squares or scraps. Let your child apply glue all over the apple shape and stick on the paper pieces to create a mosaic.
There’s no right or wrong – even if all the colors mix together, it will still look bright and fun. Mosaic crafts like this help develop fine motor skills with all that picking up and pressing down of tiny pieces.
While they craft, you can mention that the fruit in the Garden of Eden might not have been an apple specifically, but we often imagine it that way because it’s easy for kids to picture.
When the mosaic apple is complete, admire it together and reinforce how beautiful the fruits in God’s garden must have been. This craft is simple, but kids take pride in their colorful creation.
4. Paper Plate Serpent Mobile

Here comes the sneaky serpent! Even though the snake is the “bad guy” in the story, making a snake craft is oddly satisfying for kids. For this paper plate craft, take a plain paper plate and have your child paint or color it in swirling shades of green (or any crazy colors – creativity welcome!).
Once it’s decorated, cut the plate in a spiral starting from the outside edge, gradually working toward the center, until you have a long coil. Attach a piece of string to the center of the coil so you can dangle the snake like a mobile.
Finally, help your preschooler tape on a paper snake head at one end of the spiral and draw on eyes and a forked tongue. Now you have a spiral snake mobile that you can hang up! Preschoolers will giggle watching their paper snake twirl.
As you craft, you might say, “In the garden, a sneaky snake tricked Eve.” Emphasize that we have to be careful of tricksters, but keep it light – you can simply leave it at “the snake was naughty.”
This craft is great for retelling that part of the story without it getting too scary. Plus, it’s a fun kids’ Bible craft idea that doubles as room decor when they hang their wiggly serpent in the playroom.
5. Garden of Eden Sensory Bin
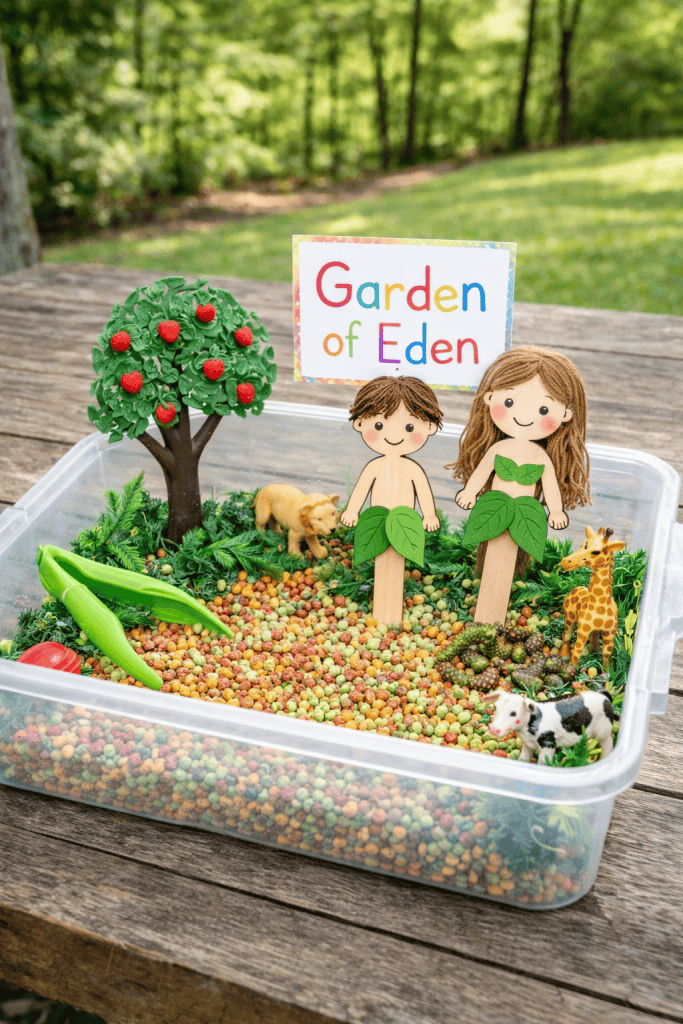
Switching gears from paper and glue, let’s get sensory!
A sensory bin is basically a hands-on mini world that kids can play with – and for the Garden of Eden, it’s perfect.
Find a shallow bin or large tray and gather some materials that evoke a garden: green shredded paper or dry green-dyed rice for “grass,” leaf shapes or cutouts, a few plastic or wooden animal figures (think elephants, lions, birds – any creatures Adam might have named).
You can even add a small bowl of water as a “river” and some smooth stones or flower petals. Don’t forget a toy figure or peg doll to represent Adam or Eve, and a toy snake if you have one!
Let your preschooler explore the bin freely: they can make the animals roam, have the person figure “walk with God” in the garden, or pretend the snake is hiding under the leaves. This kind of open-ended play engages their imagination and reinforces the setting of the story in a tactile way.
As they play, you can casually narrate bits of the Bible story (“Look, all the animals are coming to Adam. What do you think he’ll name them?”). Sensory bins are fantastic Christian preschool activities because they keep little hands busy and minds learning.
Just be sure to supervise if you have very small pieces and very young kiddos. Cleanup is part of the fun – invite your child to help “put the garden away” when done.
6. Garden of Eden Collage Scene
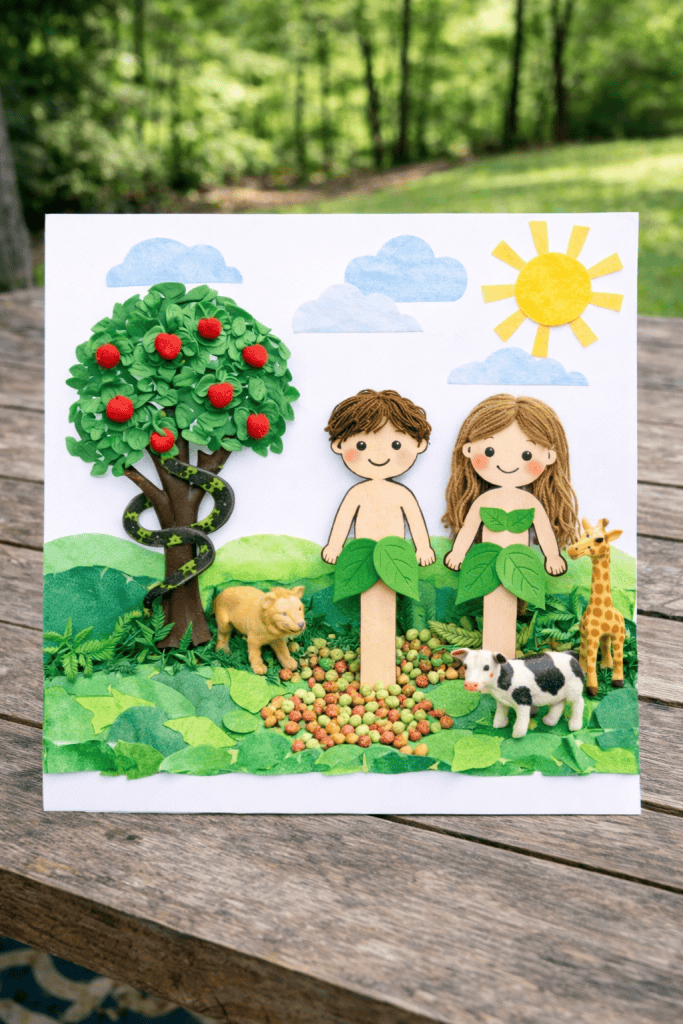
Now let’s create the whole Garden of Eden on paper! A collage scene allows kids to decorate a picture with all the elements of the story. Start with a large sheet of construction paper (blue or white as a background).
Provide cut-out paper shapes or stickers for a tree, lots of green leaves, flowers, animals, Adam and Eve (you can pre-draw and cut these, or use foam stickers if available). If you made the handprint tree craft (#1 above) or have a tree template, you can use that for the tree here too.
Let your preschooler glue the tree onto the background, then add the people and animals wherever they like – it doesn’t have to be historically accurate, it’s about their vision of a perfect garden.
They can glue cotton balls or pom-poms for clouds, and swirl blue crayon for a river. For the serpent, twist a green pipe cleaner into an “S” shape and glue it near the tree, or simply draw a squiggly snake. This becomes a beautiful mixed-media collage!
7. Leaf Rubbing “Fig Leaf” Art
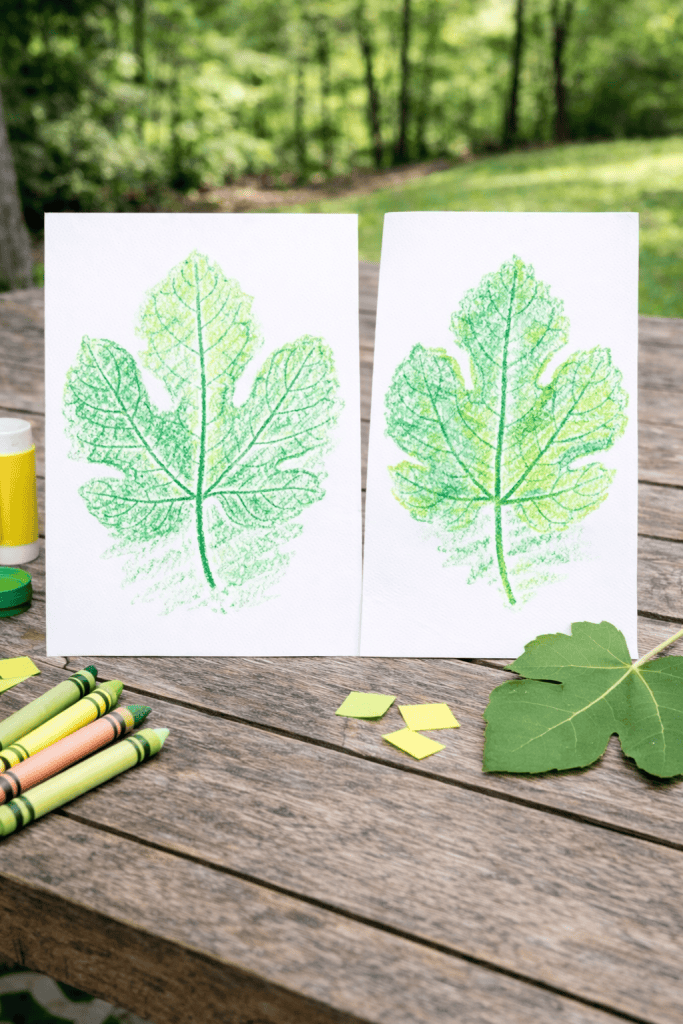
When Adam and Eve realized they disobeyed God, the Bible says they covered themselves with fig leaves. We can use that part of the story to spark a neat leaf art activity (without dwelling on the disobedience too much).
Take your preschooler on a mini nature walk to collect a few leaves from outside. Then place the leaves under a thin sheet of paper. Give your child crayons and show them how to rub the crayon sideways over the paper – like magic, leaf patterns will appear!
This classic leaf rubbing craft is exciting for little ones because it reveals all the veins and shapes of the leaves. They can try green crayons for most leaves and maybe a brown crayon for a fall leaf, etc. After making several rubbings, you can help them cut out the leaf shapes.
These paper “fig leaves” can be glued onto a drawing of Adam and Eve like clothing, or simply displayed as a collage of pretty leaves. The tie-in to the story is that Adam and Eve used leaves as their first clothes – a gentle way to mention it without focusing on anything uncomfortable.
This activity also celebrates nature (which God created) and gets kids appreciating the details in leaves. It’s a quick, low-mess craft that works great if you need a filler activity. Plus, it sneaks in a little science observation as they notice the leaf patterns.
8. “Snake Snack” Edible Craft
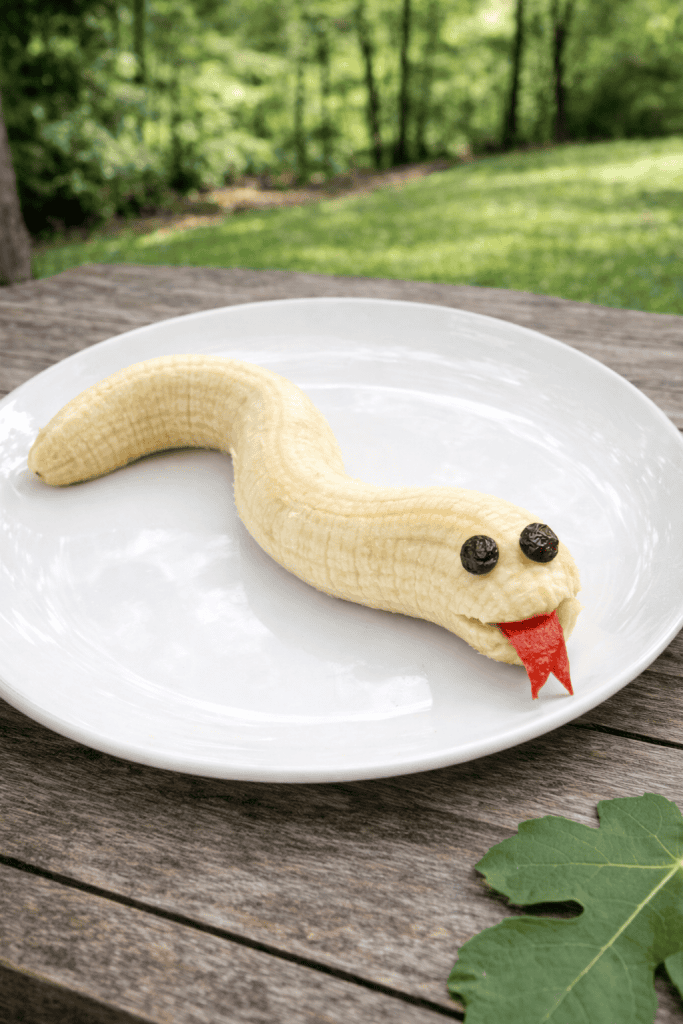
Here’s a food craft that’s both memorable and tasty! Making a “snake snack” is a clever way to revisit the serpent’s role using something yummy. One simple idea: take a banana and let your child help peel it (great for fine motor practice).
Lay it on a plate and have them decorate it to look like a snake. They can use peanut butter or cream cheese to stick on raisin eyes, and a strawberry or red apple slice for a tongue.
If you have grapes or circular cereal, you could cut the banana into chunks and alternate with grapes on a skewer to form a slithery snake shape. Another option is creating a snake with a long piece of licorice rope or gummy candies on top of an apple or cupcake – use what you have!
The key is that it looks like a snake so you can say, “Remember the tricky snake in the garden? Now we have a silly snake we can eat for snack!” Kids usually find this hilarious and not at all scary.
Edible crafts are great for preschoolers because they get to assemble and then immediately enjoy their creation (instant gratification!). Just be sure to supervise and handle any cutting.
While munching on their snake snack, you might casually reinforce, “We want to be good listeners and not like that silly snake.” Mostly, though, let them relish the treat. This activity brings the story full circle in a lighthearted way and gives a nice break in between glue-and-paper projects.
9. Apple Stamping Art
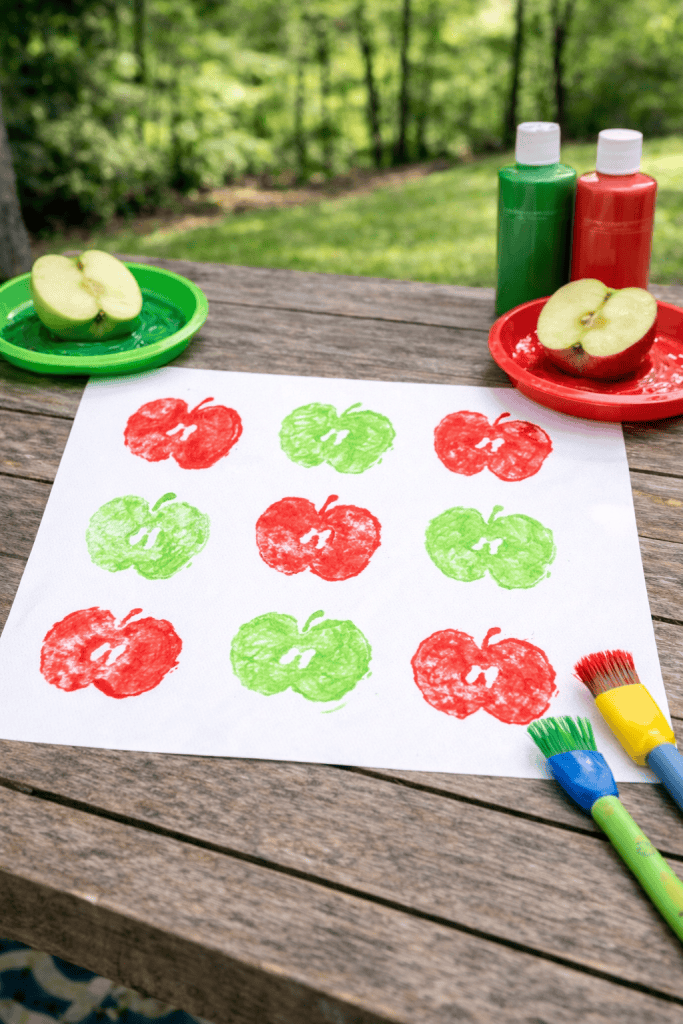
Time to break out some paint for a classic preschool craft with a biblical twist. Apple stamping involves using a real apple as a stamp – and it fits our Adam and Eve theme perfectly.
Cut an apple in half (adults do this part), dip the flat cut side in red or green washable paint, and help your child press it onto paper. The apple half prints a perfect fruit shape! They can make multiple apple stamps across the paper.
For added fun, use a carrot or wine cork dipped in brown paint to stamp a small rectangle on top of each apple print – voila, it becomes a stem. Have your child dip their fingertip in green paint to dot a little leaf on each stem. Soon you’ll have a page full of cute apple art.
This is a wonderful sensory experience – feeling the cold apple, the squishy paint, the stamping action. While your little one is enthusiastically stamping away, you can mention, “These apples remind me of the fruit in the Garden of Eden.”
It’s an easy way to tie back without a lecture. Some preschoolers might even want to draw a snake slithering around their apple prints once the paint dries!
Painting crafts like this are great for Sunday school crafts when you don’t mind a bit of mess, and they reinforce the lesson in a very visual (and active) manner. Just prep a cleaning station for those painty hands afterward.
10. DIY Adam & Eve Puzzle
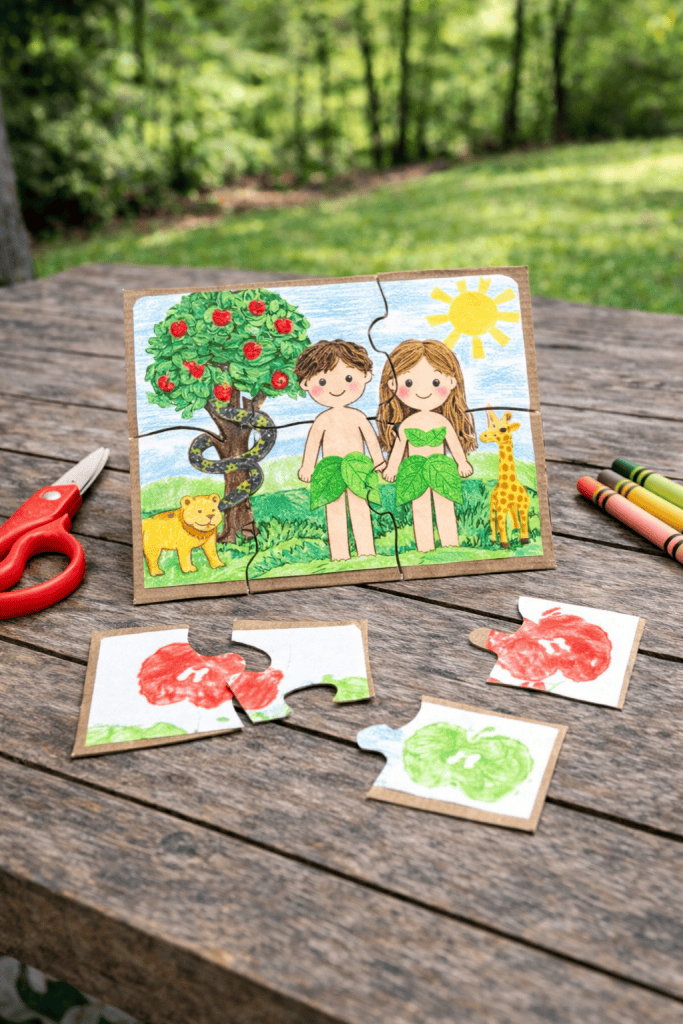
Finally, let your preschooler become a puzzle maker! This craft doubles as a keepsake game they can play over and over. Provide a blank index card or thin cardboard (an old cereal box cut into a rectangle works well).
Ask your child to draw a scene from the Adam and Eve story on it – it could be the garden with animals, Adam and Eve by the tree, or even just a big snake. Remind them of all the things we’ve crafted: “Do you want to draw the tree or the snake or maybe both?”
Once they finish their masterpiece, help them cut it into a few puzzle pieces. For preschoolers, 4–6 pieces is plenty (you can lightly pencil guiding lines for them to cut, or do the cutting for very young ones). Now they can mix up the pieces and try to put their own Adam & Eve puzzle back together!
This activity really makes them the storyteller; as they draw, they’re recalling details from the Bible story. It’s also great scissor skills practice. If you like, you can store the pieces in a small zip-top bag or envelope and label it “Garden of Eden Puzzle.”
Kids will be proud to show off the puzzle they made themselves. And each time they solve it, they’ll remember the story.
This idea works in a class setting too: each child makes a quick puzzle, and then they swap and solve each other’s – a fun, cooperative game. It’s amazing how a simple drawing turned puzzle can reinforce the lesson one more time in a quiet, thoughtful way.
Ready to Get Creative in Your Own “Garden”?
You’ve now got 10 awesome Adam and Eve craft ideas up your sleeve, ranging from paper creations to playful snacks. The best part is that they also help biblical lessons stick in young minds.
When kids craft, they aren’t just making art; they’re experiencing the story. Hands-on activities can reinforce the Bible lesson and remind children of what they learned long after craft time is over.
As you try these ideas, feel free to adapt them to your child’s interests and what you have on hand. Crafting together is about making memories and opening up faith-filled conversations naturally. (Don’t be surprised if your little one asks some big questions while glue sticks and crayons are out – that’s a great opportunity to share your faith in an age-appropriate way.)
And if a project doesn’t go as planned, no worries – laugh it off and maybe try another. The goal is joyful learning and quality time.
For more creative Bible fun beyond Adam and Eve, you can also explore our other activities – for example, check out some wholesome Easter crafts for kids when spring rolls around.
As different seasons and Bible stories come up, I’ve got you covered with simple Passover crafts for kids, easy Christian Valentine’s crafts that share God’s love, and even amazing Noah’s Ark crafts for those animal-loving kiddos.
There’s a whole world of kids’ Bible craft ideas to discover, ensuring you’ll have faithful fun all year long.
I hope these ideas spark laughter, learning, and lots of proud smiles.
Which craft will you try first? I’d love to hear how it goes or if you have your own creative twists – let us know in the comments below!
Happy crafting, and God bless!
Get the FREE Fruit of the Spirit Playdough Mats + Coloring Pages

Make your Fruit of the Spirit lesson hands-on with this FREE printable set that includes a playdough mat and a bonus coloring page—two activities in one.
Kids can build and color their way through love, joy, peace, patience, kindness, goodness, faithfulness, gentleness, and self-control from Galatians 5:22–23. For easy re-use, laminate the mat (or slide it into a page protector) and pull it out anytime for Bible time, Sunday School, or quiet time at home.
Click below to grab both printables.
FAQs
What age are these Adam and Eve crafts suitable for?
These crafts are designed for preschoolers (ages 3–5) but can be adapted for toddlers or slightly older kids. Younger children may need more help with cutting or gluing, while older kids can handle more detail. Supervision and adjusting complexity is key. The main goal is fun and learning without frustration.
How can I introduce the Adam and Eve story without it feeling like a lecture?
Keep it light and story-like while crafting. Ask simple questions like, “What’s your favorite part of the garden?” or mention characters casually: “This snake reminds me of a sneaky character in the story.” You can also read a children’s Bible version before or after the craft. Sprinkling the story throughout the activity keeps it fun and memorable.
What supplies will I need?
Most crafts use basic supplies: construction paper, crayons or markers, child-safe scissors, glue, paper plates, tissue paper, pom-poms, and pipe cleaners. For sensory bins, include a bin, dried rice or paper shreds, and toy animals. Snack crafts need simple food items like fruit or peanut butter. Cover surfaces for easy cleanup, and improvise with what you have on hand.
Can I use these crafts in Sunday School or church groups?
Yes! These crafts work great in a group setting. Pre-cut materials and set up stations for different activities to keep kids engaged. Stick puppets, collages, and leaf rubbings are easy for individual work, while paint-based crafts may need extra helpers. The crafts reinforce the Bible story while keeping kids hands-on and engaged.
How do I manage mess and keep preschoolers focused?
Use washable surfaces or craft outside. Break crafts into small steps and give plenty of encouragement. Offer wiggle breaks or let kids choose colors to stay engaged. Keep extra supplies handy for mistakes, and make cleanup a fun game. Remember, a little mess is part of the fun!
